
If you are looking for a recipe guaranteed to disappear first at any potluck, you’ve found the absolute winner! Nothing says comfortable gathering and classic American food quite like perfect deviled eggs. I remember helping my mom whip up trays of these creamy, tangy bites for every neighborhood picnic when I was growing up. Trust me, once you master this foolproof recipe for deviled eggs, you’ll never look back. We aren’t messing around with tons of fancy additions here; this is about hitting that perfect, nostalgic balance everyone expects. You can read a little more about how these traditions started in my kitchen, but right now, let’s get those eggs cooking!
- Why This Deviled Eggs Recipe Delivers the Best Deviled Eggs
- Ingredients for Your Classic Deviled Eggs Recipe
- How to Make Deviled Eggs: Step-by-Step Instructions
- Tips for the Ultimate Party Finger Food Presentation
- Storage and Keeping Your Deviled Eggs Fresh
- Frequently Asked Questions About Deviled Eggs
- Estimated Nutritional Data for This Deviled Eggs Recipe
- Share Your Perfect Deviled Eggs Experience
Why This Deviled Eggs Recipe Delivers the Best Deviled Eggs
I know there are a million ways to make these, but if you want that classic appetizer crowd-pleaser, you need consistency. My method focuses on three things that my mom always insisted on: they must be super creamy, the whites have to peel without fighting me, and the filling needs that perfect tangy kick. This recipe delivers on all fronts, which is why it’s my go-to for every party. You get delicious results without any drama!
- Perfectly creamy, not runny, yolk filling.
- Yolks that are bright yellow, never grayish or dull.
- Simple, reliable steps for the whole process.
Achieving Perfect Yolks Every Time
The biggest complaint I hear about deviled eggs is that nasty gray-green ring around the yolk. Ugh! That means the egg cooked too long or cooled down too slowly. That’s why we skip the gentle simmer. You bring the water to a rolling boil, and then—this is the trick—you immediately pull the pot off the heat, cover it tight, and just let the residual heat do the work for exactly 12 minutes.
This gentle steam bath keeps the yolks a beautiful, vibrant yellow. Seriously, it’s the secret to the best deviled eggs! Once those 12 minutes are up, they go straight into giant buckets of ice water. Don’t skip that ice bath, either—it stops the cooking instantly, which locks in that perfect color.
Ingredients for Your Classic Deviled Eggs Recipe
Okay, time to gather your supplies! This list is straightforward because, honestly, too many ingredients just confuse people. I use what my mother used because it gives us that perfect, nostalgic flavor we all crave. Here is what you need on hand to make a full platter of the best deviled eggs. Don’t worry; you probably have almost everything in the pantry right now!
12 large eggs
1/2 cup mayonnaise
2 tablespoons yellow mustard
1 tablespoon white vinegar
1/2 teaspoon salt
1/4 teaspoon black pepper
Paprika, for garnish
Ingredient Notes and Substitutions
If you are serious about getting that dreamy, creamy filling, stick to full-fat mayonnaise. The lighter stuff just doesn’t give you the right texture when you mix those yolks up. For the mustard, standard bright yellow mustard is truly the way to go for that iconic tang; Dijon is fine, but it changes the classic color a bit, so I’d save it for another time.
One little tip that helps absolutely everyone: don’t use farm-fresh eggs if you are planning on boiling them in the next day or two. Eggs that are a week or so old peel so much easier! It’s the weirdest thing, but it saves so much frustration when you’re rushing to get this party finger food ready.
How to Make Deviled Eggs: Step-by-Step Instructions
Now for the fun part—putting it all together! Making deviled eggs shouldn’t be stressful. I’ve laid out the process so you can easily execute this classic appetizer without feeling rushed. Remember, the key to success is in how you handle the initial boiling, so pay close attention to that first step. Once the eggs are cooked right, making the creamy filling for these easy deviled eggs is a snap!
Mastering the Hard-Boiled Egg Technique
This is where a lot of people run into trouble, but we fixed it! Remember the drill: put your eggs in a pot and cover them with cold water. Get that water boiling hot, a full, rolling boil. The second it hits that, kill the heat, snap that lid on tight, and set your timer for exactly 12 minutes. This is crucial—it stops the cooking before it gets too aggressive, which is why we don’t get those awful green rings around the yolk.
The second the timer goes off, yank those eggs out and dump them straight into the ice bath. Do not pass go, do not collect $200; they need an instant temperature shock. This chilling stops the carryover cooking and actually helps separate the egg white from the shell membrane, making your peeling experience heavenly!
Creating the Creamy Filling for Deviled Eggs
Once your whites are peeled and sliced in half, scoop all those lovely yellow yolks into a mixing bowl. Before you even think about adding the mayo, take your fork and mash those yolks until they are completely fine and powdery, like cornmeal almost. If you leave lumps now, they will stay when you mix everything else in!
Once they are perfectly crumbly, you can mix in your mayo, mustard, vinegar, salt, and pepper. Stir it all together until it looks like smooth, luxurious frosting—you are aiming for a spreadable consistency for this easy deviled eggs recipe. Trust me, take the extra minute to mash well here!
Tips for the Ultimate Party Finger Food Presentation
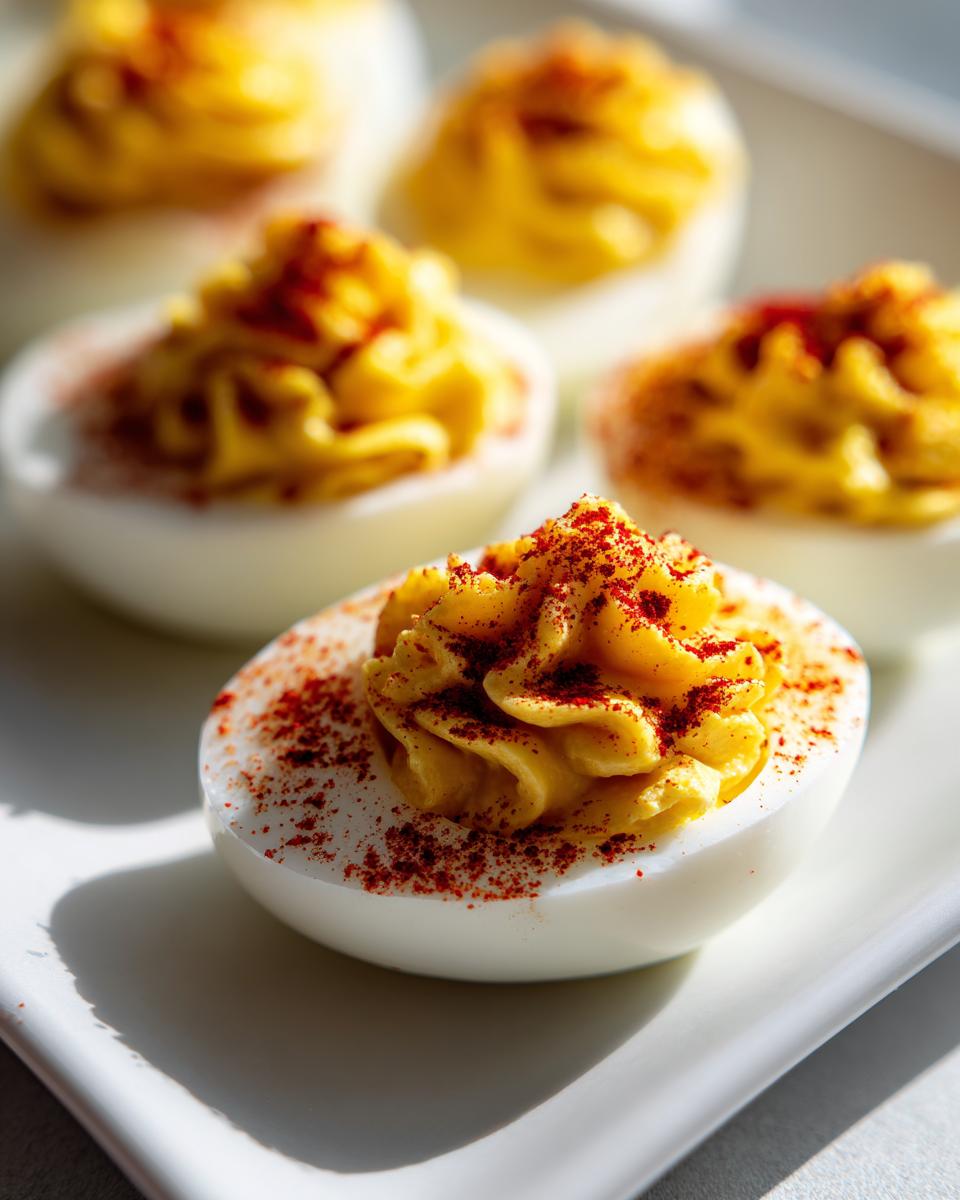
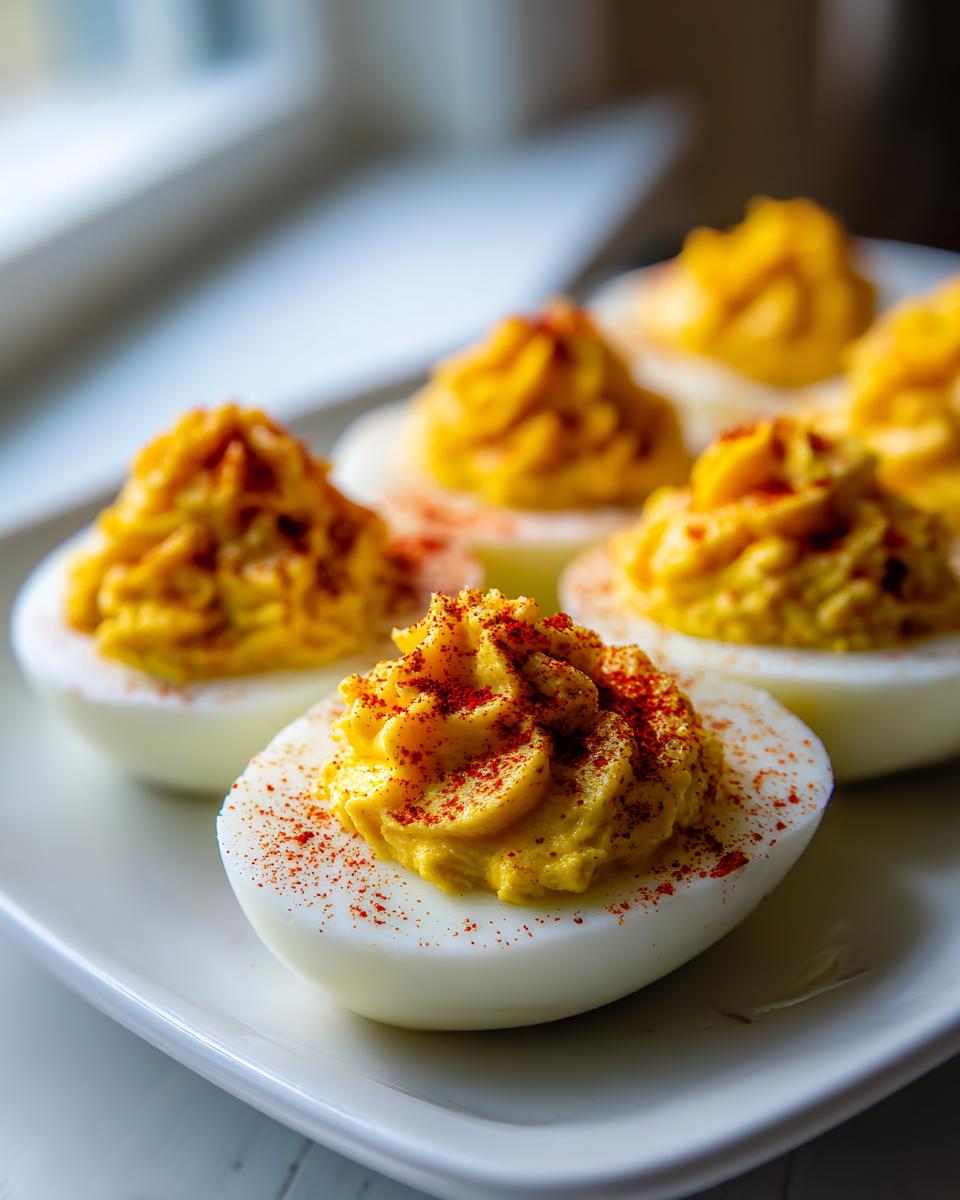
Getting these delicious bites ready for the table is almost as fun as eating them! If you really want to impress, you need to focus on the finish. While you can certainly spoon that creamy filling back into the white halves, I highly recommend using a piping bag fitted with a large star tip. It instantly upgrades these from simple snacks to gorgeous party finger food. Just scoop the filling into the bag, snip the end, and pipe beautiful little swirls into each half. It looks so professional!
Whatever method you choose, give these little beauties a good chill time—at least 30 minutes—before you serve them. That time in the fridge lets the tanginess of the vinegar and mustard really settle into the yolk mixture. It makes them taste so much better, I promise!
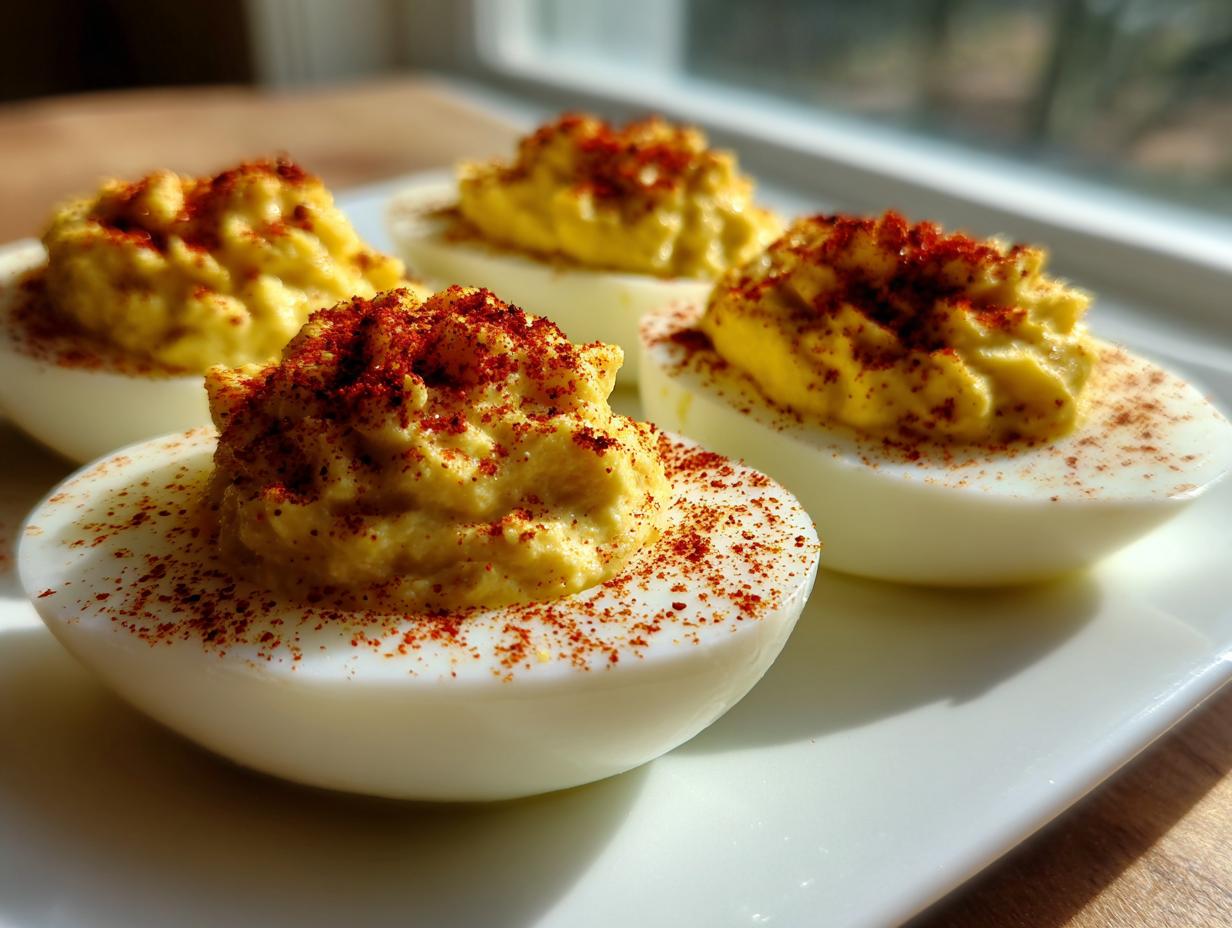
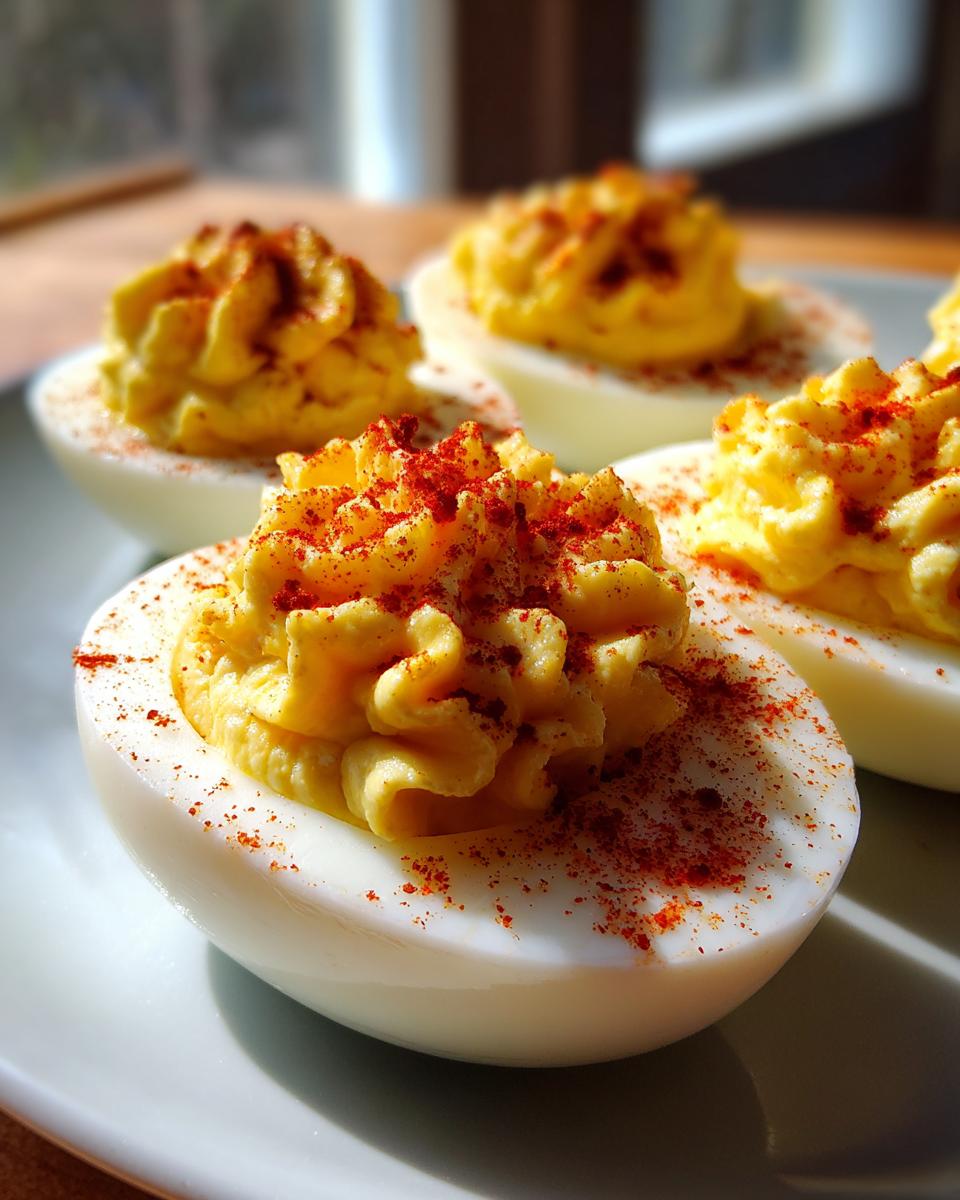
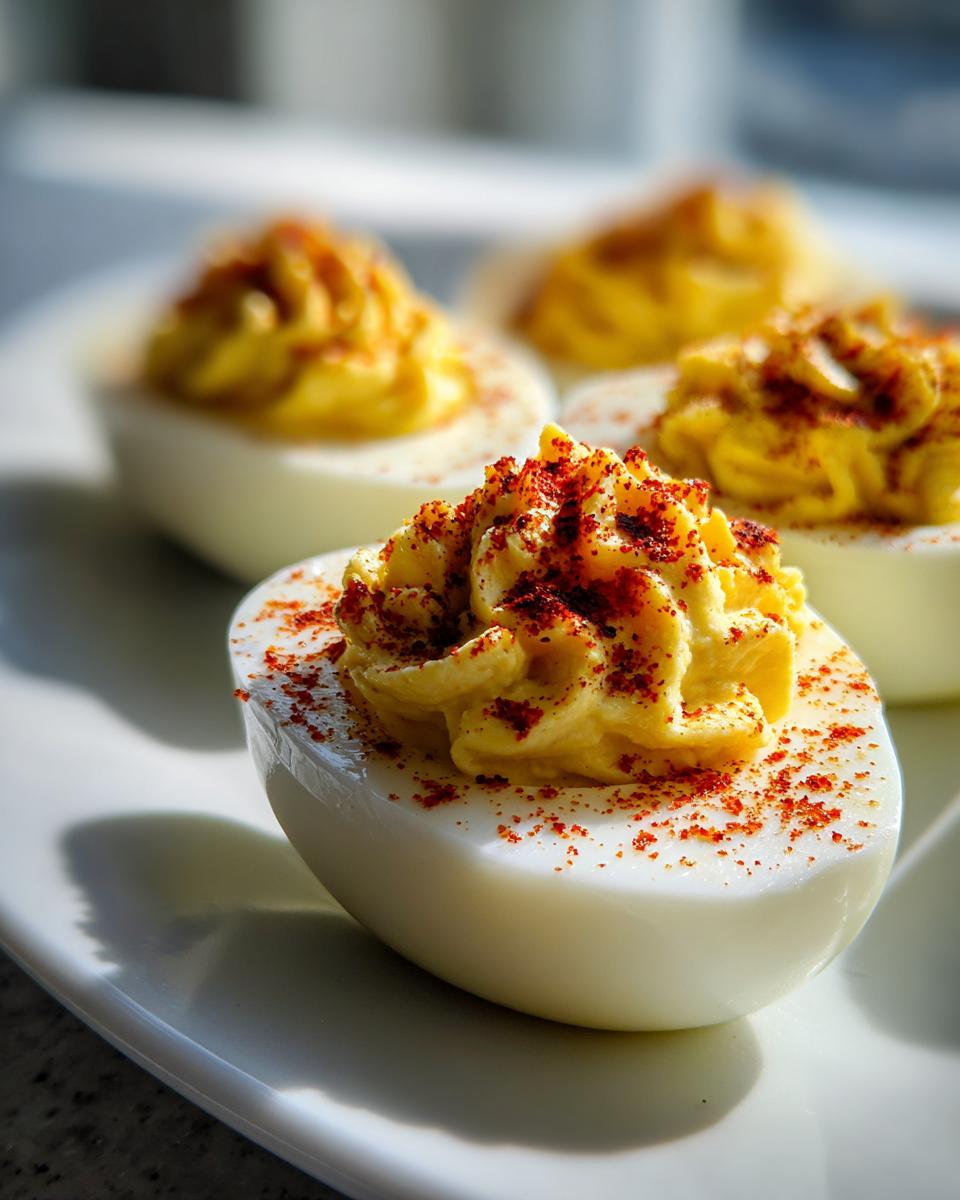
Garnishing Your Perfect Deviled Eggs Recipe
The final flourish is the paprika. Don’t just sprinkle it everywhere; you want an even, light dusting over the very top of the filling swirl. Use a small sieve to dust it on; this makes the color pop beautifully against the white filling. If you want to get fancy without straying too far from the classic vibe, I sometimes add one tiny cornichon slice or a single tiny sprig of fresh dill right on top. Keep it simple, though—the flavor is the real star of your deviled eggs recipe.
Storage and Keeping Your Deviled Eggs Fresh
Since these are so popular and contain mayo, we have to talk about storage—safety first, even when making the best appetizers! If you have any leftovers, you absolutely must keep them chilled. They should never sit out at room temperature for more than two hours, especially if it’s a warm day at a barbecue.
The easiest way to store them is to cover the serving platter tightly with plastic wrap. I often place them back into the refrigerator immediately after the party dies down. If you want to make them a day ahead, it’s better to store the mashed yolk mixture separately in an airtight container and only fill the egg white halves right before you serve them. That keeps the filling looking its absolute best, and you can peek at our storage policies if you ever have questions about keeping food safe!
Frequently Asked Questions About Deviled Eggs
It’s natural to have questions when you’re trying to nail a classic like this! I get so many messages asking for little tweaks or checking on safety, so I pulled together the things I hear most often. Having the answers handy makes whipping up this party finger food so much less intimidating!
Can I use hard-boiled eggs made ahead of time for this deviled eggs recipe?
Yes, you totally can! I usually peel mine the day before and keep the empty white halves stored in an airtight container in the fridge. You can even boil and peel them two days ahead of time. Just make sure they are kept cold, especially since we’re making easy deviled eggs!
What makes this the best deviled eggs recipe?
Honestly, it’s the balance! We nail the perfect amount of tanginess from the vinegar and mustard to cut through the richness of the mayo, ensuring they aren’t heavy or bland. Plus, the foolproof cooking method means you start with a perfect egg every single time. That’s what separates the good ones from the best deviled eggs!
If you need to reach out about storage issues or just want to say hello, you can always find our contact link right here!
Estimated Nutritional Data for This Deviled Eggs Recipe
I always track this stuff loosely, especially when making treats that might appear more than once a year! Remember that these are just estimates based on standard ingredients, so the actual numbers might shift slightly based on your specific brand of mayo or mustard. For two halves, you’re looking at about 90 calories per serving, which isn’t bad for such a satisfying snack. It’s a nice dose of fat (around 8g) to keep you full, with roughly 3 grams of protein. Happy snacking!
Share Your Perfect Deviled Eggs Experience
Now it’s your turn! I really hope you give this classic appetizer a go for your next get-together. Let me know how they turned out in the comments below, and please leave a rating—it helps other folks find this recipe too! You can read our terms on sharing kitchen triumphs, but mostly, I just can’t wait to hear about your success!
PrintClassic Deviled Eggs Recipe

A dependable recipe for making traditional, creamy deviled eggs, perfect for any gathering.
- Prep Time: 20 min
- Cook Time: 12 min
- Total Time: 32 min
- Yield: 24 halves 1x
- Category: Appetizer
- Method: Boiling and Mixing
- Cuisine: American
- Diet: Gluten Free
Ingredients
- 12 large eggs
- 1/2 cup mayonnaise
- 2 tablespoons yellow mustard
- 1 tablespoon white vinegar
- 1/2 teaspoon salt
- 1/4 teaspoon black pepper
- Paprika, for garnish
Instructions
- Place eggs in a large saucepan and cover with cold water by one inch.
- Bring water to a full boil over high heat. Once boiling, remove the pan from the heat, cover it, and let the eggs stand for 12 minutes.
- Immediately transfer the eggs to an ice bath (a bowl of ice and water) and let them cool completely, about 15 minutes.
- Peel the cooled eggs. Slice each egg in half lengthwise.
- Carefully scoop the yolks into a medium bowl. Place the egg white halves on a serving platter.
- Mash the yolks with a fork until they are fine crumbs.
- Add the mayonnaise, mustard, vinegar, salt, and pepper to the mashed yolks. Mix until the filling is smooth and creamy.
- Spoon or pipe the yolk mixture back into the hollows of the egg white halves.
- Sprinkle paprika over the top of each deviled egg before serving.
Notes
- For easier peeling, use slightly older eggs rather than very fresh ones.
- If you want a smoother filling, press the mashed yolks through a fine-mesh sieve before mixing in the other ingredients.
- Chill the finished deviled eggs for at least 30 minutes before serving for the best flavor.
Nutrition
- Serving Size: 2 halves
- Calories: 90
- Sugar: 0.5
- Sodium: 120
- Fat: 8
- Saturated Fat: 2
- Unsaturated Fat: 6
- Trans Fat: 0
- Carbohydrates: 0.5
- Fiber: 0
- Protein: 3
- Cholesterol: 75