
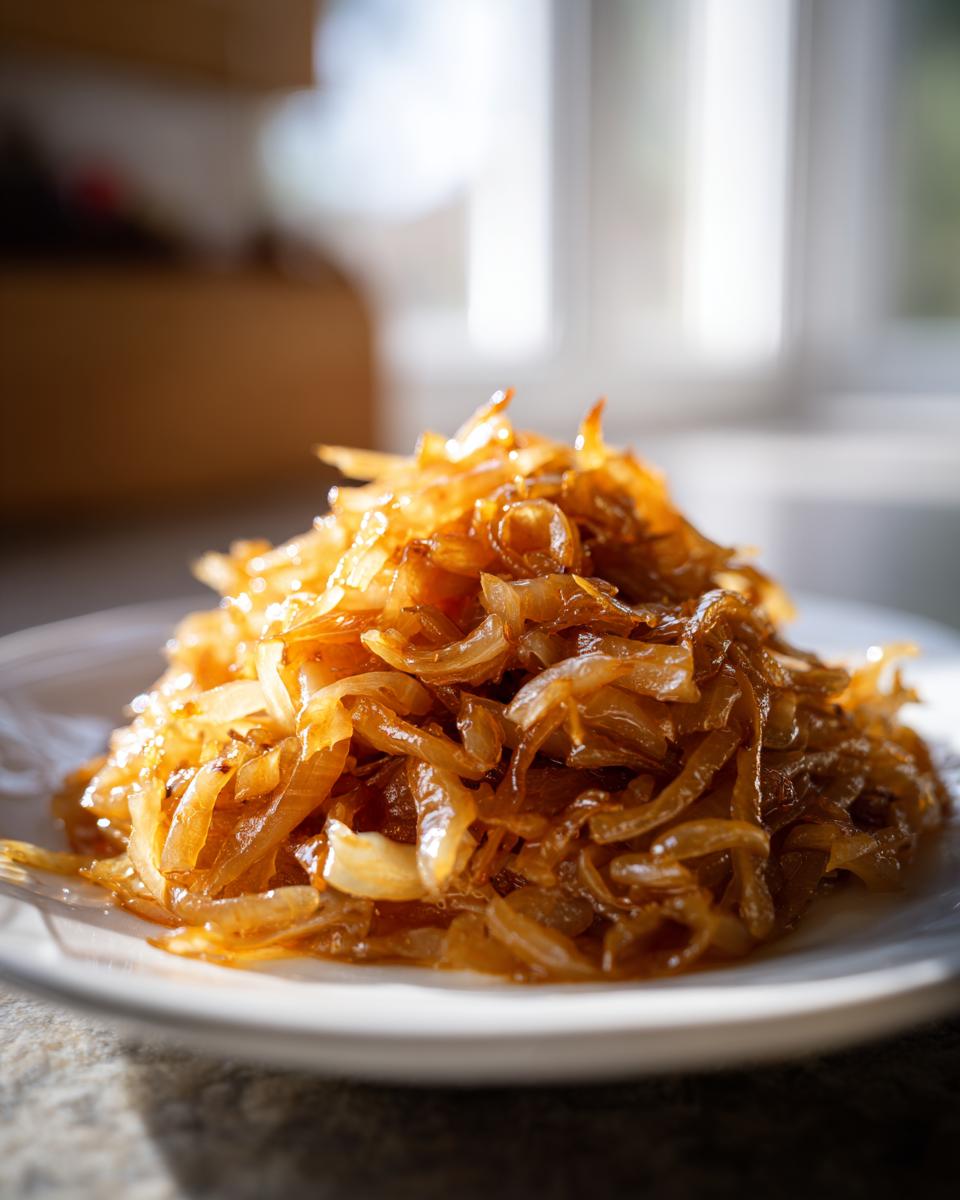
There are few things in the kitchen as magical as watching something raw completely transform right on the stovetop. That sharp, biting edge of a freshly cut onion melts away, not just softening, but turning into something deep, dark, and unbelievably sweet. When I think about the flavors I grew up with in my Ohio kitchen, it always comes back to that profound flavor that only comes from patience. Learning how to make incredible caramelized onions—that perfect balance of sweet and savory onions—is one of those foundational skills. It’s the secret backbone to so many comforting dishes. Trust me, mastering this simple technique is worth every minute you spend stirring. If you want to know more about my philosophy for making simple, profound flavors work for busy families, check out my story here.
- The Ultimate Guide to Making Perfectly Sweet and Savory Caramelized Onions
- Best Caramelized Onion Technique: Tips for Deep Flavor Onions
- Why These Caramelized Onions Are Flavor Boosting Toppings
- What to Make with Caramelized Onions: Creamy Caramelized Onion Pasta Ideas
- Make Ahead Onion Recipes and Storage for Caramelized Onions
- Essential Equipment for Perfect Caramelized Onions
- Troubleshooting Common Caramelized Onions Issues
- Frequently Asked Questions About Caramelized Onions
- Nutritional Profile of Sweet and Savory Onions
The Ultimate Guide to Making Perfectly Sweet and Savory Caramelized Onions
When people ask me for the secret weapon that instantly upgrades mac and cheese, burgers, or even just toast, I point them straight to this method. That sharp, biting edge of a freshly cut onion melts away, not just softening, but turning into something deep, dark, and unbelievably sweet. Learning how to make incredible caramelized onions—that perfect balance of sweet and savory onions—is one of those foundational skills. It’s the secret backbone to so many comforting dishes. Trust me, mastering this simple technique is worth every minute you spend stirring. If you’re not careful, you might burn them if you rush, so remember that patience is key! If you want to see how I apply this patience to other slow-cooked meals, check out my recipe for the slow cooker turkey breast. This whole process takes about 60 minutes total.
Ingredients for Perfect Caramelized Onions
We keep this simple because the onion itself needs to shine through. You don’t need a ton of fancy stuff here, just good quality fat to help them along!
- 3 large yellow onions, thinly sliced
- 2 tablespoons unsalted butter
- 1 tablespoon olive oil
- 1/2 teaspoon salt
- 1/4 teaspoon black pepper
Step-by-Step Instructions: How to Caramelize Onions
This is where the transformation happens! I always use my largest, heaviest stainless steel skillet for this because it holds heat so evenly. Follow these steps closely for the best results when learning how to caramelize onions.
- Slice all three onions thinly and make sure they are as uniform in size as possible. Uneven slices will cook at different speeds, which means some will burn before others are done.
- Set your large, heavy-bottomed skillet on the stove and add your fat—that mix of butter and olive oil—over medium-low heat. We start gentle!
- Toss those onion slices right in there, making sure every piece gets coated in the fat. Then sprinkle in your salt and pepper now; the salt helps draw out that initial moisture.
- Cook slowly for the first phase, stirring every 5 to 7 minutes. This takes about 15 to 20 minutes, and you’ll see the onions get soft and release a huge puddle of liquid.
- Now, reduce the heat way down to low. This is critical! Continue cooking for another 30 to 40 minutes. Stir every five minutes or so. You’re looking for them to start turning pale gold here.
- Keep scraping the very bottom of the pan as you stir. Those brown bits—that’s the fond, and that’s pure flavor gold! We want those incorporated back into the onions for that deep, rich color.
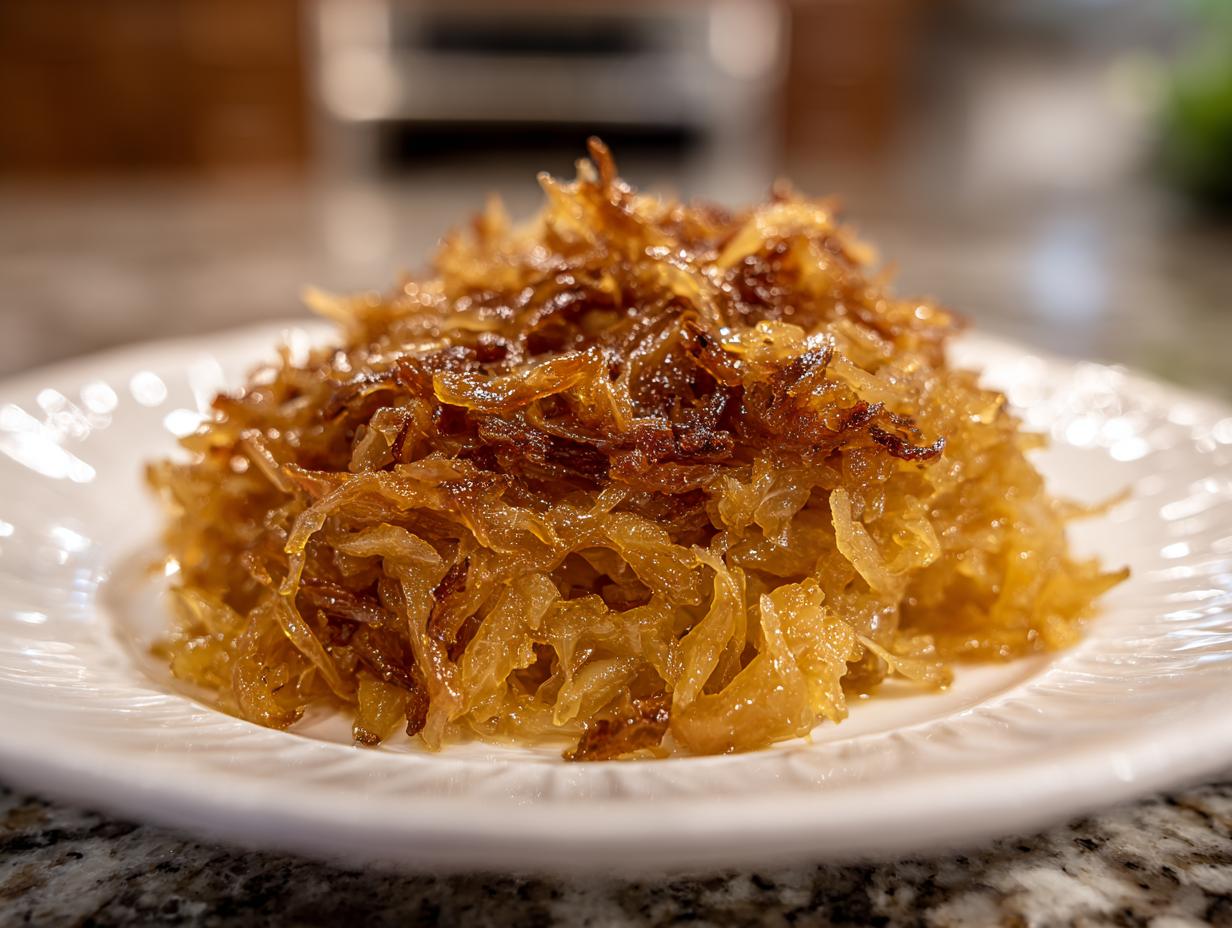
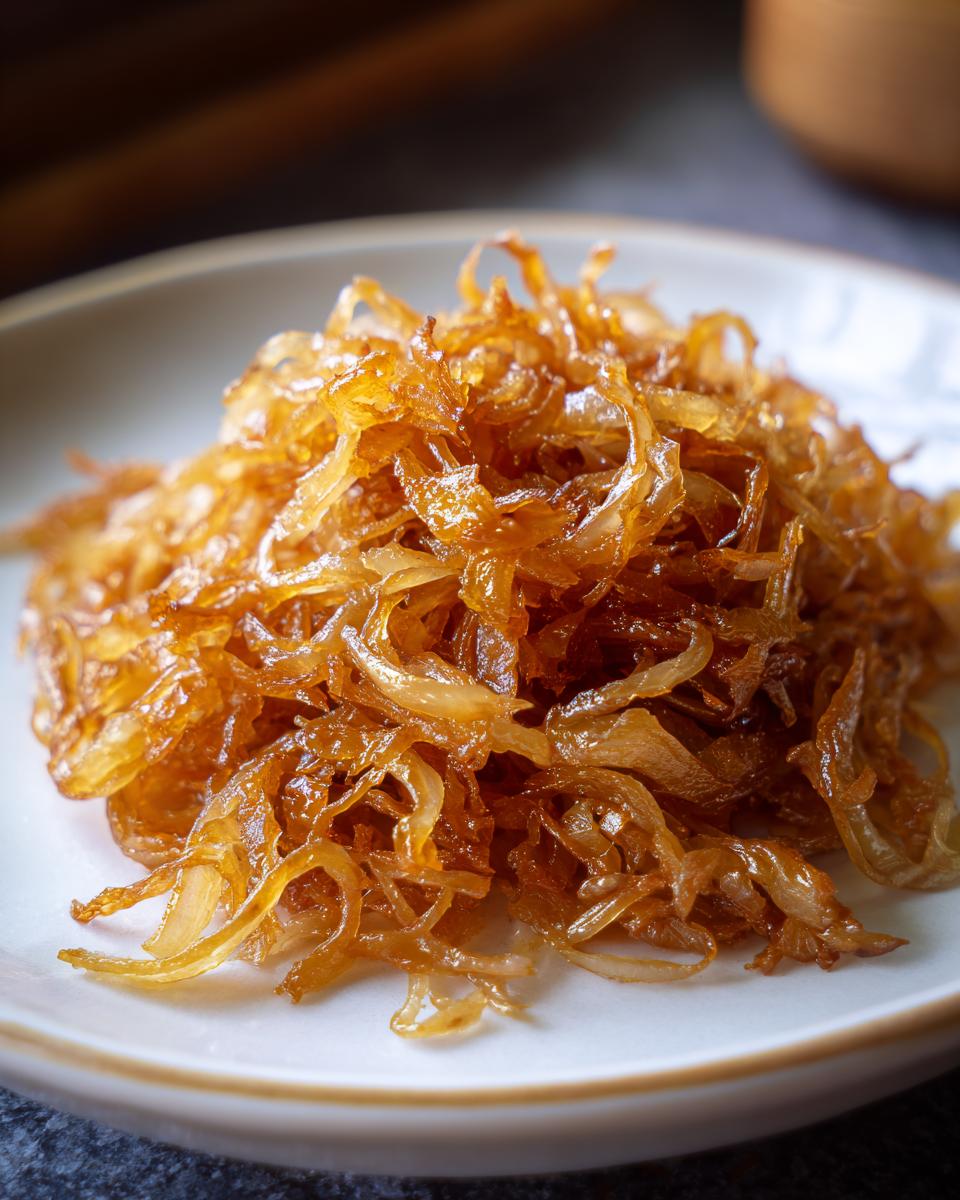
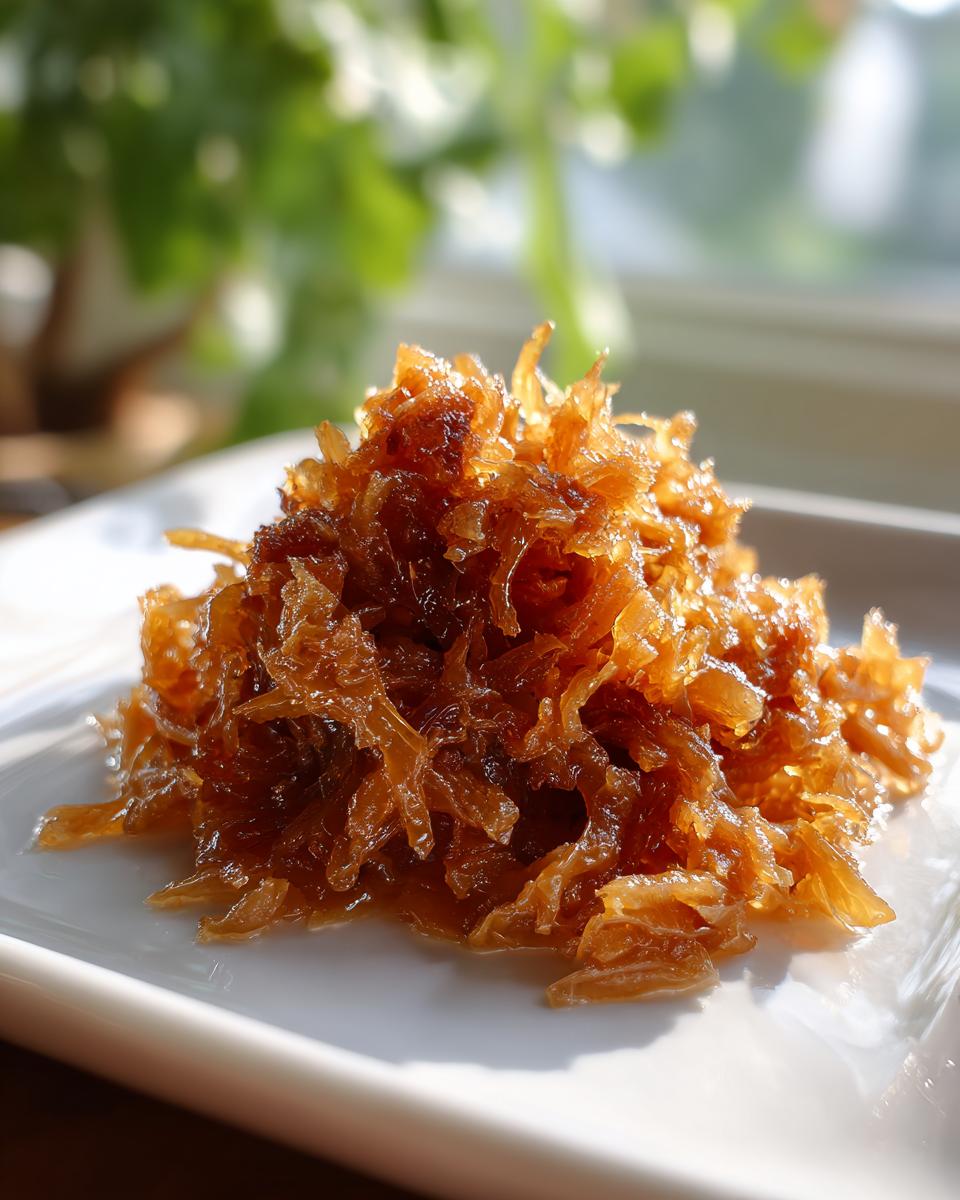
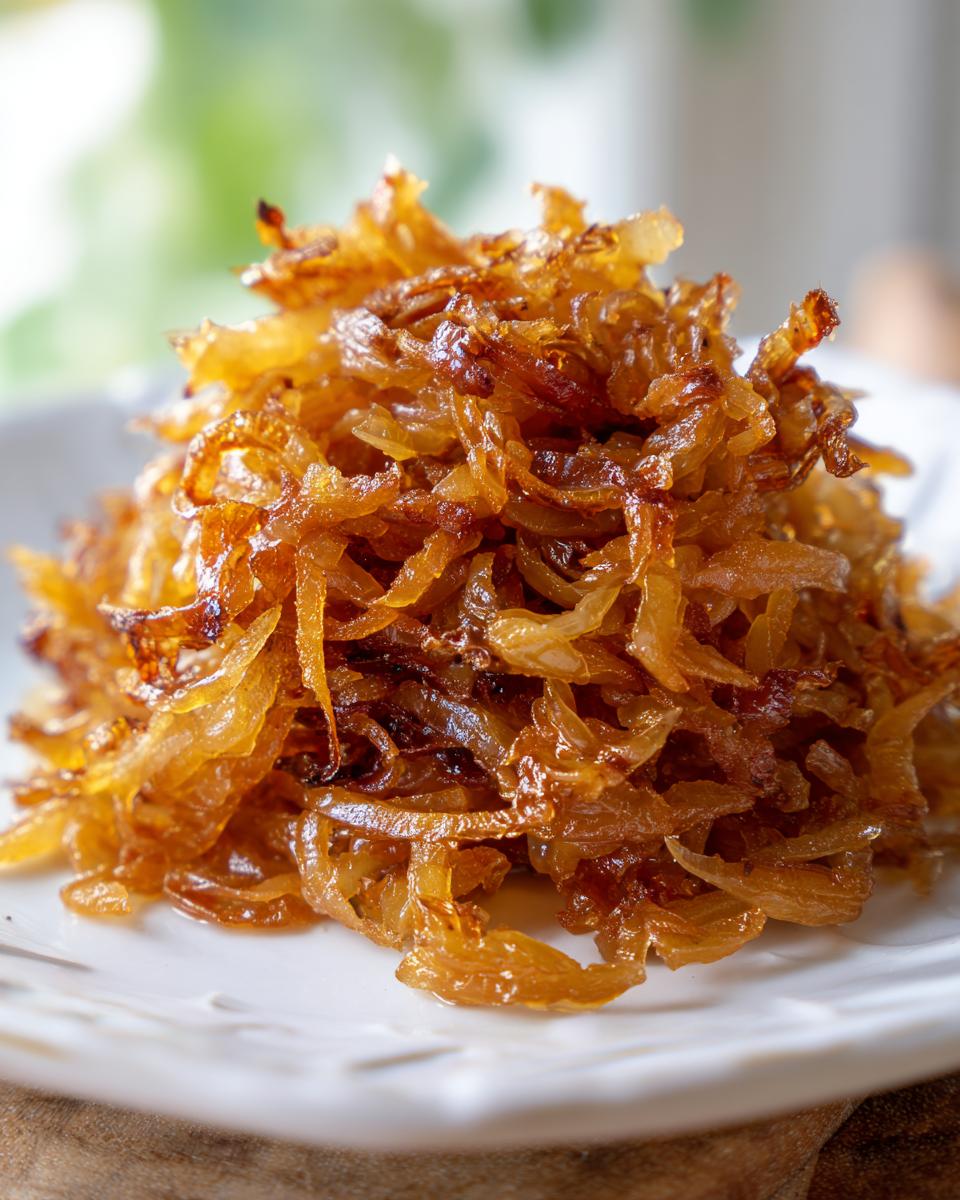
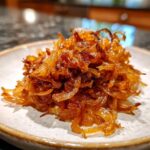
- When the onions are that deep, gorgeous brown, and completely jammy and tender, take the skillet off the heat immediately.
Best Caramelized Onion Technique: Tips for Deep Flavor Onions
This is where most people mess up their onions, and frankly, I don’t blame them! We live in a world where everything boasts about being ‘quick and easy,’ but when it comes to this particular technique, you just have to lean into the process. Rushing those onions by turning the heat up high just means you end up with burnt edges and raw centers, which is definitely not what we want for true caramelized onions. We are aiming for jammy, tender layers that melt in your mouth, not crispy, nearly-burnt bits.
Learning the best caramelized onion technique comes down to respecting the sugar inside the onion. That sweetness takes time to develop. Now, I know sometimes you’re pressed for time, so here’s my little cheat, though I save it for when I truly need it: about ten minutes before you think the onions are done, you can stir in a tiny teaspoon of granulated sugar or even a splash of balsamic vinegar. That little boost helps that final browning along beautifully, adding layers of complexity!
If you want to see how I use these deeply flavored onions in a festive holiday spread, you should peek at my easy homemade cranberry sauce recipe sometime—it uses that sweet-savory balance too!
Managing Heat for Slow Cooked Onions
The entire secret weapon here is the heat control. You must start lower than you think you need to! For the first 20 minutes, medium-low heat is your friend. This lets the onions release their water without scorching the milk solids from our butter. Once that moisture is gone, that’s when you drop the heat down low—I mean simmer level low.
Why? Because low and slow cooking is what allows the natural sugars inside the onion structure to slowly break down, transforming the onion from sharp and astringent into that beautiful, mellow sweetness. If the pan looks dry or the onions are starting to glue themselves together too firmly, don’t panic! Just splash in a tablespoon of water or even broth and immediately scrape up those little browned bits stuck to the bottom. That keeps everything moist while still developing flavor.
Why These Caramelized Onions Are Flavor Boosting Toppings
Once you’ve put in the hour required, these onions stop being just a side dish—they become pure gold dust for your entire meal! Seriously, mastering caramelized onions changes the game for weeknight cooking. Think about it: you can’t buy this kind of depth in a jar. They are genuinely the ultimate flavor boosting toppings for anything that needs a little magic hug.
I use these rich, sweet layers on almost everything. They turn a simple grilled cheese into something gourmet, they’re essential for making a proper French Onion Dip, and they are absolutely the best onion topping for burgers you will ever encounter. My husband demands them on every single burger we make now!
This base flavor is so flexible, too. If you are looking for ways to sneak some extra savory goodness into your next family meal, check out my bacon cheeseburger casserole recipe—I often fold a bit of these into the meat mixture for an extra punch!
What to Make with Caramelized Onions: Creamy Caramelized Onion Pasta Ideas
Now for the fun part! Once you have your glorious jar of deep, sweet, jammy onions ready to go, the possibilities really open up. You’ll be asking yourself, “What to make with caramelized onions next?” because you’ll want to use them on everything! For me, the absolute best application is when they become the star of a creamy sauce.
If you don’t have a favorite pasta dish yet, you have to try my recipe for Creamy Caramelized Onion Pasta. It takes those sweet onions and blends them right into the sauce, giving you these incredible deep flavor onions without any heavy cream. It feels so luxurious but honestly comes together fast for a weeknight. I love pairing that dish with a simple salad!
Don’t forget that these rich flavors also work wonders in savory applications that go beyond sandwiches. You can easily use them to whip up a spectacular, rustic onion gravy that tastes like it simmered all day, or use them as a base for decadent dips. Check out how others use this technique over at Serious Eats just for inspiration on these fantastic caramelized onion pasta ideas!
Creating Savory Onion Gravy or Dip Bases
Beyond a simple topping, using a batch of your well-made caramelized onions as a foundational flavor layer makes anything taste like it came from a gourmet restaurant. For example, if you simmer your onions down with a little beef broth and flour toward the end of the cooking process, you create the dreamiest savory onion gravy. It’s amazing poured over mashed potatoes or even simple roast chicken.
I also find mixing them into cream cheese or sour cream with a touch of thyme makes for the best dip for chips or crackers. They lend that essential earthy, sweet note that you just can’t replicate any other way. It’s all about stretching that one hour of cooking into a whole week of elevated meals!
Make Ahead Onion Recipes and Storage for Caramelized Onions
This is my absolute favorite part about making a big batch of these onions—they are the perfect cornerstone for so many make ahead onion recipes. You put in the work once, and then you have these deeply flavored gems ready to go all week long. Honestly, having them in the fridge makes throwing together a last-minute dinner so much less stressful.
Once your caramelized onions have cooled completely, transfer them into a clean, airtight container. They keep beautifully in the refrigerator for up to a full week, maybe even a little longer if you’re lucky! That means they are ready to be spooned over scrambled eggs on Tuesday morning or added to that quick easy breakfast idea you need for the kids. They truly turn simple weeknight onion sides into something special without you lifting another pan!
Essential Equipment for Perfect Caramelized Onions
Getting these rich, golden brown onions right isn’t about owning fancy gadgets, but it is absolutely about having the right pan. If you try to rush this process in a thin, cheap skillet, you’re going to run into scorching and sticking issues almost immediately. That’s why I always lean on the same few reliable tools when I’m making a batch of these gorgeous onions.
First and foremost, you need a heavy-bottomed skillet. I prefer stainless steel or cast iron for this job. The thickness of the pan distributes the heat evenly across the surface, which is non-negotiable when you are cooking something that low and slow. A thin pan will create hot spots, and those hot spots will cause your onions to burn before the rest of the batch has caramelized. Trust me, upgrading your pan choice here makes the hour feel much less hands-on!
You also need a good tool for stirring. While I love my wooden spoons for my grandmother’s cake recipes, when I’m making these onions, I tend to use a durable rubber or silicone spatula. Why? Because that flexibility lets me really scrape up every single bit of browned material—the fond—from the bottom of the pan without scratching the surface. Getting those flavorful bits back into the onions is the difference between good sautéed onions and truly spectacular ones.
Finally, a sharp knife and a steady mandolin or cutting board setup are essential for your prep time. Remember, uniform slicing is key for even cooking. If you’re looking for other recipes that benefit from this heavy-duty cooking approach, maybe check out my quick weeknight dinners collection where I use similar substantial pots and pans!
Troubleshooting Common Caramelized Onions Issues
Even when you follow the steps perfectly, sometimes the stovetop just fights back! The biggest issue people run into when making caramelized onions is thinking they need to rush the process once things start sticking. If you see the onions sticking way too much to the bottom of that heavy skillet, or if they start browning way too quickly before they’ve softened up, stop turning up the heat!
This is my tried-and-true fix: add just one tablespoon of water or broth to the pan, and immediately grab your spatula and scrape up all those lovely browned spots stuck to the bottom. That water creates steam that lifts the fond right off the metal and incorporates it back into the onions. It’s a lifesaver! If you ever just need to reach out about a recipe or baking crisis, please don’t hesitate to message me on my contact page; I love hearing from you all!
Frequently Asked Questions About Caramelized Onions
I get so many questions about this process once people realize how much flavor they’ve been missing out on! It all boils down to time and expectations, really. Here are the things I hear most often when people are diving into their first batch of these wonderful, deep-flavored onions.
Can I make caramelized onions faster than an hour?
Oh, I wish I could tell you yes, but truly, no! If you try to rush them past the 45-to-60-minute mark, you end up with something else entirely. You’ll get onions that are nicely sautéed, or maybe even nicely browned because you cranked the heat up, but you won’t get that deep, jammy sweetness that comes from breaking down the sugars over a long, slow cook. Those quick methods skip the chemical transformation that defines true caramelized onions. If you need something fast, just sauté them until they are soft, but don’t call them caramelized!
What is the best type of onion for caramelized onions?
In this particular recipe, I insist on using big, beautiful yellow onions. They have a great balance of moisture and sharpness that handles the long cook time perfectly, resulting in that ideal sweet and savory outcome. However, you know me, I always experiment! If you’re making a really large batch, you can substitute some of them with sweet onions, like Vidalia. They caramelize a bit faster because they have higher sugar content naturally, which is a nice trick for your onion cooking basics knowledge! Just watch them closely if you mix the types.
If you are searching for ways to incorporate these amazing flavors into lighter midday meals, you should take a look at my healthy lunch recipes collection. Sometimes a little onion makes a salad feel like a real meal!
Nutritional Profile of Sweet and Savory Onions
Now, I know a lot of you out there are tracking macros or just trying to keep an eye on what goes into your family’s dinner, and I get that completely! While these onions are pure flavor boosters made from humble ingredients, it’s good to know what you’re working with. Since these caramelized onions are mostly onion, butter, and oil, they are naturally higher in carbohydrates from the natural sugars and fat from the cooking medium.
Remember, this is just an estimation based on the recipe using yellow onions, butter, and oil, and doesn’t account for any balsamic vinegar or sugar you might have added during your caramelization process! If you’re planning meals around these sweet and savory onions, you can use these numbers as a good starting point while you check out my favorite quick weeknight dinners for inspiration.
Here’s the nutritional breakdown per serving (which we estimated at 1/4 cup):
- Serving Size: 1/4 cup
- Calories: 75
- Sugar: 8g
- Fat: 4g (with 2g being saturated)
- Carbohydrates: 10g (with 2g being fiber)
- Protein: 1g
They are certainly low in sodium and cholesterol, which is great! They are rich in flavor, which means you need less of them to make every dish taste brighter. That’s the beauty of the slow-cook method we used for these caramelized onions—it concentrates the goodness!
PrintThe Ultimate Guide: How to Make Perfectly Sweet and Savory Caramelized Onions
Learn the best technique to slow cook onions until they are deeply golden, sweet, and tender. This foundational recipe is perfect for meal prep and adds rich flavor to burgers, pasta, and sandwiches.
- Prep Time: 10 min
- Cook Time: 50 min
- Total Time: 60 min
- Yield: About 1.5 cups 1x
- Category: Side Dish
- Method: Slow Cooking/Sautéing
- Cuisine: American
- Diet: Vegetarian
Ingredients
- 3 large yellow onions, thinly sliced
- 2 tablespoons unsalted butter
- 1 tablespoon olive oil
- 1/2 teaspoon salt
- 1/4 teaspoon black pepper
Instructions
- Slice the onions thinly and uniformly. Uniform slicing helps them cook evenly.
- Place the butter and olive oil in a large, heavy-bottomed skillet over medium-low heat.
- Add the sliced onions to the skillet and toss them to coat them in the fat. Add the salt and pepper.
- Cook the onions slowly, stirring every 5 to 7 minutes. This initial phase will take about 15 to 20 minutes, and the onions will soften and release moisture.
- Reduce the heat to low. Continue cooking, stirring every 5 minutes. The onions will start to turn pale gold. This stage requires patience and low heat to prevent burning.
- Continue cooking for another 30 to 40 minutes. Scrape the bottom of the pan frequently to incorporate any browned bits (fond), which add deep flavor.
- When the onions reach a deep, rich brown color and are jammy in texture, remove them from the heat.
- Use immediately or store for later use.
Notes
- For quicker caramelization, add a teaspoon of sugar or a splash of balsamic vinegar during the last 10 minutes of cooking to aid browning.
- If the onions start to stick too much or brown too fast, add one tablespoon of water to the pan and scrape the bottom.
- This recipe is excellent for batch cooking; caramelized onions keep well in the refrigerator for up to one week.
Nutrition
- Serving Size: 1/4 cup
- Calories: 75
- Sugar: 8
- Sodium: 110
- Fat: 4
- Saturated Fat: 2
- Unsaturated Fat: 2
- Trans Fat: 0
- Carbohydrates: 10
- Fiber: 2
- Protein: 1
- Cholesterol: 8