
There is just something magical about a big family gathering, isn’t there? That feeling of everyone crowding around the table, plates piled high, laughing so loud the windows rattle a bit. For me, these moments always need a centerpiece that feels both nostalgic and utterly dependable. That’s exactly what the 7 layer salad is.
When I was little back in Ohio, my mom would pull out the big, clear glass bowl, and the whole room would just light up when the layers started going in. It’s not fancy layered greens; it’s something heartier, something comforting, and honestly, something that holds up beautifully. This recipe is my tried-and-true way to make that classic dish for massive crowds or just a casual Sunday dinner.
It’s the ultimate make ahead salad for potluck because you assemble it, step back, and let it chill until it’s time to shine. Trust me when I say this straightforward approach means you spend less time worrying on party day and more time enjoying the connections that happen around food.
If you’re looking for the real deal—the kind that disappears first, leaving tell-tale smears of creamy dressing behind—you can check out how I make my easy homemade cranberry sauce while you’re planning your sides, but right now, let’s focus on this spectacular salad centerpiece!
- Why This Classic 7 Layer Salad Recipe is a Potluck Favorite
- Gathering Ingredients for Your 7 Layer Salad
- How to Prepare the Perfect Make Ahead Salad for Potluck
- Tips for Success with Your Retro Salad Recipe
- Storage and Serving the Classic Layered Salad Recipe
- Frequently Asked Questions About the 7 Layer Salad
- Estimated Nutritional Profile for This 7 Layer Salad
- Share Your Perfect Party Ready Side Dish Experience
Why This Classic 7 Layer Salad Recipe is a Potluck Favorite
Honestly, this 7 layer salad is the reason I started cooking for others! I remember taking this to my first big neighborhood BBQ, feeling a little nervous about bringing a salad against all those heavy classic casseroles. I used my mom’s old glass punch bowl, and people just stopped to stare before they even got their plates. It’s absolutely a potluck favorite salad because it looks like you worked for hours, but we know the secret, right?
Since it’s a total party ready side dish that holds up so well in the fridge, you can whip it up the night before. It just gets better! That chilling time lets the flavors marry together without the lettuce wilting. I love that! It means I’m not running around right when guests walk in the door.
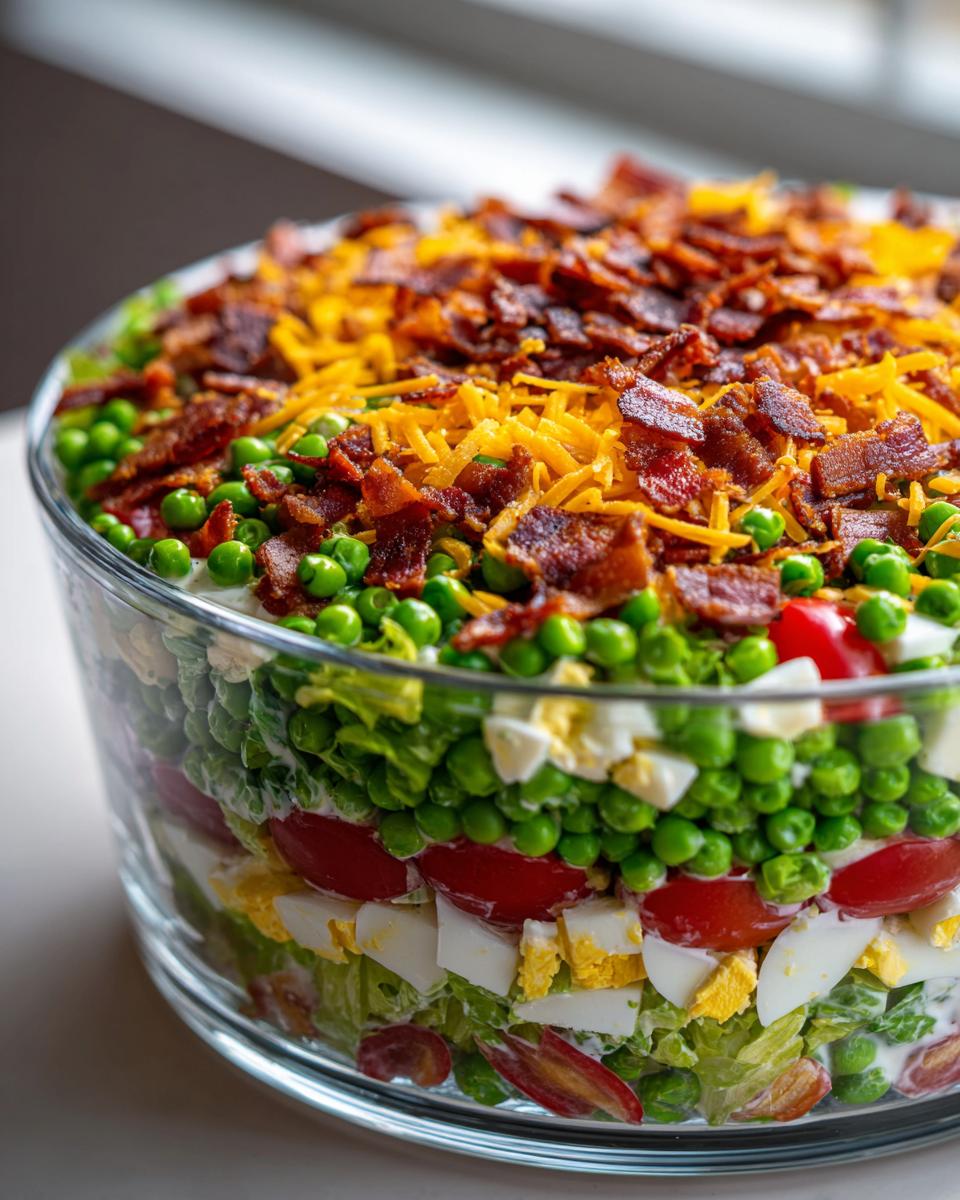
The Best 7 Layer Salad Formula for Visual Impact
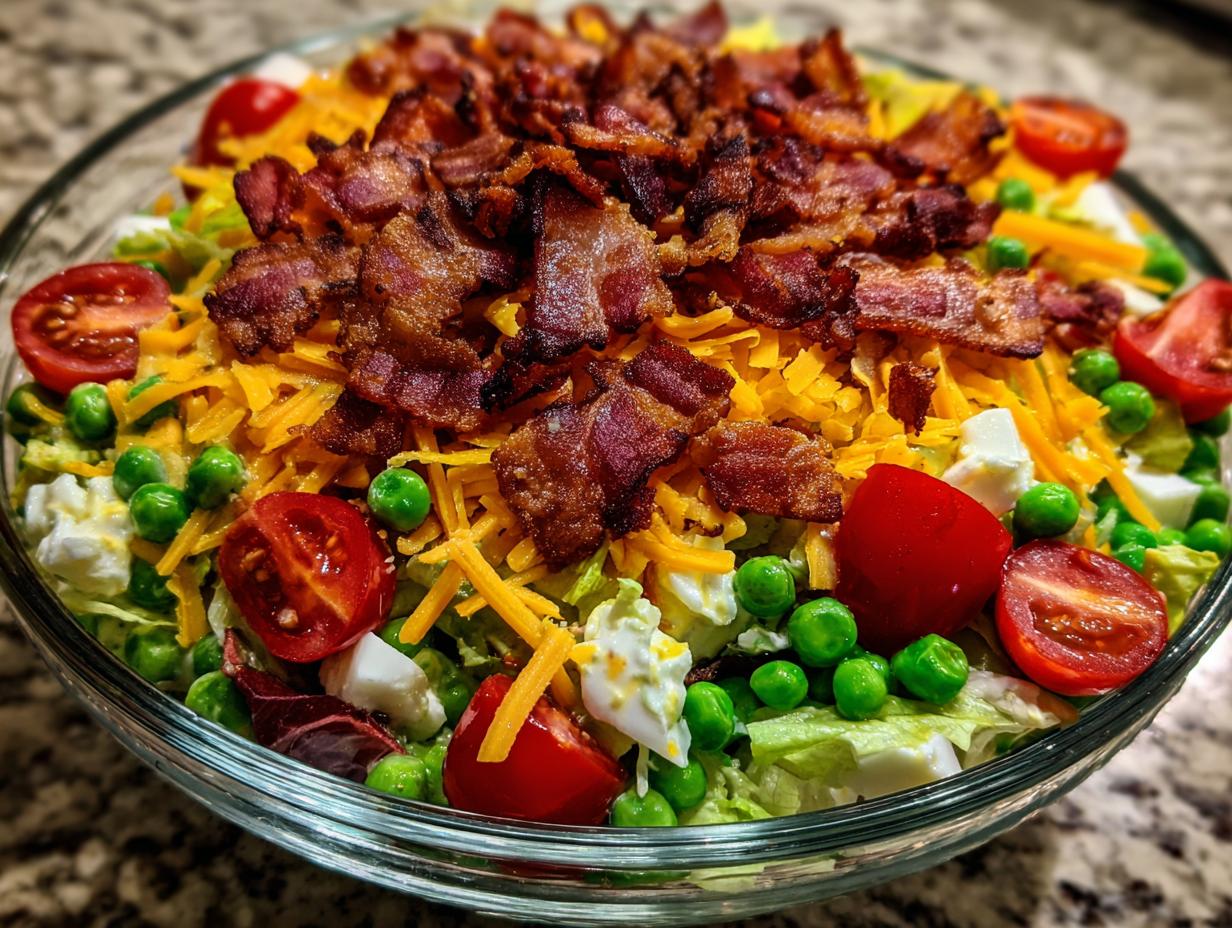
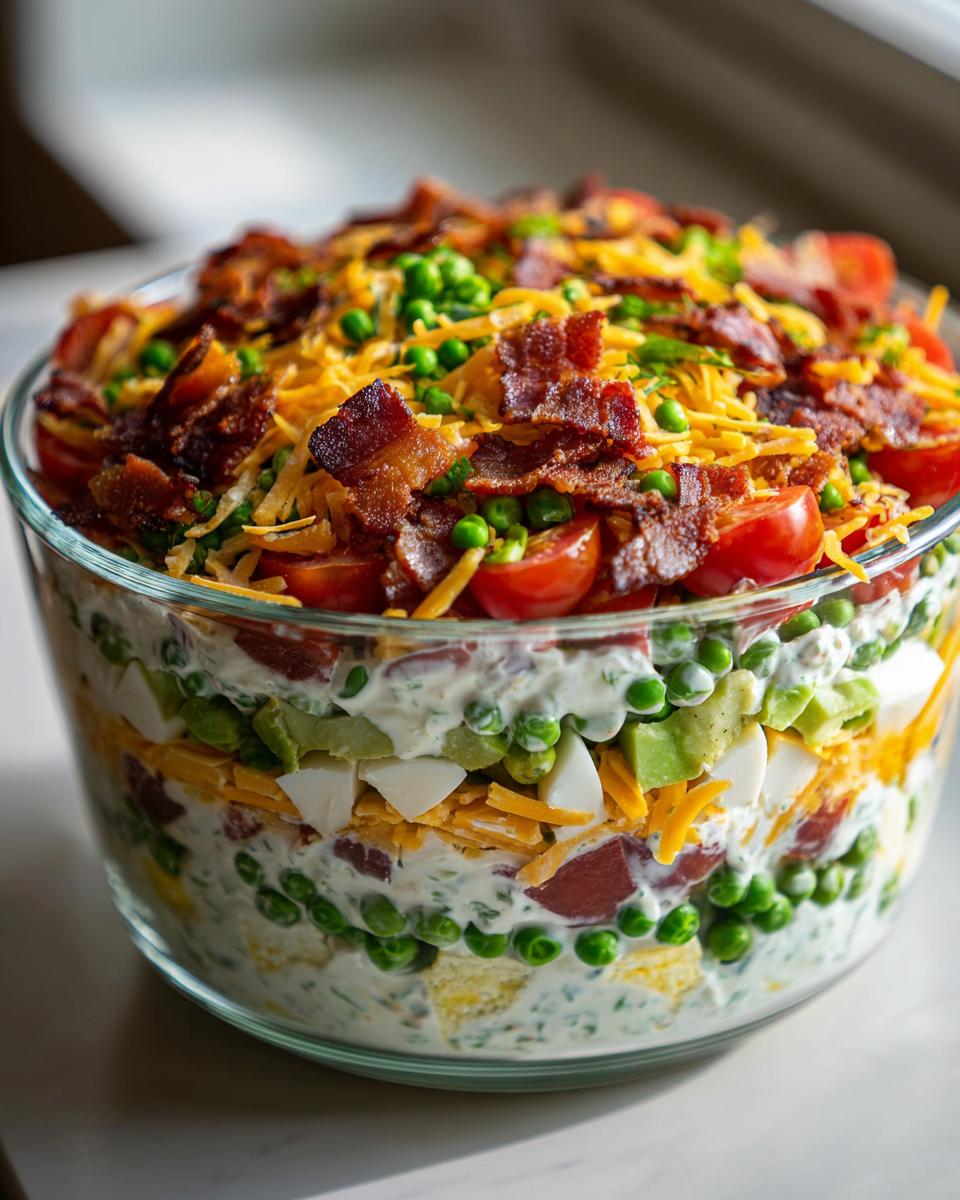
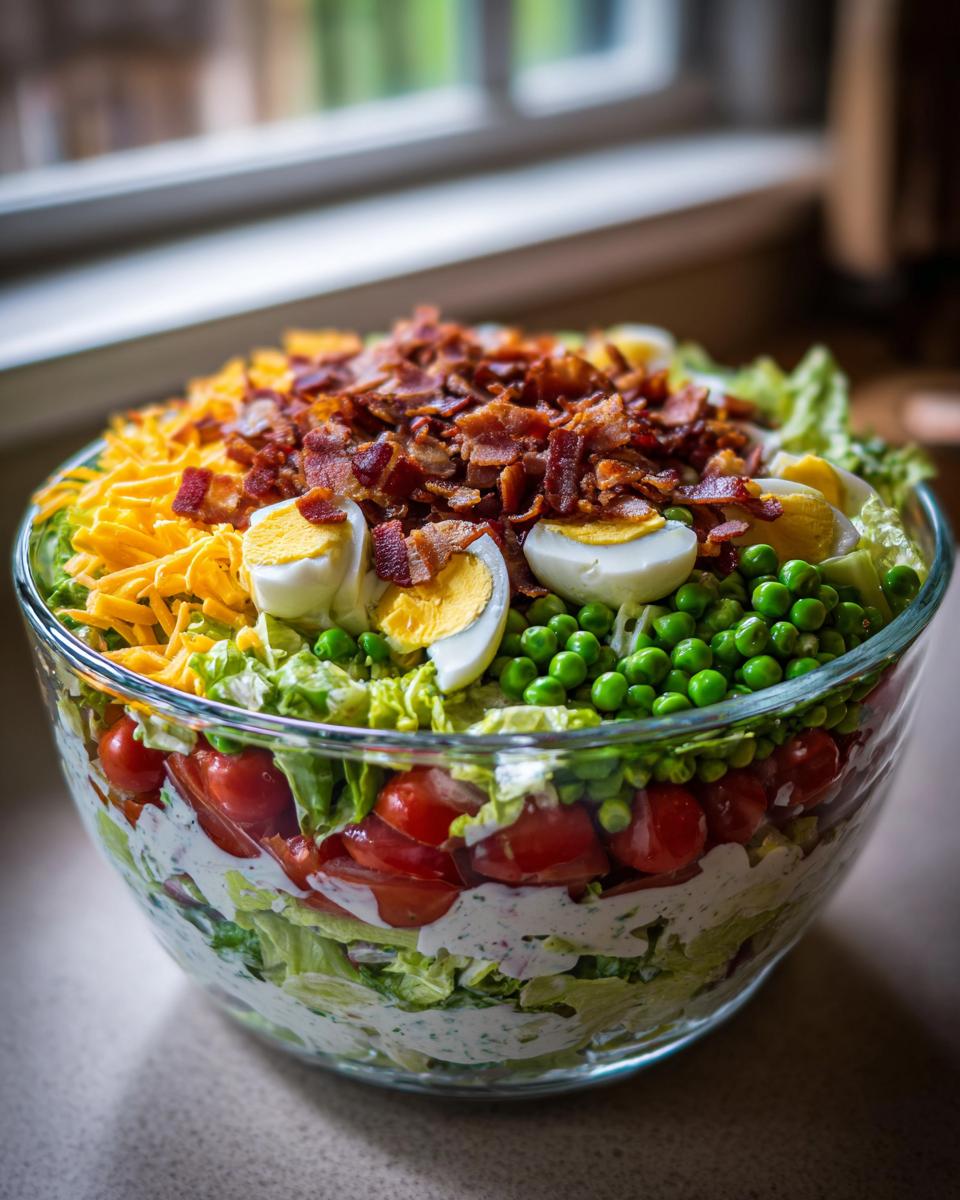
You simply *must* use a clear container for this. If you don’t have that big scoop-style glass bowl, use a deep trifle dish—anything that lets you see those distinct rows of color. The whole point of this vegetable layer salad is that visual appeal! Seeing that perfect line of bright green peas against the yellow eggs and red tomatoes is what draws people in. The glass bowl salad presentation is half the battle when it comes to serving a crowd.
I always make sure my layers are packed just tight enough so they don’t start bleeding into each other overnight, but not so tightly that you can’t get a serving spoon down through all those yummy layers. If you liked this make-ahead approach, you absolutely have to try my recipe for funeral potatoes next time you’re feeding a crowd!
Gathering Ingredients for Your 7 Layer Salad
Okay, the beauty of this dish is that it relies on simple, familiar things. But listen to me—you have to prep *everything* before you even look at that glass bowl. If you try to layer and chop at the same time, you’ll end up mixing layers before they even get a chance to stack up! That’s when the magic fades, so get organized first. My favorite savory comfort food that uses similar prep techniques is my bacon cheeseburger casserole; prepping ahead is key for both!
Creamy Salad Dressing Recipe Components
The dressing isn’t just flavor; it’s the glue and the crucial sealer for this 7 layer salad. It keeps the layers below it perfectly fresh. For this tangy experience, you need:
- 1 cup good quality mayonnaise
- 1/4 cup sour cream (for that extra tang!)
- 1 tablespoon white vinegar
- 1 teaspoon dried dill weed
- 1/2 teaspoon onion powder
- 1/4 teaspoon salt
- 1/4 teaspoon black pepper
Vegetable Layer Salad Components
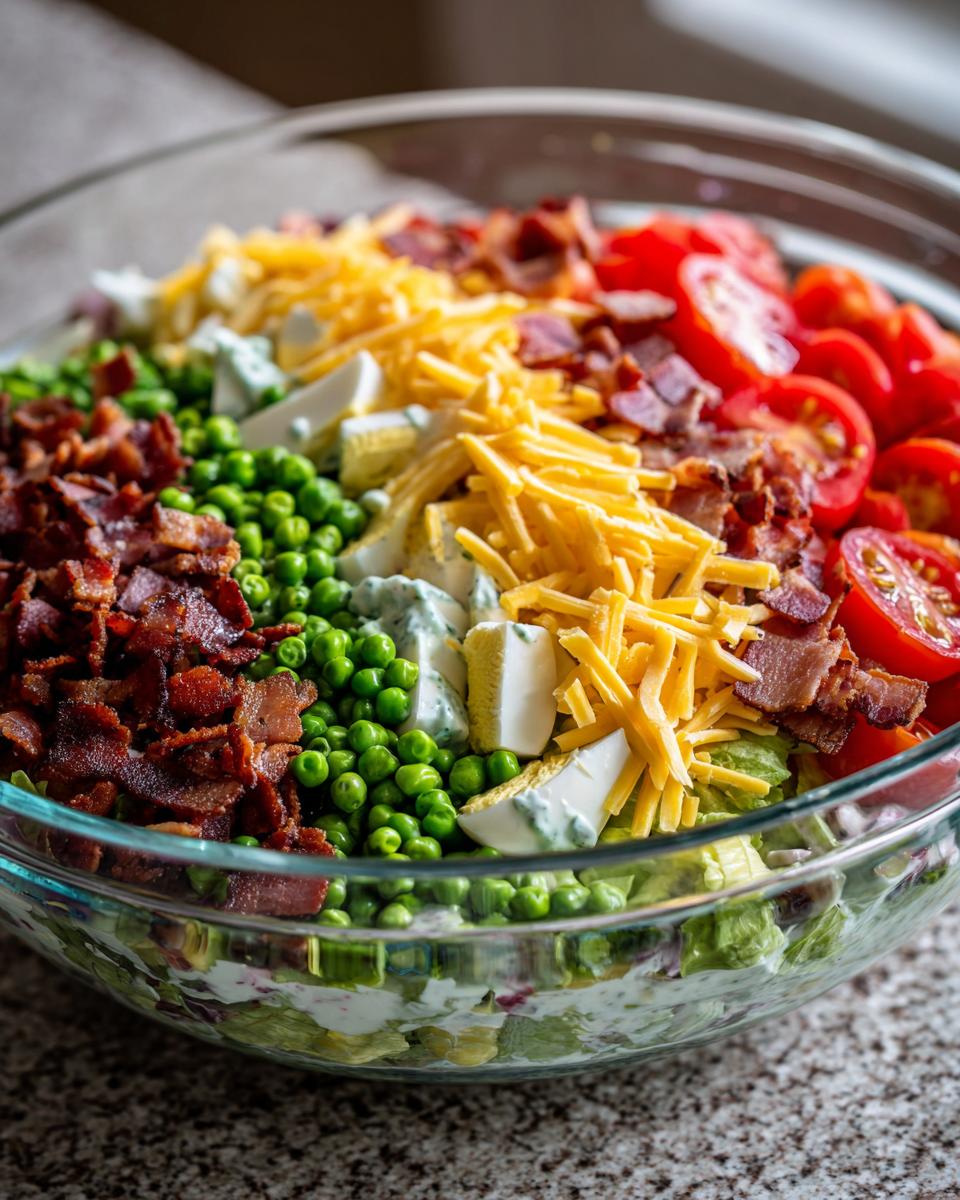
For the crunch and substance, we need texture, and these ingredients need special attention:
- 1 head iceberg lettuce, washed, spun totally dry, and finely chopped
- 1 cup frozen green peas, thawed completely (no ice crystals allowed!)
- 2 cups cherry or grape tomatoes, halved
- 4 hard-boiled eggs, chopped
- 1 cup sharp cheddar cheese, shredded
- 6 slices bacon, cooked until crisp and crumbled
How to Prepare the Perfect Make Ahead Salad for Potluck
Now for the fun part—building the rainbow! This is where you need to be deliberate. If you want this to be the best make ahead salad for potluck you’ve ever brought, you cannot just dump things in. We are building structure here. Remember, we are using all our ingredients twice because we want thick, glorious layers that show up well in the glass bowl. First thing: make sure that iceberg lettuce feels completely dry. Water is the enemy of presentation!
If you’re testing this out before the big event, you can try my easy puff pastry apple strudel recipe just to get a feel for layering techniques, but for the salad, precision matters!
Step 1: Constructing the Base Layers of the 7 Layer Salad
Start by dedicating half of your ingredients to the first run. Place half of your finely chopped lettuce at the bottom. Don’t press too hard! Next, evenly scatter half of the perfectly thawed peas over the lettuce. Then comes half of the tomatoes, followed by half of the chopped eggs, and then half of that beautiful shredded cheddar. At this point, sprinkle half of your crispy, crumbled bacon right on top of the cheese layer. Finally, take half of that creamy dill dressing and gently spread it over the bacon. This dressing layer acts like cement, locking the first half together.
Step 2: Repeating and Sealing the Vegetable Layer Salad
Go ahead and repeat everything you just did! Lettuce, peas, tomatoes, eggs, cheese, bacon. You should have used up all your veggies and toppings now. The absolute last thing you do, and listen to me closely here—this is the secret to the best 7 layer salad—is take the *remaining* dressing and spread it edge-to-edge. You want that top layer of bacon completely covered and sealed off from the air. This prevents it from shrinking or getting tacky. Cover the whole thing tight and put it in the fridge for at least four hours, but overnight is when the magic really happens!
Tips for Success with Your Retro Salad Recipe
This retro salad recipe is just so satisfying because it’s simple, but simple doesn’t mean you can skip steps! I’ve learned a few things over the years trying to keep this beauty looking perfect until serving time. The biggest pitfall is always sogginess, and that usually comes down to moisture control or timing. Iceberg lettuce is thirsty, and those delicious peas hold water. You have to treat them right!
My best personal tip? I always buy my bacon two days ahead and cook it slow on the stovetop, letting it drain on paper towels overnight in the fridge. By the time I use it the next day, it’s perfectly crisp and dry, which is essential before it hits that creamy dressing layer. If you want to practice another crispy classic while you wait for your salad to chill, you should definitely check out my recipe for fried pickles; similar concept—you need things totally dry before cooking!
Ingredient Notes and Substitutions for the 7 Layer Salad
While I stick pretty close to the classic layers because, hey, why mess with perfection? I know sometimes you need flexibility, especially if you’re cooking for someone with an allergy or you just ran out of something at the last minute. The layering structure is rigid, but the ingredients themselves can bend a little.
- Cheese Swaps: If sharp cheddar is too bold for your crowd, Monterey Jack is a lovely, milder choice that still melts beautifully into the dressing. Colby Jack works great too. Just avoid very soft, fresh cheeses that might turn soupier when chilled.
- Peas vs. Celery: Love peas but someone at your table doesn’t? You can absolutely swap them out for finely diced celery. You won’t get that lovely pop of sweetness, but you’ll keep that great crunchy texture. Make sure you dice the celery super small so it doesn’t overwhelm the layer.
- Dressing Consistency: If your dressing seems too thick even after whisking—maybe your mayo was extra stiff—you can thin the final dressing layer just slightly with a teaspoon of cold water or milk right before spreading it over the top. That thin seal is everything!
Storage and Serving the Classic Layered Salad Recipe
Alright, you’ve put in the loving effort to build those perfect rows, so don’t rush the finishing line! The storage step is mandatory—it’s just non-negotiable for a great 7 layer salad. You need to cover that glass bowl tightly with plastic wrap. I mean *tightly*. You don’t want any fridge smells trying to sneak in and taint that beautiful dill dressing!
It seriously needs at least four hours in the cold before it’s ready, but if you can manage it, chilling it overnight is where this easy layered side dish truly shines. The flavors get to mingle, and the lettuce firms up just right. When it’s time to serve, just pull it out, take the plastic off, and serve straight from the bowl. We never mix it until the very end, right at the table, or until someone scoops out their first big helping. You can certainly keep perfecting your mains, like my easy baked Caesar chicken while this salad chills!
Frequently Asked Questions About the 7 Layer Salad
I get asked these questions all the time! When you’re managing a beloved classic like this, people want to know the rules, or when they can bend them a bit. Don’t worry; I’ve sorted out the common hangups so your salad comes out looking exactly like the picture every single time. It’s all about managing expectations, just like when I’m trying to get my maple brown sugar cookies perfectly soft!
Can I make the 7 layer salad more of a healthy layered salad?
Oh, absolutely! While this is definitely a rich, comforting salad because of that creamy dressing, you can definitely lighten the load a bit without losing the magic. The easiest fix is in the dressing. You can swap out half the mayonnaise for plain Greek yogurt, which keeps that creamy texture but cuts down on fat significantly. Also, pump up the volume on those vegetables! If you have leftover carrots or maybe some finely chopped celery you want to sneak in, add them to the lettuce layer. More veggies mean more nutrients, and it just bulks up the salad happily without adding extra richness that you might be trying to cut back on.
How long can the 7 layer salad sit before serving?
This is the best part! As I mentioned, it needs a *minimum* of four hours so the lettuce can marry with the dressing a little bit—don’t serve it immediately—but for flavor perfection, you really want to let it chill overnight. That’s usually about 10 to 12 hours. Now, can it go longer? Yes, technically. I would never push it past 24 hours, though. After a full day, that crisp iceberg lettuce starts to soften just a touch too much, and you lose that beautiful crunch that makes this appetizer salad bowl so famous.
What if I don’t have a glass bowl for this appetizer salad bowl?
I hear you! Not everyone has a massive, clear glass punch bowl lying around waiting for a potluck. Don’t stress about the vessel; focus on the vision! You absolutely must use clear glass or clear plastic so people can see those layers. My favorite alternative is a deep trifle dish. It’s usually taller than it is wide, which actually makes the layers look even more dramatic and stacked up. A deep, clear plastic container works in a pinch for picnics or outdoor events, too. Just make sure whatever you use is deep enough to accommodate two full rounds of all seven ingredients!
Estimated Nutritional Profile for This 7 Layer Salad
I always get asked about how heavy this salad is. And look, between the bacon, the cheddar cheese, and that glorious creamy dill dressing, it’s certainly not a diet snack! But when you look at the whole picture, considering it’s made with fresh vegetables and those eggs for protein, it’s a satisfying, hearty side dish that absolutely belongs at the table.
Keep in mind that these numbers are just my best estimate based on the recipe ingredients I shared. Since everyone’s bacon is different, and how much you pile onto your slice changes everything, treat this as a general guide. If you want to see how my approach differs when I make a sweeter side, you should peek at my creamy maple brown butter mashed sweet potatoes—that one trends a bit sweeter!
Here is the breakdown for one generous serving, which is about 1/8th of the whole bowl:
- Serving Size: 1/8 of salad
- Calories: 350
- Fat: 30g
- Saturated Fat: 9g
- Trans Fat: 0g
- Cholesterol: 110mg
- Sodium: 450mg
- Carbohydrates: 10g
- Fiber: 2g
- Sugar: 4g
- Protein: 12g
See? The protein from the eggs and bacon really helps balance out the fats from the mayonnaise. It’s a filling side dish, for sure, which is why it makes such a great picnic salad idea—you don’t need a huge portion to feel satisfied!
Share Your Perfect Party Ready Side Dish Experience
That’s it! We’ve built the ultimate classic layered salad recipe that travels well, wows the crowd, and tastes incredible the next day. Now comes my favorite part: hearing from you!
Did you make this for a summer cookout or maybe sneaking it onto the Thanksgiving table? I genuinely want to know how it went over! When you serve this up, snap a picture before anyone takes a scoop—I love seeing everyone’s unique glass bowl salad presentation. You can tag me on social media; I promise I’ll be cheering you on!
When you leave a comment below, tell me which layer truly stole the show for your family. Was it the crunch of the bacon, the tang of the dressing, or maybe the sweet pop of the peas? Every batch is a little bit different based on how much you pack in!
If you whipped this up and everyone cleaned the bowl, please hit those five stars at the top of the recipe card! It helps other busy cooks find reliable recipes like this easy layered side dish. And hey, if you’re already craving more make-ahead magic, don’t forget to check out my recipe for easy homemade cranberry sauce for your next major holiday spread. Or, if you want to see how others approach famous dishes, you might enjoy checking out Martha Stewart’s take on the salad over at stewartrecipes.com!
PrintClassic Make-Ahead 7 Layer Salad with Creamy Dill Dressing

This classic 7 layer salad recipe displays fresh ingredients in distinct rows within a glass bowl. It is a hearty, make-ahead side dish perfect for potlucks and family gatherings.
- Prep Time: 25 min
- Cook Time: 5 min
- Total Time: 30 min
- Yield: 8 servings 1x
- Category: Side Dish
- Method: Assembling/Chilling
- Cuisine: American
- Diet: Vegetarian
Ingredients
- 1 head iceberg lettuce, chopped
- 1 cup frozen green peas, thawed
- 2 cups cherry or grape tomatoes, halved
- 4 hard-boiled eggs, chopped
- 1 cup shredded sharp cheddar cheese
- 6 slices bacon, cooked and crumbled
- 1 cup mayonnaise
- 1/4 cup sour cream
- 1 tablespoon white vinegar
- 1 teaspoon dried dill weed
- 1/2 teaspoon onion powder
- 1/4 teaspoon salt
- 1/4 teaspoon black pepper
Instructions
- Prepare the creamy dill dressing: In a small bowl, whisk together the mayonnaise, sour cream, white vinegar, dill weed, onion powder, salt, and pepper until smooth. Set aside.
- Prepare the layers: Ensure the lettuce is washed and dried well. Thaw the peas completely. Halve the tomatoes. Chop the hard-boiled eggs. Cook and crumble the bacon.
- Assemble the salad in a large, clear glass bowl to show the layers. This presentation makes it a party ready side dish.
- Layer 1: Place half of the chopped iceberg lettuce at the bottom.
- Layer 2: Spread half of the thawed peas evenly over the lettuce.
- Layer 3: Arrange half of the halved tomatoes over the peas.
- Layer 4: Sprinkle half of the chopped hard-boiled eggs over the tomatoes.
- Layer 5: Sprinkle half of the shredded cheddar cheese over the eggs.
- Layer 6: Sprinkle half of the crumbled bacon over the cheese.
- Layer 7: Spread half of the creamy dill dressing over the bacon layer, sealing the ingredients.
- Repeat the layers starting with the remaining lettuce, peas, tomatoes, eggs, cheese, and bacon.
- Spread the remaining dressing over the top layer, completely covering the bacon to prevent it from getting soggy.
- Cover the bowl tightly with plastic wrap. Chill the salad for at least 4 hours, or preferably overnight, before serving. This make ahead salad for potluck tastes best when chilled.
- When ready to serve, remove the plastic wrap.
Notes
- To keep the layers crisp, do not mix the salad until you are ready to serve it.
- You can substitute the cheddar cheese with Monterey Jack or a Colby blend for a different flavor profile.
- If you are making this for a smaller group, use a deep trifle dish instead of a large punch bowl for a similar visual effect.
Nutrition
- Serving Size: 1/8 of salad
- Calories: 350
- Sugar: 4
- Sodium: 450
- Fat: 30
- Saturated Fat: 9
- Unsaturated Fat: 21
- Trans Fat: 0
- Carbohydrates: 10
- Fiber: 2
- Protein: 12
- Cholesterol: 110