
Oh, my friends, are you ready for a weekend baking project that stops everything the second it comes out of the oven? I’m talking about true indulgence here, the kind of treat that smells like a cozy bakery right in your own kitchen. We’re moving beyond basic cinnamon rolls today; we are making the showstopper: from-scratch red velvet cinnamon rolls. These are pillowy soft, unbelievably fluffy, and topped with that essential, perfectly tangy cream cheese frosting that balances all that rich cocoa goodness. If you’ve ever wanted a recipe for the ultimate, soft, and gooey cinnamon rolls experience, this is it! Back in my childhood kitchen in Ohio, we loved comfort food, and these rolls carry that deep, connecting feeling forward. Trust me, these bakery-style cinnamon rolls are worth every minute!
- Why You Will Love These Red Velvet Cinnamon Rolls
- Ingredients for the Softest Red Velvet Cinnamon Rolls
- Step-by-Step Instructions for Bakery Style Cinnamon Rolls
- Tips for Success When Making Red Velvet Cinnamon Rolls
- Make-Ahead & Freezer Tips for Red Velvet Cinnamon Rolls
- Storage & Reheating Instructions for Homemade Sweet Rolls
- Serving Suggestions for Your Festive Dessert Recipes
- Frequently Asked Questions About Red Velvet Cinnamon Rolls
- Nutritional Estimates for Decadent Breakfasts
- Share Your Red Velvet Cinnamon Rolls Creations
Why You Will Love These Red Velvet Cinnamon Rolls
Honestly, if you’re going to bake rolls, you want them to be spectacular, right? These aren’t just any sweet rolls; they are a celebration in a pan. Here is why I know you’re going to be obsessed with this recipe:
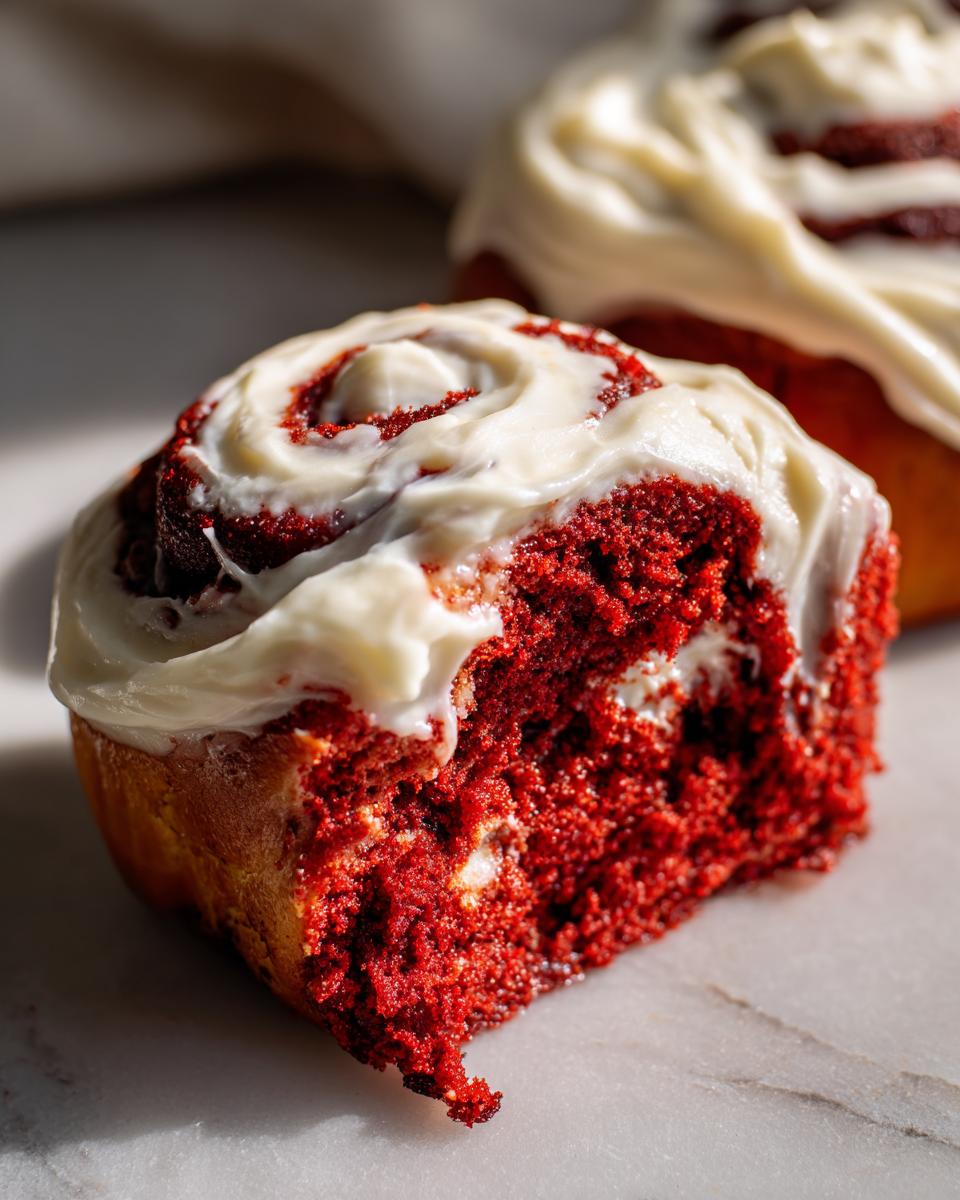
- Cloud-Like, Fluffy Dough: We are focusing on the softest breakfast rolls texture possible. That yeasted dough gets beautifully tender after the two rises.
- Vibrant, Show-Stopping Red: These are truly eye-catching! Using the right food coloring means you get that signature deep red color that screams festive dessert recipes.
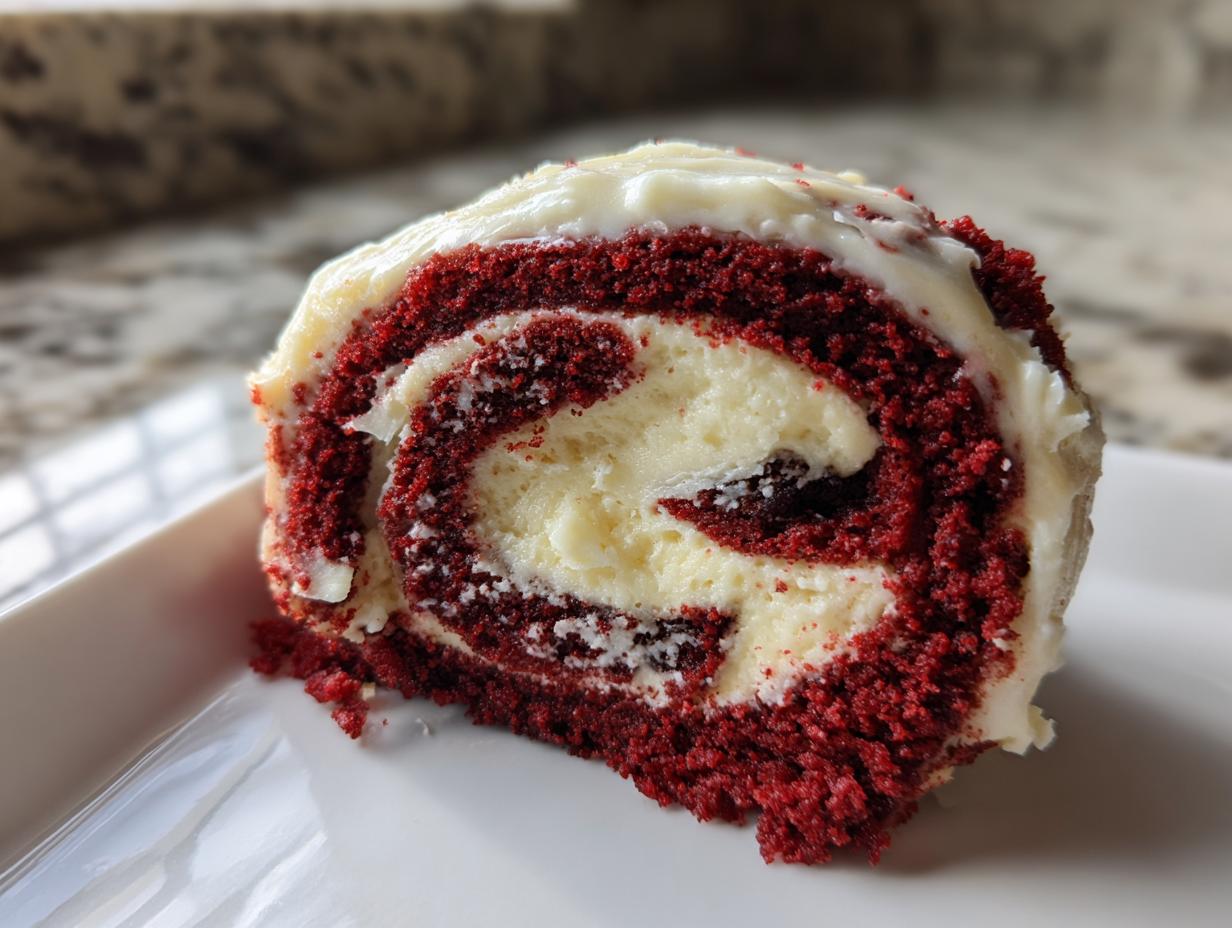
- Perfect Cinnamon Swirl: Inside that red velvet dough is a rich filling packed with brown sugar, cocoa powder, and plenty of cinnamon—it melts into chocolate cinnamon swirls when baked.
- The Essential Tangy Cream Cheese Frosting: You simply cannot have red velvet without that rich, tangy icing on top. It cuts the sweetness perfectly! You can find my notes on the best moist, fluffy red velvet cake secrets, which really applies here, too!
- Bakery Style Cinnamon Rolls at Home: Skip the expensive cafe price. These homemade sweet rolls totally rival anything you’d buy sliced fresh from the oven.
- Ideal Holiday Brunch Ideas: These are guaranteed to be the star of any Christmas morning or Valentine’s Day spread.
Ingredients for the Softest Red Velvet Cinnamon Rolls
Okay, I know listing out ingredients can sometimes feel tedious, but listen to me—this recipe is why these rolls are so spectacular! Precision matters when we’re aiming for that perfect, soft texture, especially with all that red coloring involved. We need the yeast happy, the butter just right, and the cream cheese perfectly softened for that glorious topping. If you get these raw materials just right, you’ve already won half the battle for the best moist spice cake recipe crossover you’ve ever made!
For the Fluffy Red Velvet Dough
The dough is where the magic starts, giving us those soft, fluffy results. Make sure your egg is at room temperature—that really helps the dough incorporate everything smoothly!
- For the Dough: 1 cup warm milk (It needs to be warm, not hot, or you’ll kill your yeast!)
- 2¼ teaspoons active dry yeast
- ¼ cup granulated sugar
- 1 large egg, room temperature (Don’t forget this step!)
- 3½ cups all-purpose flour, plus more for dusting (Measure this carefully!)
- 1 teaspoon salt
- 2 tablespoons unsalted butter, melted
- 2 tablespoons red food coloring (Gel preferred for vibrant color—liquid just doesn’t cut it for a true red velvet!)
- 1 teaspoon vanilla extract
For the Chocolate Cinnamon Swirl Filling
This filling is fantastic because it marries the classic cinnamon roll swirl with a hint of the cocoa flavor we expect from red velvet. That combination is just *chef’s kiss*!
- For the Filling: ¾ cup unsalted butter, softened (Make sure this is soft enough to spread easily!)
- 1 cup packed light brown sugar
- 2 tablespoons ground cinnamon
- 1 tablespoon unsweetened cocoa powder
For the Tangy Cream Cheese Frosting Recipes
You absolutely need this frosting. It’s the counterbalance that makes these indulgent red velvet cinnamon rolls sing. If you skip the tang, you miss the whole point of the flavor profile!
- For the Cream Cheese Frosting: 8 ounces cream cheese, softened
- ½ cup unsalted butter, softened
- 2 cups powdered sugar, sifted (Sifting prevents lumps in your lovely icing!)
- 1 teaspoon vanilla extract
- 1 tablespoon milk (optional, only if you like a thinner, more drizzly consistency)
Step-by-Step Instructions for Bakery Style Cinnamon Rolls
Alright, roll up those sleeves! This is where we pull everything together to get those gorgeous, towering bakery-style cinnamon rolls. Don’t rush the two rises—that’s the secret to making them soft and fluffy, not dense! We’re making true indulgent morning treats here.
Making the Fluffy Dough and First Rise
First things first, we have to wake up that yeast. In a little bowl, mix your warm milk, the yeast, and just one teaspoon of the sugar. Let it sit for about 5 to 10 minutes. If it gets foamy on top, that yeast is ready to work! If it doesn’t foam, toss it and start over—we need active yeast for beautiful lift.
In your big mixing bowl, whisk your flour, the rest of the sugar, and the salt. Now, dump in the yeast mixture, the room-temperature egg, the melted butter, vanilla, and that glorious red food coloring. Mix it all up until it looks like a slightly messy, very red ball of dough. Turn it out onto your lightly floured surface and get kneading! You need about 6 to 8 minutes. Keep going until the dough feels smooth like velvet and holds that deep, vibrant red color evenly. Pop that beautiful red ball into an oiled bowl, turn it to coat, cover it up, and let it rest in a warm spot for 1 to 1.5 hours until it’s doubled up, just like for my homemade cream of chicken soup recipe where we wait for the flavors to marry!
Spreading Filling and Shaping Your Red Velvet Cinnamon Rolls
While that dough is getting puffy, go ahead and whip up that filling we talked about. Just beat the softened butter, brown sugar, cinnamon, and cocoa powder until it’s smooth enough to spread like peanut butter. Seriously, it should be easy to work with—no chunks! This filling layer is what makes them so decadent. It’s the perfect mix of cocoa and cinnamon, which you can see echoed in the look of other fantastic recipes like the one over at I Am Winifred.
Once your dough has doubled, gently punch the air out—don’t be shy, but don’t beat it to death! Roll that dough out on your lightly floured surface into a big rectangle, roughly 12 by 18 inches. Now, take your filling and spread it everywhere! Mean it, edge to edge, but leave maybe half an inch bare along one of the long sides. That little border helps seal everything up nicely.
Starting on the opposite long edge, roll that dough up super tight into a log. Pinch that bare seam closed so it doesn’t pop open while baking. Now for the cutting! Use a sharp knife or, if you want those perfect edges, some unflavored dental floss—trust me on the floss trick! Slice that log right into 12 equal rolls. Pop them into your greased 9×13 dish, ready for their next rest.
Baking and Preparing the Tangy Icing Toppings
Next, cover those cut rolls loosely and let them have a final little nap—this second rise takes about 30 to 45 minutes until they look puffy again. While they rest, go ahead and preheat your oven to 375°F (190°C). You want the oven hot and ready for these festive creations!
They bake for about 20 to 25 minutes until the centers look set. If you want truly soft rolls, you can try the foil trick I use for my cinnamon roll casserole: cover the pan with foil for the first 15 minutes to trap steam inside—it keeps them extra moist. While those beauties are baking, make your frosting! Whip your softened cream cheese and softened butter together until it’s totally smooth. Slowly add in the powdered sugar and vanilla. Keep beating until it’s light and fluffy. If it looks too stiff? Just splash in a tiny bit of milk until it pours nicely.
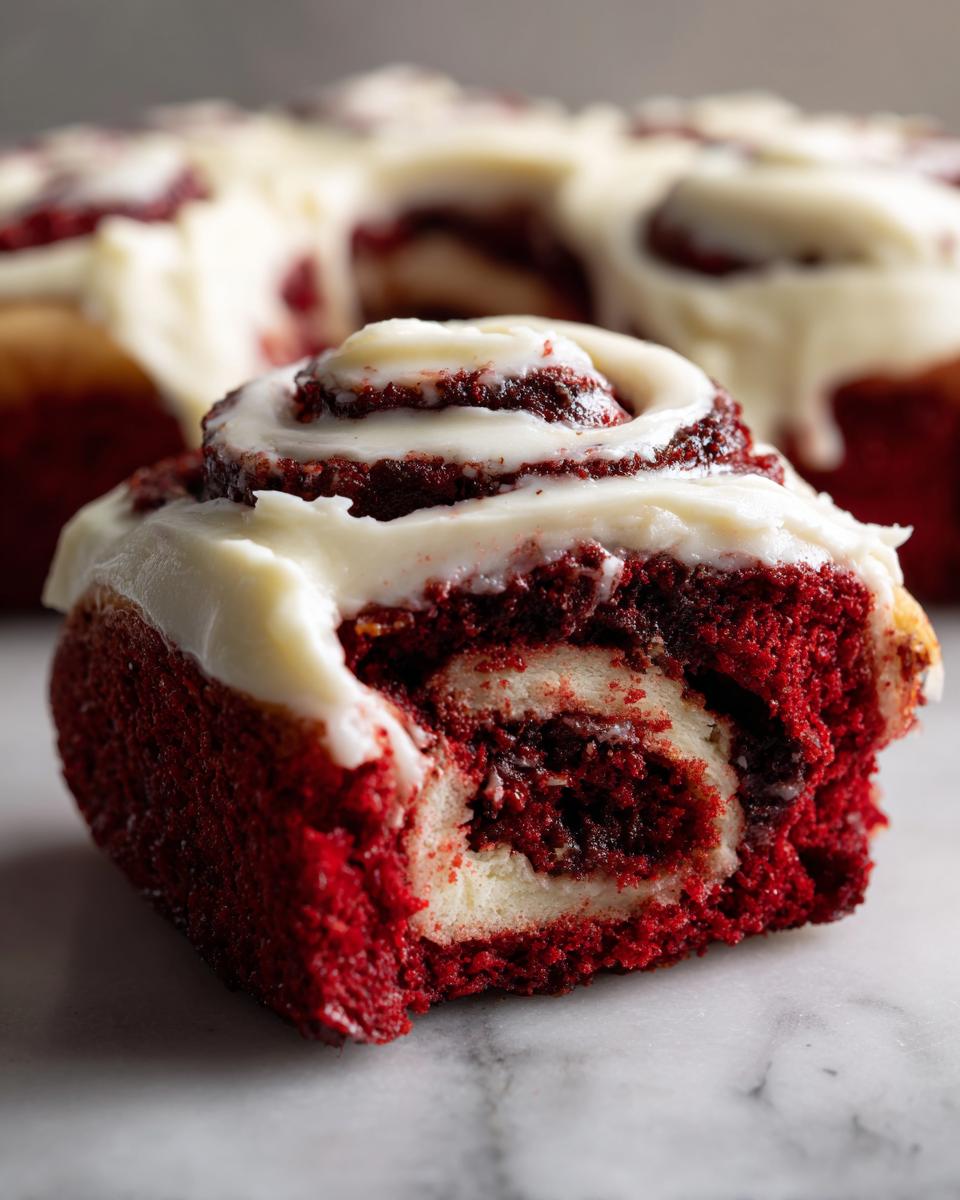
Pull those red velvet cinnamon rolls out of the oven. Let them cool for just about 10 minutes—you want them warm enough for the icing to melt slightly, but not scalding hot. Then, go wild slathering that tangy cream cheese frosting over the warm rolls so it seeps right down into all those gorgeous swirls. Serve immediately!

Tips for Success When Making Red Velvet Cinnamon Rolls
I’ve messed up enough batches of dough in my life to know the little tricks that make all the difference between a good roll and a “call your friends over, they’re that good” roll. Since we’re aiming for those soft, fluffy results that taste like they came straight from that warm Ohio bakery, you need to pay attention to a couple of key details. It’s all about managing expectations and making sure your vibrant color stays put!
Achieving Vibrant Red Color in Red Velvet Cinnamon Rolls
This is a big one for red velvet everything, isn’t it? You want that deep, stunning color, not some pale, pinkish dough! If you use standard liquid food coloring drops you buy at the grocery store, you’re going to end up adding way too much liquid, which throws off your dough structure, and the color still looks weak. My advice, and what I always keep stocked now, is gel food coloring. You are going to use way less of the gel coloring to get a dramatically deeper, more intense red. It really locks in that beautiful color through the kneading and baking process. Don’t skimp here if you want them to truly look festive!
Techniques for Extra Soft Breakfast Rolls
We talked about the importance of the two rises for fluffiness, but here’s a trick for baking day that really seals the deal for that bakery-style softness. When I bake these, or whenever I’m making my soft lemon scones, I trap moisture in the oven. For these rolls, once they are in the baking pan, I cover the whole thing tightly with foil for the first 15 minutes of baking. This traps steam, and steam keeps the dough from drying out on the outside before the inside is cooked. They come out unbelievably tender! I actually read a great article from the folks at Fresh Savory that talked about how important moisture is, and this step totally delivers that cozy, melt-in-your-mouth texture.
Make-Ahead & Freezer Tips for Red Velvet Cinnamon Rolls
Listen, I know mornings can be absolutely crazy, especially when you’re trying to pull off a spread for holiday brunch ideas. Who wants to jump up at 4 AM to knead dough? Not me! The beauty of these rich, vibrant rolls is that they are amazing candidates for making ahead of time. This is one of my top secrets for keeping my sanity during the holidays. It lets me enjoy the *smell* of baking without the actual frantic labor when everyone else is waking up!
Because we used yeast in this dough, we can use that slow, cold rise to deepen the flavor while we sleep. It’s a win-win! If you prepare the dough all the way up to the end of the first rise, you can actually stick the whole thing in the fridge—that’s the overnight trick.
Here is exactly how I handle this for special occasion baking:
- Finish the First Rise and Cut: Follow steps 1 through 8 above. Get the dough made, kneaded, rolled, filled, and sliced into your 12 beautiful rolls. Place them snugly into your greased 9×13 baking dish.
- Chill Out: Cover that pan tightly with plastic wrap—TIGHTLY! You don’t want your fridge air drying out those beautiful tops. Pop the whole dish into the refrigerator. They can safely chill here for up to 18 hours. Seriously, go to bed!
- The Morning Wake-Up Call: When you wake up, the dough will be firm and won’t have risen much in the cold. You need to let them warm up before baking so they get that final puff. Take the pan out of the fridge and leave it, still covered, on the counter for about 30 minutes. Then, remove the plastic wrap and let them sit for another 30 to 45 minutes until they look noticeably puffy again—this is your second rise happening slowly at room temperature. If your kitchen is cold, this might take closer to an hour, so just watch the dough, not the clock!
- Bake as Directed: Once they are puffy, bake them exactly as the main recipe says, starting at 375°F (190°C). That slow refrigeration makes them incredibly flavorful, just like they marinated overnight. Imagine serving these amazing homemade sweet rolls just minutes after everyone wakes up!
You can also freeze them! After you slice the rolls but *before* the second rise (so, right after step 8), you can place the unrisen rolls in a disposable aluminum pan, cover them very well with plastic wrap and then foil, and freeze them for up to a month. When you want to bake them, let them thaw on the counter for several hours before putting them in the oven. You might need a slightly longer second rise, but it works like a charm for having fresh rolls ready anytime!
Storage & Reheating Instructions for Homemade Sweet Rolls
If you actually manage to have any of these glorious red velvet cinnamon rolls left over (which, honestly, I never do!), you need to know how to keep them tasting amazing. We worked so hard to get that soft, gooey texture, and we are not going to let them dry out sitting on the counter!
First things first: Wait until the cream cheese frosting has set up a bit before you even think about covering them. Once they’ve cooled down from being piping hot, store any leftovers in a really good airtight container. You don’t want air creeping in and stealing that moisture we fought so hard to create. They usually stay perfectly soft like this on the counter for about two days. If you think they’ll sit longer, I’d pop them in the fridge, but you *must* reheat them properly before eating.
Reheating to Bring Back the Gooey Goodness
The microwave is your best friend for a quick fix, but you have to use it gently! I take a roll or two, place them on a microwave-safe plate, and warm them for just 15 to 20 seconds. That rapid heat melts the frosting slightly and gets the dough soft again. If you’re reheating a whole pan, though, the oven is better to keep them from getting weirdly chewy.
For the oven method, which is best if you want that ‘fresh-baked’ feel, preheat it low and slow—say, 325°F (160°C). Place the rolls (loosely covered with foil if they are already frosted, or tightly if they are plain) in a baking dish. Heat them for about 10 to 12 minutes until they are warmed right through. If you’re reheating plain rolls, you can add a tiny splash of water to the bottom of the pan before you cover them with foil; this creates a little steam bath and keeps them looking as lovely as my creamy maple brown butter mashed sweet potatoes.
Just try not to blast them too long in either device, or you risk turning that wonderful fluffy dough into a chewy hockey puck. Warm, gooey, and slightly melted frosting is the goal—and it’s totally achievable with these simple reheating steps!
Serving Suggestions for Your Festive Dessert Recipes
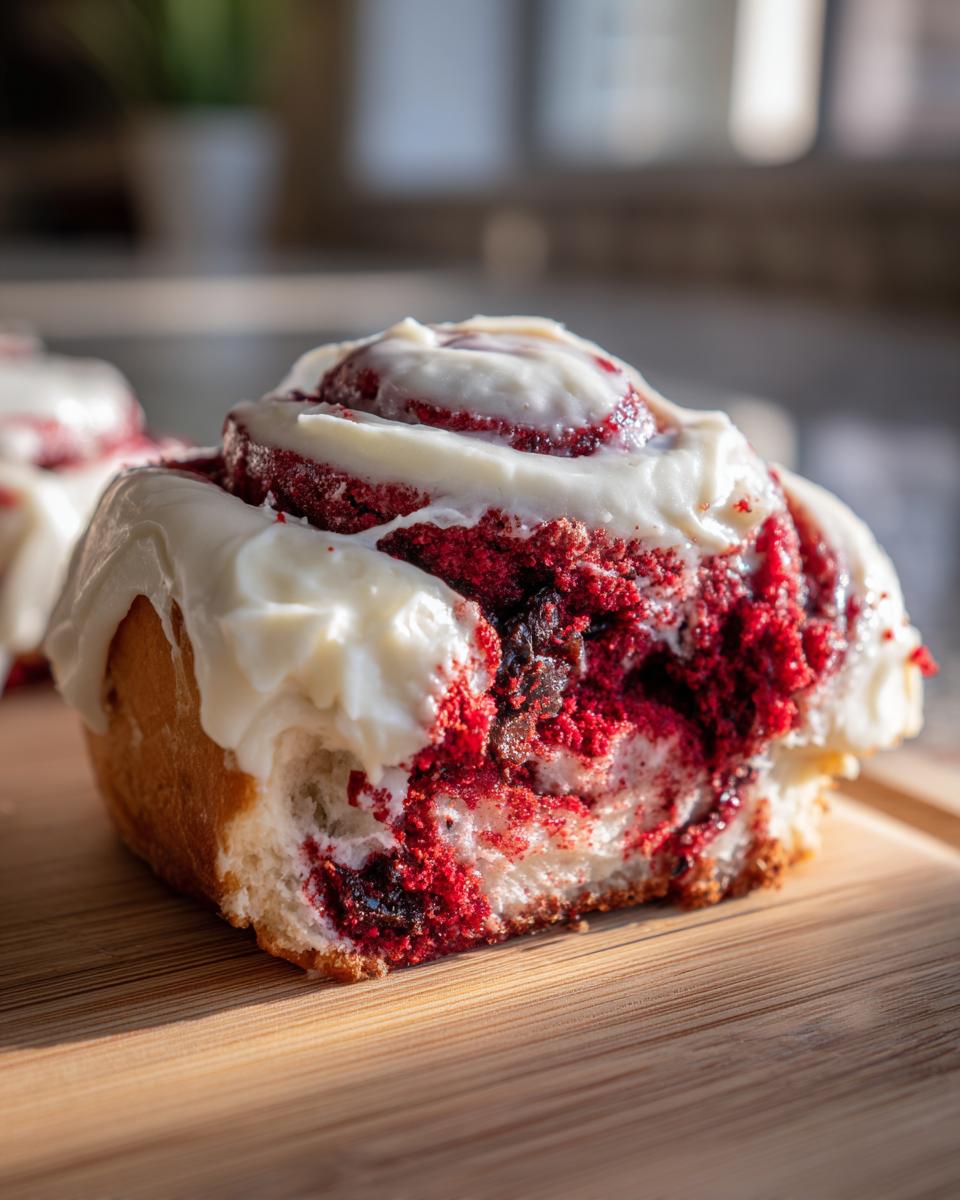
These **red velvet cinnamon rolls** are definitely the main event, aren’t they? They are intensely flavorful, rich, and draped in that marvelous cream cheese frosting. Because they are so decadent, sometimes the best pairings are actually very simple! When I pull these beautiful rolls out for a holiday brunch or a special weekend baking project, I like to keep the side dishes light so everyone can enjoy two or three rolls without feeling weighed down!
For me, it always comes down to a great beverage to cut through that richness. A simple cup of strong coffee is non-negotiable—it stands up perfectly to the cocoa notes in the dough and the tang of the icing. If you’re serving these for a party, especially around Christmas, you have to grab the recipe for my non-alcoholic Christmas punch. That bright, fruity flavor is such a nice contrast to the deep, warm spices we use in the filling.
If you need something a little less intense than punch but want to keep it cozy, you simply must try making a batch of my whipped hot chocolate instead of plain cocoa. It feels fancy, it’s fun to look at, and the light texture won’t compete with the amazing gooey cinnamon rolls.
-
For Coffee Lovers: Serve with a strong, freshly brewed black coffee. The bitterness balances the sweetness perfectly.
-
A Touch of Fruit: Because these are so rich, a simple, fresh side of sliced strawberries or orange segments adds color and a needed fresh element to your festive dessert recipes spread.
-
For Holiday Gatherings: A beautiful holiday punch, like the recipe I shared, is a fantastic non-alcoholic centerpiece that looks amazing next to the vibrant red of the rolls.
-
Keep it Simple: Honestly, these rolls don’t need much help. A glass of cold milk works just as well for the kids (or me, late at night!).
The key is that these rolls are already rich, so we want our accompaniments to either complement that warmth or offer a refreshing, bright contrast. They are your star, so let them shine!
Frequently Asked Questions About Red Velvet Cinnamon Rolls
I always get so many questions after people try these for the first time! It’s usually about keeping that color bright or trying to cut a few corners, which, while I understand, can sometimes change the texture we worked so hard for. Here are the common things I hear about achieving the very best cinnamon roll recipe version of these beauties. Sometimes people ask if they can use a shortcut, like a box mix, but trust me, making your own dough is what gives you these incredible homemade sweet rolls.
Can I make these red velvet cinnamon rolls without yeast?
Oh, honey, you sure *can* try. But I gotta warn you, the whole reason these are hailed as the soft breakfast rolls of your dreams is because of that yeast! It’s what creates those beautiful, airy pockets when it rises. If you absolutely can’t use yeast, you could maybe make a quick baking powder dough, sort of like a biscuit dough, but it will result in something much denser, more like a quick bread spiral. It won’t have that amazing, pillowy fluffiness that makes these bakery-style cinnamon rolls so special. You’d be missing that signature tearable texture! If you’re looking for other quick bakes, you might enjoy my recipe for easy puff pastry apple strudel, which skips the yeast step entirely.
How do I get the cream cheese frosting to be perfectly tangy?
This is what separates a good frosting from a phenomenal one, right? If you want that gorgeous counterpoint to the sweetness, it all comes down to the ingredients and temperature. First, make sure you use full-fat, good quality cream cheese and butter. Don’t substitute those with low-fat versions if you want that classic flavor! Second, just like with the dough, having the cream cheese and butter at the perfect, soft room temperature is crucial before you start beating them. If they’re too cold, they’ll never whip up light and airy. If they are *too* warm or starting to melt, you’ll end up with soup! That perfect consistency whipped up with the powdered sugar is what gives you that rich, tangy icing toppings that cuts through the sweetness of the red velvet roll perfectly.
My pro-tip for extra zing? A tiny splash of fresh lemon juice along with the vanilla extract sometimes sneaks its way into my batch when I want something extra bright! It enhances the slight natural tanginess you get from the cocoa and buttermilk elements hinted at in the red velvet flavor profile.
Nutritional Estimates for Decadent Breakfasts
Now, I know what you’re thinking. These red velvet cinnamon rolls are amazing, colorful, and incredibly satisfying, but they also taste like pure comfort, which usually means they are high in, well, everything good! Listen, I believe in enjoying life and enjoying food without obsessing over every calorie, especially when we’re talking about a special occasion bake or a weekend treat.
But because I want to be totally transparent with you—that’s just how we do things here at Mia’s Meals—I’ve run the numbers based on the ingredients list above. These are my best estimates for one roll, assuming you cut the batch into 12 nice slices. These values are what you can expect from these decadent breakfasts when made exactly as written!
- Serving Size: 1 roll
- Calories: 480
- Fat: 25g (Be aware this includes about 15g of saturated fat from all that butter and cream cheese!)
- Carbohydrates: 58g
- Sugar: 35g (Yes, that’s a lot, but that’s why it tastes like dessert for breakfast!)
- Protein: 7g
- Sodium: 350mg
- Cholesterol: 60mg
A quick word of caution, though, just like I mentioned back when we talked about the carrot cake: these are estimates! The actual numbers can change depending on the brand of butter you use, the exact amount of frosting you manage to slather on top (and trust me, I always use more!), or if you decide to cut the rolls into 10 instead of 12. So take these figures as a general guide. These are meant to be enjoyed as an indulgent morning treat, not an everyday staple!
Share Your Red Velvet Cinnamon Rolls Creations
Now comes the best part! I’ve poured my heart into making sure this recipe for red velvet cinnamon rolls gives you that soft, fluffy, bakery-style result we all dream about. But my kitchen isn’t the only place where great memories are being made, right?
I absolutely LIVE to see your bakes! When you pull those vibrant red swirls out of the oven, slathered in that tangy cream cheese frosting, snap a picture! Tag me on social media so I can celebrate with you. Seeing your incredible efforts reminds me why I share these recipes—to bring that connection and joy right into your homes.
If you made these for a holiday brunch or just a random Tuesday indulgence, please do me a huge favor: come back here and leave a rating. Five stars always makes my day, but honest feedback helps me keep tweaking things for the next batch of comfort food perfection. You can read more about my philosophy behind sharing these family-focused recipes over on my About page. Happy baking, sweet friends!
PrintHeavenly Red Velvet Cinnamon Rolls with Tangy Cream Cheese Frosting

Make soft, fluffy, and vibrant Red Velvet Cinnamon Rolls from scratch. This recipe delivers bakery-style rolls with a rich cocoa-cinnamon swirl and a tangy cream cheese frosting that balances the sweetness perfectly. These are ideal for holiday brunch or special weekend baking projects.
- Prep Time: 45 min
- Cook Time: 25 min
- Total Time: 175 min
- Yield: 12 servings 1x
- Category: Breakfast
- Method: Baking
- Cuisine: American
- Diet: Vegetarian
Ingredients
- For the Dough: 1 cup warm milk
- 2¼ teaspoons active dry yeast
- ¼ cup granulated sugar
- 1 large egg, room temperature
- 3½ cups all-purpose flour, plus more for dusting
- 1 teaspoon salt
- 2 tablespoons unsalted butter, melted
- 2 tablespoons red food coloring (gel preferred for vibrant color)
- 1 teaspoon vanilla extract
- For the Filling: ¾ cup unsalted butter, softened
- 1 cup packed light brown sugar
- 2 tablespoons ground cinnamon
- 1 tablespoon unsweetened cocoa powder
- For the Cream Cheese Frosting: 8 ounces cream cheese, softened
- ½ cup unsalted butter, softened
- 2 cups powdered sugar, sifted
- 1 teaspoon vanilla extract
- 1 tablespoon milk (optional, for thinning)
Instructions
- Activate the yeast: In a small bowl, combine the warm milk, yeast, and 1 teaspoon of the granulated sugar. Let this stand for 5 to 10 minutes until foamy.
- Mix the dough: In a large bowl, whisk together the remaining granulated sugar, flour, and salt. Add the yeast mixture, egg, melted butter, vanilla extract, and red food coloring to the dry ingredients. Mix until a shaggy dough forms.
- Knead the dough: Turn the dough out onto a lightly floured surface. Knead for 6 to 8 minutes until the dough is smooth and elastic. It should be a deep, vibrant red.
- First rise: Place the dough in a lightly oiled bowl, turning to coat. Cover the bowl with plastic wrap or a clean towel. Let the dough rise in a warm spot for 1 to 1.5 hours, or until doubled in size.
- Prepare the filling: While the dough rises, mix the softened butter, brown sugar, cinnamon, and cocoa powder in a medium bowl until well combined and spreadable.
- Shape the rolls: Punch down the risen dough gently. Roll the dough out on a lightly floured surface into a large rectangle, about 12×18 inches.
- Spread the filling: Evenly spread the cinnamon-cocoa filling over the entire surface of the dough, leaving a small half-inch border on one long edge.
- Roll and cut: Starting from the long edge opposite the border, tightly roll the dough into a log. Pinch the seam closed. Slice the log into 12 equal rolls using a sharp knife or unflavored dental floss.
- Second rise: Arrange the rolls in a greased 9×13 inch baking dish. Cover loosely and let them rise again for 30 to 45 minutes until puffy.
- Bake the rolls: Preheat your oven to 375°F (190°C). Bake for 20 to 25 minutes, or until the centers are set and the edges are lightly golden.
- Make the frosting: While the rolls bake, beat the softened cream cheese and butter together until smooth. Gradually add the powdered sugar and vanilla extract. Beat until light and fluffy. Add milk one tablespoon at a time if you prefer a thinner consistency.
- Frost and serve: Remove the rolls from the oven and let them cool for about 10 minutes. Spread the tangy cream cheese frosting generously over the warm rolls. Serve immediately for the best gooey texture.
Notes
- For the most vibrant red color, use gel food coloring instead of liquid drops.
- If you want bakery-style cinnamon rolls that are extra soft, cover the pan with foil for the first 15 minutes of baking to trap steam.
- You can prepare the dough the night before, let it rise once, then place the cut rolls in the pan, cover, and refrigerate overnight. Bring them to room temperature for 30 minutes before baking as directed.
Nutrition
- Serving Size: 1 roll
- Calories: 480
- Sugar: 35g
- Sodium: 350mg
- Fat: 25g
- Saturated Fat: 15g
- Unsaturated Fat: 10g
- Trans Fat: 0.5g
- Carbohydrates: 58g
- Fiber: 2g
- Protein: 7g
- Cholesterol: 60mg