
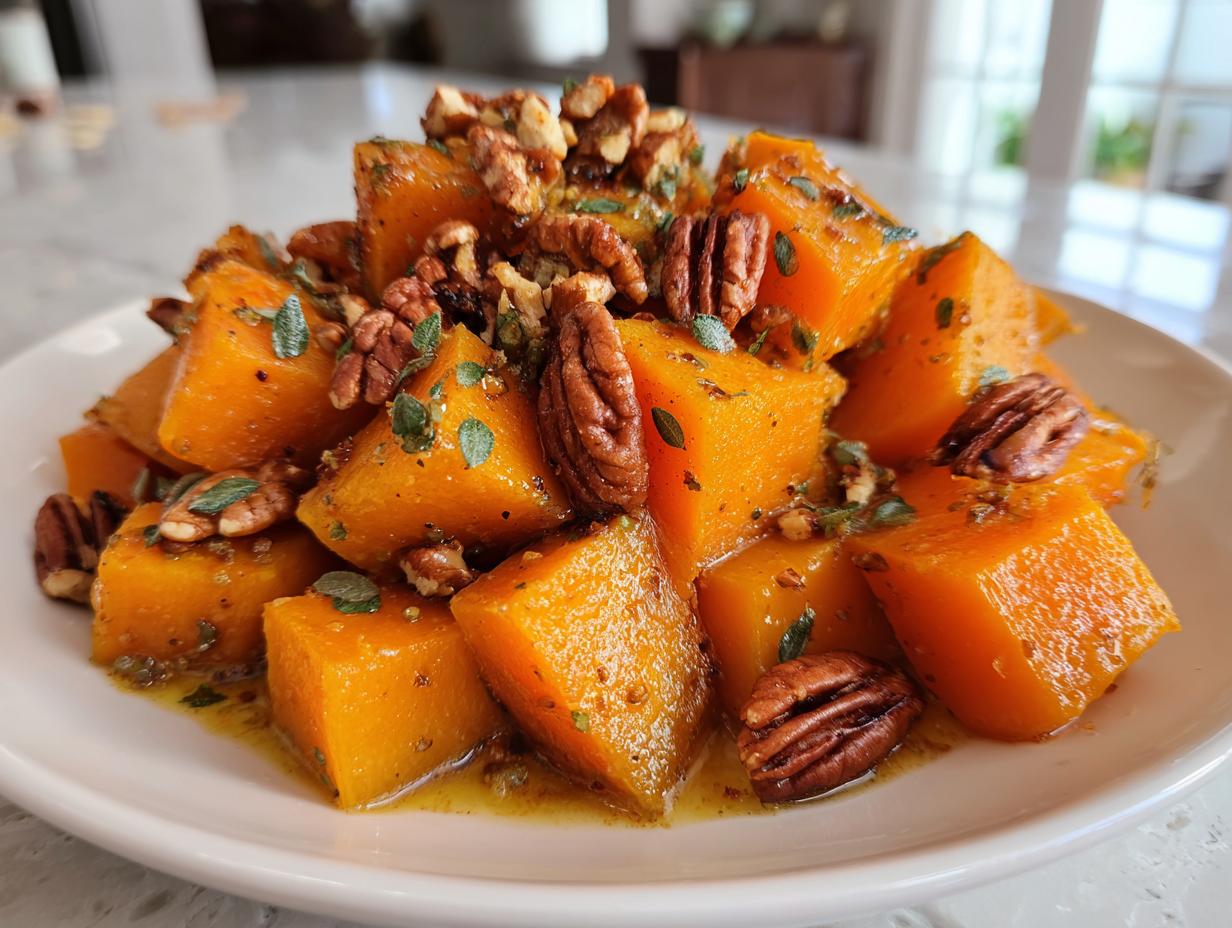
Oh, friends, you know how much I just adore that deep, warming flavor of fall? When the air gets crisp, I instantly want everything slow-cooked and fragrant. That’s why I’m so excited to share this recipe with you today, because it gets us maximum flavor with minimal fuss: Maple-Sage braised butternut squash. Honestly, this technique is the secret to getting the most unbelievably tender butternut squash recipes you’ll ever taste. It brings me right back to my childhood kitchen, where Mom always taught me that the best meals often come from just letting good ingredients—like broth and maple syrup—do the work for you instead of standing over a hot stove for hours. This is truly an easy butternut squash recipe for dinner that feels fancy! You can read a little more about why I focus on simple cooking here.
- Why This Maple-Sage Braised Butternut Squash Recipe Works
- Gathering Your Ingredients for Perfect Braised Butternut
- Step-by-Step Instructions: How to Braise Squash Perfectly
- Finishing Touches for Your Sweet and Savory Braised Side
- Flavor Variations for Your braised butternut
- Serving Suggestions for this Comfort Food Squash Recipe
- Storage and Reheating Instructions for Leftover braised butternut
- Frequently Asked Questions About Braised Butternut
- Share Your Simple Recipes for a Happy Home
Why This Maple-Sage Braised Butternut Squash Recipe Works
So many butternut squash cooking methods involve roasting, but when you need that melt-in-your-mouth texture, you just have to try braising. It holds moisture like nothing else! This method ensures you get truly tender butternut squash recipes every single time, making it my go-to for a hearty fall side dish. It just feels like such reliable comfort food.
Why is it so great? Well, the liquid does most of the heavy lifting for you:
- It guarantees softness—no scraping tough edges here!
- The low-and-slow simmer infuses the squash with maple and sage flavor deeply.
- It’s actually quicker than slow-cooked butternut squash side dish methods, making it an easy butternut squash recipe for dinner.
If you’re looking for more dishes that come together fast for busy weeknights, check out my collection of fast meals!
Gathering Your Ingredients for Perfect Braised Butternut
Okay, let’s talk what you need for this absolutely stunning braised butternut squash. Since we only have a few components here, quality really counts! You’ll start with about two pounds of squash, remembering that you want it peeled, seeded, and cut into nice, even 1-inch cubes so everything cooks at the same speed. We melt some butter with olive oil for the sear, and then the magic comes from half a cup of broth, pure maple syrup for sweetness, fresh thyme, salt, pepper, and a little bit of chopped fresh sage, which hits at the end. Don’t forget those pecans for crunch—I’ve got a great pairing recipe for creamy sweet potatoes if you need another side! Make sure you have all these items ready to go before you start heating the pan.
Ingredient Notes and Substitutions for your braised butternut
When choosing your broth for this braised butternut, either chicken or veggie broth works beautifully; just use whatever you usually keep stocked. The key here is *pure* maple syrup—don’t grab the pancake stuff, promise? The complex flavor of real maple syrup is what balances the earthy squash so perfectly. If you don’t have fresh thyme, a quarter teaspoon of dried is fine, but don’t skip the fresh sage at the end; those bright herb notes are non-negotiable for the finish!
Step-by-Step Instructions: How to Braise Squash Perfectly
This is where we learn how to braise squash and make it taste like a million bucks without being fussy. This method is so reliable, Mia’s Meals promises!
First things first, if you want the *best* flavor possible, go ahead and brown that butter. Melt the 2 tablespoons of butter until it foamy and you see those lovely little brown specks at the bottom, then toss in your oil and the cubed squash. We sear it for about five minutes until some edges look a little happy and caramelized. Then we add flavor—the broth and maple syrup go right in. Remember, we want a very gentle simmer before we cover it up; don’t let it boil wildly! Trust me, that patient approach is how you get truly fantastic braised butternut.
Once everything is bubbling gently, reduce the heat way down, pop that lid on tight, and let it do its thing. This is the part where you can go check your email or quickly whip up a batch of scrambled eggs—try my easy breakfast ideas while you wait!
Building Flavor: Searing and Simmering the braised butternut
The initial sear is key! It builds those savory little sticky bits on the bottom of the pot, and that’s where so much of the depth comes from in this braised butternut. Once you add the broth and maple syrup, give everything one gentle stir. Make absolutely sure the liquid beneath the squash is just barely simmering before you put that heavy lid on. If it’s too aggressive, you’ll knock all the beautiful caramelized bits right off the squash!
Achieving Tender Butternut Squash: The Braising Time
Now for the magic waiting game! Cover the pot and let the squash steam and soften for 15 to 20 minutes. You are aiming for the best way to cook butternut squash until soft, which means fork-tender. Gently insert a fork into a piece; if it goes in smoothly without much resistance, they are done! Don’t overcook them to mush, even though they are so tempting.
Finishing Touches for Your Sweet and Savory Braised Side
Once your squash is perfectly fork-tender, we need to pull it together! Take that lid off your pot, and you’ll see there’s a good bit of flavorful liquid left. This is where the magic turns into a gorgeous glaze. Turn the heat up just a hair, maybe medium-low, and let that liquid bubble away for about three to five minutes. Don’t walk away now! We want that broth and maple syrup to reduce down until it’s a shimmering coat around the cubes of braised butternut.
Right at the very end—seriously, in the last minute—stir in that chopped fresh sage. Sage is delicate, so we don’t want to cook it into oblivion. While that little bit of sauce perfectly thickens, quickly toast your pecans in a dry skillet. When you put the creamy squash next to those crunchy, nutty pieces? Wow. That contrast is what makes this a truly special sweet and savory braised side dish. If you need another festive side, you have to try my easy homemade cranberry sauce recipe!
Flavor Variations for Your braised butternut
I love that this method for braised butternut is so flexible! If you’re looking to shake things up after making it the classic maple-sage way, you’ve got tons of options. This is where you can really get creative with your winter squash braising liquid ideas.
For a touch more complexity, try swapping out that maple syrup for nice dark honey; it adds a different kind of floral sweetness that’s fabulous. If you lean toward savory, ditch the maple entirely and stick to just broth, but add two cloves of smashed garlic and a teaspoon of smoked paprika right when you add the liquid. That gives you a wonderful, earthy flavor profile reminiscent of savory braised vegetables.
Want a little creaminess? Once the squash is tender, remove it from the heat, stir in a splash of heavy cream or coconut milk before you reduce the sauce, and you’ve got a beautiful, creamy braised butternut squash dish that’s so comforting!
Serving Suggestions for this Comfort Food Squash Recipe
This Maple-Sage braised butternut is rich enough to be the star, but it truly shines as a sidekick for heavier proteins. When I make this, I make sure I’ve always got something roasted—pork chops or a whole chicken are my favorite pairings for this comfort food squash recipe.
Because it’s so tender and cloaked in that beautiful reduced sauce, you don’t want to crowd the plate! Serve a generous scoop right next to a piece of simple roasted meat. The sweetness of the squash cuts right through the richness of the protein. If you need inspiration for another simple side that goes with everything, you have to see my recipe for the easy roasted carrots. They have a similar rustic, wholesome feel!
Storage and Reheating Instructions for Leftover braised butternut
Don’t you hate when leftovers get all sad and mushy? Because this braised butternut cooks slowly in liquid, it actually holds up really well! You can pop any leftovers into an airtight container and keep them in the fridge for up to four days. They are still great for quick lunches—you can find some ideas over in my healthy lunch recipes section.
When you’re ready for round two, skip the microwave if you can! The microwave tends to make soft vegetables watery. Instead, gently warm your braised butternut in a small saucepan over low heat. Add just a tiny splash of water or broth if it looks dry. Give it a gentle stir until it’s warmed through, and you’ll get that perfect, tender texture all over again. Freezing is possible, but I find the texture changes slightly, so fridge storage is best!
Frequently Asked Questions About Braised Butternut
I know sometimes when you follow a recipe, little questions pop up at the last minute! Don’t stress—that’s what this section is for. We want to make sure your braised butternut turns out exactly how you want it every time. Here are the questions I get asked most often when people try this method for the first time.
Can I make this braised butternut squash recipe vegan?
Absolutely, yes! This recipe is so easy to adapt for a vegan diet. Just swap out the 2 tablespoons of butter for the same amount of vegan butter sticks, and use vegetable broth instead of chicken broth. Keep the maple syrup just as it is—that’s the heart of the flavor! It will still result in wonderfully tender butternut squash recipes.
What liquid works best for butternut squash braising liquid ideas?
For the best results, you need a balance! My recipe leans sweet because of the maple, so the broth provides the savory backbone. If you want less sweetness overall, try using just broth but add one teaspoon of apple cider vinegar right at the end instead of the sage. That touch of acid brightens up the whole dish, which is key when exploring winter squash braising liquid ideas.
Why didn’t my liquid reduce completely?
That’s usually just a matter of heat or time! If your sauce is still a bit thin when the squash is tender, take the lid off and turn your heat up to medium-low. Let it simmer uncovered for about 4 or 5 minutes, stirring gently. You’ll see that beautiful glaze start to form. If you need more help or have other questions, feel free to reach out through my contact page!
Share Your Simple Recipes for a Happy Home
Now that you’ve got this incredible Maple-Sage braised butternut recipe under your belt, I just want to see what you create! Remember, my whole philosophy here at Mia’s Meals is building happiness through simple, shared food—and tasting someone else’s experience is part of that connection.
Did this method give you the most tender butternut squash recipes you’ve made all year? Did it feel like a breeze getting this delicious side dish on the table? I genuinely want to hear about it!
Please take a moment to leave a star rating right below the recipe card, and then drop a comment telling me how it went for you. Let me know if you tried adding smoked paprika or if you stuck to the classic maple and sage. Seeing your successes truly makes my day and proves that great meals don’t need to be complicated!
If you’re planning a big meal now that you’ve mastered this side, don’t forget to check out my simple appetizers and snacks section for easy starters!
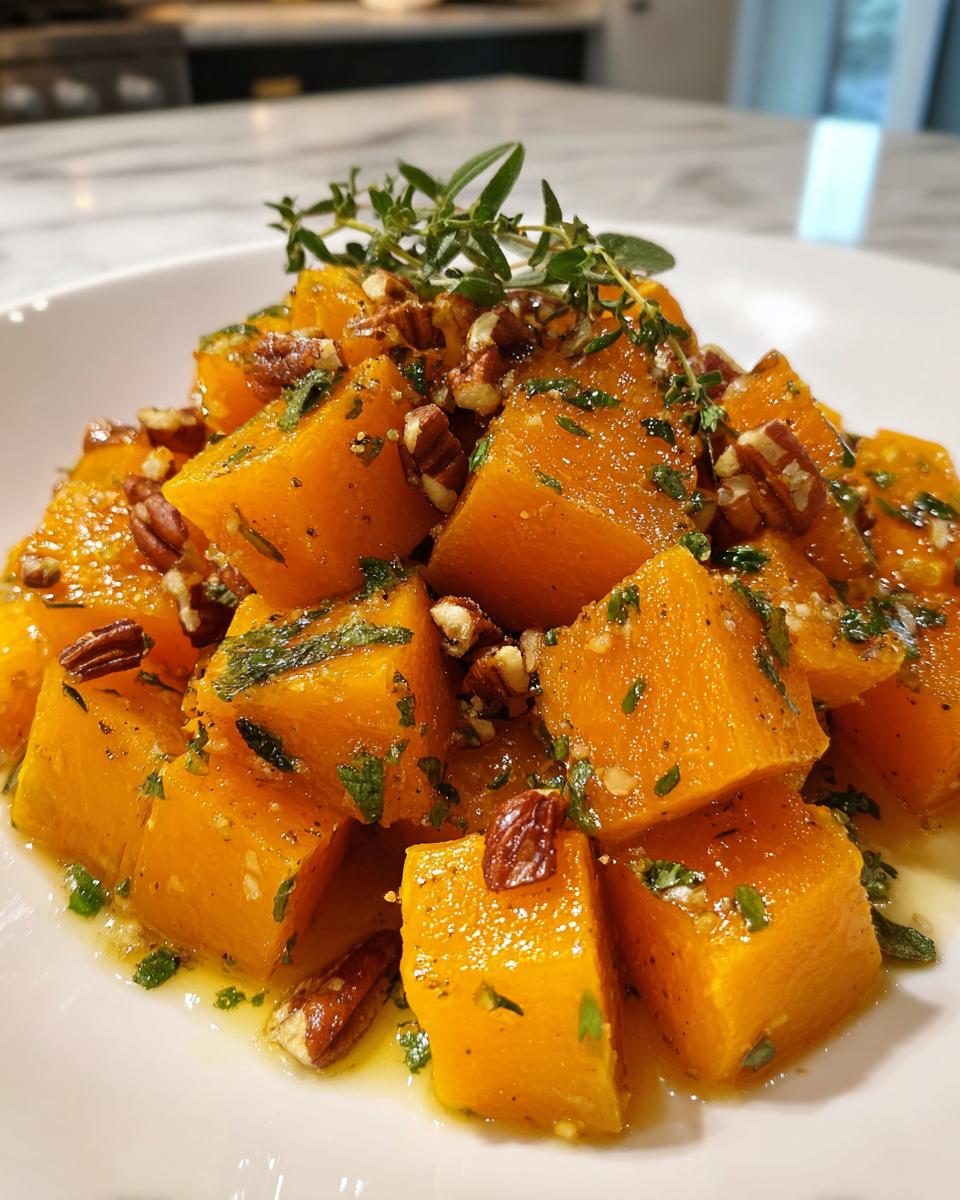
PrintMaple-Sage Braised Butternut Squash with Brown Butter and Toasted Pecans
This recipe shows you how to make tender butternut squash using the braising method, flavored with maple syrup, fresh sage, and finished with nutty brown butter and crunchy pecans. It is an easy butternut squash recipe for dinner.
- Prep Time: 15 min
- Cook Time: 30 min
- Total Time: 45 min
- Yield: 4 servings 1x
- Category: Side Dish
- Method: Braising
- Cuisine: American
- Diet: Vegetarian
Ingredients
- 2 lbs butternut squash, peeled, seeded, and cut into 1-inch cubes
- 2 tablespoons unsalted butter
- 1 tablespoon olive oil
- 1/2 cup chicken or vegetable broth
- 1/4 cup pure maple syrup
- 1 teaspoon fresh thyme leaves
- 1/2 teaspoon salt
- 1/4 teaspoon black pepper
- 4 fresh sage leaves, chopped
- 1/4 cup pecan halves
Instructions
- Melt the 2 tablespoons of butter with the olive oil in a large, heavy-bottomed pot or Dutch oven over medium heat.
- Add the cubed butternut squash to the pot and cook for 5 minutes, stirring occasionally, until the edges begin to caramelize slightly.
- Pour in the broth and maple syrup. Add the thyme, salt, and pepper. Bring the liquid to a gentle simmer.
- Reduce the heat to low, cover the pot, and let the squash braise for 15 to 20 minutes, or until the butternut squash is fork-tender.
- Remove the lid. Increase the heat to medium-low and cook for another 3 to 5 minutes, allowing most of the liquid to reduce and thicken slightly around the squash. Stir in the chopped sage during the last minute of cooking.
- While the squash finishes, toast the pecans: Place the pecan halves in a small, dry skillet over medium heat. Cook for 3 to 4 minutes, stirring often, until fragrant. Remove from heat.
- To serve, transfer the braised butternut squash to a serving dish and spoon any remaining sauce over the top. Sprinkle with the toasted pecans.
Notes
- For a richer flavor, you can brown the butter before adding it to the pot. Melt the 2 tablespoons of butter until it foams and brown bits form at the bottom, then add the olive oil and proceed with the recipe.
- If you prefer a sweeter side dish, increase the maple syrup to 1/3 cup.
- This slow cooked butternut squash side dish pairs well with roasted chicken or pork chops.
Nutrition
- Serving Size: 1 cup
- Calories: 240
- Sugar: 18
- Sodium: 250
- Fat: 12
- Saturated Fat: 4
- Unsaturated Fat: 8
- Trans Fat: 0
- Carbohydrates: 33
- Fiber: 6
- Protein: 3
- Cholesterol: 15