
Sometimes you just need that old-school comfort, right? I grew up in Ohio, and our kitchen was always filled with the smell of something sweet baking for the next church potluck or family gathering. My mom and grandma never complicated things, which is why I’m obsessed with making sure *you* don’t have to either. That’s why I’m handing over my absolute go-to recipe for the butterscotch lush.
This isn’t some fussy, fancy cake; it’s a creamy, layered masterpiece that looks like you spent all day fussing over it. Trust me, this butterscotch lush is reliable, foolproof, and always gets rave reviews whether I bring it to a holiday party or just need a sweet treat after a busy week. If you want that rich, comforting flavor without the stress, you’re in the right place. You can find more of my tested, dependable recipes here: delicious dessert recipes.
- Why This Ultimate Butterscotch Lush Dessert Works (EEAT Focus)
- Ingredients for Your Creamy Layered Butterscotch Lush
- Step-by-Step Instructions for the Perfect Butterscotch Lush
- Tips for Success with Your Layered Butterscotch Dessert
- Ingredient Notes and Substitutions for this Butterscotch Pudding Dessert Recipe
- Make Ahead Layered Desserts: Storing Your Butterscotch Lush
- Serving Suggestions for this Retro Layered Dessert
- Frequently Asked Questions About the Butterscotch Lush
- Sharing Your Ultimate Butterscotch Layered Treat
Why This Ultimate Butterscotch Lush Dessert Works (EEAT Focus)
You’re looking for reassurance, and I get it! This butterscotch lush is the definition of a winner because it masters that spectacular layered butterscotch dessert look without demanding hours of your time. It’s one of my most tested recipes—the one I turn to when I need to feed a crowd reliably. It truly is a great make-ahead layered dessert.
Here’s why I know this recipe works every single time:
- It hits that perfect balance: a slightly crunchy, buttery crust below layers of impossibly creamy pudding.
- It’s designed for potlucks—it travels well and keeps everyone happy!
- You can mix the layers together the day before. Seriously, put it in the fridge and forget about it until dessert time.
If you need more recipes built for advance prep, check out my guide to make ahead layered desserts!
Ingredients for Your Creamy Layered Butterscotch Lush
When I first started testing this recipe—remember, I need things simple and tasty!—I found that using good quality butter in the crust makes such a difference. Don’t skimp there! You’ll notice we rely on instant pudding here, which is our secret weapon for rapid setting needed in a creamy layered pudding dessert. It keeps the mixing time down, which is exactly what we want.
Here’s what you need to gather:
- 1 cup all-purpose flour
- 1 cup cold butter, cubed
- 1 cup chopped pecans
- 1 (8 ounce) package cream cheese, softened
- 1 cup powdered sugar
- 1 cup heavy whipping cream
- 1 (3.4 ounce) package instant butterscotch pudding mix
- 2 cups cold milk
- 1 (12 ounce) container frozen whipped topping, thawed
- 1 cup butterscotch chips
See? Nothing scary here. Just grab your measuring cups and let’s build this beautiful treat!
Step-by-Step Instructions for the Perfect Butterscotch Lush
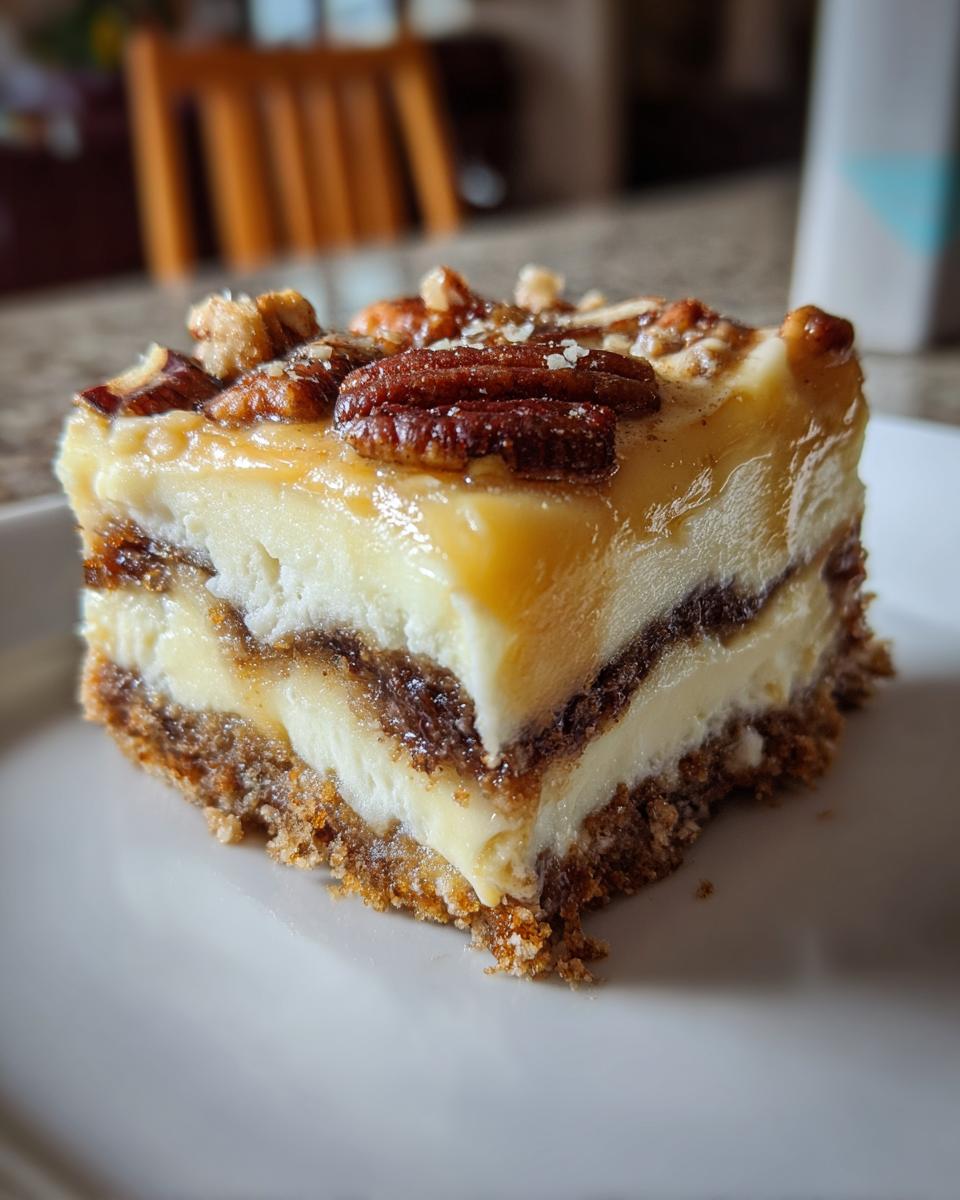
Okay, now for the fun part—building this delicious dessert! Making the butterscotch lush is basically an exercise in layering textures, and it’s so satisfying to watch it come together. We start by briefly baking the bottom layer just to set that buttery crust. Don’t worry, it’s super quick! Remember to keep moving through the steps smoothly, but never rush the cooling and chilling stages. Those are non-negotiable for a gorgeous-looking dessert lasagna.
Preparing the Pecan Crust Base
First things first, get your oven warmed up to 350 degrees F. You want to combine that flour, the cold cubed butter, and your chopped pecans right there in a bowl. Once it’s mixed well—it’ll look crumbly—press that nutty mixture firmly and evenly into the bottom of your 9×13 inch baking dish. Seriously press it down hard! Pop that into the oven for exactly 15 minutes. When it comes out, you MUST let it cool completely. If you layer on warm crust, your cream cheese layer will melt, and we don’t want that mess!
Assembling the Sweet Cream Cheese Dessert Layers
While the crust chills out, we move to the second layer. Beat your softened cream cheese with the powdered sugar until it’s completely smooth—no lumps allowed! Then, gently fold in one cup of the thawed whipped topping. Spread this luscious mixture right over that cooled crust. Now, for the butterscotch: whisk the instant butterscotch pudding mix with two cups of cold milk. It thickens fast, usually in about two minutes, so work quickly to spread this over the cream cheese layer seamlessly. This is key for that ultimate butterscotch layered treat texture.
Final Touches and Chilling the Butterscotch Lush
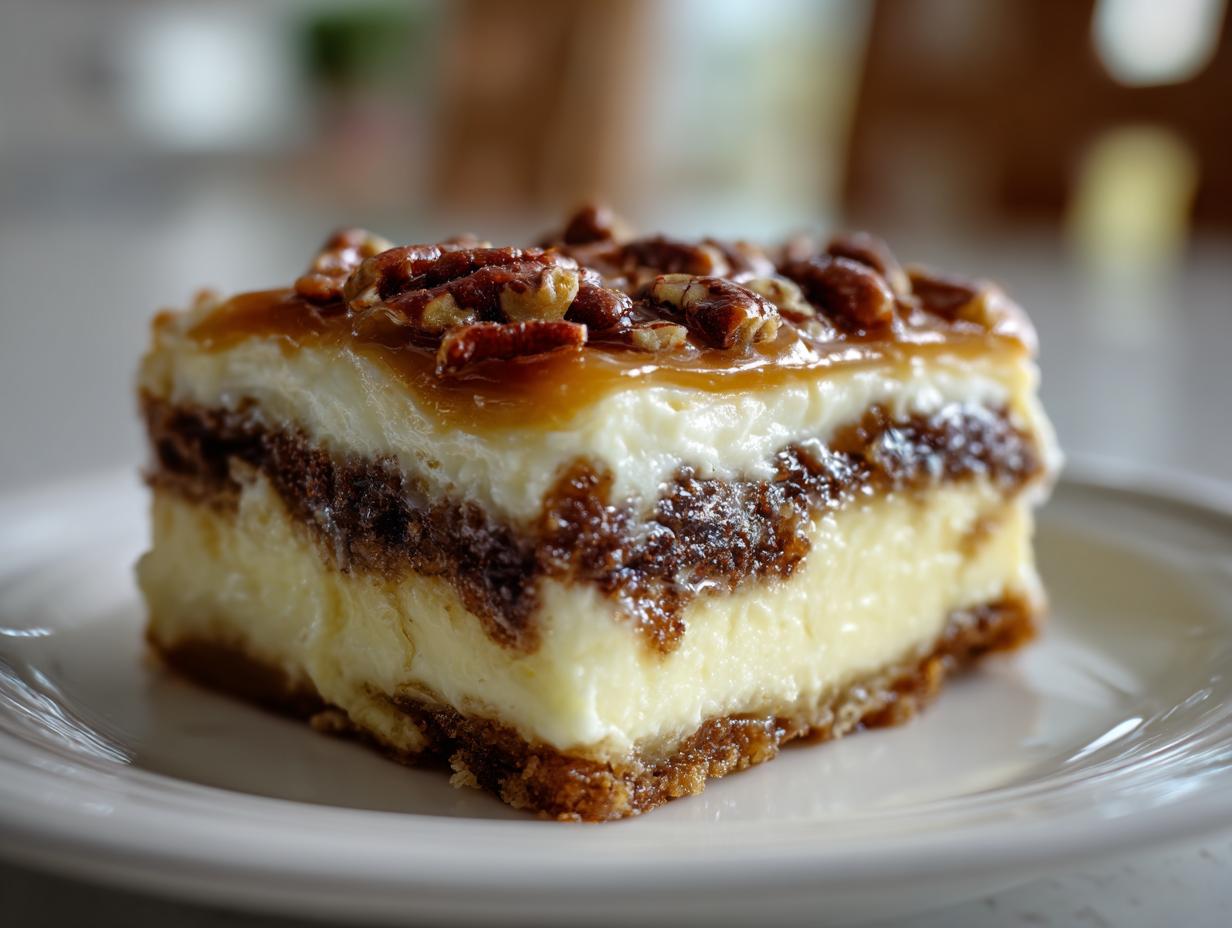
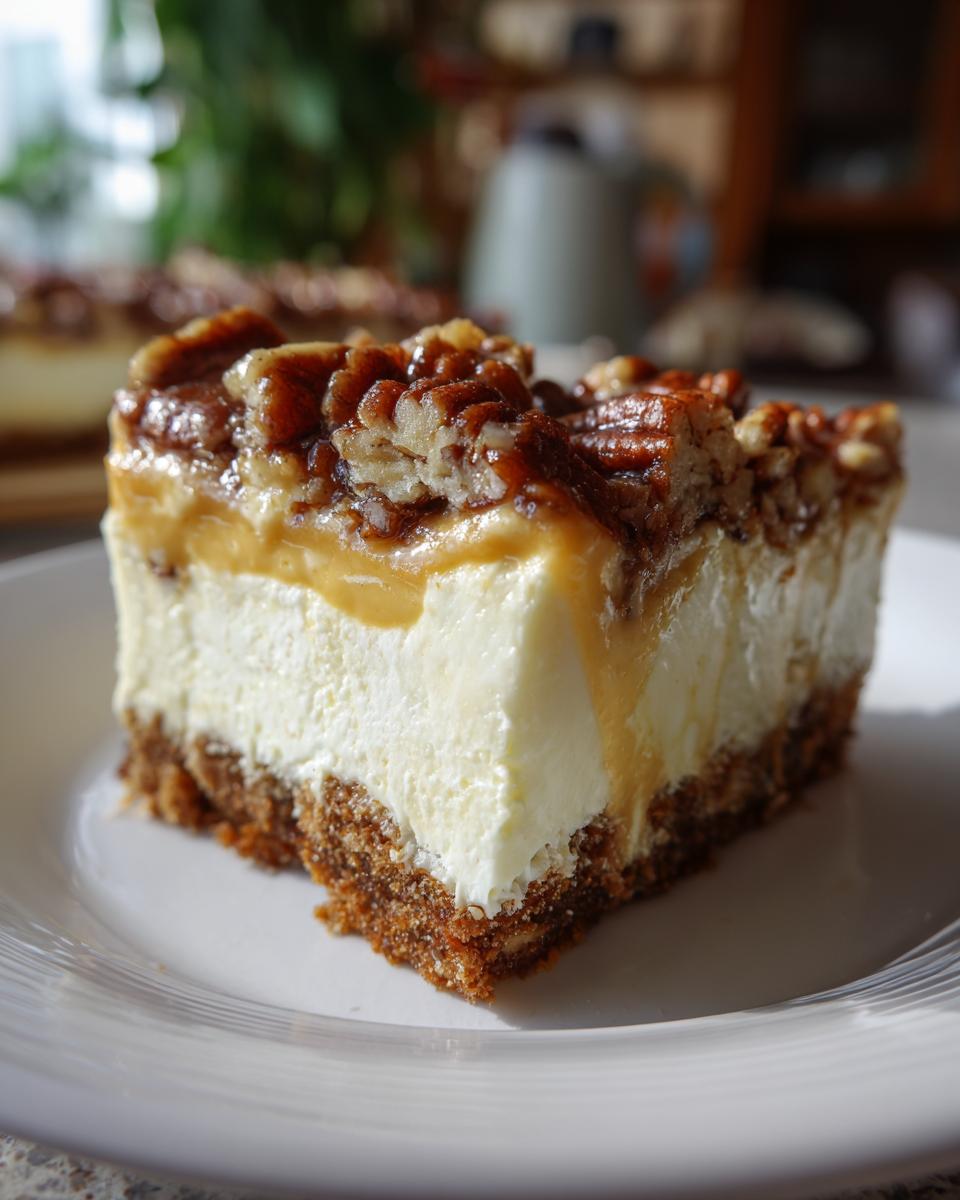
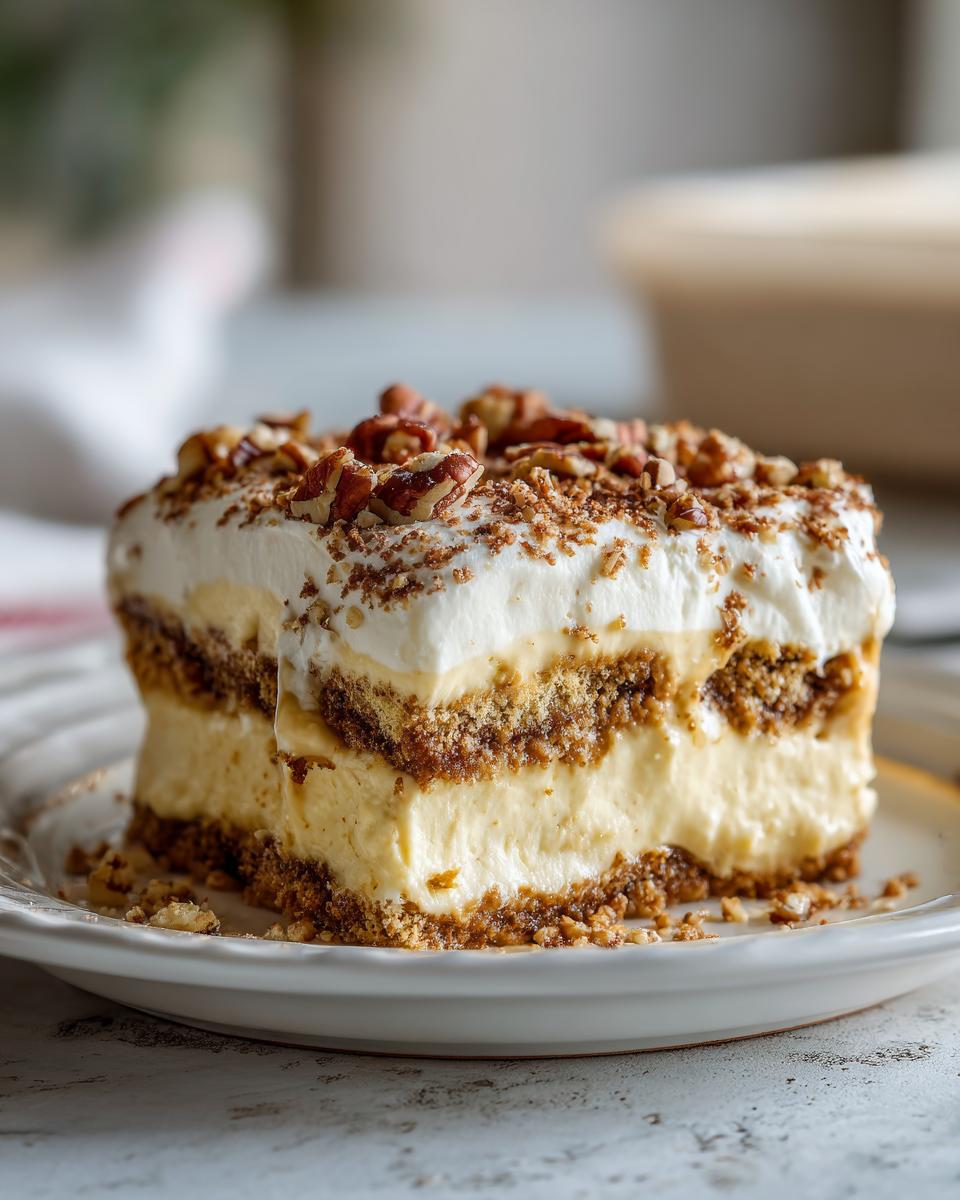
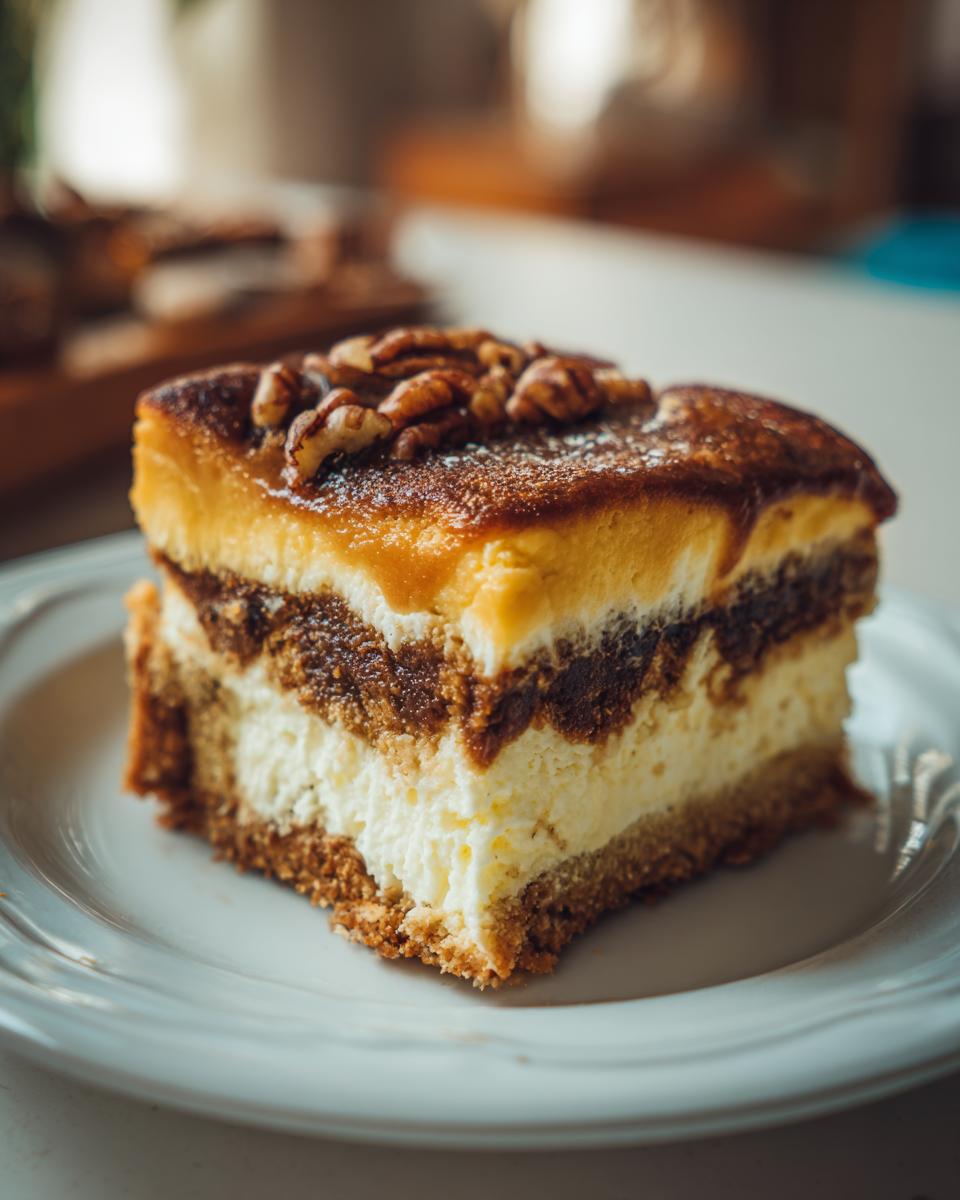
We’re almost done! Spread the rest of your thawed whipped topping over the pudding layer. This creates a beautiful, fluffy white blanket. Then, evenly sprinkle those wonderful butterscotch chips all across the top. Now for the hardest part: patience! Cover the dish and stick it in the refrigerator. You absolutely need at least 4 hours, but honestly, chilling overnight is my secret for the best structure in this lush dessert lasagna. When it’s firm, you can serve those perfect squares!
If you’re looking for more simple desserts that fit into a busy schedule, check out my tips for making easy no bake dessert options!
Tips for Success with Your Layered Butterscotch Dessert
Listen, I’ve made this butterscotch lush a dozen times, so let me share a few things I’ve learned that keep mine perfect every time. The biggest pitfall I see is temperature! Make sure your cream cheese is actually softened—not melted—when you beat it with the powdered sugar. If it’s too cold, you’ll get little chunks that ruin that smooth texture we’re aiming for.
Also, if you happen to be out of butterscotch pudding mix, don’t panic! I learned that you can substitute instant vanilla pudding and just stir in about a teaspoon of butterscotch extract for a really nice flavor pop. That trick keeps this dessert on my rotation, even if I’m missing one obscure ingredient! For more quick and easy fixes for parties, check out my simple appetizers and snacks guide.
Ingredient Notes and Substitutions for this Butterscotch Pudding Dessert Recipe
Let’s talk specifics about the ingredients because these little details really impact the final texture of your layered butterscotch dessert. When you grab those butterscotch chips, I usually just reach for a standard bag of semi-sweet ones. Milk chocolate chips work too if you prefer a sweeter finish, but I find semi-sweet keeps that flavor balanced against the rich cream layer.
I mentioned this before in the crust section, but it bears repeating: please use real butter in that nutty base. Margarine just doesn’t set up the same way, and it really impacts the texture of the final no-bake dessert bars. We want that nice, dense crumble holding everything up!
The main thing I always get questions about is the pudding. You absolutely must use the instant pudding mix for this recipe. If you try to use cooked pudding from scratch, it won’t set up correctly when layered with the cream cheese mixture, and your whole thing will turn into soup. Instant pudding is designed to thicken up quickly with cold milk, making it perfect for this style of creamy layered pudding dessert without needing that long bake time.
Make Ahead Layered Desserts: Storing Your Butterscotch Lush
One of the best things about this butterscotch lush is its incredible make-ahead flexibility! I often whip this up on Tuesday night, and it’s perfect for a Friday night gathering. When you store it in the fridge, cover it tightly—plastic wrap right on the surface of the chips works well, or just seal the whole dish. It stays perfectly creamy and delicious for about three to four days. That’s why it’s such a fantastic choice for potluck dessert recipes!
You can even freeze it! If you know you need this for a big holiday layered dessert situation, slice the whole thing into squares while it’s still chilled, then flash freeze them on a baking sheet before transferring them to a freezer-safe container. It holds up really well, though I always recommend letting it thaw overnight in the fridge for the absolute best flavor when serving. For more recipes built for advance prep, check out my guide to make ahead layered desserts.
Serving Suggestions for this Retro Layered Dessert
Because this butterscotch lush is so rich and absolutely packed with creamy goodness, you don’t need much on the side! In fact, sometimes the very best presentation is no presentation at all, just slicing it neatly and letting people devour it. That said, I do have a couple of tricks for serving this easy no bake dessert when you want to make it feel a little extra special.
First, let’s talk slicing. The chilling time is key here! If you try to cut it too soon, you end up with messy lines. My trick is to dip a large, sharp knife in hot water, wipe it dry, and slice. You’ll get gorgeous, clean squares every time. Reheat the water and wipe the knife between every *two* cuts to keep the edges sharp.
If I’m serving this after a particularly heavy meal—like a big holiday dinner—I like to balance that sweetness. A little dollop of lightly sweetened whipped cream on the side cuts through the richness perfectly. Or, even better, a splash of strong, hot black coffee right alongside the plate. The bitterness is just divine with the butterscotch flavor!
For smaller gatherings, you can totally adapt this! Pour the layers into individual small jars or clear glasses instead of one large dish. It looks super cute, and everyone gets a perfect little cross-section of the crust, cream cheese, and pudding. It makes plating unnecessary! If you need quick ideas for what to serve alongside your dessert, I have a few speedy options over in my quick weeknight dinners section that might inspire you!
Frequently Asked Questions About the Butterscotch Lush
I always get questions when people see this dessert for the first time because it looks so much fancier than it actually is! Don’t you just love a dessert that delivers the wow factor without the actual baking marathon? Here are the things people ask me most often about this creamy layered pudding dessert.
Can I skip baking the crust for this easy no bake dessert?
Oh, I’m tempted sometimes, too, when I’m in a serious hurry! But trust me, resist that urge. That crust—with the butter, flour, and pecans—needs those 15 minutes in the oven at 350 to actually set up. If you skip it and just press the mixture in raw, it stays too soft. When you try to scoop out your squares later, the whole bottom layer just turns into a pile of wet crumbs. We need that short bake time to solidify the base so everything else stays stacked beautifully!
What makes this a ‘lush dessert lasagna’?
That’s such a fun term folks use, isn’t it? It really comes down to the distinct, stacked layers! Think about a traditional lasagna—you have noodles, sauce, cheese, repeat. Here, we have the nutty crust, the firm and tangy cream cheese layer, the smooth pudding layer, and then the fluffy topping. Each layer brings a completely different texture and flavor to the party, and you get all of them in one bite. That construction is why people lovingly call this style a ‘lush dessert lasagna’—it’s just layers upon layers of deliciousness!
Is this a true no-bake dessert?
It’s almost there! We call it an ‘easy no bake dessert’ because the hands-on assembly is totally no-bake, which is the hard part, right? However, that crust needs that brief 15-minute bake to firm up properly. If you completely avoid the oven, you risk a soggy and crumbly bottom, which ruins the whole structure of this ultimate butterscotch layered treat. So, 15 minutes of baking for hours of serving fame—totally worth it!
Can I use homemade butterscotch pudding instead of instant mix?
You totally can if you love making pudding from scratch! But for this specific recipe—especially if you need those quick chilling times—I really recommend sticking to the instant mix. The instant pudding is formulated to firm up solid enough to hold the weight of the whipped topping and chips when layered cold. Homemade pudding, even when thickened, tends to stay a bit softer and might cause your layers to bleed into each other, turning your crisp squares into a puddle. If you experiment, make sure your homemade pudding is extra thick!
If you’re looking for quick fixes for other meals while you wait for this dessert to chill, I’ve got some inspiration over at my easy breakfast ideas page!
Sharing Your Ultimate Butterscotch Layered Treat
Now that you have the secrets to the butterscotch lush, I really want to know how it turned out for you! Did you go for the overnight chill? Which layer was your absolute favorite part?
Please come back, leave a star rating for this recipe, and tell me all about your batch in the comments below. Let’s get cooking and connect! If you need to send me a note privately, you can always reach me via my contact page!
PrintUltimate Butterscotch Lush Dessert

Make this easy, no-bake Butterscotch Lush dessert, a creamy, layered treat perfect for potlucks and family gatherings.
- Prep Time: 25 min
- Cook Time: 15 min
- Total Time: 4 hr 40 min
- Yield: 12 servings 1x
- Category: Dessert
- Method: No Bake (with brief bake for crust)
- Cuisine: American
- Diet: Vegetarian
Ingredients
- 1 cup all-purpose flour
- 1 cup cold butter, cubed
- 1 cup chopped pecans
- 1 (8 ounce) package cream cheese, softened
- 1 cup powdered sugar
- 1 cup heavy whipping cream
- 1 (3.4 ounce) package instant butterscotch pudding mix
- 2 cups cold milk
- 1 (12 ounce) container frozen whipped topping, thawed
- 1 cup butterscotch chips
Instructions
- Preheat your oven to 350 degrees F.
- Combine the flour, cold butter, and pecans in a bowl. Press this mixture firmly into the bottom of a 9×13 inch baking dish to form the crust.
- Bake the crust for 15 minutes. Let it cool completely.
- In a medium bowl, beat the softened cream cheese and powdered sugar until smooth. Fold in 1 cup of the whipped topping. Spread this mixture evenly over the cooled crust.
- In a separate bowl, whisk together the instant butterscotch pudding mix and the cold milk until thickened, about 2 minutes. Spread the pudding mixture over the cream cheese layer.
- Top the pudding layer with the remaining whipped topping.
- Sprinkle the butterscotch chips evenly over the top layer.
- Chill the dessert in the refrigerator for at least 4 hours, or preferably overnight, before slicing and serving.
Notes
- For a richer flavor, you can substitute instant vanilla pudding for the butterscotch pudding and add 1 teaspoon of butterscotch extract to the pudding layer.
- This dessert freezes well if you need to make it ahead of time for holiday layered desserts.
- Use real butter in the crust for the best texture in this layered butterscotch dessert.
Nutrition
- Serving Size: 1 square
- Calories: 380
- Sugar: 30
- Sodium: 250
- Fat: 25
- Saturated Fat: 15
- Unsaturated Fat: 10
- Trans Fat: 0.5
- Carbohydrates: 38
- Fiber: 1
- Protein: 4
- Cholesterol: 60