
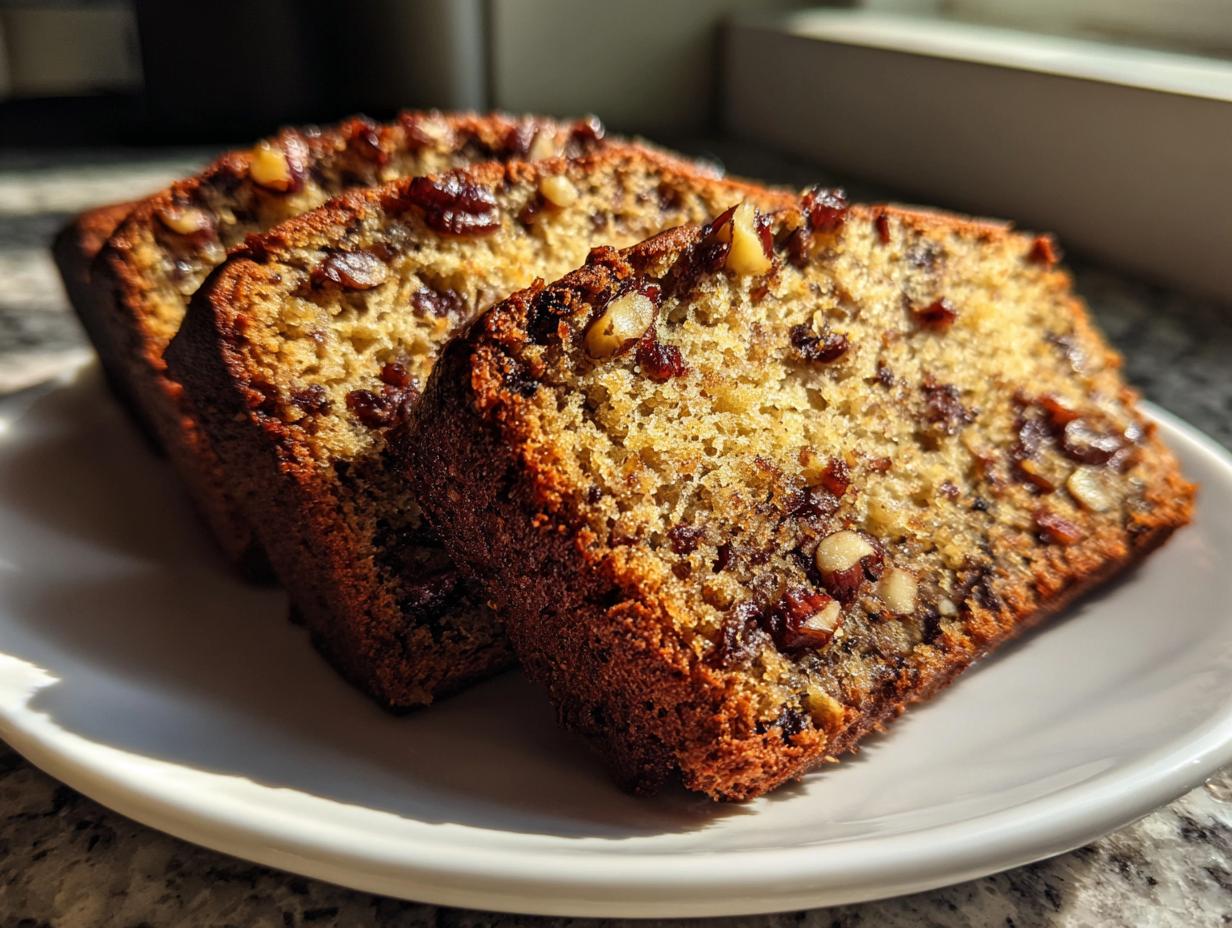
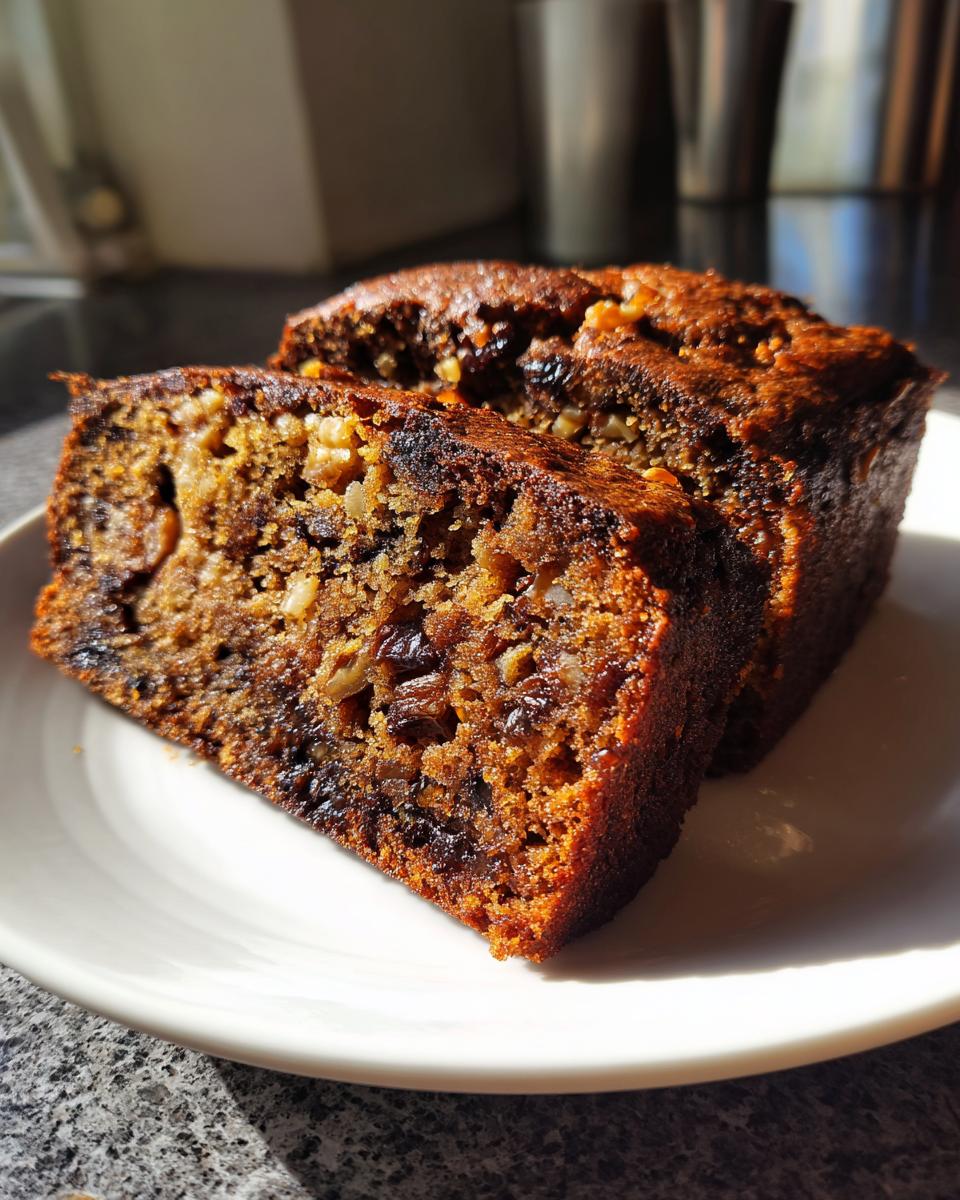
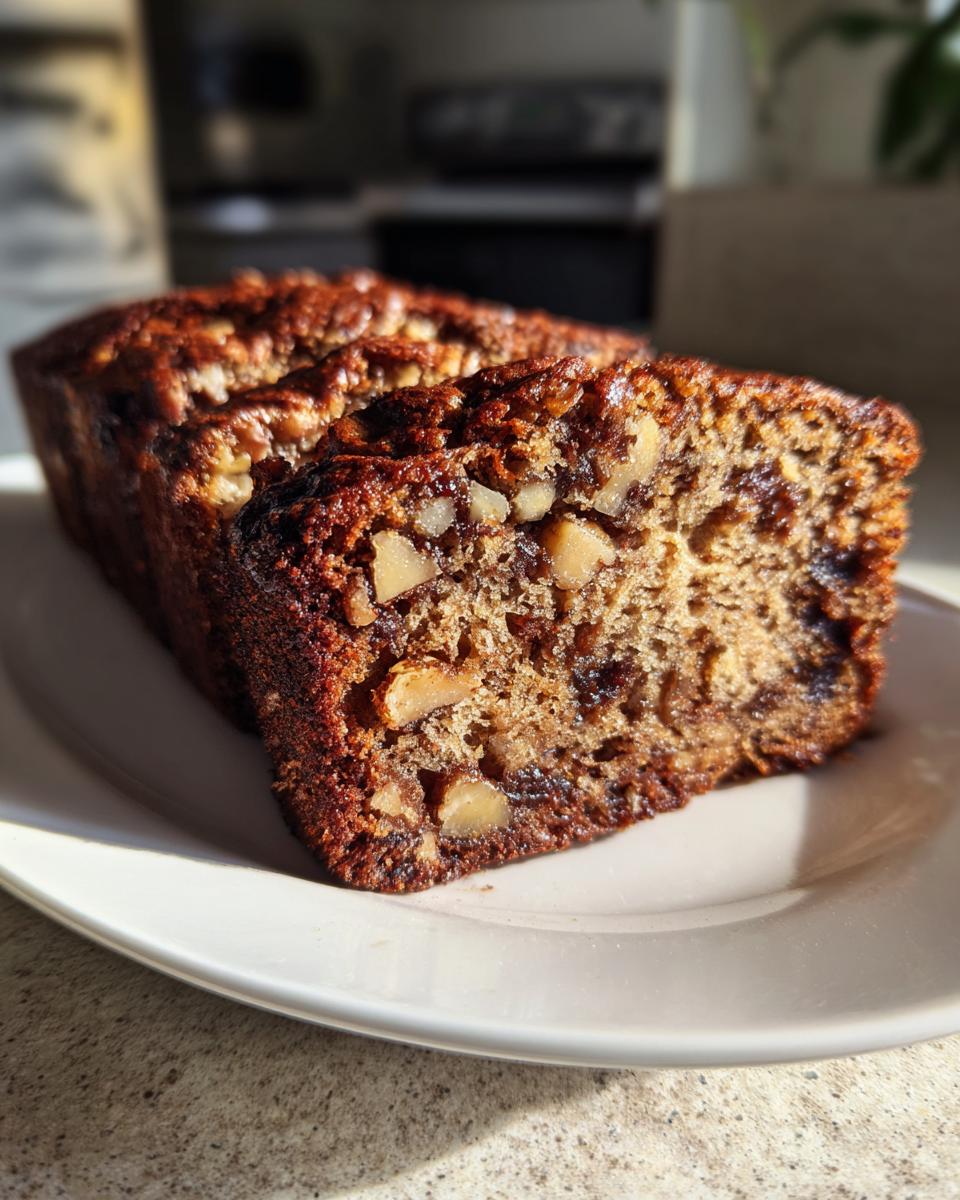
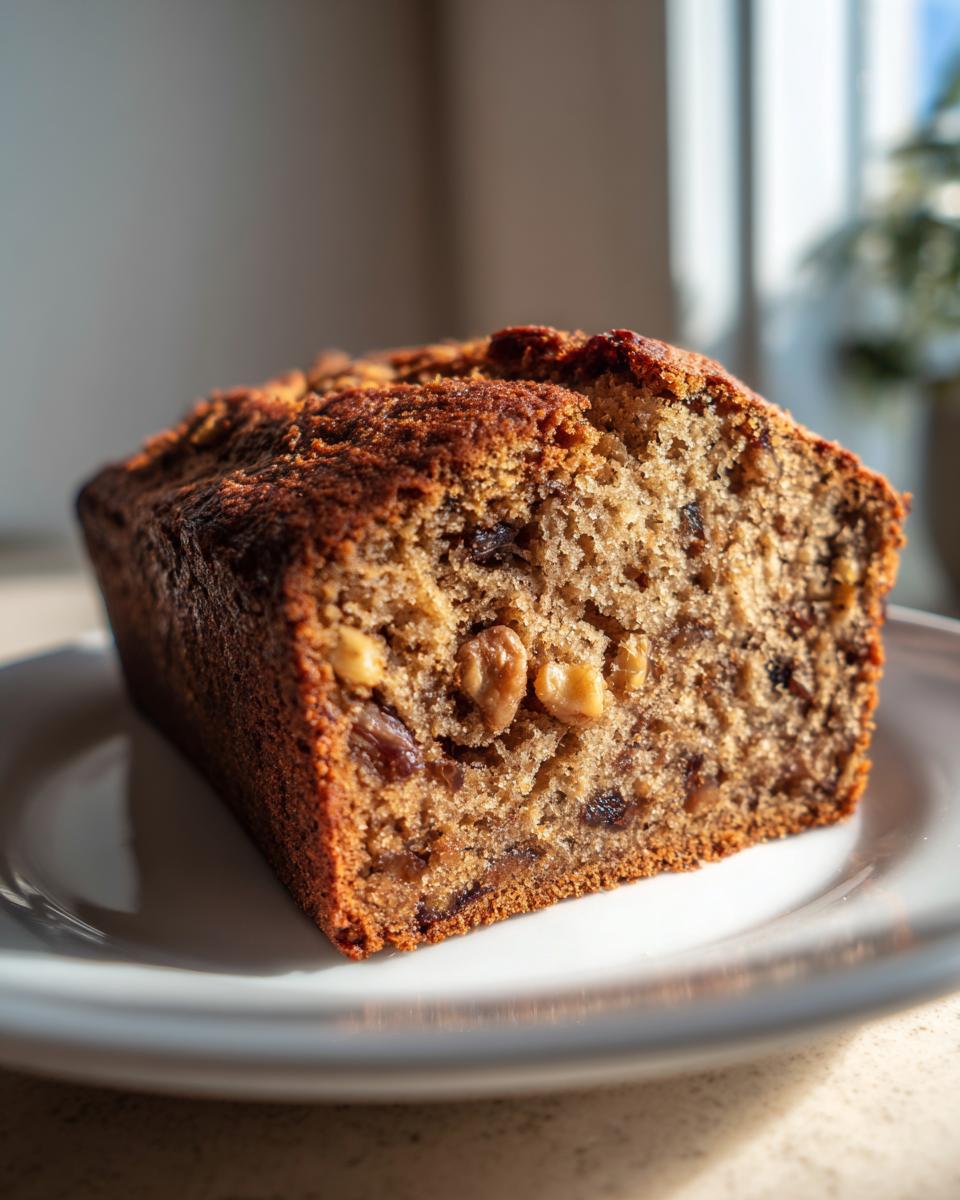
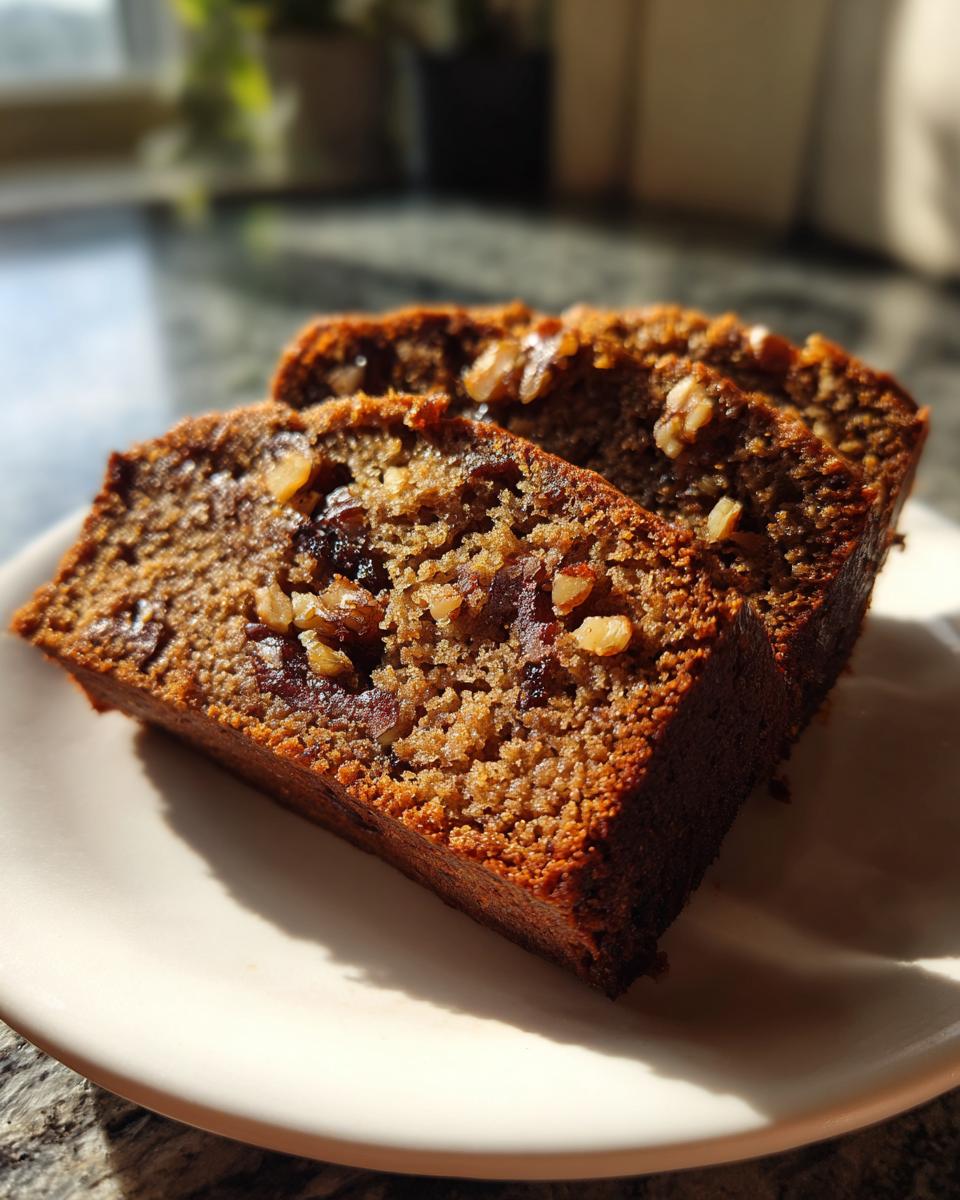
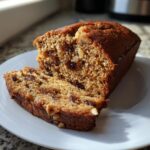
There is just nothing homier than pulling a warm loaf of quick bread out of the oven, right? It smells like everything good in the world! If you ask me, the king of comfort baking has always been the classic date nut bread. We’re not talking about some fussy, overly complicated cake today, oh no. We’re making what I call ‘The Ultimate Moist & Easy Old-Fashioned Date Nut Bread.’ This recipe is dependable, packed with those sweet, soft dates and crunchy walnuts, and it takes just minutes of actual hands-on time. Trust me, this is the keeper recipe that will fill your kitchen with that perfect nostalgic baking aroma every single time.
- Why This Is The Best Date Nut Bread Recipe You Will Make
- Gathering Ingredients for Moist Date Nut Bread
- Step-by-Step Instructions for Easy Quick Bread Recipe
- Tips for Making the Ultimate Moist Date Nut Bread
- Serving Suggestions for Your Homemade Date Loaf Cake
- Storage and Reheating Instructions for Date Nut Bread
- Frequently Asked Questions About Date Nut Bread
- Estimated Nutritional Data for This Date Nut Bread
- Share Your Homemade Date Loaf Cake Experience
Why This Is The Best Date Nut Bread Recipe You Will Make
I’ve tried a million ways to make a quick bread, and honestly, sometimes they come out a little dry around the edges. Not this one! When people ask for my go-to recipe, I point them straight here because it consistently delivers that deep, comforting flavor we all crave. It achieves the perfect balance between being incredibly simple and still feeling special.
What makes this the absolute best date nut bread? It all comes down to reliability and texture. I highlighted a few reasons why you should skip all those other recipes:
- It guarantees a truly moist date nut bread every single time. No dry crumbs here, I promise!
- It’s built for busy lives—it really is an easy quick bread recipe that comes together fast.
- It relies on classic flavor mixing, not strange additions, so it tastes exactly like what you remember.
Quick Prep for Your Old Fashioned Date Loaf
My goal here was to make something that feels classic and nostalgic, that old fashioned date loaf you remember from childhood, but that doesn’t require a weekend afternoon to assemble. We’re talking only about 20 minutes of actual hands-on prep time! That means you can stir this up while the coffee is brewing, pop it in the oven, and be completely done before your morning really kicks off. It just fits into life, which is exactly what a good quick bread should do.
Gathering Ingredients for Moist Date Nut Bread
Okay, let’s talk about what you need to pull off this incredible moist date nut bread. Because it’s a quick bread, the ingredient list is pretty straightforward, but every piece matters when we are chasing that perfect soft texture. You’ll start by getting your dates ready—make sure you have one cup of dates that are pitted and chopped into smaller pieces. Don’t skip the soaking step we’ll cover later; that’s where the magic moisture happens!
Next up is the fat: we need a half stick of softened butter and one full cup of nice, packed light brown sugar. That brown sugar is crucial for that classic depth of flavor. We are using all-purpose flour (about one and three-quarter cups), along with standard leavening agents like baking powder, salt, and two large eggs for richness. Oh, and don’t forget the walnuts for that satisfying crunch!
Ingredient Notes and Substitutions for Date Nut Bread
A few quick notes to set you up for success on your date nut bread. When you chop those dates, try for pieces about the size of a small coffee bean; you want them throughout the loaf. If you happen to have beautiful soft dates like Medjool available, they are fantastic here because they are naturally sweeter and softer, but any chopped date will work just fine!
For the nuts, the recipe calls for walnuts, which I love for that traditional pairing. But hey, if walnuts are not your favorite, feel free to swap them out for pecans. Pecans give it a slightly richer, almost buttery crunch that is just divine. Just make sure whatever nut you choose, you’ve chopped them up a bit so they aren’t huge chunks.
Step-by-Step Instructions for Easy Quick Bread Recipe
This is where the magic happens, and you’ll see how easy this easy quick bread recipe truly is. Before you grab your bowls, make sure your oven is set at 350 degrees F (175 degrees C). I always take the extra step to thoroughly grease AND flour one 9×5 inch loaf pan. It takes an extra minute, but it means guaranteed easy release later—no one wants a stuck loaf! If you want to read more about why this approach to simple cooking is so important to us, check out our philosophy over on the About Page.
My instructions below follow the order that yields the moistest result, keeping everything straightforward from start to finish.
- Get those dates soaking right away! Place your chopped dates in a bowl, pour one cup of boiling water over them, and stir in that sneaky baking soda. Let that sit for a full 15 minutes while you handle the rest of the ingredients.
- In your big mixing bowl, cream your softened butter and brown sugar until it looks pale and fluffy—this is key aeration for a soft crumb. Beat in your two eggs one at a time, mixing well after each addition, then swirl in the vanilla extract.
- In another bowl, whisk together the flour, baking powder, and salt until they are beautifully combined.
- Now, we gently combine! Add the dry ingredients to the wet mixture in batches, but only mix until you can barely see the flour streaks anymore.
- Finally, gently fold in that date mixture (water and all!) and your pre-chopped walnuts. Don’t stir too much!
- Pour everything into your prepared pan and bake for about 50 to 60 minutes.
The Crucial Date Soaking Step in Date Nut Bread
I always get asked why we soak the dates. It’s not just about softening them! When you pour boiling water over the dates, and *especially* when you add that baking soda, you are jumpstarting a chemical reaction. The soda reacts with the acids in the dates and the brown sugar, creating fine bubbles. This process softens the dates to a jam-like consistency and ensures that extra moisture is locked right into the final date nut bread, guaranteeing it never tastes dry.
Mixing and Baking Your Soft Spiced Nut Bread
When you add the flour mixture, remember our golden rule for quick breads: DO NOT OVERMIX. Overmixing develops gluten, and that turns your tender loaf into something tough. Mix only until those streaks of flour disappear. You are aiming for a soft spiced nut bread that barely holds together when you pour it in the pan.
To check for doneness, stick a wooden skewer right into the center. If it comes out clean or with just a few moist crumbs clinging to it, you are perfect! If you see wet batter, give it five more minutes. Trust me, taking it out too early is the only real risk here!
Tips for Making the Ultimate Moist Date Nut Bread
Okay, you’ve mixed it, you’ve baked it, but how do we guarantee that this date nut bread rivals every bakery version you’ve ever had? A few simple habits—the kind my family drilled into me—make all the difference in achieving that ultra-soft crumb.
First, let’s talk cooling, which can feel counterintuitive when the bread smells incredible. Don’t immediately struggle to yank it out of the pan! You need that initial 10 minutes to let the structure set up slightly. If you try to release it immediately, you risk tearing the edges, especially since this loaf is so wonderfully moist. Let it sit gently in the pan on a cooling rack. For other seasoned bakers needing inspiration, check out this wonderful old fashioned date nut bread recipe!
My second big recommendation ties right back to that soaking step. When you add the date mixture to the batter, make sure you are scraping out every last bit of that gooey liquid. That starchy, soda-activated water is pure moisture insurance for your loaf! Some recipes tell you to drain it, but I say dump it all in—that’s how we create our signature damp crumb.
Speaking of getting the best flavor, you absolutely must try serving a slice warm. Not piping hot, just warm enough that it coaxes the butter you spread on it to melt beautifully into all those nooks and crannies. Honestly, a thick smear of softened butter on a slice of this rich loaf is peak comfort food. You can even give it a quick 10-second blast in the microwave if you’re eating it the next day.
Finally, think about your nuts. If you are using walnuts that have been sitting in the pantry for a few months, they can sometimes taste a little stale. For the very *best* result, take a minute to lightly toast your walnuts before you chop them. It only takes about 5 minutes in a dry skillet, but the flavor boost is huge.
Serving Suggestions for Your Homemade Date Loaf Cake
So you pulled this beautiful, deeply fragrant loaf out of the oven—now what? We need to talk about the best ways to enjoy this homemade date loaf cake! Since this is a perfect wholesome snack bread, I often make a batch just for grab-and-go moments throughout the week.
It shines on any breakfast table. Seriously, this makes the absolute best addition to breakfast quick breads. If you can manage to let it cool just enough so it’s warm—not hot—spreading butter on a thick slice is non-negotiable. It melts right into the dates and spices. If you are feeling extra fancy for weekend brunch, a dab of cream cheese is also amazing. It just tastes like tradition, which is what we are aiming for!
Storage and Reheating Instructions for Date Nut Bread
One of the reasons I love this recipe so much is that it actually tastes better the next day. I know waiting is hard when the smell of fresh date nut bread is taking over your kitchen, but give it a chance! This bread is sturdy and moist enough that it keeps really well.
When it’s completely cool—and I mean totally cool, or you’ll get condensation—you need to wrap that loaf up tight. I usually wrap mine twice: first in plastic wrap, and then I slide it into a zip-top freezer bag or wrap it again in foil. This locks in all that good moisture we worked so hard to create.
Stored correctly at cool room temperature, your loaf will be perfectly delicious for three to four days. Honestly, I’ve kept one wrapped up for almost a full week, and it was still fantastic, though maybe slightly firmer on day six.
If, for some reason, you have a massive loaf and can’t finish it in a week, this bread freezes like a dream! You can wrap individual slices—which is smart if you just need one serving at a time—or wrap the whole loaf together. It keeps wonderfully in the freezer for up to three months.
Now, when it’s time to eat that refrigerated or frozen slice, you’ve got to bring it back to life! Reheating is your best friend here. For the best results, take a slice and give it just 10 to 15 seconds in the microwave. That little burst of warmth softens the dates and makes the whole crumb feel freshly baked. If you skip reheating, it’ll be a bit firmer, but still perfectly fine for snacking!
Frequently Asked Questions About Date Nut Bread
I know sometimes you have little questions pop up after you’ve read through a recipe, and that’s totally normal! Baking is all about confidence, and knowing the answers helps you feel calm walking to the pantry. Here are some of the things I hear most often about nailing this date nut bread recipe.
Can I make this date nut bread gluten-free?
That’s a great question, especially since so many people are looking for ways to adapt recipes. Yes, you absolutely can try to make this a gluten-free version! Since our recipe relies on a standard flour base, the change is going to be simple: use a high-quality 1-to-1 gluten-free all-purpose flour blend where the package says you can directly substitute it for wheat flour. You don’t need any extra binders or weird ingredients, which makes it simple. I haven’t tested this myself extensively, so watch your bake time, but it should work out nicely for a sweet nut bread.
How do I prevent my date nut bread from sinking in the middle?
Oh, the dreaded dent! Sinking usually happens for one of two reasons when you’re making any quick bread, including this lovely loaf. The big one is usually under-baking. If the center hasn’t set completely when you pull it out, the structure collapses as it cools down. The skewer test is your best friend here, but if you’re worried, check it at the 50-minute mark, and if it still looks wet, give it another 5 to 10 minutes!
The second reason can be opening the oven door too early. Try not to peek until at least 45 minutes have gone by! A sudden blast of cool air can shock the rising batter and cause it to fall flat. If you’re following the instructions, you’ll get that perfect, level top for your old fashioned date loaf.
Just remember, if you are looking for classic inspiration, Pat Nixon’s recipe is legendary. You can see details on that version over here if you’re curious!
If you ever need information about how we handle your data online, you can review our Privacy Policy here. We keep things transparent!
Estimated Nutritional Data for This Date Nut Bread
I always think it’s helpful to have a general idea of what’s in the goodies we bake, even though honestly, when something tastes this comforting, I try not to think too hard about the numbers! This recipe is based on using all the ingredients exactly as written, including the butter and sugar, which gives us that classic, deeply satisfying flavor profile!
Based on the standard recipe structure, here is the estimated nutritional breakdown per slice:
- Calories: About 280
- Total Fat: Around 14 grams
- Carbohydrates: Roughly 37 grams
- Protein: About 4 grams
Now, listen up, because this is important: these numbers are just estimates, friends! They change slightly depending on whether you use a brand-name butter versus store-brand, or if your dates happen to be slightly larger or smaller than average. If you are tracking strict macros or have major dietary concerns, you might want to plug the exact brands you use into a dedicated nutrition calculator. But for the everyday baker making this date nut bread for brunch or an afternoon snack, these figures give you a great baseline. It tells us it’s a treat—a delicious, satisfying one—perfect alongside a cup of coffee!
If you ever have questions about the ingredients or the process, please don’t hesitate to reach out to us via our Contact Page. Happy baking!
Share Your Homemade Date Loaf Cake Experience
That’s it! You’ve made the ultimate sticky, sweet, and wonderfully fragrant loaf. I truly hope that when you cut that first warm slice of your homemade date loaf cake, you felt that familiar cozy feeling I aim for in every recipe here. Baking should always feel like a conversation, not a competition, so now I want to hear from you!
Did this loaf come out perfectly moist for you? Did you manage to sneak a peek at those walnuts while you were stirring the batter? Don’t keep this joy to yourself!
Please, take a moment to leave a rating right down below where the comments live. A five-star rating tells me this classic recipe is still working its magic for new bakers. If you made any little tweaks—maybe you decided to drizzle it with a little maple glaze or used pecans instead of walnuts—tell us all about it in the comment section! I absolutely love seeing photos of your kitchen creations shared online.
If you followed my steps and ended up with a lovely result, I’d be so grateful if you shared a picture of your finished loaf. It helps others feel confident tackling this recipe next time, kind of like how reading about someone else’s success inspired us here on this page, you know? If you are looking for another wonderful recipe to try next, check out this classic comfort food baking idea!
Thank you so much for baking with me today. Happy eating!
PrintThe Ultimate Moist & Easy Old-Fashioned Date Nut Bread
Bake a soft, moist date nut bread using this simple quick bread recipe. It delivers classic, comforting flavor perfect for breakfast or a snack.
- Prep Time: 20 min
- Cook Time: 60 min
- Total Time: 80 min
- Yield: 1 loaf (about 10 servings) 1x
- Category: Baking
- Method: Baking
- Cuisine: American
- Diet: Vegetarian
Ingredients
- 1 cup boiling water
- 1 cup pitted and chopped dates
- 1 teaspoon baking soda
- 1 cup boiling water
- 1/2 cup (1 stick) unsalted butter, softened
- 1 cup packed light brown sugar
- 2 large eggs
- 1 teaspoon vanilla extract
- 1 3/4 cups all-purpose flour
- 1 teaspoon baking powder
- 1/2 teaspoon salt
- 1 cup chopped walnuts
Instructions
- Preheat your oven to 350 degrees F (175 degrees C). Grease and flour one 9×5 inch loaf pan.
- Place the chopped dates in a medium bowl. Pour 1 cup of boiling water over the dates and stir in the baking soda. Let this mixture sit for 15 minutes.
- In a large bowl, cream together the softened butter and brown sugar until light and fluffy. Beat in the eggs one at a time, then stir in the vanilla extract.
- In a separate bowl, whisk together the flour, baking powder, and salt.
- Add the dry ingredients to the wet ingredients, mixing until just combined. Do not overmix.
- Stir the soaked date mixture and the chopped walnuts into the batter.
- Pour the batter into the prepared loaf pan.
- Bake for 50 to 60 minutes, or until a wooden skewer inserted into the center comes out clean.
- Let the bread cool in the pan for 10 minutes before turning it out onto a wire rack to cool completely.
Notes
- For an extra moist loaf, serve slices warm with softened butter.
- You can substitute pecans for walnuts if you prefer.
- This bread keeps well wrapped tightly at room temperature for several days.
Nutrition
- Serving Size: 1 slice
- Calories: 280
- Sugar: 30
- Sodium: 180
- Fat: 14
- Saturated Fat: 5
- Unsaturated Fat: 9
- Trans Fat: 0
- Carbohydrates: 37
- Fiber: 2
- Protein: 4
- Cholesterol: 45