
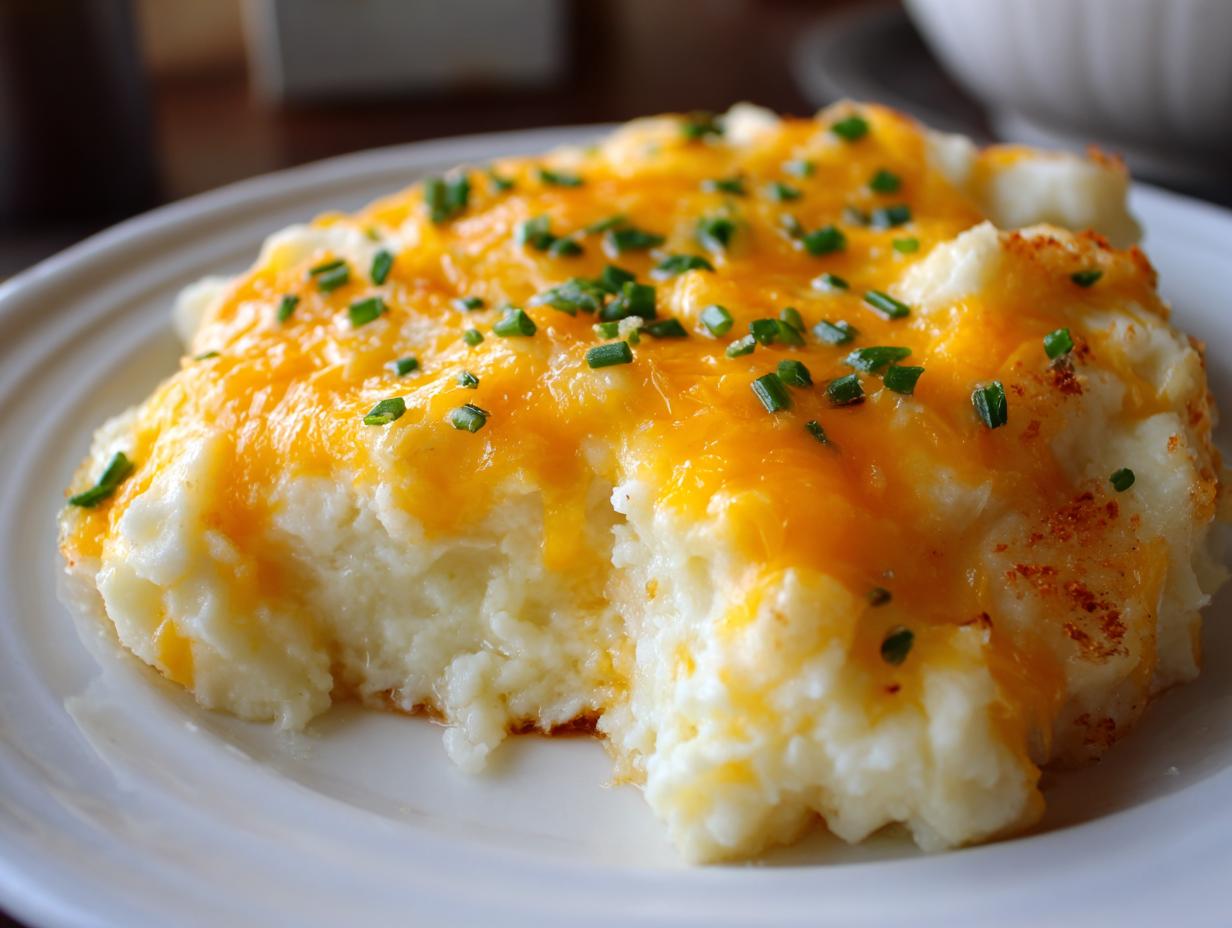
You know, living here in the Midwest, we believe mashed potatoes aren’t just a side dish; they are the foundation of a connected meal, just like my mom always taught me. We’re taking that classic comfort and kicking it up a notch today! Forget the sad, gluey stovetop version; we are leveling up to the absolute dreamiest, richest baked mashed potatoes you’ve ever tasted. The mission here? A thick, velvety interior that melts in your mouth, all wrapped up under a perfectly golden, slightly chewy baked top. Trust me, once you try this oven finish, you’ll never go back! This philosophy of connection through simple, good food is what Mia’s Meals is all about, and you can read more about our story here.
- Why This Recipe Delivers the Best Baked Mashed Potatoes
- Ingredients for Creamiest Baked Mashed Potatoes
- Step-by-Step Instructions for Perfect Baked Mashed Potatoes
- Tips for Success with Your Baked Mashed Potatoes
- Make Ahead Potato Casserole Instructions for Baked Mashed Potatoes
- Serving Suggestions for This Holiday Potato Recipe
- Frequently Asked Questions About Baked Mashed Potatoes
- Storage and Reheating Instructions for Baked Mashed Potatoes
- Nutritional Estimates for This Potato Side Dishes Recipe
- Share Your Ultimate Potato Casserole Experience
Why This Recipe Delivers the Best Baked Mashed Potatoes
There’s such a difference between standard potatoes straight from the burner and potatoes that get that gorgeous oven hug! Baking transforms the experience completely, making this a simple upgrade that pays off huge on flavor and texture when it hits the table. It’s the ultimate upgrade for your comfort food repertoire!
- It guarantees the Creamiest Mashed Potatoes imaginable because the added fat has time to bake right into the starches.
- You get that restaurant-quality finish: perfectly set, Golden Topped Potatoes without them needing to sit under heat lamps.
- It’s so convenient! This is a phenomenal Thanksgiving Side Dish Idea because you can make the whole batch ahead of time and bake when the oven is free.
Achieving Velvety Mashed Potatoes Before Baking
Listen up, this is where the magic starts. If you want true velvet, you need the cream cheese. It melts down perfectly with the warm milk—don’t skip warming the milk, please! That little bit of heat helps everything blend seamlessly. My big expert tip is this: once that cheese and butter are in there, mix it on the absolute lowest speed. If you beat it like you’re making whipped cream, you’ll end up with gummy, sticky potatoes. We want them smooth and light, not rubbery!
The Perfect Oven Baked Side Dish Finish
Once they are mixed, spooning them into the casserole dish and baking at 375°F is what seals the deal. That temperature is just high enough to bubble the cheese on top into a lovely crust but gentle enough that the inside stays pillowy soft. Honestly, this turns a simple side into a stellar Oven Baked Side Dish that feels incredibly satisfying. It’s not just warm; it’s deeply comforting because of that baked texture contrast.
Ingredients for Creamiest Baked Mashed Potatoes
The key to unbelievable richness is making sure every component is ready to go before you start mixing. You don’t want to realize your butter is still rock hard when you’re ready for the final mash! Have everything measured out—this is what makes the final assembly so fast and fun.
- 3 lbs Russet potatoes, peeled and quartered (Russets give you that fluffy base!)
- 1 cup whole milk, warmed (Just warm it slightly in the microwave first, don’t scald it!)
- 8 tablespoons unsalted butter, softened (Crucial—room temperature so it creams beautifully)
- 8 ounces cream cheese, softened (Don’t skip this; it’s our secret weapon for creaminess!)
- 1 teaspoon salt
- 1/2 teaspoon black pepper
- 1 cup shredded sharp cheddar cheese (This is for that gorgeous golden top layer)
- 2 tablespoons chopped fresh chives (Because everything tastes better with a fresh green pop!)
Step-by-Step Instructions for Perfect Baked Mashed Potatoes
Okay, let’s get cooking! This recipe is so straightforward you’ll wonder why you haven’t been baking your potatoes all along. Just follow these straightforward steps, and I promise you’ll end up with the absolute fluffiest mash that finishes perfectly in the oven. Seriously, no babysitting required, which is a win in my busy kitchen!
Preparation and Initial Cooking of Potatoes
First things first, get a head start! Preheat your oven to 375°F (190°C) right now and go ahead and grease up that 9×13 inch baking dish. Now, toss your peeled and quartered potatoes into a big pot. Cover them with cold, salted water—and yes, it has to be cold water to ensure they cook evenly! Bring that baby to a boil and let them go until they are totally tender when you poke them with a fork, which usually takes about 15 to 20 minutes.
Once they are soft, drain them like your life depends on it! Here’s the pro secret for texture: Put the drained potatoes back into the hot, empty pot over very low heat. Let them sit there for about a full minute. This little trick helps evaporate any lingering moisture so your mash isn’t watery later on. Don’t burn them, just dry them!
Mixing for Velvety Mashed Potatoes
Time to mash! Use your favorite tool—a masher or a ricer works great—until they are as smooth as you like. Now, bring in the flavor and the creaminess! Add that warm milk, your softened butter, and that essential softened cream cheese. I highly recommend using an electric hand mixer here, but here’s the expertise part: mix it on LOW speed. Just mix until you see everything incorporated, maybe 30 seconds. Over-mixing at this stage is how you turn glorious potatoes into glue, so stop as soon as it looks smooth!
Finally, stir in your salt and pepper. Taste test now! Adjust seasoning before you bake because once that crust forms, it’s hard to correct later. Then, carefully spoon all that rich potato mixture into your prepared baking dish and spread it out into an even layer.
Assembling and Baking Your Baked Mashed Potatoes
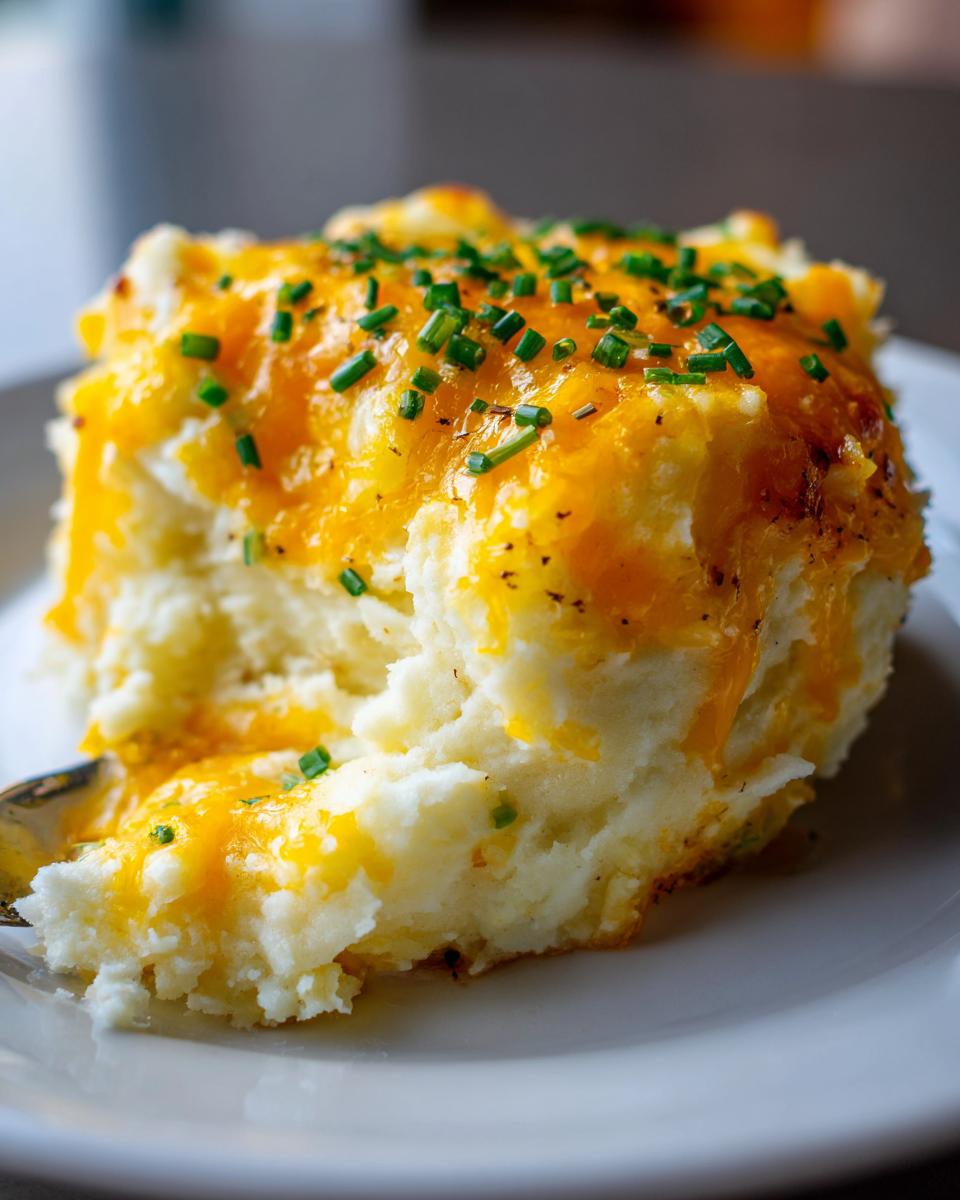
This is the grand finale! Sprinkle that beautiful shredded sharp cheddar cheese evenly right over the top. Then, slide the dish into your preheated 375°F oven. We bake these amazing baked mashed potatoes for about 20 to 25 minutes. You are looking for two things: the potatoes need to be piping hot all the way through, and that cheese topping should be melted and just starting to get those lovely golden brown spots. If you want that extra crisp, check out this great inspiration for extra crispy ideas! Once they look perfect, pull them out, sprinkle with chives, and serve immediately while they are bubbling hot!
Tips for Success with Your Baked Mashed Potatoes
I know you want these to be the best Comfort Food Side Dishes you’ve ever made, so let’s talk details! Getting these right is all about temperature and a little final blast of heat. Don’t stress about this part; it’s super easy once you know the little tricks Grandma used to teach me.
Ingredient Temperature Matters for Baked Mashed Potatoes
I can’t stress this enough: your butter and cream cheese must be soft! If they are cold, they won’t properly incorporate into the hot potatoes. You end up with lumps of cold butter floating around, and that completely ruins the dream of achieving those amazing Creamiest Mashed Potatoes texture we are aiming for. Let them sit out on the counter for at least an hour before you even start boiling the water. Cold dairy ruins the seamless blend that makes baked potatoes so dreamy.
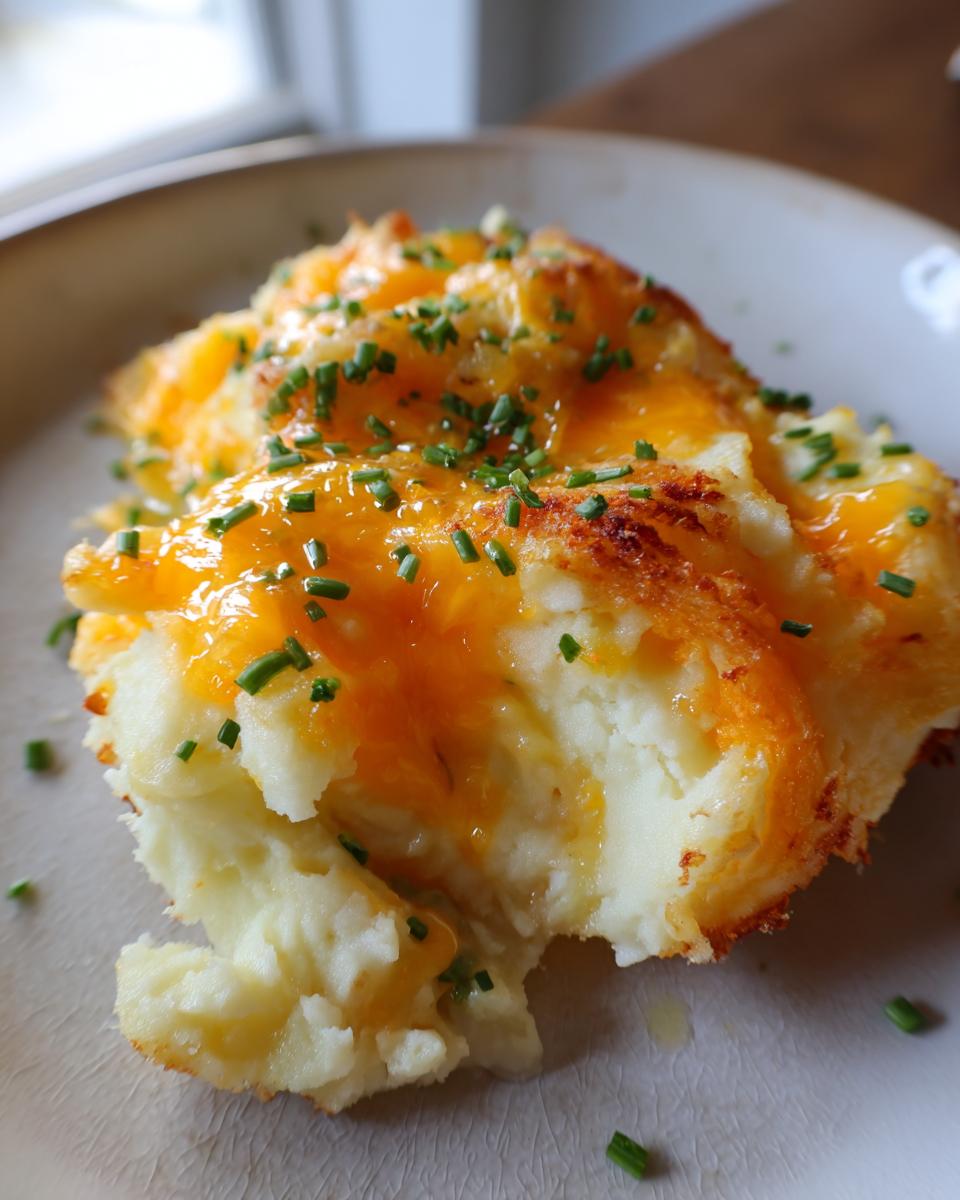
Getting a Crisp Golden Topped Potatoes Finish
If you feel like your cheese topping isn’t browning enough during the standard bake time, I have a little trick for you, inspired by restaurant finishes! You can peek at what others are doing for extra richness here. Once your potatoes are hot and the cheese is melted, switch your oven to broil for the last minute or two. You have to stand right by the oven door, though! Watch them like a hawk because they go from golden brown to burnt charcoal in about three seconds flat. That quick, intense heat gives you fantastic Golden Topped Potatoes contrast!
Make Ahead Potato Casserole Instructions for Baked Mashed Potatoes
One of the reasons I love passing these cheesy potatoes onto the table at holiday gatherings is how totally stress-free they make the actual serving day. This recipe works perfectly as a Make Ahead Potato Casserole! You can totally prep this dish the day before your big dinner, which frees up your oven for that turkey or roast.
Here’s how you handle the advanced prep: follow the instructions right up until Step 7—that means you mash everything, stir in the dairy, season it up perfectly, and spread it into the baking dish. Do NOT add the cheese topping yet! Cover that whole dish tightly with plastic wrap. You can tuck it right into your refrigerator for up to 24 hours. Don’t worry, they hold their shape beautifully!
Now for the adjustment when it’s game time: since the baked mashed potatoes go into the oven cold from the fridge, they need more time to warm through before that top layer even thinks about browning. You’ll need to add about 10 to 15 extra minutes to the baking time. So instead of 20-25 minutes, plan for 30 to 40 minutes total at 375°F. After they’re hot, you can add the cheese and bake for the final 5 minutes until golden, or follow the longer bake, then top and finish. For the make-ahead details on everything, I always check out great tips on making potato dishes ahead of time, like what this baker suggests over here!
This little bit of planning makes serving the ultimate comfort food so much easier!
Serving Suggestions for This Holiday Potato Recipe
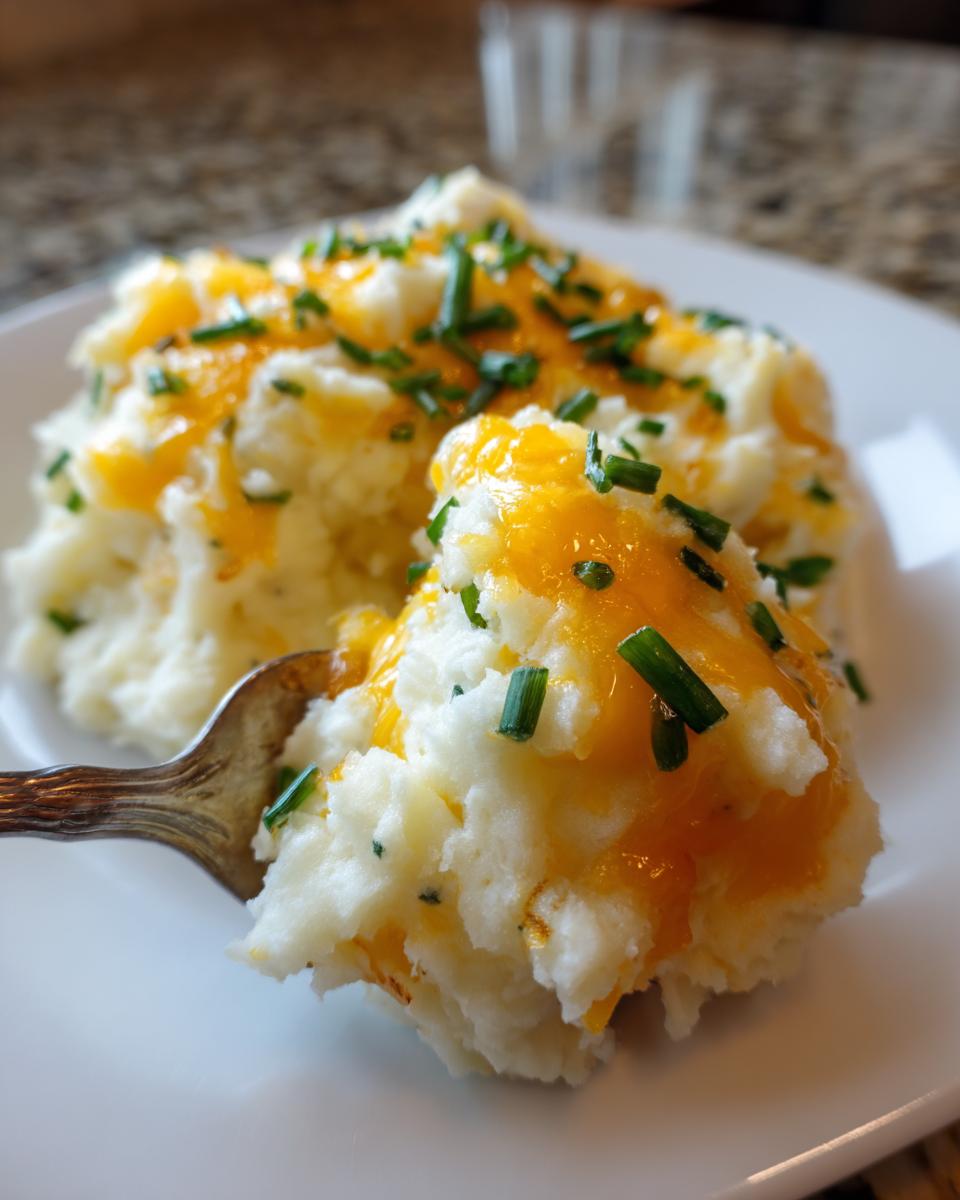
Since these rich, cheesy potatoes are so decadent, they really shine next to slightly simpler or brighter main courses. Think of them as the star foundation for your plate! They truly anchor any kind of potluck or big family meal we throw together.
If you’re planning the ultimate Holiday Potato Recipe spread, you need mains that can stand up to all that butter and cream cheese. My go-to pairings are always crowd-pleasers that don’t require fussing:
- Roast Turkey or Ham: These are the classics for a reason! The savory, salty juices that collect on the pan mix perfectly if you spoon a little over the potatoes when serving.
- Simple Roasted Chicken: A perfectly seasoned whole chicken is great because it lets the creaminess of this side dish really sing without competing too much on richness.
- Glazed Meatloaf: If we’re having a cozy Sunday dinner, nobody complains when meatloaf shows up. This dish makes the meatloaf seem 100 times better!
For complementary sides that cut through the richness (since we love our Thanksgiving Side Dish Ideas to have balance), try a tart cranberry sauce or a super simple green bean almondine. That little bit of acidity or crunch cleanses the palate perfectly after enjoying one of these velvety-rich bites!
Frequently Asked Questions About Baked Mashed Potatoes
I know sometimes you have quick questions pop up when you’re juggling a huge meal spread, especially if these are part of your bigger Comfort Food Side Dishes collection. Don’t sweat it! I’ve gathered the most common things folks ask about these creamy beauties.
Can I use Yukon Gold potatoes instead of Russets for baked mashed potatoes?
Oh, absolutely you can! That’s a great question. Russets are my go-to because they are starchy, which gives you that wonderful, light, fluffy base before we even add the cheese and butter. Yukon Golds are fantastic too; they are naturally a little more buttery and hold their shape a bit better, giving you a slightly denser texture. If you switch to Yukon Golds, just keep an eye on the liquid—you might need to add just a splash less milk because they don’t release as much starch and water as Russets do. Either way, they make wonderful Cheesy Baked Potatoes!
How do I prevent my baked mashed potatoes from drying out?
This is the #1 fear when baking potatoes, I get it! Honestly, the cream cheese is your insurance policy here. That extra fat and moisture content really anchors the texture in place. The other big thing is avoiding over-baking. We only need 20-25 minutes to get that top golden. If you find you need to bake them longer, especially if you are working with leftovers, you *must* cover the baking dish tightly with foil. Trapping that steam keeps everything lush and prevents that dry crust from hardening all the way through. You can find some more great reassurance on keeping things moist right here.
What is the best way to reheat leftover baked mashed potatoes?
Leftovers are the best part, right? But they can sometimes get a little stiff after chilling. Don’t just nuke them uncovered; that’s asking for dry patches! The best way is to put the leftovers back into a baking dish, cover it well with foil, and heat them slowly in a 325°F oven for about 15-20 minutes until they are just warmed through. If they look a little thick when you pull them out, just quickly stir in a tiny splash of warm milk or even chicken broth before serving. It brings them right back to that soft, scoopable goodness!
Storage and Reheating Instructions for Baked Mashed Potatoes
Now, let’s talk about the best part of making a big batch: leftovers! Good news—these baked mashed potatoes hold up beautifully because of the cream cheese and butter we added inside. They are truly fantastic the next day, which is another reason this recipe is such a winner for busy families. You definitely want to store these correctly so you don’t lose that velvety texture!
When you have leftovers, the key is keeping the moisture sealed in. Once the dish has cooled down a bit—don’t put piping hot food right in the fridge, please!—cover that baking dish tightly with a layer of plastic wrap pressed right up against the surface, and then cover the whole thing with aluminum foil. This double protection is perfect for keeping them fresh in the refrigerator for up to three or four days.
When it’s time to reheat, low and slow is the absolute mantra. You can certainly use the microwave for a quick meal, but honestly, using the oven gives you that more authentic, fresh-baked texture back. Pop the covered dish back into a moderate oven, around 325°F, and let it warm up slowly for about 20 minutes. If you plan on freezing them, scoop the leftover mash into freezer-safe bags or containers *before* baking them (or after they cool), and they will keep well for up to three months. Thaw overnight in the fridge, and then add that splash of warm milk when reheating in the oven!
Nutritional Estimates for This Potato Side Dishes Recipe
I always try to give a rough idea of what you’re getting into when you make a rich side dish like this. Because we use whole milk, cream cheese, and plenty of butter, these aren’t exactly light little fluffballs, but oh my goodness, they are worth every single bite! These fluffy potatoes are definitely worth treating yourself to, especially when planning out your big holiday menus.
These estimates are based on the full recipe divided into 8 generous servings. Please remember that these numbers are just guidelines. If you switch to low-fat cream cheese or use skim milk instead of whole, the numbers will shift around quite a bit! These values reflect the total richness that makes these Potato Side Dishes for Dinner so satisfying.
- Serving Size: 1 serving
- Calories: 350
- Fat: 22g
- Saturated Fat: 14g
- Carbohydrates: 32g
- Protein: 7g
- Sodium: 450mg
We aren’t counting micro-nutrients here, but the protein and fiber are present thanks to the Russets themselves! Enjoy this delicious Comfort Food Side Dishes knowing it’s prepared with love—that’s the most important calorie count anyway, right?
Share Your Ultimate Potato Casserole Experience
Well, that’s the whole journey from potato peeling right up to that golden, cheesy finish! Now that you’ve tried making this comforting classic, I genuinely want to hear all about it. Did you manage to get that perfect velvety texture? Did you add bacon like one of my neighbors suggested for their Ultimate Potato Casserole version?
Don’t be shy! Leave a star rating right below this section and tell me what you thought in the comments. Seeing pictures of the beautiful dishes you create in your own kitchens is honestly the highlight of my week. If you made any tweaks or served it alongside amazing mains, share the secrets!
If you have any final questions about storage, substitutions, or anything else that popped up while you were cooking, feel free to reach out directly using our contact page. Happy eating, and thanks for bringing a little bit of simple, connected comfort to your table!
PrintThe Best Creamiest Baked Mashed Potatoes

Make ultra-creamy mashed potatoes that bake to a golden, slightly crisp finish. This recipe is perfect for holiday dinners or any time you need a rich, comforting side dish.
- Prep Time: 20 min
- Cook Time: 25 min
- Total Time: 45 min
- Yield: 8 servings 1x
- Category: Side Dish
- Method: Baking
- Cuisine: American
- Diet: Vegetarian
Ingredients
- 3 lbs Russet potatoes, peeled and quartered
- 1 cup whole milk, warmed
- 8 tablespoons unsalted butter, softened
- 8 ounces cream cheese, softened
- 1 teaspoon salt
- 1/2 teaspoon black pepper
- 1 cup shredded sharp cheddar cheese (for topping)
- 2 tablespoons chopped fresh chives (for garnish)
Instructions
- Preheat your oven to 375°F (190°C). Grease a 9×13 inch baking dish.
- Place the peeled and quartered potatoes in a large pot and cover them with cold, salted water. Bring to a boil and cook until the potatoes are fork-tender, about 15 to 20 minutes.
- Drain the potatoes completely. Return them to the hot, empty pot over low heat for one minute to dry out any remaining moisture.
- Mash the potatoes thoroughly using a potato masher or ricer until smooth.
- Add the warm milk, softened butter, and softened cream cheese to the mashed potatoes. Mix with an electric mixer on low speed until just combined and smooth. Do not overmix.
- Stir in the salt and pepper. Taste and adjust seasoning if needed.
- Spread the mashed potato mixture evenly into the prepared baking dish.
- Sprinkle the shredded cheddar cheese over the top layer of potatoes.
- Bake for 20 to 25 minutes, or until the potatoes are heated through and the cheese topping is melted and lightly golden brown.
- Remove from the oven, sprinkle with fresh chives, and serve immediately.
Notes
- For extra richness, substitute sour cream for half of the milk.
- If you want a crispier topping, place the dish under the broiler for the last 1-2 minutes, watching closely to prevent burning.
- You can prepare the mashed potatoes and assemble the dish up to one day ahead. Cover and refrigerate, then add 10-15 minutes to the baking time.
Nutrition
- Serving Size: 1 serving
- Calories: 350
- Sugar: 3
- Sodium: 450
- Fat: 22
- Saturated Fat: 14
- Unsaturated Fat: 8
- Trans Fat: 0.5
- Carbohydrates: 32
- Fiber: 3
- Protein: 7
- Cholesterol: 55