

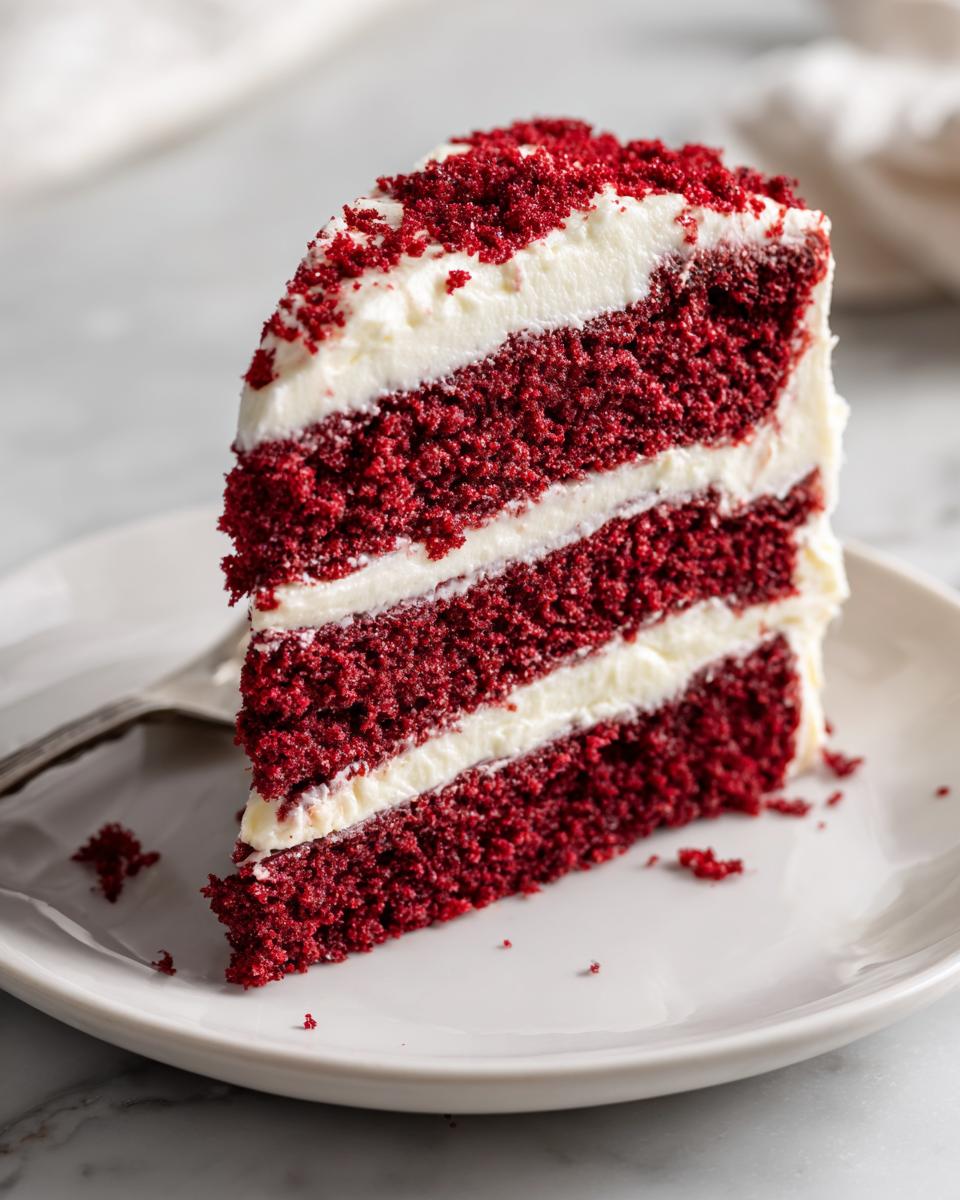
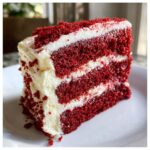
We all chase that perfect slice, don’t we? You know the one—the dream cake that manages to be deeply colored, incredibly soft, and utterly decadent, all at once. Well, stop dreaming, because I finally perfected it. This isn’t just another recipe; this is truly the best truly moist and fluffy classic Southern red velvet cake from scratch. When I started Mia’s Meals, it was because I knew busy families needed real comfort food without the all-day fuss. This red velvet cake proves you can have that bakery-style elegance with simple, dependable steps, bringing that warmth I remember from my childhood kitchen right to your table.
- Why This Classic Red Velvet Cake Recipe Stands Out (E-E-A-T Focus)
- Ingredients for the Best Red Velvet Cake from Scratch
- Step-by-Step Instructions for a Fluffy Red Velvet Cake Recipe
- Crafting the Homemade Red Velvet Cake Cream Cheese Frosting
- Tips for the No Fail Red Velvet Cake Success
- Variations: Beyond the Classic Southern Red Velvet Cake
- Serving Suggestions for Your Showstopping Red Velvet Cake
- Storing Your Homemade Red Velvet Cake
- Frequently Asked Questions About Making Red Velvet Cake
- Nutritional Estimates for This Red Velvet Cake
- Share Your Experience Making This Classic Red Velvet Dessert
- Nutritional Estimates for This Red Velvet Cake
- Share Your Experience Making This Classic Red Velvet Dessert
Why This Classic Red Velvet Cake Recipe Stands Out (E-E-A-T Focus)
What makes this recipe different from all the others flooding the internet? It’s all about the texture, my friends. We want that gorgeous stack of fluffy red velvet cake layers that feel like velvet when you cut into them, not crumbly or dense. The secret sauce here hinges on chemistry—using oil instead of all butter keeps the crumb incredibly soft, while the buttermilk reacts perfectly with the baking soda and a tiny bit of vinegar.
That reaction is key; it creates those tiny bubbles that make the whole thing light. Now, for achieving that brilliant color that screams ‘special occasion’: skip the liquid dyes if you can. I swear by a good quality gel food coloring. You need less product, and it gives you a deeper, truer red without disturbing the delicate balance of the batter.
Achieving the Signature Moist Red Velvet Cake Texture
If you’re used to using butter in all your cakes, this might feel a bit different, but trust me on the oil. Butter gives flavor, yes, but oil stays liquid at room temperature, which means your cake stays softer for longer—it’s the ultimate trick for a truly moist cake that tastes just as good the next day.
We use just enough flour and just enough cocoa. That cocoa powder isn’t supposed to make it taste like a chocolate cake; it’s there to interact with the acid and deepen that beautiful red hue. Keep your mixing brief once the dry ingredients go in; we want tenderness above all else!
Ingredients for the Best Red Velvet Cake from Scratch
Okay, gathering your supplies is half the battle. When you’re making a cake this special—a true red velvet cake from scratch—using what you have on hand matters. I broke the list down so you know exactly what goes into those gorgeous layers. You’ll need everything at room temperature for the best possible mix, especially the eggs and buttermilk.
Please, please, please, pay attention to the food coloring. You want that classic, deep color, right? If you’re using liquid coloring, you might need a whole bottle and it can thin out the batter. I always recommend grabbing a good quality gel paste coloring if you can find it. A small little dab goes a long way towards getting that vibrant, show-stopping red without messing up the wet/dry ratio.
Cream Cheese Frosting Ingredients for Your Red Velvet Cake Cream Cheese Frosting
And then, the best part arrives: the frosting! You can’t have that perfect red velvet cake without a ridiculously creamy, tangy topping. This is crucial: make sure your cream cheese and your butter are actually softened. I mean, truly soft—if you press your finger into them, it leaves an indent easily. If they are cold, you end up with lumps, and nobody wants a lumpy red velvet cake cream cheese frosting, trust me!
- 1 1/2 cups vegetable oil
- 1 1/2 cups granulated sugar
- 2 large eggs
- 1 teaspoon vanilla extract
- 1 cup buttermilk
- 1 tablespoon red food coloring (liquid or gel)
- 2 1/2 cups all-purpose flour
- 1 teaspoon baking soda
- 1 teaspoon salt
- 1 tablespoon unsweetened cocoa powder
- 1 teaspoon white vinegar
For the frosting, you’ll need:
- 1 (8 ounce) package cream cheese, softened
- 1/2 cup unsalted butter, softened
- 3 cups powdered sugar
- 1 teaspoon vanilla extract
Step-by-Step Instructions for a Fluffy Red Velvet Cake Recipe
Alright, let’s get this beautiful red velvet cake into the oven! This is where the ‘easy’ part really shines through, even though we are making this spectacular cake from scratch. Preheat your oven right away to 350°F (175°C) and get those two 9-inch pans greased and floured—I like using a bit of cocoa powder with the flour in the pans instead of just flour, it helps prevent that white residue on the outside of the dark cake.
Remember those cinnamon buns we made? The technique is similar here: we build layers of flavor carefully. Get all your wet components ready, and your dry components ready. Once those are separate, it’s time to bring them together for what will become the best fluffy red velvet cake you’ve ever made. If you need a refresher on how to mix things smoothly without ruining the structure, check out my guide to building batter layers.
Mixing the Batter for a Perfectly Velvety Cake
First up, beat that oil and sugar until they look pale—this traps air! Then eggs go in one by one. In separate bowls, you’ve mixed your buttermilk/coloring and your flour/cocoa/salt/soda. Now we alternate! Start with one-third of the dry mix, blend gently. Then half of the dyed buttermilk, blend gently. Repeat, ending with the dry ingredients. The moment everything is *just* combined, stop the mixer. Seriously, stop!
The final touch is the white vinegar. Stir it in quickly with a spatula. That vinegar is the activator that makes the baking soda really pop! This careful, alternating process is what guarantees that incredible, smooth, velvety cake texture we are aiming for. Don’t you dare overmix it once that vinegar is in there!
Baking and Cooling Your Red Velvet Layer Cake
Divide that gorgeous batter evenly between your prepped pans. Pop them into that 350°F oven for about 30 to 35 minutes. You’re checking for doneness by inserting a wooden pick—if it comes out clean with maybe a few moist crumbs stuck to it, you’re done. I repeat: moist crumbs, not wet batter!
Let those fabulous red velvet layer cake rounds cool in the pans for about 10 minutes flat. This keeps them firm enough to handle. Then, gently flip them out onto a wire rack to cool entirely. Don’t rush this cooling step; trying to frost a warm cake is a guaranteed meltdown disaster!

Crafting the Homemade Red Velvet Cake Cream Cheese Frosting
Now that our cake layers are completely cooled—and I mean cool, like, touch them and they aren’t even slightly warm—we move onto the grand finale: the cream cheese frosting! This is what takes our from-scratch creation from a great cake to a genuinely decadent cake recipe. Truly, the frosting makes the red velvet cake, in my honest opinion.
Remember I stressed using softened cream cheese and butter when we looked at the ingredients? That is non-negotiable for this step. If your dairy fats are cold when you start beating them, you are going to end up with those tiny, grainy lumps throughout your beautiful frosting, and we just can’t have that.
Start by whipping the softened cream cheese and butter together until they are totally smooth and silky. I like using my stand mixer for this, but if you’re using a hand mixer, just make sure you beat it for a good minute or two until it looks uniform. Once that base is gorgeous, slowly start incorporating your powdered sugar, maybe a cup at a time, mixing on low speed at first so you don’t end up with a sugar cloud in your kitchen!
We finish this off by beating it on medium speed until it’s light and fluffy—this is where we incorporate air and make it spreadable, not dense. A little splash of vanilla at the end perks everything up. If the frosting seems too thick for spreading easily over your layers, you can thin it out slightly with maybe half a teaspoon of milk or cream, just until it reaches a nice, luscious consistency perfect for slathering all over your homemade red velvet cake.
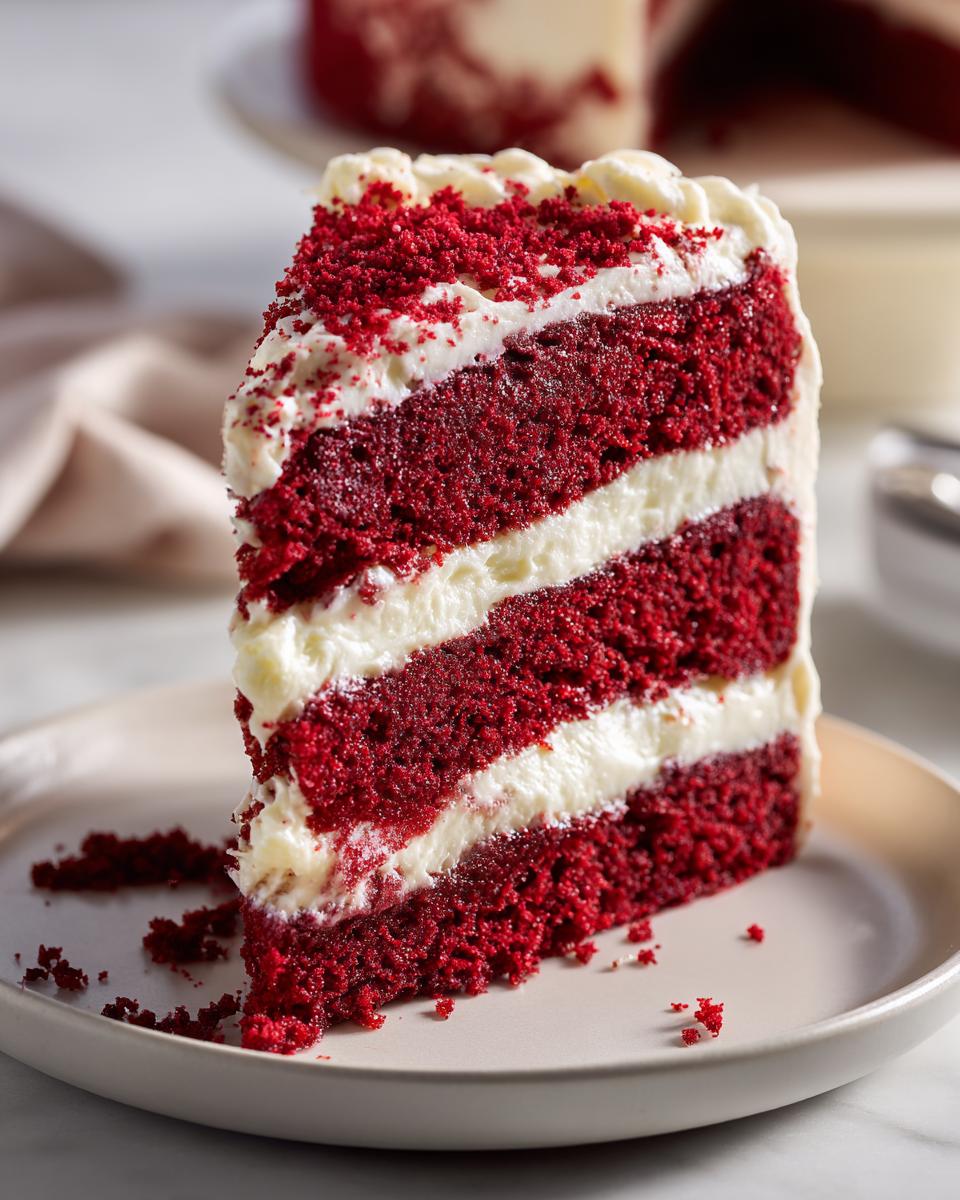
Once you get this right, you have the perfect complement to those tender cake layers. Every bite that combines the tang from the cheese and the sweetness of the sugar is pure heaven. If you’ve ever struggled with lumpy frosting before, check out my tips on getting smooth toppings over on my guide to moist spice cake frosting!
Tips for the No Fail Red Velvet Cake Success
Even with the best recipe, sometimes baking throws us a curveball, right? I want to arm you with a few insider secrets from my time learning in the kitchen so your cake is foolproof. This is about making sure you get that tender crumb every single time you pull out those pans.
My number one rule, which I mentioned briefly before, is all about temperature—and I mean it for more than just the butter. Make sure your eggs and your buttermilk are genuinely at room temperature before you start mixing anything. Cold ingredients don’t emulsify (mix smoothly) with the oil mixture nearly as well. When they’re cold, they tend to curdle the batter slightly, which results in a tougher, less fluffy cake in the end. Give your eggs a little bath in warm, not hot, water if you’re rushed!
Another thing that always trips people up is the baking soda and that little bit of vinegar we add at the end. These are your primary lifters in this recipe, not the baking powder, so they need to be fresh! If your baking soda is old, it won’t react vigorously enough with the acid, and your cake will flatten out. You can test it by dropping a tiny bit into a splash of white vinegar; if it doesn’t foam up immediately like a tiny science experiment, toss it and grab a fresh box. It’s a small step, but it makes a huge difference in the lift and lightness of the final product.
Lastly, while we are using oil for moisture constancy, don’t skip the salt! Just one teaspoon might not sound like much, but that salt is what balances out the sweetness of the sugar and the slight tang from the buttermilk. It’s the flavor anchor that stops this from tasting one-note.
Variations: Beyond the Classic Southern Red Velvet Cake
I know this recipe delivers the ultimate classic Southern red velvet cake, but sometimes you just need to switch things up, especially when you have leftover batter or you’re feeling extra adventurous! While the heart of this recipe is the moist, tender crumb layer cake, it’s surprisingly adaptable for different types of decadent cake recipes.
If you are looking for something quicker—maybe you need a dessert ready in a flash—you could easily adapt this into a red velvet poke cake variation. Once your cake layers are baked and cooled, instead of frosting them traditionally, you just take a wooden spoon handle and poke holes all over the top surface. Then, you pour a thick layer of white chocolate pudding or even a simple sweetened condensed milk mixture right into those holes. It soaks in beautifully! Just top with Cool Whip, and suddenly, you have a totally different—and super easy—dessert.
Now, for the ambitious bakers out there, think about how incredible this flavor profile would be in a cheesecake setting. While I haven’t published my official red velvet cheesecake recipe yet, you can absolutely use the leftover dry ingredients combined with cream cheese and a graham cracker crust to create a stunning hybrid. Imagine: that rich, slightly acidic red cake baked right around a creamy cheesecake center. It’s showstopping dessert material for sure!
No matter how you spin it, keeping that core buttermilk and oil ratio, which makes this the best red velvet cake, ensures you maintain that signature tenderness. If you’re obsessed with using these classic flavors in simpler forms, you absolutely have to check out my recipe for red velvet cake mix cookies. They are dangerously good!
Serving Suggestions for Your Showstopping Red Velvet Cake
This stunning cake deserves the perfect backdrop! Because this red velvet layer cake is already so rich with that creamy tang from the frosting, you don’t need a ton of extra fuss on the side. Simple pairings actually let the cake itself shine, which is what we want for a showstopping dessert like this.
When I serve this for a big gathering, like Christmas or for a special birthday cake idea, I always keep the sides incredibly straightforward. A drizzle of melted white chocolate across the top, just after the frosting sets, adds a little extra visual pop. If you want something cool and refreshing next to that deep color, a small bowl of fresh raspberries or strawberries on the side is fantastic. Their little burst of tartness cuts through the richness perfectly.
For an evening dessert, especially after a big holiday meal, forget loud accompaniments. A strong, slightly bitter black coffee is the ideal partner. It cleanses the palate after that decadent cake and frosting combo moves across your tongue. It’s simple, elegant, and lets everyone savor the texture we worked so hard to achieve.
If you are looking for a festive drink to go alongside this beauty during your holiday baking desserts season, you absolutely have to check out my recipe for a wonderful cranberry punch. It’s bright, bubbly, and keeps the focus totally on the dessert while giving guests something equally celebratory to sip on. You can find that recipe right here!
Honestly, though, the best serving suggestion is just slicing it onto a pretty plate, stepping back, and watching everyone’s face light up when they see those vibrant layers.
Storing Your Homemade Red Velvet Cake
Now that you’ve created this absolutely perfect, moist red velvet cake, the last thing we want is for it to dry out overnight! Storing this beauty correctly is super important if you want to maintain that tender crumb texture we worked so hard to achieve. Thankfully, this cake is pretty robust, but knowing the right way to wrap it makes all the difference.
If you aren’t serving the entire red velvet cake right away, say you’re just wrapping up a few leftover slices, keep them tightly covered at room temperature. Because we used oil in the recipe, it handles the countertop fine for a day or two, especially if you use an airtight container or cover those slices tightly with plastic wrap. If you notice the frosting starting to sweat or look messy, just leave single slices on the plate and wrap them snugly to keep the air out.
But what if you made this decadent cake ahead of time for a big event? That’s when freezing comes in handy, and this recipe handles it beautifully! Remember when I mentioned you could make the layers early? Here’s how you do it properly so they taste fresh-baked later.
First, the layers must be completely cool—I mean stone cold—and preferably unfrosted. Don’t wrap them naked, though! You need a double layer of protection here. Wrap each individual layer tightly, first in a layer of plastic wrap, making sure you press the wrap right against the cake surface to push out any air pockets. Then, wrap that package again in a layer of aluminum foil, or even better, stick the double-wrapped layers into a large zip-top freezer bag. This ensures no freezer burn attacks your crumb!
They can hang out like that for up to a month. When you’re ready to frost and serve your incredible homemade red velvet cake, just pull the layers out and let them thaw completely on the counter while still wrapped for several hours. Once they are room temperature, then you can unwrap them and get busy with that glorious cream cheese frosting!
Frequently Asked Questions About Making Red Velvet Cake
Why is my red velvet cake not as red as I expected?
If you’re not getting that deep, vibrant color in your cake, don’t panic! Usually, this happens for two simple reasons. First, your food coloring might be a standard liquid type, which isn’t as concentrated as the gel pastes. For that truly iconic look, you need the gel. Second, if you used too much cocoa powder, that tends to darken the color toward brown rather than red. Remember, we only use a tablespoon in this recipe because the cocoa is mainly for flavor depth, not chocolate dominance. This recipe is designed to give you a gorgeous, naturally colored moist red velvet cake when following the coloring instructions closely!
Can I substitute buttermilk if I don’t have any on hand?
I always preach using real buttermilk because that acid kick is essential for the chemical reaction that creates this fluffy red velvet cake recipe texture, but I know life happens! If you are in a pinch, you absolutely can make a substitute. Just take any regular milk—whole milk is best—and stir in one tablespoon of white vinegar or lemon juice for every cup of milk you need. Let it sit on the counter for about five minutes until it looks slightly curdled. It won’t be *quite* as effective as the real deal, but it will give you that necessary acid boost for a lovely, tender crumb cake.
How long does this homemade red velvet cake last stored properly?
This is one of the best things about using oil in our recipe! Unlike cakes made only with butter, this homemade red velvet cake stays wonderfully moist. Stored tightly covered at cool room temperature, it’s usually perfect for three to four days. If you want it to last longer, wrapping the unfrosted layers tightly and freezing them (like I explained earlier!) is perfect for months of enjoyment. If you freeze it, just make sure you thaw it slowly at room temperature still wrapped so that moisture stays locked inside.
Is this recipe truly an easy red velvet cake to master?
Yes, promise! While we are technically making a red velvet cake from scratch, the mixing process is incredibly straightforward because it’s an oil-based cake. We avoid the creaming step that takes so much time with butter. You’re basically just whisking wet ingredients, whisking dry ingredients, and then alternating the two! It comes together in about 20 minutes of active time, which is why I love it for busy weeknights when the craving for a decadent cake recipes hits!
If you have any other lingering questions before you start baking, please don’t hesitate to reach out to me via my contact page. Happy baking!
Nutritional Estimates for This Red Velvet Cake
I always include this little section just because some of you are keeping track, but please take these numbers with a giant grain of salt! We know this is a special occasion dessert, not a light salad, right? Since we used oil and a good amount of sugar in the cake and the rich cream cheese frosting, the numbers reflect that.
These estimates are calculated based on 12 generous slices of the final layer cake with frosting. If you decide to make a red velvet poke cake variation or skip the frosting, your numbers will obviously change!
- Serving Size: 1 slice
- Calories: 450
- Sugar: 55g
- Sodium: 300mg
- Fat: 25g
- Saturated Fat: 10g
- Unsaturated Fat: 15g
- Trans Fat: 0g
- Carbohydrates: 58g
- Fiber: 1g
- Protein: 4g
- Cholesterol: 50mg
If you are looking specifically for a lighter take on a classic red velvet dessert, you might want to look into my fruit-based loaf recipes instead, but for this showstopping layer cake, these numbers are about right for the pure indulgence!
Share Your Experience Making This Classic Red Velvet Dessert
You’ve done it! You’ve managed to create the moist, fluffy, and utterly perfect classic red velvet dessert! Now, I need to see your masterpieces! When you bake this, please take a photo and tag me, or leave a quick comment right here on the post. Knowing that our simple pathway to this amazing cake worked for you means the world to me.
Did you successfully get that tender crumb cake texture? Did you have any struggles piping the cream cheese frosting? Was this your new favorite birthday cake idea? I thrive on feedback, and seeing how your family celebrates with this beautiful cake keeps the mission of Mia’s Meals alive! If you loved this recipe, don’t forget to save it or share it with a friend who needs a little lift in their baking life. I appreciate you welcoming this recipe into your kitchen!
If you need to get in touch with me about anything else, recipe suggestions, or technical baking questions, you know where to find me on the contact page!
Nutritional Estimates for This Red Velvet Cake
I always include this little section just because some of you are keeping track, but please take these numbers with a giant grain of salt! We know this is a special occasion dessert, not a light salad, right? Since we used oil and a good amount of sugar in the cake and the rich cream cheese frosting, the numbers reflect that.
These estimates are calculated based on 12 generous slices of the final layer cake with frosting. If you decide to make a red velvet poke cake variation or skip the frosting, your numbers will obviously change!
- Serving Size: 1 slice
- Calories: 450
- Sugar: 55g
- Sodium: 300mg
- Fat: 25g
- Saturated Fat: 10g
- Unsaturated Fat: 15g
- Trans Fat: 0g
- Carbohydrates: 58g
- Fiber: 1g
- Protein: 4g
- Cholesterol: 50mg
If you are looking specifically for a lighter take on a classic red velvet dessert, you might want to look into my fruit-based loaf recipes instead, but for this showstopping layer cake, these numbers are about right for the pure indulgence!
Share Your Experience Making This Classic Red Velvet Dessert
You’ve done it! You’ve managed to create the moist, fluffy, and utterly perfect classic red velvet dessert! Now, I need to see your masterpieces! When you bake this, please take a photo and tag me, or leave a quick comment right here on the post. Knowing that our simple pathway to this amazing cake worked for you means the world to me.
Did you successfully get that tender crumb cake texture? Did you have any struggles piping the cream cheese frosting? Was this your new favorite birthday cake idea? I thrive on feedback, and seeing how your family celebrates with this beautiful cake keeps the mission of Mia’s Meals alive!
If you loved this recipe, don’t forget to save it or share it with a friend who needs a little lift in their baking life. I appreciate you welcoming this recipe into your kitchen! If you need to get in touch with me about anything else, recipe suggestions, or technical baking questions, you know where to find me on the contact page!
PrintThe Best Truly Moist and Fluffy Classic Southern Red Velvet Cake from Scratch
Make the best red velvet cake you have ever tasted. This recipe delivers a perfectly moist, soft, and tender crumb, balanced with just the right amount of cocoa. You will finish it with rich, homemade cream cheese frosting for a truly decadent dessert.
- Prep Time: 20 min
- Cook Time: 35 min
- Total Time: 55 min
- Yield: 12 servings 1x
- Category: Dessert
- Method: Baking
- Cuisine: American
- Diet: Vegetarian
Ingredients
- 1 1/2 cups vegetable oil
- 1 1/2 cups granulated sugar
- 2 large eggs
- 1 teaspoon vanilla extract
- 1 cup buttermilk
- 1 tablespoon red food coloring (liquid or gel)
- 2 1/2 cups all-purpose flour
- 1 teaspoon baking soda
- 1 teaspoon salt
- 1 tablespoon unsweetened cocoa powder
- 1 teaspoon white vinegar
- 1 (8 ounce) package cream cheese, softened
- 1/2 cup unsalted butter, softened
- 3 cups powdered sugar
- 1 teaspoon vanilla extract
Instructions
- Preheat your oven to 350°F (175°C). Grease and flour two 9-inch round cake pans.
- In a large bowl, whisk together the vegetable oil and granulated sugar until combined. Beat in the eggs one at a time, then stir in the vanilla extract.
- In a separate small bowl, mix the buttermilk and red food coloring together. Set aside.
- In a medium bowl, whisk together the flour, baking soda, salt, and cocoa powder.
- Add the dry ingredients to the wet ingredients in three additions, alternating with the buttermilk mixture, beginning and ending with the dry ingredients. Mix only until just combined after each addition.
- In a small bowl, mix the white vinegar into the batter last. Do not overmix.
- Divide the batter evenly between the prepared cake pans.
- Bake for 30 to 35 minutes, or until a wooden pick inserted into the center comes out clean. Let cakes cool in the pans for 10 minutes before inverting them onto a wire rack to cool completely.
- Prepare the cream cheese frosting: In a large bowl, beat the softened cream cheese and butter together until smooth. Gradually beat in the powdered sugar until fully incorporated. Stir in the vanilla extract until the frosting is light and fluffy.
- Once the cakes are completely cool, frost and stack the layers. You have a bakery style cake ready to serve.
Notes
- For an authentic Southern red velvet cake flavor, use real buttermilk.
- If you want a deeper red color, use gel food coloring instead of liquid.
- You can make this cake ahead of time; wrap cooled layers tightly in plastic wrap and freeze for up to one month.
Nutrition
- Serving Size: 1 slice
- Calories: 450
- Sugar: 55g
- Sodium: 300mg
- Fat: 25g
- Saturated Fat: 10g
- Unsaturated Fat: 15g
- Trans Fat: 0g
- Carbohydrates: 58g
- Fiber: 1g
- Protein: 4g
- Cholesterol: 50mg