
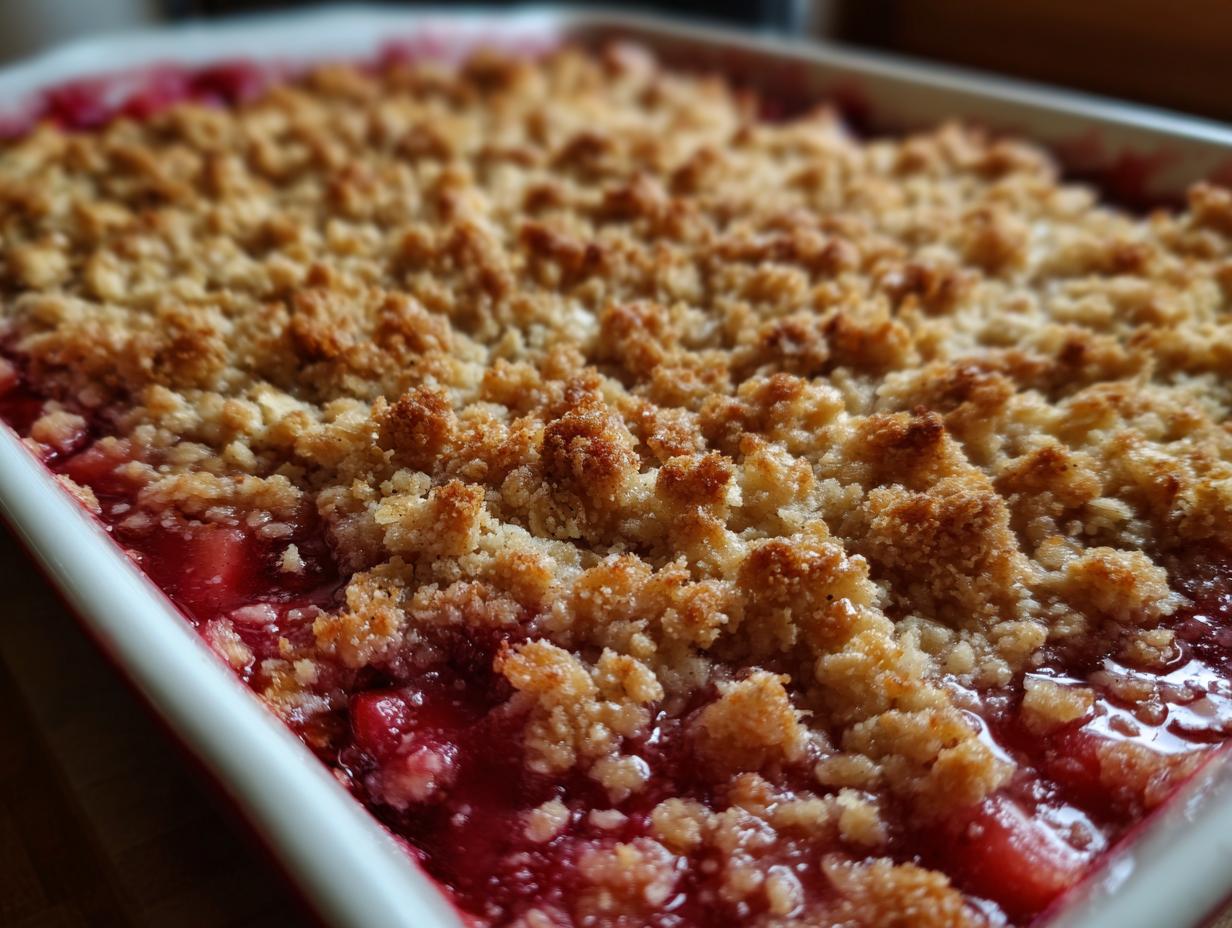
When spring rolls around and that beautiful, tart rhubarb starts appearing at the market, my heart just sings! There’s nothing quite like taking a seasonal ingredient and turning it into something deeply comforting. That’s why I absolutely swear by this rhubarb crisp recipe. Forget fussy layered desserts; this is the ultimate, easy-to-make comfort food that always tastes like home. It’s all part of my simple philosophy, something I learned back home, which you can read more about over at the About Page. This crisp perfectly proves that connection and great flavor don’t need complicated steps. It’s simple, it’s delicious, and it’s waiting for you to try it!
- Why This Easy Rhubarb Crisp Recipe Is Your New Favorite Spring Fruit Dessert
- Ingredients for the Ultimate Rhubarb Crisp
- How to Make Homemade Rhubarb Crisp Step-by-Step
- Tips for Success Making Rhubarb Crisp
- Variations for Your Rhubarb Crisp Recipe
- Storage and Freezer Friendly Rhubarb Dessert Tips
- Frequently Asked Questions About Making Rhubarb Crisp
- Estimated Nutritional Data for This Rhubarb Crisp
- Share Your Best Crisp Recipe Experience
Why This Easy Rhubarb Crisp Recipe Is Your New Favorite Spring Fruit Dessert
I’ve made so many crisps over the years, and what I keep coming back to is that pure, simple satisfaction. This rhubarb crisp delivers exactly that, making it my go-to spring fruit dessert year after year. It’s fast enough for a weeknight treat but special enough for company. Trust me, once you try this combination, you’ll see why it’s essential for your baking rotation.
- It only takes about 15 minutes of hands-on time! Total time under an hour, which qualifies it as a truly quick rhubarb dessert.
- It achieves that incredible, craveable sweet and tart dessert profile without being overly sugary.
- The topping isn’t just ‘good,’ it’s unbelievably crunchy and buttery—the best part, honestly.
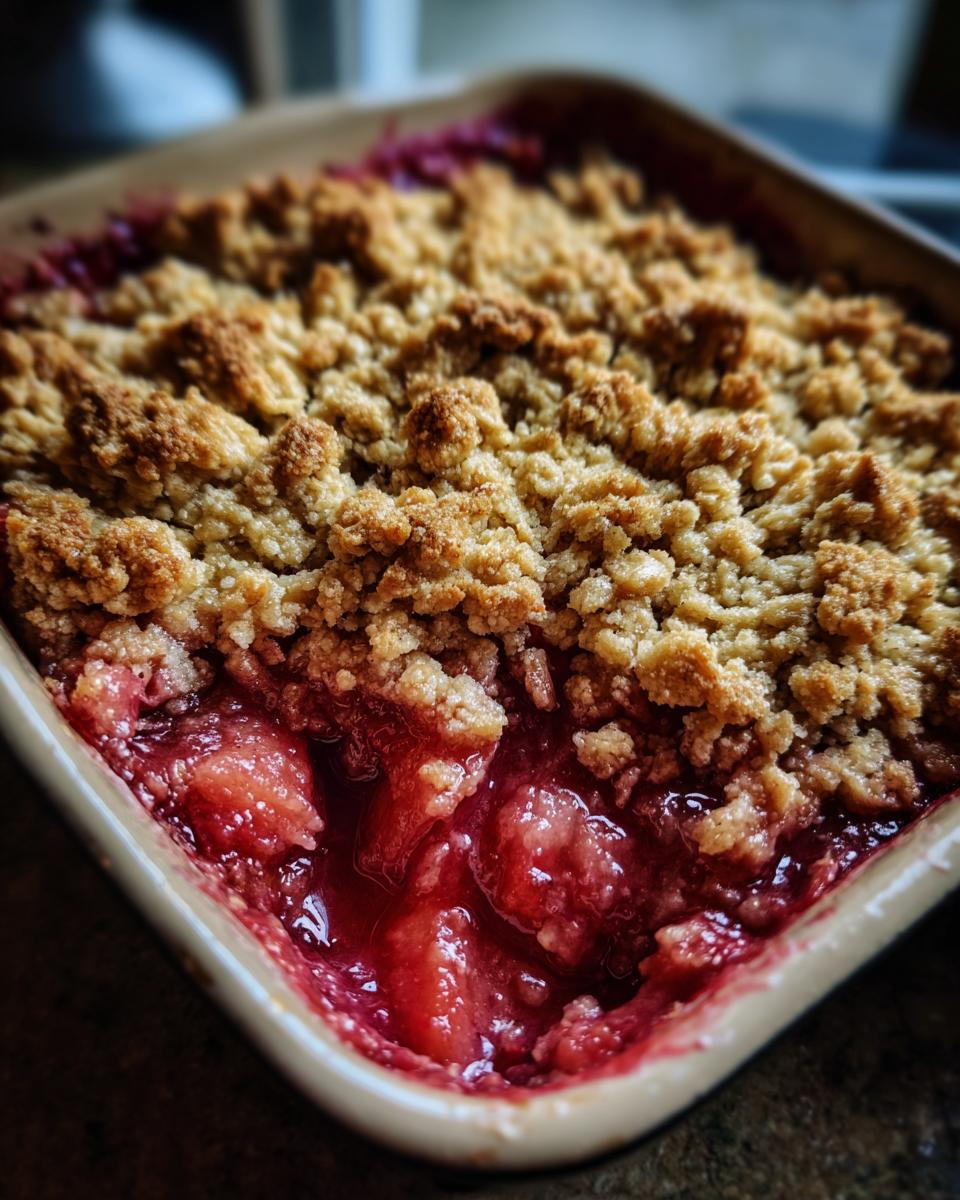
Achieving the Perfect Sweet and Tart Rhubarb Crisp Filling
Rhubarb is wonderfully tart, right? That’s why we need that granulated sugar to bring it into balance. I add just a couple of tablespoons of flour to the filling, and this is crucial! It grabs all those delicious juices that bubble up while baking, thickening them so you get a jammy filling instead of a watery puddle in the bottom of your dish. That perfect tang shines through!
Secrets to the Buttery Oat Topping Texture
The crunch factor is everything in a great rhubarb crisp. The secret is using butter straight out of the fridge, cut into tiny pieces. When you incorporate it into the topping mixture, you want those pea-sized bits, not a smooth paste. When baked, those cold pieces steam and separate, creating those wonderfully coarse, golden crumbs that give you a satisfying crunch in every bite.
Ingredients for the Ultimate Rhubarb Crisp
Listing out ingredients is my favorite part because it feels like gathering my supplies before starting a fun weekend project. This rhubarb crisp is so straightforward, and having everything pre-measured honestly makes the final baking process a breeze. I demand precision here because it leads to reliability later—I don’t want anyone missing out on that perfect crunch!
For the Sweet and Tart Rhubarb Filling
This part comes together in one bowl, super quick. You’ll notice we use a mix of sugars and spices here to really make that rhubarb sing!
- 4 cups fresh rhubarb, chopped into roughly inch-sized pieces
- 1 cup granulated sugar (you can cut this back slightly if your rhubarb isn’t too sour, but I trust the recipe!)
- 2 tablespoons all-purpose flour (This is our secret weapon against watery filling!)
- 1 teaspoon vanilla extract
- 1/4 teaspoon ground cinnamon
For the Buttery Oat Topping
This is where the magic happens! For that superior buttery oat topping, make sure your butter is truly cold. I mean fridge-cold. If it starts getting soft while you’re measuring things out, just pop the whole bowl of butter back in for five minutes!
- 1/2 cup all-purpose flour (for the topping)
- 1/2 cup rolled oats (don’t use instant! We need the texture)
- 1/2 cup packed light brown sugar
- 1/4 teaspoon ground cinnamon (yes, a touch more is never a bad idea)
- 1/4 teaspoon salt
- 1/2 cup cold unsalted butter, cut into small, small pieces
How to Make Homemade Rhubarb Crisp Step-by-Step
Okay, let’s get baking! This is the simplest part, but I want to make sure every single person who tries this rhubarb crisp gets that perfect result. We aren’t aiming for fussy; we are aiming for reliable comfort food. If you love how easy this process is, you might also enjoy my recipe for Moist Coffee Cake with Cinnamon Streusel—it uses similar topping magic!
Preparing the Filling and Pan for Your Rhubarb Crisp
First things first: get your oven humming! We need it at 375 degrees Fahrenheit. While it’s warming up, quickly grease that baking dish—a standard 9-inch pie dish is perfection. In one bowl, toss your chopped rhubarb with the granulated sugar, the little bit of flour, vanilla, and cinnamon meant for the filling. Don’t just stir, toss it gently so every piece of rhubarb gets coated. Once everything is glistening, pour that ruby-red mix into your prepared dish and spread it out nicely so it’s flat. That’s the base done!
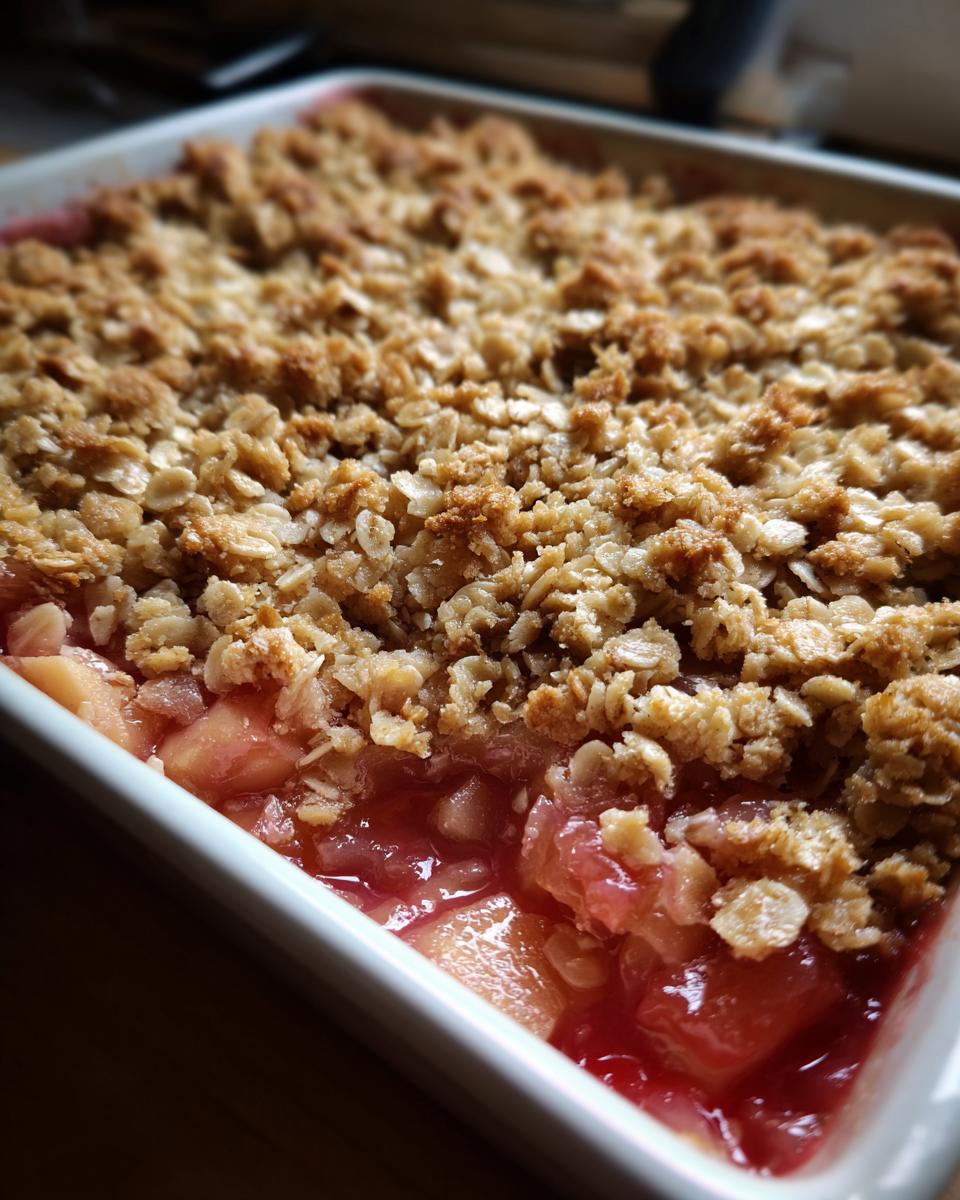
Creating the Perfect Buttery Oat Topping
Now for the best part: the buttery oat topping. Grab a new bowl and mix the topping flour, oats, brown sugar, that second dust of cinnamon, and salt. Remember what I said about the cold butter? Take those little pieces and add them in. You can use your fingertips; just rub the butter into the dry mix until it looks like coarse meal with some bigger, walnut-sized crumbs running through it. That variation in size is what gives you that amazing texture in the final rhubarb crisp.

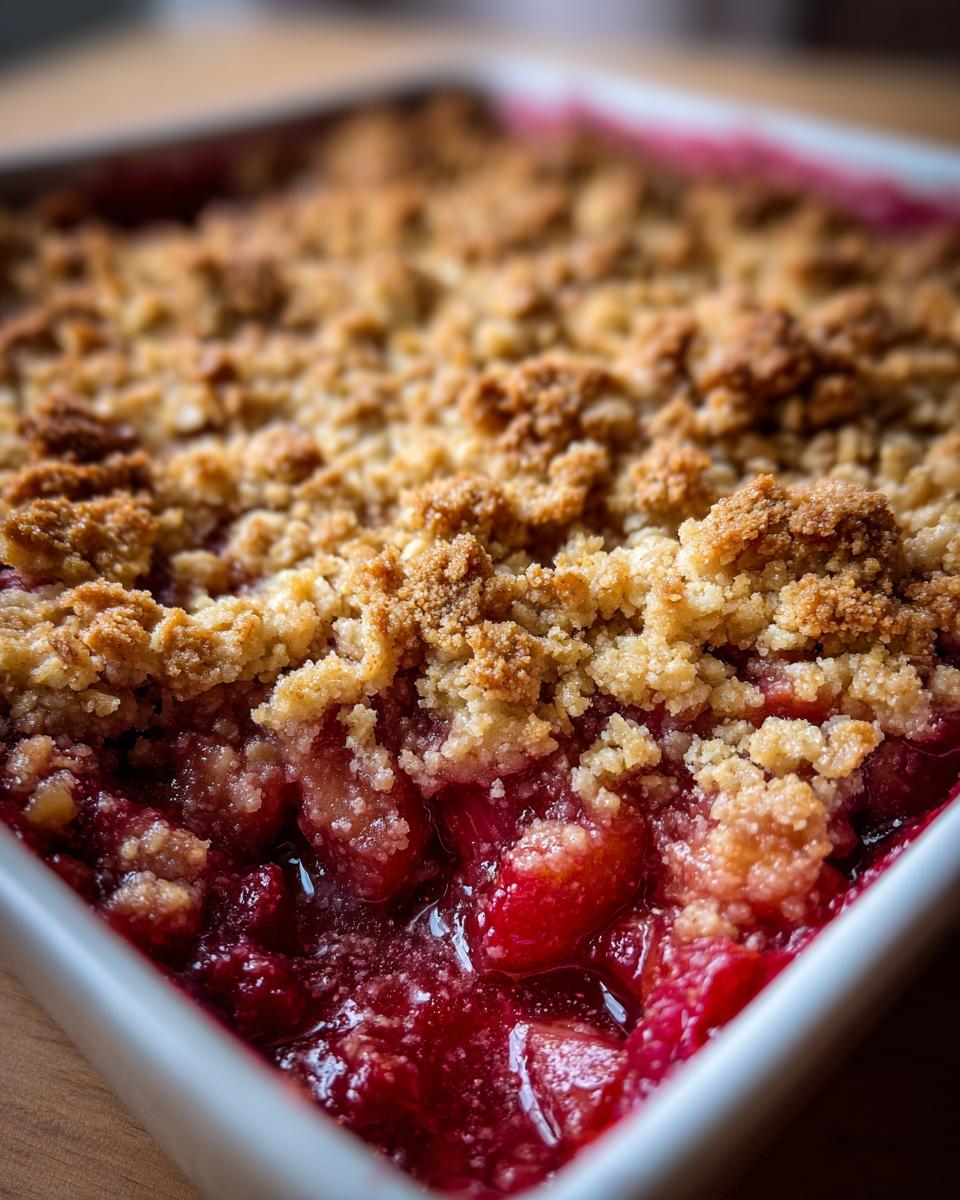
Baking and Serving the Classic Rhubarb Dessert
Take that glorious crumbly mix and sprinkle it evenly right over the rhubarb. Make sure you don’t leave any bare spots! Slide it into the oven and set a timer for 35 minutes. You’ll know it’s done when that topping is beautifully golden brown and, most importantly, you see the filling bubbling thick and heavy around the edges. When it comes out, you absolutely must force yourself to wait 15 minutes before digging in. This cooling time lets those juices set up. Then, serve it warm—and yes, a big scoop of dessert with vanilla ice cream is non-negotiable for the best experience with this classic rhubarb dessert!
Tips for Success Making Rhubarb Crisp
Even with an easy rhubarb crisp recipe like this one, sometimes you need a little extra know-how, especially since rhubarb likes to keep us guessing season to season. When I’m making my old fashioned rhubarb crisp, I always keep a few thoughts in mind to guarantee that perfect balance of texture and flavor every single time. These little tricks are what separate a good crisp from an amazing one!
Adjusting Sweetness in Your Rhubarb Crisp
The biggest variable with rhubarb is how tart it is that week! Some stalks are mild, and frankly, others could strip paint right off your counter, haha! If you’re dealing with super sharp rhubarb, you might want to up that granulated sugar in the filling slightly—maybe by another quarter cup. Now, I know you can’t safely taste raw flour and sugar mix, but if you’re brave and your rhubarb looks particularly pale or thin, you can test a tiny, cooked spoonful before baking, just to check the tang. It’s all about listening to the fruit.
Troubleshooting a Soggy Rhubarb Crisp Bottom
Ugh, the notorious soggy bottom! We absolutely cannot have that with this beautiful buttery oat topping. Here’s my trick for crisp bottoms: I always bake this on the lowest rack in my oven, or very close to the bottom element if you have that option. Since we aren’t using a double crust like an apple pie—which you can see my recipe for here—the direct heat helps bake the bottom quickly so the juices don’t have time to steam the crust before it sets. If you know your rhubarb is ridiculously watery, add an extra tablespoon of flour into that filling mixture just to be safe!
Variations for Your Rhubarb Crisp Recipe
While this classic rhubarb recipe is already fantastic on its own, sometimes you just want to mix things up a little bit, right? That’s what I love about fruit desserts—they are so flexible! We can easily turn this into a wonderful summer fruit crumble just by mixing textures. These variations are super simple and don’t require mastering any new techniques, keeping things firmly in the ‘easy’ category we love here at Mia’s Meals.
Adding Fruit to Your Rhubarb Crisp
If you are lucky enough to have other spring or summer fruit ready, go ahead and mix it in! My favorite is pairing rhubarb with strawberries—you can see my thoughts on strawberry rhubarb pie here, but it works brilliantly in a crisp too. If you add about two cups of strawberries, you might want to add an extra tablespoon of sugar since strawberries are sweeter than straight rhubarb. Apples are another winner; if you use firm apples, tear them up small so they cook down at the same rate as the rhubarb stalks.
Gluten-Free Rhubarb Crisp Adaptation
If you have friends or family who need gluten-free (GF), this is one of the easiest crisps to adapt! The filling is naturally GF since we only use a tiny bit of flour as a thickener. For the topping, just swap! Use a good quality 1-to-1 gluten-free baking blend instead of the all-purpose flour listed in the topping ingredients. It blends and crumbles perfectly, and honestly, you won’t notice the difference once it’s baked golden brown!
Storage and Freezer Friendly Rhubarb Dessert Tips
One of the best things about making a big, bubbly rhubarb crisp is knowing you don’t have to eat it all in one sitting! This kind of comfort food baking should be enjoyed over a few days, or even better, saved for a rushed weeknight when you need a guaranteed win. I know how busy life gets, so I always plan for leftovers.
For storing leftovers, just let the crisp cool down completely first—that’s important to avoid steam making things soggy! Once cooled, cover your baking dish tightly with plastic wrap or foil. It keeps beautifully on the counter at room temperature for about a day, but if it’s warm in your kitchen, pop it in the fridge. It’ll stay good tasting great for three or four days. When you want to eat those leftovers, I seriously recommend reheating it in a moderate oven (about 325°F) for about 10 minutes. That brings the topping right back to life; a microwave just makes it sad and soft.
If you’re ahead of the game or had an amazing harvest, this makes a fantastic freezer friendly rhubarb dessert. You have two options here. You can freeze it after it has baked and cooled completely, wrapping it super tightly. Or, my favorite trick for a truly quick rhubarb dessert later on: assemble the entire crisp—filling and topping—in an aluminum foil pan, cover it with two layers of plastic wrap and foil, and freeze it unbaked. When you’re ready, just bake it straight from frozen, adding maybe 10 to 15 minutes to the baking time until it’s golden and bubbly. Easy peasy!
Frequently Asked Questions About Making Rhubarb Crisp
I always get so many questions once people start seeing this beauty pop up online in the springtime! It’s natural; when you find The Best Crisp Recipe, you want to nail it. These are the things I hear most often when people are making their homemade rhubarb crisp for the first time. I hope this helps calm any last-minute baking jitters. If you’re looking for more fast recipes to simplify your week, check out some ideas on quick weeknight dinners!
Can I make this Rhubarb Crisp ahead of time?
Absolutely! As much as I love baking things right when I need them, sometimes you just need a plan, especially if you are hosting. For an amazing rhubarb crisp, I recommend preparing the filling and the topping completely separately. Store the mixed rhubarb in the baking dish covered in the fridge for up to 24 hours. Then, keep the buttery oat topping in a separate container, also chilled. When it’s time for dessert, assemble it (topping over the cool filling) and then bake it. You will need to add about 10 minutes to the baking time since the filling is cold.
What is the best way to serve this dessert with vanilla ice cream?
Oh, the classic pairing! Serving this rhubarb crisp warm with dessert with vanilla ice cream is the peak of comfort food, in my opinion. The key here is warm, not scorching hot! If it’s piping hot straight from the oven, the ice cream melts into soup instantly. Let the crisp cool for those crucial 15 to 20 minutes after it comes out. This allows the juices to thicken while still leaving the filling warm enough to contrast beautifully with the cold, creamy ice cream. The temperature difference is honestly half the fun!
Can I use frozen rhubarb in this recipe?
Yes, you certainly can. I rely on frozen rhubarb whenever the fresh stuff isn’t quite available, making this a year-round treat. The one thing you absolutely must remember, though, is *do not thaw it*! Just dump those frozen stalks right into your bowl, add the sugar and flour, and toss everything together. Because the frozen fruit releases a lot of water upfront, your quick rhubarb dessert might need a little extra baking time. Start checking at the 40-minute mark, but be prepared to let it bake for an extra 5 to 10 minutes until you see that glorious, thick bubbling.
Estimated Nutritional Data for This Rhubarb Crisp
I always feel a tiny bit awkward putting numbers next to something this wholesome, but I know some of you plan for nutrition, so I wanted to give you a good ballpark idea of what’s in this delicious rhubarb crisp. Please remember, this is an estimate based on the ingredient list we used above, dividing it up to serve 6 people. If you eat a giant slice (and trust me, I’ve been tempted!), the numbers will obviously jump quite a bit!
This homemade version, while involving butter and sugar, is still a wonderful way to enjoy seasonal fruit. Here’s a quick look at the main numbers for one serving slice:
- Calories: Around 350
- Fat: Roughly 16g (that’s where that buttery topping comes from, yum!)
- Carbohydrates: Approximately 50g
- Sugar: About 30g
We also get a nice boost of fiber, around 4 grams per slice, and about 5 grams of protein. It’s a perfect comfort food dessert baking treat, especially when you are serving it warm with that mandatory scoop of vanilla ice cream!
Share Your Best Crisp Recipe Experience
Well, that’s it! We’ve mixed the tart filling, we’ve built that glorious, buttery oat topping, and now your kitchen smells like pure springtime comfort. Making this rhubarb crisp is just the first step; the real fun is digging in and enjoying that sweet, crunchy, warm payoff. I truly hope this recipe simplifies your baking life and brings a little bit of that Midwestern kitchen warmth to your table.
I am always thrilled to hear how things turn out when you try my recipes! Did you stick strictly to the plan, or did you sneak in a little extra cinnamon? Did you try adding strawberries, making it that perfect summer fruit crumble I mentioned? Or maybe you served it with a huge scoop of ice cream—I hope so!
Please take a moment to rate this easy rhubarb crisp right below! Leaving a comment tells me what you loved and helps other home bakers find this reliable recipe. If you want to browse through more of my tried-and-true dishes that focus on simple, connected home cooking, you can see a whole list of delicious dessert recipes. And if you loved this, maybe check out this other fantastic take on a great rhubarb treat over at this link! Happy baking, friends!
PrintThe Ultimate Easy & Buttery Rhubarb Crisp with The Perfect Crumble Topping
Make this classic Rhubarb Crisp for a sweet and tart dessert with a buttery oat topping. This simple recipe delivers comfort food baking perfection, ready in under an hour.
- Prep Time: 15 min
- Cook Time: 40 min
- Total Time: 55 min
- Yield: 6 servings 1x
- Category: Dessert
- Method: Baking
- Cuisine: American
- Diet: Vegetarian
Ingredients
- 4 cups fresh rhubarb, chopped
- 1 cup granulated sugar (adjust to taste)
- 2 tablespoons all-purpose flour
- 1 teaspoon vanilla extract
- 1/4 teaspoon ground cinnamon
- 1/2 cup all-purpose flour (for topping)
- 1/2 cup rolled oats
- 1/2 cup packed light brown sugar (for topping)
- 1/4 teaspoon ground cinnamon (for topping)
- 1/4 teaspoon salt
- 1/2 cup cold unsalted butter, cut into small pieces
Instructions
- Preheat your oven to 375 degrees Fahrenheit. Lightly grease a 9-inch pie dish or an 8×8 inch baking pan.
- In a large bowl, combine the chopped rhubarb, granulated sugar, 2 tablespoons of flour, vanilla extract, and 1/4 teaspoon of cinnamon. Toss gently to coat the rhubarb evenly.
- Pour the rhubarb mixture into your prepared baking dish and spread it into an even layer.
- In a separate medium bowl, prepare the topping. Combine the 1/2 cup flour, rolled oats, brown sugar, 1/4 teaspoon cinnamon, and salt. Mix these dry ingredients together with a fork.
- Cut the cold butter pieces into the dry topping mixture using a pastry blender or your fingertips. Work the butter in until the mixture resembles coarse crumbs with some pea-sized pieces remaining. This creates the buttery oat topping texture.
- Sprinkle the topping evenly over the rhubarb filling in the baking dish.
- Bake for 35 to 45 minutes, or until the topping is golden brown and the rhubarb filling is bubbling thickly around the edges.
- Remove the crisp from the oven and let it cool on a wire rack for at least 15 minutes before serving.
- Serve your homemade rhubarb crisp warm, ideally with a scoop of vanilla ice cream.
Notes
- If you use frozen rhubarb, do not thaw it first. You may need to increase the baking time by 5 to 10 minutes.
- For a gluten-free rhubarb crisp, substitute the all-purpose flour in the topping with a 1-to-1 gluten-free baking blend.
- This dessert freezes well after baking; cool completely, cover tightly, and freeze for up to three months. Thaw in the refrigerator and reheat gently.
Nutrition
- Serving Size: 1 slice
- Calories: 350
- Sugar: 30g
- Sodium: 150mg
- Fat: 16g
- Saturated Fat: 9g
- Unsaturated Fat: 7g
- Trans Fat: 0g
- Carbohydrates: 50g
- Fiber: 4g
- Protein: 5g
- Cholesterol: 35mg