
Oh, the smell of Christmas baking taking me right back to my mother’s tiny Ohio kitchen! When the holiday lights went up, the first thing we pulled out were the big, blue mixing bowls destined for these gorgeous cookies. If you’ve ever been let down by dry, crumbly cookies that crack everywhere, trust me when I say this: you need my absolute best peanut butter blossom recipe. This isn’t just a sugar cookie with chocolate slapped on top; this is the secret to making the softest, chewiest batch that melts in your mouth, just like we made in the Midwest. These simple treats are the definition of connection—the perfect, easy dessert to bring everyone together. For more wonderful ideas, check out my collection of delicious dessert recipes. I guarantee you won’t need to look anywhere else for your go-to recipe!
- Why This Classic Peanut Butter Blossom Recipe Works Every Time
- Gathering Ingredients for Your Peanut Butter Blossom
- Step-by-Step Instructions for the Perfect Peanut Butter Blossom
- Making Peanut Butter Blossoms for the Holidays
- Storage and Keeping Your Peanut Butter Blossoms Fresh
- Variations on the Classic Peanut Butter Blossom
- Frequently Asked Questions About This Peanut Butter Blossom Recipe
- Estimated Nutritional Data for Your Homemade Peanut Butter Blossoms
- Share Your Classic Peanut Butter Cookies Creations
Why This Classic Peanut Butter Blossom Recipe Works Every Time
Lots of recipes promise greatness, but what makes this peanut butter blossom stand out? It’s about science, but made easy—I promise! My approach focuses on achieving that perfect texture that people rave about. You want that gentle peanut butter flavor that supports the chocolate, right? We use a lovely balance of granulated and brown sugar in our dough. That extra brown sugar is crucial; it keeps moisture locked in, guaranteeing that soft, melt-in-your-mouth result instead of a brittle cookie. You can see why this is often called the absolute best peanut butter blossom recipe out there!
These specific ratios are what prevent that sad, major cracking around the kiss—the kind that makes you think, “Oops, I baked it wrong!” It’s all about keeping the structure intact while ensuring supreme tenderness. For more foundational cookie tips, don’t forget to check out my notes on making a perfect butter cookie recipe.
Achieving Soft and Chewy Peanut Butter Cookies
The secret weapon for Soft and Chewy Peanut Butter Cookies is definitely that higher ratio of brown sugar to white. The molasses really helps keep things tender. But listen closely: you absolutely cannot overmix once the flour goes in! Mix only until those last white streaks disappear. Overmixing scares the moisture right out of the dough, leaving you with tough little hockey pucks instead of delightful kisses. Keep it gentle, keep it fast!
Gathering Ingredients for Your Peanut Butter Blossom
Okay, let’s talk about getting everything ready for your batch of Peanut Butter Blossoms. When you look at the ingredients list, stick to it closely, especially for this classic version. We need one full cup of good, unsalted butter—make sure it’s softened, please! It needs to be truly soft, not melted at all, otherwise your creaming step won’t work right. You also need that specific combination of creamy peanut butter, the right amount of granulated sugar, and one full cup of packed brown sugar. Don’t forget to have all 72 of your milk chocolate kisses unwrapped and sitting right next to your mixing station. Trust me, you do *not* want to be peeling foil with hot cookies waiting!
Ingredient Notes and Substitutions for the Peanut Butter Blossom Recipe
Every great Peanut Butter Blossom Recipe starts with the right foundation! While I always push for using regular all-purpose flour because that’s what gives us that perfect chew, I know we all have different dietary needs now. If you need a solution, substituting the AP flour with a high-quality, 1-to-1 gluten-free baking blend works surprisingly well here. Just make sure you measure that flour substitute very carefully. Also, stay away from using natural peanut butter; it separates too much and affects the final cookie structure we’re aiming for. Creamy peanut butter is non-negotiable for this traditional taste!
Step-by-Step Instructions for the Perfect Peanut Butter Blossom
Now for the fun part—making these gorgeous Peanut Butter Blossoms! Get your oven humming at 375 degrees Fahrenheit right away, and line those baking sheets with parchment paper; we don’t want any sticky situations! First, we treat the butter, the sugars, and the peanut butter like royalty—cream them until they are light and fluffy. Then, two eggs go in solo, one after the other, followed by that splash of vanilla. While that’s happening, quickly whisk your dry stuff: flour, baking soda, powder, and salt, in another bowl.
When combining the wet and dry, remember my rule: low speed and slow addition! You want just married, not stressed! Once they come together, grab that sugar dish you set aside for rolling. Scoop out balls about the size of a walnut, roll them completely in the extra sugar so they look snow-dusted, and space them well apart on the sheet. I always think of them standing at a respectable distance before they go into the oven.
If you’re looking for other rich, chocolatey treats, you might love my recipe for easy chocolate mousse recipe while these bake!
Baking Tips for the Best Peanut Butter Blossom Results
Oven temperature is everything here. You want 8 to 10 minutes, tops! Don’t wait for them to look fully golden brown—that means you’ve waited too long. They should look set around the edges, but frankly, the centers need to retain just a hint of softness. If you pull them out when they look *slightly* underdone, I promise you’ll end up with the softest cookies imaginable! This gets us the perfect chewy bite we’re aiming for. You can find more techniques similar to this on sites like Modern Honey.
The Crucial Chocolate Kiss Application for Your Peanut Butter Blossom
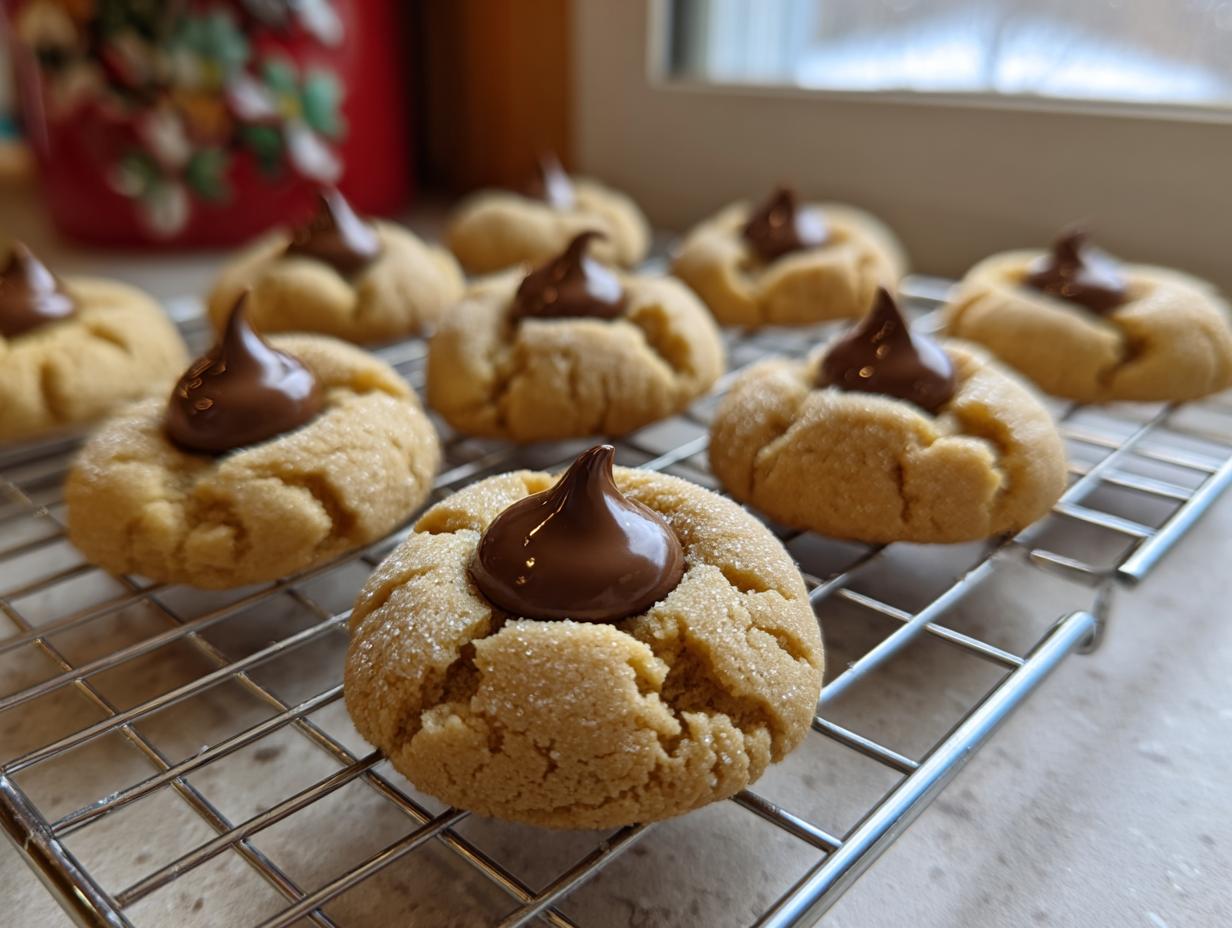
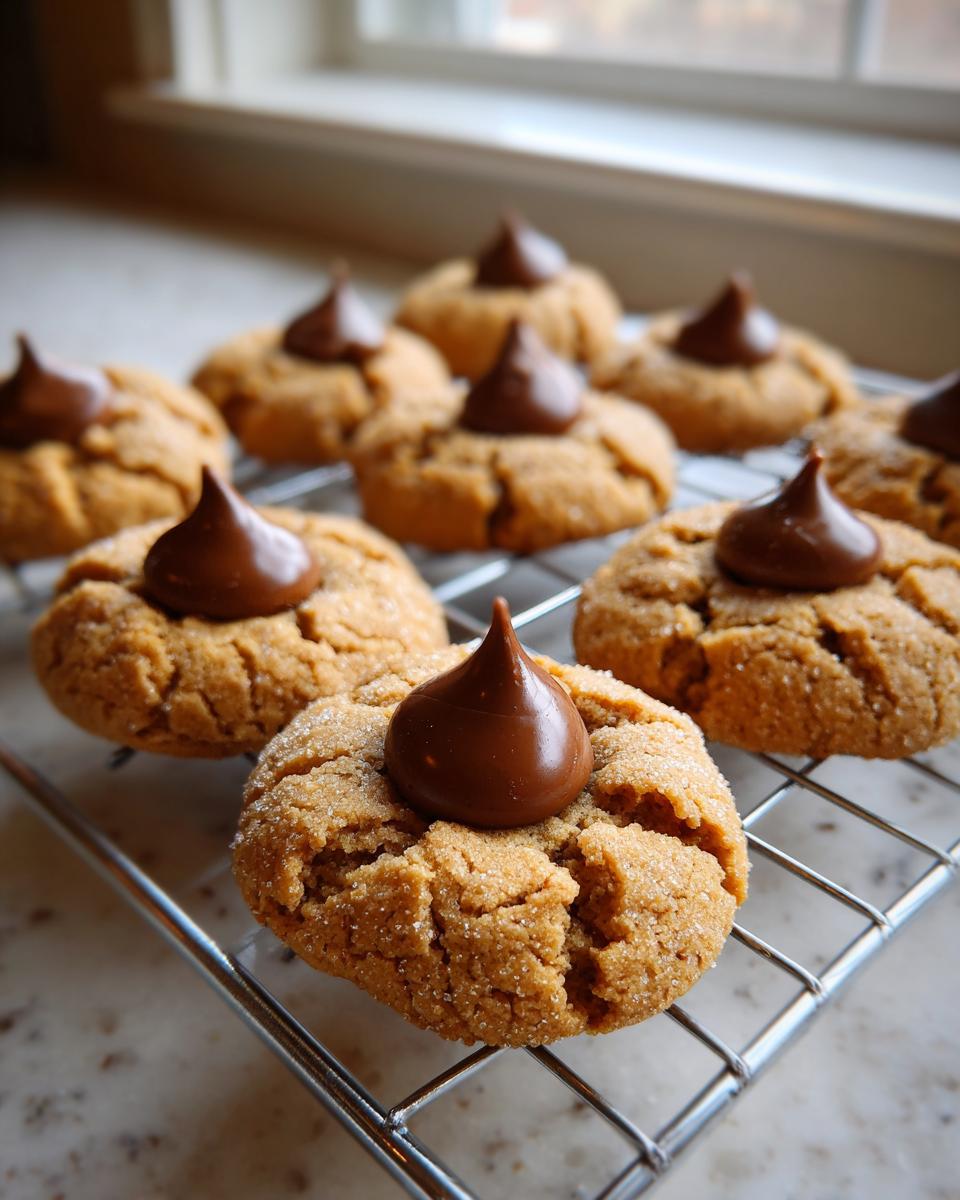
This is the part that seals the deal for a great peanut butter blossom. The second those warm cookies leave the oven, grab an unwrapped chocolate kiss and gently press it right down into the middle of each cookie. Don’t hold it for too long! The residual heat is enough to soften the bottom of the chocolate so it sinks slightly, creating those signature little cracks in the peanut butter dough around the base. Let them sit on that hot pan for about five minutes before you move them to a wire rack. That five minutes lets the chocolate firm up just enough so you can handle them!
Making Peanut Butter Blossoms for the Holidays
For me, there’s no scent that screams ‘home for the holidays’ louder than these cookies. We always grouped these beauties together with our sugar cookies and frosted shortbread to make one massive plate of Christmas Cookie Recipes. When I was little, Mom would let me do the Kiss pressing, but I had to wait until the cookies cooled *just* enough so I wouldn’t melt the chocolate all over my fingers! These aren’t just cookies; they are the epitome of Traditional Christmas Cookies.
I remember making a huge batch of these peanut butter blossoms one year when the snow was coming down hard, refusing to let my cousins visit. We ended up having a living room baking party instead of a traditional holiday dinner. We listened to records and made double batches just for fun! If you’re looking for another great festive treat, try my chocolate crinkle cookies recipe next.
It’s such a reliable cookie, too. You know they’ll look perfect on your holiday platter, even if you don’t have time for fussy piping or complex assembly. You can find some other wonderful holiday ideas over on Baking You Happier for inspiration!
Storage and Keeping Your Peanut Butter Blossoms Fresh
You’ve baked the perfect batch of soft, chewy cookies, so naturally, you want them to last! The good news is that because of that wonderful balance of peanut butter and sugar, these peanut butter blossoms stay wonderfully soft for days. I always cool mine completely on the rack, and then I store them in a simple cookie tin or an airtight container right on the counter. They usually stay perfectly tender for a full four or five days that way.
You really don’t need to refrigerate them, and honestly, the fridge can sometimes dry out the cookie part faster. If, by some miracle, you have leftovers after a week—which I never do!—you can freeze them airtight for up to three months. Just let them thaw on the counter for an hour or so before enjoying that melt-in-your-mouth perfection again!
Variations on the Classic Peanut Butter Blossom
While nothing beats the original milk chocolate kiss sinking into that warm dough, sometimes I like to mix things up a bit! You can absolutely get creative with your topping once you’ve mastered the **peanut butter blossom** underneath. If you’re feeling fancy, try pressing a dark chocolate kiss in there instead; the slight bitterness is heavenly against the sweet cookie. Or, if you want even more peanut butter power, a simple peanut butter chip pressed right in works like a charm!
You can even play with the butter base if you’re feeling adventurous, though I always recommend trying the classic first. For other great peanut-centric recipes, take a peek at my ideas for peanut butter balls (easy no-bake recipe). And if you want to see how other bakers switch things up, check out the awesome ideas shared by The Crispy Chef!
Frequently Asked Questions About This Peanut Butter Blossom Recipe
I get so many lovely emails asking for little tweaks to this recipe, which is just wonderful! It shows how much everyone wants to make this the absolute best batch for their families. Here are some of the things I hear most often about crafting the perfect peanut butter blossom.
Do I really have to roll the dough balls in extra sugar? Yes, you absolutely should! That outer sugar coating is what gives you that beautiful, slightly crisp shell that contrasts with the soft interior. It also helps keep the bottom from sticking to the pan, which is always nice. If you’re running low on time between baking and needing supper, you might want to look at my easy breakfast ideas—cookies aren’t the only thing I simplify!
Can I make a No Chill Cookie Recipe version of the peanut butter blossom?
Great news! This Peanut Butter Blossom Recipe is naturally a No Chill Cookie Recipe. Seriously! Because of the ratios we use for creaming the butter and sugars, the dough is fantastic right away. You mix it, roll it, sugar it, and bake it. No waiting required for soft, chewy perfection!
What is the best peanut butter to use for this peanut butter blossom?
For the best texture—that glorious ‘melt in your mouth’ quality—you must stick with creamy, conventional peanut butter. The kind that doesn’t require stirring! Natural peanut butter is too oily and often separates, which ruins the structure of these delicate cookies.
Estimated Nutritional Data for Your Homemade Peanut Butter Blossoms
When we’re focused on comfort food and classic tastes, nutrition isn’t the main event, but it’s good to have an idea, right? Please remember that this data is just an estimate based on the standard ingredients list we used, especially since the size of your cookies and the exact brand of chocolate kiss can change things!
- Serving Size: 1 cookie
- Calories: 180
- Total Fat: 10g
- Protein: 4g
- Carbohydrates: 21g
- Sugar: 15g
As you can see, they are a delicious treat, perfect for a holiday platter or when you just need something sweet after dinner. Enjoy them!
Share Your Classic Peanut Butter Cookies Creations
Now it’s your turn! I truly hope this recipe brings that same warmth to your home that it brings to mine. Once you’ve baked these peanut butter blossoms, please come back and leave me a star rating. Tell me how they turned out—did they stay soft? Did the kids devour them instantly? I love hearing your feedback on my Simple Dessert Ideas! If you snapped a picture of your tray, please share it with me by reaching out through my contact page. Happy baking, everyone!
PrintClassic Soft and Chewy Peanut Butter Blossoms
Make the best Peanut Butter Blossom Recipe, a soft and chewy classic cookie topped with a melted chocolate kiss. This simple dessert is perfect for holiday baking.
- Prep Time: 20 min
- Cook Time: 10 min
- Total Time: 30 min
- Yield: About 3 dozen cookies 1x
- Category: Dessert
- Method: Baking
- Cuisine: American
- Diet: Vegetarian
Ingredients
- 1 cup unsalted butter, softened
- 1 cup creamy peanut butter
- ¾ cup granulated sugar, plus extra for rolling
- ¾ cup packed brown sugar
- 2 large eggs
- 1 teaspoon vanilla extract
- 2 ¼ cups all-purpose flour
- 1 teaspoon baking soda
- ½ teaspoon baking powder
- ½ teaspoon salt
- About 72 milk chocolate kisses (unwrapped)
Instructions
- Preheat your oven to 375 degrees Fahrenheit. Line baking sheets with parchment paper.
- In a large bowl, cream together the softened butter, peanut butter, granulated sugar, and brown sugar until the mixture is light and fluffy.
- Beat in the eggs one at a time, then mix in the vanilla extract.
- In a separate medium bowl, whisk together the flour, baking soda, baking powder, and salt.
- Gradually add the dry ingredients to the wet ingredients, mixing on low speed until just combined. Do not overmix.
- Place about 2 tablespoons of extra granulated sugar into a shallow dish. Roll the dough into 1-inch balls. Roll each ball in the sugar to coat completely.
- Place the sugared dough balls about 2 inches apart on the prepared baking sheets.
- Bake for 8 to 10 minutes, or until the edges are set but the centers still look slightly soft.
- Immediately upon removing the cookies from the oven, gently press one chocolate kiss into the center of each warm cookie. The cookie will crack slightly around the base of the kiss.
- Let the cookies cool on the baking sheet for 5 minutes before transferring them to a wire rack to cool completely. The chocolate will set as they cool.
Notes
- For the softest, chewiest bite, do not overbake the cookies. They should look slightly underdone in the center when you remove them from the oven.
- Unwrap all your chocolate kisses before you start baking to make the final step quick.
- If you want a gluten free Peanut Butter Blossom Recipe, substitute the all-purpose flour with a 1-to-1 gluten-free baking blend.
Nutrition
- Serving Size: 1 cookie
- Calories: 180
- Sugar: 15
- Sodium: 110
- Fat: 10
- Saturated Fat: 4
- Unsaturated Fat: 6
- Trans Fat: 0
- Carbohydrates: 21
- Fiber: 1
- Protein: 4
- Cholesterol: 25