
Oh, friend, have you ever had that deep, powerful craving for something wonderfully cheesy that sticks to your ribs just right? Sometimes you just need a bite of pure, unadulterated comfort, and that’s exactly why I cherish this recipe so much. Forget fussy breads; today we are making what I call the Ultimate Authentic Pão de Queijo (Brazilian Cheese Bread). These little puffs deliver that perfect contrast: a shatteringly crisp exterior giving way to the most delightfully chewy and elastic center. The best part? Because we only use tapioca flour, keeping your kitchen happy and wholesome, they are naturally gluten free! This is the kind of simple snack that brings that cozy, connected feeling right back to your busy day. They are fantastic for a quick weekend treat or as part of your Brazilian breakfast ideas!
- Why This Authentic Brazilian Cheese Bread Recipe Works (Crispy Outside Chewy Inside Bread)
- Ingredients for the Best Pao de Queijo Recipe
- How to Make Brazilian Cheese Bread (Pao de Queijo Recipe)
- Tips for Success with Tapioca Flour Bread
- Serving Suggestions for Brazilian Snack Recipe
- Storage and Make-Ahead Tips for Brazilian Cheese Bread
- Frequently Asked Questions About Brazilian Cheese Bread
- Nutritional Estimates for Brazilian Cheese Bread
- Share Your Homemade Cheesy Bread Puffs
Why This Authentic Brazilian Cheese Bread Recipe Works (Crispy Outside Chewy Inside Bread)
So, why does this specific version of Pao de Queijo Recipe blow the others out of the water? Well, it all comes down to technique and ingredient confidence. When I first tried making these Easy Baked Cheese Bites, I was frustrated by flat, crumbly results. But once I understood what the tapioca starch needed, everything changed immediately. If you’re looking for the best Brazilian Snack Recipe, this is it!
Naturally Gluten Free Cheese Bread Advantage
First off, this is a win for everyone! Since we skip wheat flour completely, this is 100% naturally Gluten Free Cheese Bread. If you are looking for dependable, non-corn-based Party Appetizers Gluten Free options, look no further. It’s the tapioca that does all the heavy lifting here.
The Secret to Chewy Cheesy Bread Puffs
The absolute make-or-break moment for achieving those amazing Chewy Cheesy Bread Puffs is step two: scalding the flour. We pour the boiling liquid—the milk, oil, and salt—right over the Tapioca Flour Bread mix. This heat immediately starts to gelatinize the starch, which is what gives us that signature elastic, bouncy, almost mochi-like center when they bake up. Trust me, don’t skip heating that liquid!

Ingredients for the Best Pao de Queijo Recipe
Gathering your supplies is actually incredibly fast for this recipe—one of the reasons I love it for busy weeknights! Because we only use six core components, measuring everything out takes barely five minutes of your time. Remember, we need whole milk, oil, salt, the tapioca starch, eggs, and two kinds of cheese. Make sure that Parmesan is well-shredded so it melts into the dough nicely, and you’re set to go!
How to Make Brazilian Cheese Bread (Pao de Queijo Recipe)
I told you this was fast, right? Seriously, you can have these ready to bake in about 15 minutes! Because we start with that hot liquid hitting the flour, the process moves quickly, but you can’t rush safety or texture. Follow these steps exactly, and you’ll have those gorgeous, puffy, Authentic Brazilian Cheese Bread rolls you’re dreaming of. While these are perfect for a quick snack, make sure you preheat that oven first!
Preparing the Tapioca Flour Base
First things first, get your oven warmed up to 375°F (190°C). Get your muffin tin or baking sheet ready—I like using parchment paper for easy cleanup. Now for the crucial part: Take your milk, oil, and salt and heat it in a small pan until it just starts to bubble up around the edges—don’t let it boil over! Pour that hot liquid right over your tapioca flour in a big bowl. Stir this hard with a wooden spoon until it’s all mashed together into a sticky, ugly paste. Honestly, it looks weird, but don’t panic! Let that hang out for about ten minutes until it’s cool enough to handle safely.
Mixing and Shaping Your Brazilian Cheese Bread
Once that paste isn’t scorching hot, toss in your eggs, one at a time. Mix really well after each one. The dough will get sticky, which is totally normal for this kind of Pao de Queijo Recipe. Now, stir in all that glorious Parmesan and mozzarella. When it’s uniform, use little scoops—about a tablespoon and a half—and roll them into balls between your palms. If the dough sticks to you, just lightly oil your hands, but remember, these need space on the tray to puff out!
Baking for the Perfect Puffy Finish
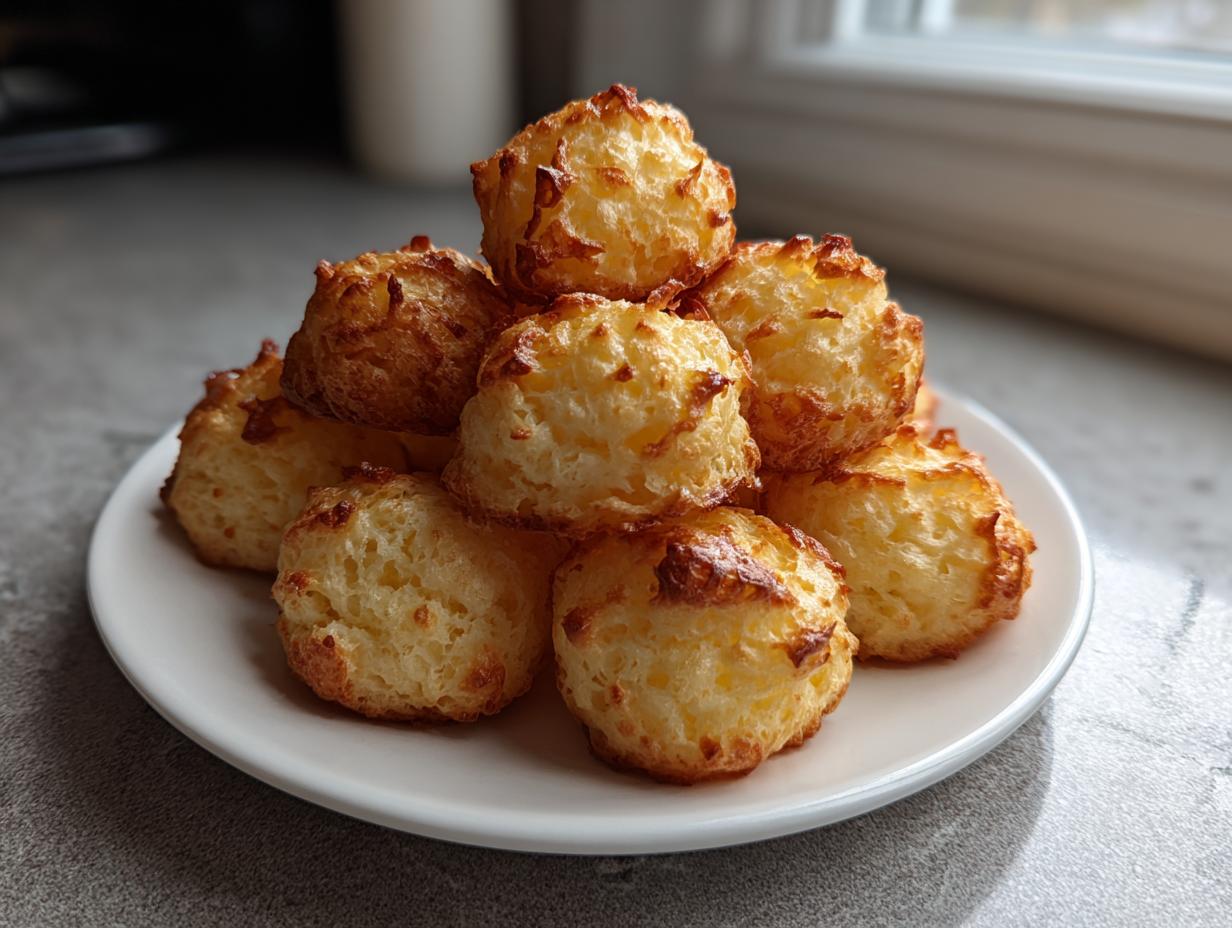
Pop those little guys in the hot oven for about 20 to 25 minutes. You’re looking for them to balloon up big and get golden brown on the outside. The crust needs to look firm when you gently tap it. When they come out, you have to try one immediately! Serving them warm is the secret to getting that perfect shock of crispy crust followed by the soft, elastic center. This is the best way to enjoy your Quick Homemade Cheese Bread!

Tips for Success with Tapioca Flour Bread
Okay, baking Brazilian Cheese Bread seems simple, but getting that *perfect* texture can take a little intuition. Since this relies on something as unique as tapioca flour, a few small adjustments make all the difference between a good puff and an amazing one. If you nail these details, you’ll be making the best Savory Brazilian Rolls your neighbors have ever tried!
Cheese Selection for Intense Flavor
Listen, you can use any hard cheese, but if you want that deep, savory punch, go for the good stuff. I find that using an aged Parmesan really bumps up the flavor profile. If you’re aiming for that rich, indulgent bite like the Brazilian Cheese Bread you get in fancy steakhouses, Parmesan is your best friend. Don’t be shy with it; the saltiness plays so well against the starch.
Troubleshooting Sticky Dough
I want to reassure you right now: the dough *will* be weirdly sticky after the eggs go in. It’s not going to look like regular bread dough, and that’s okay! That stickiness is your clue that the gelatinization process is working beautifully. If you feel like it’s completely unmanageable, just use a little bit of neutral oil on your hands before you start rolling. It’s the easiest trick for handling this wonderful, naturally gluten free bread dough. Don’t add more flour, or you’ll lose that essential chew!

Serving Suggestions for Brazilian Snack Recipe
The beauty of these Brazilian Cheese Bread puffs is that they fit seamlessly into any part of the day. Honestly, they are never unwelcome! I find that if I make a batch in the morning, half are gone before lunch, simply because they are so insanely good fresh out of the oven.
Pairing with Brazilian Breakfast Ideas
If you’re enjoying these as part of your Brazilian breakfast ideas, you absolutely must have a cup of dark, strong coffee nearby—it’s the traditional pairing! They are wonderful beside some fresh melon or berries, too. But don’t just save them for the morning; these make exceptional stand-ins for dinner rolls or the perfect little appetizer when friends drop by unexpectedly. They bake up so fast, you can whip up a batch instantly!
Storage and Make-Ahead Tips for Brazilian Cheese Bread
You know how sometimes you just want to make a huge batch of these Pao de Queijo Recipe bites so you can have them ready to go all week? Well, these freeze like a dream! This is one of those wonderfully practical tricks I leaned on when the kids were small and dinner prep felt like a marathon.
For making ahead, the trick is to freeze the dough balls *before* baking. After you scoop and roll them, place them snugly on a baking sheet lined with parchment—give them a little breathing room—and freeze them solid. Once they’re hard little pebbles, scoop them into a zip-top freezer bag. You can even check out great tips on freezer storage over at Brazilian Cheese Bread storage!
The best part? You don’t even have to thaw them! Just toss those frozen puffs straight into the preheated oven. Since they start cold, you just need to add about 5 to 10 extra minutes to the bake time. You get that same incredible, chewy, cheesy result without any extra prep fuss. It means you always have emergency party appetizers ready to go!

Frequently Asked Questions About Brazilian Cheese Bread
When I first started tackling this recipe, I had so many questions, especially about the flour and the final texture! It’s the little things that make the difference between a great experience and a mediocre one. Here are some of the most common things folks ask about making the best Pao de Queijo!
Can I substitute the tapioca flour in this Brazilian Cheese Bread recipe?
Oh, honey, please don’t try to swap it out! I’ve seen people suggest things like almond flour or wheat starch, but that just won’t work if you want that signature texture. The tapioca flour—sometimes called tapioca starch—is absolutely the non-negotiable ingredient here. It’s what gives the Brazilian Cheese Bread that unbelievable chewiness and keeps it perfectly gluten free. If you change it, it won’t be Pão de Queijo anymore!
What cheese is best for Authentic Brazilian Cheese Bread?
In Brazil, traditionally they use Minas cheese, which can be tricky to find here in the States. For a wonderful, accessible flavor, I highly recommend the blend we used in the recipe: Parmesan and Mozzarella. The Parmesan really beefs up the savory flavor, getting you close to that tasty Copycat Texas De Brazil Cheese Bread profile you might be looking for, while the mozzarella gives you that amazing melt and stretch.
How do I get my Pão de Queijo puffs extra crispy outside?
Crispiness comes down to oven heat and patience! Make sure your oven thermometer is correct, and that it is fully preheated to 375°F before anything goes in. My biggest tip for getting that golden, crackly exterior is this: Resist the urge to peek! Do not open the oven door at all for the first 15 minutes. That trapped steam is what causes them to puff up perfectly and set that crisp shell. If you let the heat out too soon, they might deflate!
If you have any other burning questions or want to chat about substitutions, feel free to reach out through my contact page. Happy baking!
Nutritional Estimates for Brazilian Cheese Bread
Since we are using simple ingredients, these little puffs are a wonderfully satisfying snack! Now, I always have to give a little disclaimer here: because every cheese blend and even the size of one person’s egg can shift things slightly, these numbers are just a good general guide. These estimates are based on one roll, yielding about 18 pieces total. You’re looking at around 110 calories, 7g of fat, 4g of protein, and 9g of carbs per irresistible bite!
Share Your Homemade Cheesy Bread Puffs
Well, friend, that’s it! You now have the absolute best recipe for Brazilian Cheese Bread—the chewy, crispy, shockingly easy version that proves good food doesn’t have to be complicated. I truly hope that when you bake these Chewy Cheesy Bread Puffs, they bring a little bit of that warm, connected feeling right into your own kitchen.
I live for hearing about your baking adventures! When you pull those golden puffs out of the oven, snap a quick picture and tag me! Seriously, I want to see how they turned out, especially that amazing texture we worked so hard for. Did they puff right up? Are they perfectly chewy in the middle? Let me know down in the comments how your first batch of Pao de Queijo Recipe went.
Leaving a rating helps keep these wonderful, dependable recipes flowing for everyone else looking for simple, delicious food. It’s my whole mission here at Mia’s Meals to help you build those happy home moments, and sharing your success is the best way you can help me do that. Thanks so much for baking with me today!
If you want to learn more about simplifying your kitchen adventures, check out my About Page. Happy eating!
PrintThe Ultimate Authentic Pão de Queijo (Brazilian Cheese Bread): Chewy, Crispy, and Naturally Gluten-Free

You can make authentic Pão de Queijo, the famous Brazilian cheese bread, right in your home kitchen. This recipe delivers the signature texture: a shatteringly crisp exterior and a wonderfully chewy, cheesy interior. Because it uses tapioca flour, this snack is naturally gluten free.
- Prep Time: 15 min
- Cook Time: 25 min
- Total Time: 40 min
- Yield: About 18 rolls 1x
- Category: Appetizer
- Method: Baking
- Cuisine: Brazilian
- Diet: Gluten Free
Ingredients
- 1 cup whole milk
- 1/2 cup vegetable oil
- 1 teaspoon salt
- 2 cups tapioca flour (also called tapioca starch)
- 2 large eggs
- 1 cup shredded Parmesan cheese
- 1/2 cup shredded mozzarella cheese
Instructions
- Preheat your oven to 375°F (190°C). Lightly grease a standard 12-cup muffin tin or line a baking sheet with parchment paper.
- Combine the milk, vegetable oil, and salt in a small saucepan. Heat this mixture over medium heat until it just begins to boil. Remove from the heat immediately.
- Place the tapioca flour in a large mixing bowl. Pour the hot milk mixture over the flour. Stir vigorously with a wooden spoon until the mixture is well combined and forms a thick, sticky paste. Let this cool for about 10 minutes.
- Add the eggs to the cooled tapioca mixture one at a time, mixing well after each addition until fully incorporated. The dough will look sticky.
- Stir in the Parmesan cheese and mozzarella cheese until the dough is uniform and very sticky.
- Using lightly oiled hands or two spoons, scoop portions of the dough (about 1.5 tablespoons each) and roll them into small balls, roughly 1.5 inches in diameter. Place the balls onto your prepared baking sheet or into the muffin tin cups, leaving about 1 inch of space between them.
- Bake for 20 to 25 minutes, or until the cheese bread puffs up, turns golden brown, and the outside feels firm.
- Serve warm immediately for the best crispy outside and chewy inside texture.
Notes
- For the best texture, use high-quality, aged Parmesan cheese for flavor.
- If you prefer a copycat Texas de Brazil Cheese Bread flavor, increase the Parmesan slightly.
- This recipe is naturally gluten free, making it a great option for gluten free bread seekers.
- You can freeze the unbaked dough balls on a tray, then transfer them to a freezer bag. Bake directly from frozen, adding 5 to 10 minutes to the bake time.
Nutrition
- Serving Size: 1 roll
- Calories: 110
- Sugar: 0.5
- Sodium: 150
- Fat: 7
- Saturated Fat: 3
- Unsaturated Fat: 4
- Trans Fat: 0
- Carbohydrates: 9
- Fiber: 0.2
- Protein: 4
- Cholesterol: 35