
If you’re like me, you know the disappointment of tearing open a bag of store-bought English muffins only to find pale discs that taste suspiciously like cardboard. That just isn’t right for a proper breakfast! That’s partly why I developed what I truly believe is The Best Classic Homemade English Muffins with Nooks and Crannies. Here at Mia’s Meals, my philosophy is all about simplifying those wonderful, nostalgic comfort foods for our busy modern lives. These muffins are proof that you can achieve that perfect bakery style right on your stovetop without a ton of fuss. Get ready for a truly superior breakfast baking experience!
- Why This English Muffin Recipe Beats Store-Bought
- Gathering Ingredients for Perfect Homemade English Muffins
- Step-by-Step Instructions for the Best English Muffin Recipe
- Tips for Perfect English Muffins Every Time
- Storing and Reheating Your Homemade English Muffins
- Serving Suggestions for Classic English Muffins
- Frequently Asked Questions About Making English Muffins
- Estimated Nutrition for The Best English Muffin Recipe
- Share Your Homemade English Muffins
Why This English Muffin Recipe Beats Store-Bought
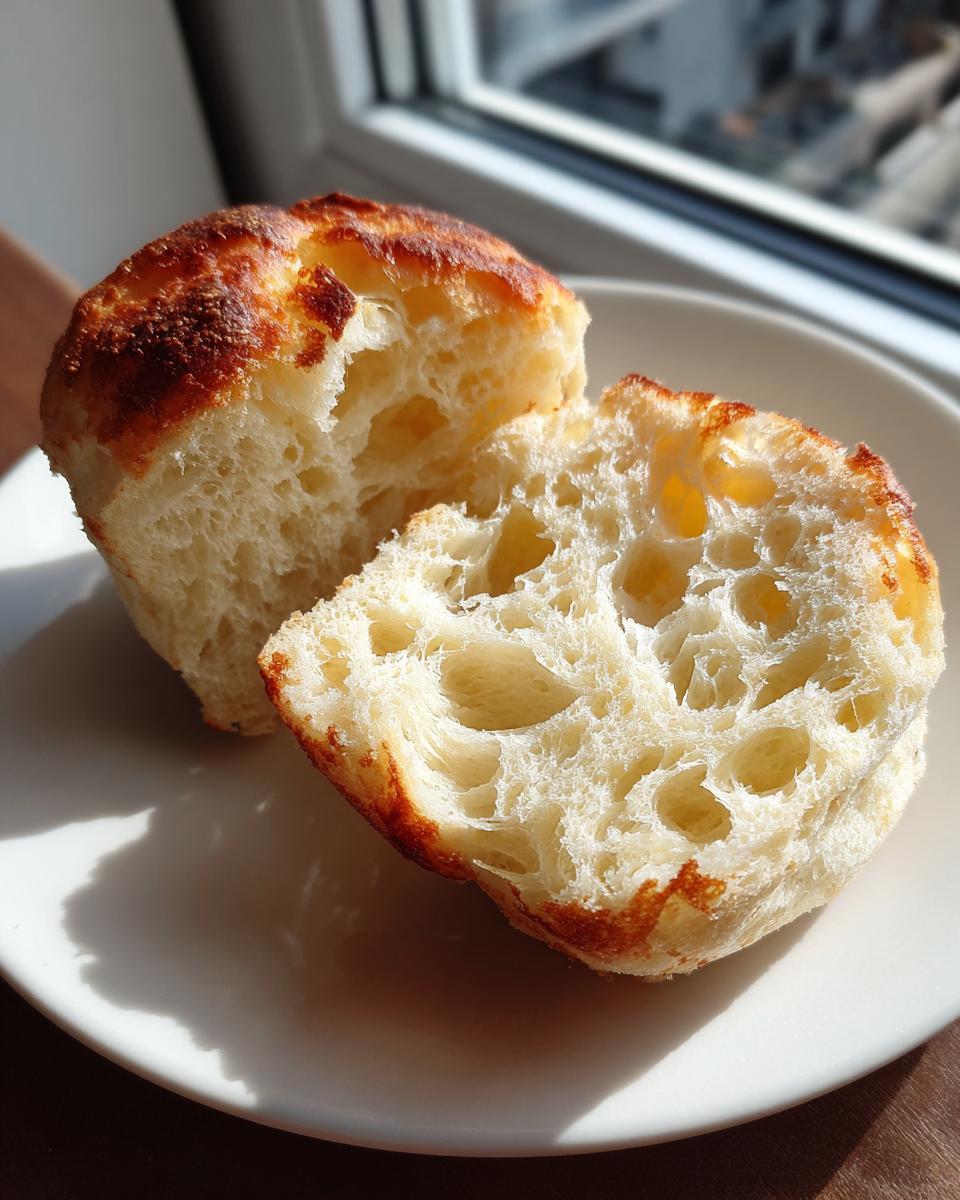
Honestly, the store-bought versions just can’t compete once you taste a genuine, homemade English muffin. We are aiming for something far beyond just bread here; we want **fluffy English muffins** that feel substantial yet yield perfectly when you squeeze them. These are truly **bakery style muffins at home**! The difference is all in the structural integrity we build into the dough and, crucially, how we cook them. You end up with a beautiful, soft interior that soaks up butter better than anything plastic-wrapped can. If you love perfecting dough processes, you’ll also enjoy my ideas over on my puff pastry apple strudel recipe for reference!
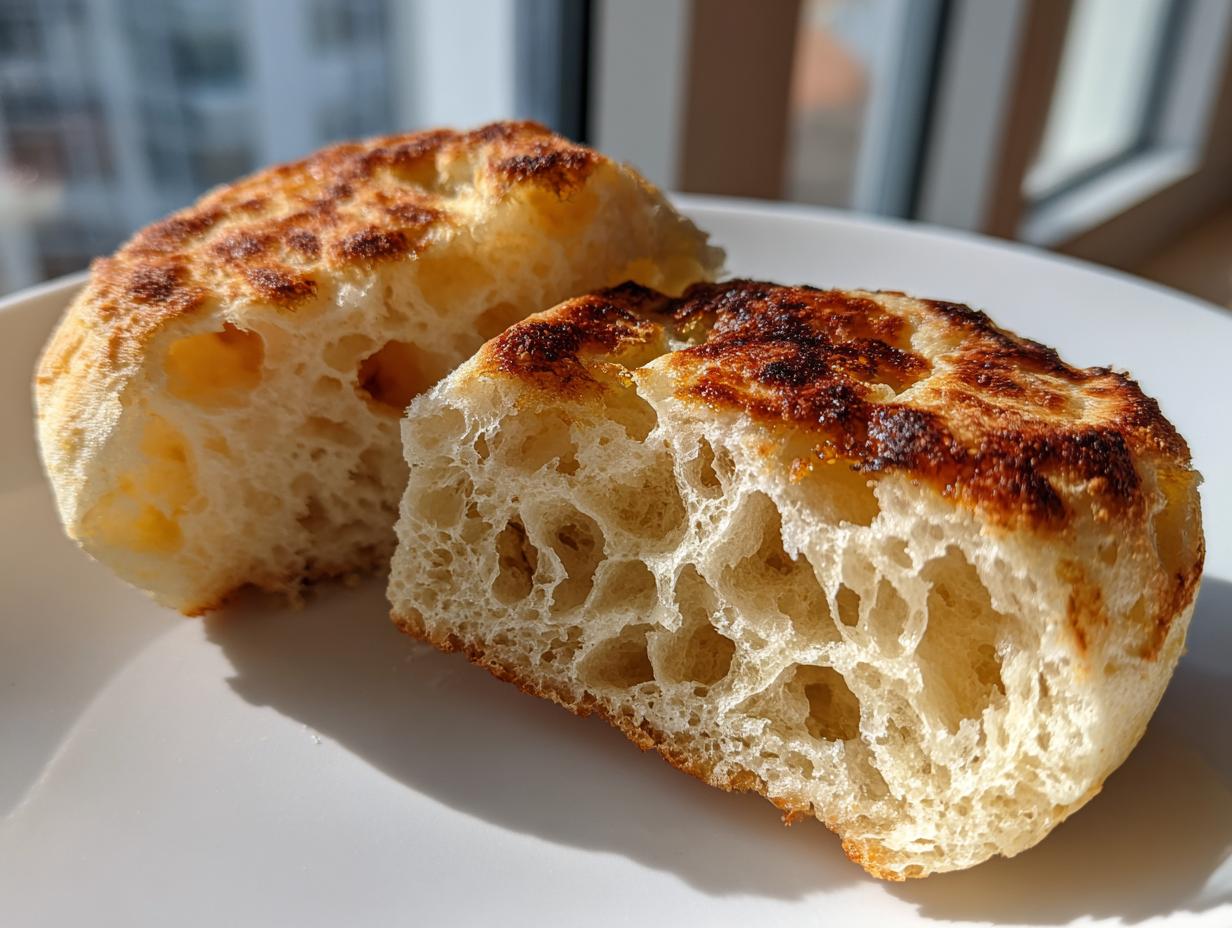
Mastering the English Muffin Nooks and Crannies
This magical network of holes—the famous nooks and crannies—is what makes or breaks an English muffin. We avoid over-kneading the dough, which keeps the gluten relaxed. Then, the key is that slow, gentle cooking process right on the griddle instead of baking them hard in the oven. This slow heat allows the moisture inside to turn to steam, creating those little pockets of air that stay open when you split them later.
Gathering Ingredients for Perfect Homemade English Muffins
When we talk about making the **best english muffins**, we need to respect the ingredients a little bit more than we do for a standard loaf of bread. It’s these few items that create that signature chew and softness. You’ll need milk, dry yeast, sugar, all-purpose flour—and I mean three full cups, plus more for dusting, trust me! We also use a quarter cup of perfectly melted butter for richness. Pay close attention to the milk temperature; getting that right is non-negotiable for successful yeast action. If you are used to my less fussy recipes, like my homemade cream of chicken soup, know that this dough definitely requires a bit more precision!
Ingredient Notes and Substitutions for English Muffins
That dusting agent is important; I listed cornmeal or semolina. Cornmeal gives you that classic slightly gritty, golden base, but semolina flour acts almost like a built-in non-stick layer, giving a slightly finer texture. Now, about that milk: make sure it’s warm, around 105 to 115°F. If it’s too cold, the yeast just naps. If it’s too hot—say, over 130°F—you’ll accidentally kill it. We want happy, bubbly yeast for that rise!
Step-by-Step Instructions for the Best English Muffin Recipe
Okay, now for the fun part! Making homemade English muffins is really just about patience and low, slow heat. We aren’t rushing this bread; we want it to develop character. The timings I’ve given you are just guidelines, so always work with what your dough is telling you, not just the clock. Follow these steps closely, and you’ll see why this **English muffin recipe** gives you that incredible texture you’re used to finding in a bakery. If you are loving this, you can check out how I simplify loaves in my classic homemade crusty French bread recipe, too!
Activating Yeast and Mixing the English Muffin Dough
First, we wake up the yeast! Mix your warm milk, the yeast, and the sugar right in your big bowl. You must let this sit for about 5 to 10 minutes until it gets foamy on top. If it’s foamy, your yeast is alive and ready to work its magic. Once it’s bubbly, stir in that melted butter. That little bit of fat is crucial for softness!
Kneading and First Rise for Fluffy English Muffins
Time to bring in the dry stuff—flour and salt whisked together first. Add the flour mix slowly to the wet stuff until you have a shaggy mess. Then, turn it onto your counter and knead it for a solid 5 to 7 minutes. You’re aiming for smooth and elastic, but honestly, don’t panic if it feels a tiny bit soft. Pop that dough into an oiled bowl, cover it tightly, and let it chill and rise in a warm spot for a good hour to an hour and a half until it’s doubled up.
Shaping and Cooking Stovetop English Muffins
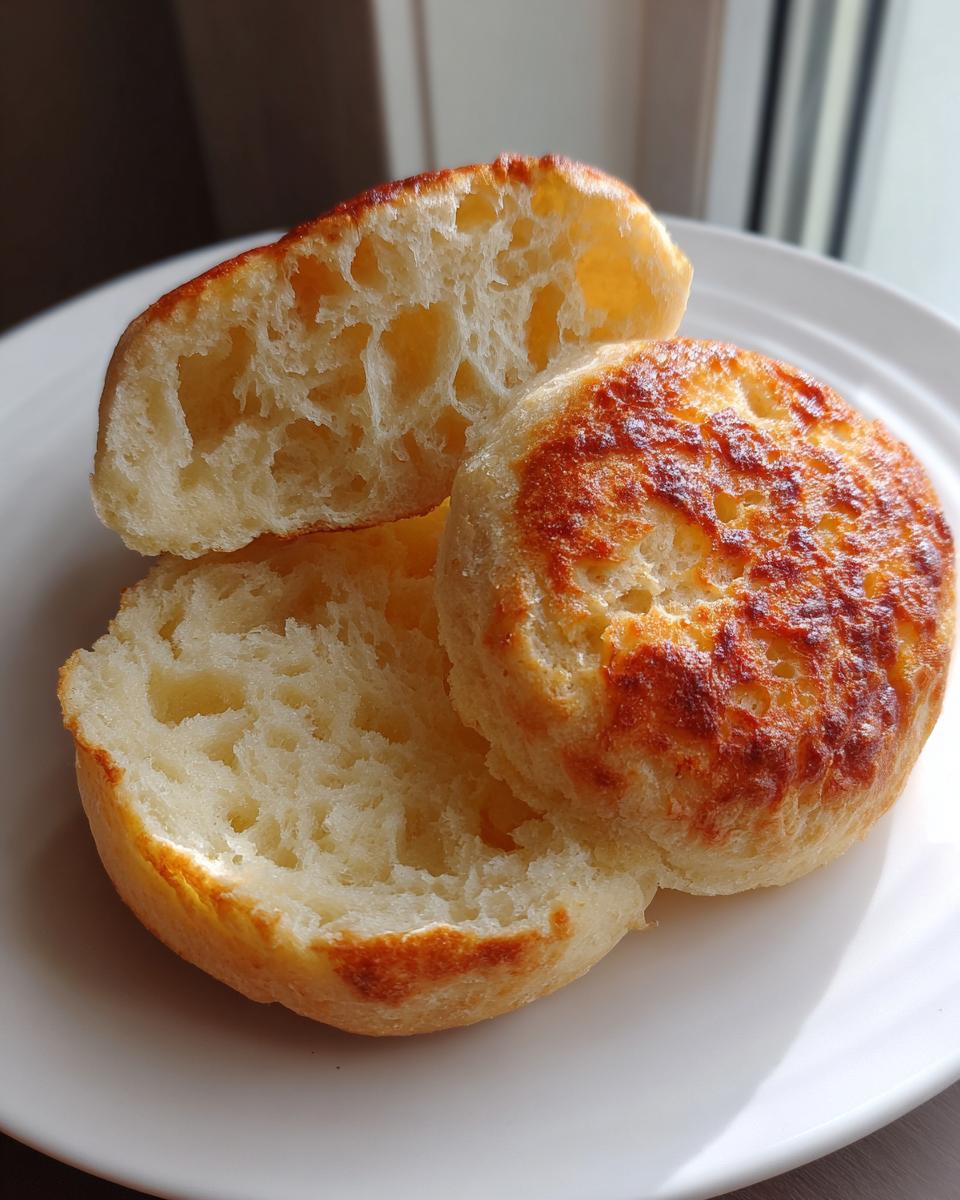
Once it’s puffed up, gently punch it down. Generously dust your counter with cornmeal or semolina—don’t skimp here! Pat or carefully roll the dough out until it’s about 3/4 of an inch thick. Use your 3-inch cutter to stamp out the rounds and place them on a heavily dusted baking sheet for their final 30-minute rest. Now, this is key for those **stovetop English muffins**: heat your griddle over medium-low heat. If it’s too hot, they’ll scorch before the inside cooks. Cook them for 8 to 10 minutes a side until golden brown. I mean it: whatever you do, please, please *do not* press them down with your spatula—that’s how you kill the air pockets!
Tips for Perfect English Muffins Every Time
When I first started experimenting with these fantastic **easy bread recipes**, I ended up with some very sad, flat discs that looked more like pancakes than English muffins. The biggest lesson I learned, and what I want you to remember, is temperature control on the griddle. Medium-low is your friend, always! If the surface is too hot, you get a dark brown crust while the inside is still doughy—a total texture fail.
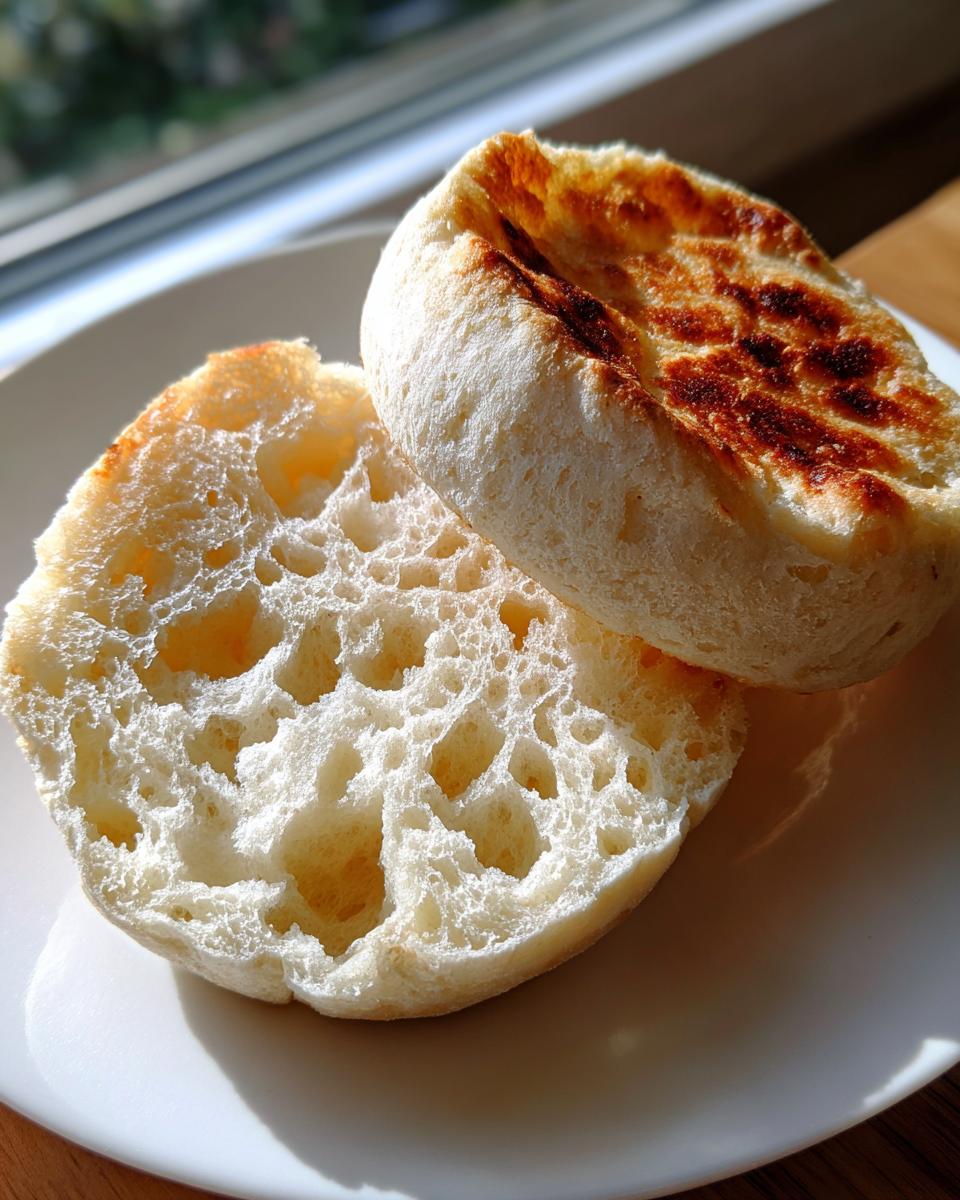
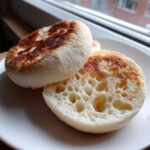
My second pro tip is absolutely about the splitting process. Once they cool completely, you must grab a fork, not a knife, to separate the halves. A knife crushes those delicate air channels we worked so hard to create. Using a fork pulls them apart gently, uncovering all those amazing **English muffin nooks and crannies** you see in the pictures. For more reliable bread results, check out my apple strudel guide; it shares similar patience tips!
Finally, I learned that sometimes you just need to trust the process and let them rest during that second rise. Don’t rush it because you’re hungry! The final 30-minute rest on the cornmeal dusting before they hit the heat is non-negotiable for that final lift. If you follow my advice and still feel like you could use some extra pointer from other bakers, I love seeing what other folks are succeeding with, too!
Storing and Reheating Your Homemade English Muffins
The best part about making a big batch of these **homemade English muffins** is knowing they are ready for a **make ahead breakfast** all week long! Once they cool completely on that wire rack—and I mean completely, or you’ll get condensation—store them in a simple airtight container on the counter for about three to four days. They stay wonderfully fresh.
If you make more than you can eat quickly, they freeze like a dream. Just stack them up, wrap them tightly in plastic wrap, then slide them into a heavy-duty freezer bag. They last up to three months this way! Here’s a great tip from my freezer stash: you don’t even need to thaw them. Just pop a frozen muffin right into the toaster or under the broiler. They come out perfectly warm and ready for butter. I walk through all my best make-ahead strategies over on my make ahead breakfast option guide!
Serving Suggestions for Classic English Muffins
Now that you have perfected those amazing **homemade English muffins**, the real fun begins: eating them! Honestly, the simplest way is often the best. I love splitting a freshly toasted half and letting butter melt right into those deep nooks and crannies. A beautiful, tangy homemade jam, like the blackberry kind my mother used to make, melts perfectly over the top.

But come on, these are made for towering breakfast sandwiches! Think melted cheddar, a fried egg, and maybe some crispy bacon or sausage. They hold up great, which is why this recipe is featured prominently in my easy breakfast ideas roundup. They are also fantastic when cut into halves and used as the base for miniature Eggs Benedict on a fun brunch board. You can even toast them and serve them alongside a big platter, as suggested by my friends over at Ovenly Magic!
Frequently Asked Questions About Making English Muffins
I get so many notes asking about tweaks or troubleshooting, which is wonderful because it means you’re actually baking! Here are a few things I hear most often about this **English muffin recipe** when people are trying to get that perfect texture.
Can I use bread flour instead of all-purpose flour in this English Muffin Recipe?
You certainly can, but I need to give you a little heads-up. All-purpose flour is my go-to because it creates a more tender, slightly softer bite overall. Bread flour has more protein, and while that’s great for making chewy artisan loaves, it can end up making your **fluffy English muffins** a bit too tough or chewy. Bread flour can definitely work if you kneaded it super gently, but I stick to AP flour for that classic, light interior.
Why are my homemade English Muffins not getting nooks and crannies?
Oh, the dreaded flat disc! This usually happens for one of three sneaky reasons. Don’t worry, we can easily fix this next time! Here are the main culprits:
- You pressed down on them with your spatula while they were cooking on the griddle. Never, ever press them! Let the heat do the work!
- You might have cut them open with a knife instead of splitting them gently with a fork. The fork marks create the natural pathways for the air pockets to open up when toasted.
- The dough didn’t rest long enough during that second proofing period (Step 10 in the instructions). That second rest builds in that final lift needed before chilling.
For more great troubleshooting advice regarding textures, take a peek at what my friends at Cooklyra suggest for making sure your texture is spot-on!
If you’re looking for faster baking in general, I have some great tips for quick weeknight dinners, but when it comes to bread, slow and steady really wins the race for that signature texture!
Estimated Nutrition for The Best English Muffin Recipe
It’s important to know what you’re eating, especially when you’re making things from scratch! Based on my best estimates, this recipe yields about 180 calories per muffin before you add any butter or jam. That sounds pretty reasonable for a hearty from scratch breakfast, right?
Here is the breakdown per one muffin, but remember these numbers can change depending on the exact brands of flour and milk you use:
- Calories: 180
- Fat: 4g
- Carbohydrates: 31g
- Protein: 6g
- Sugar: 2g
- Sodium: 280mg
I always tell people that making this recipe is more about the joy of baking than counting macros, but it’s nice to know these **homemade English muffins** are delicious *and* fit nicely into a balanced morning routine!
Share Your Homemade English Muffins
I truly hope your first batch of these homemade English muffins turns out absolutely perfect. If they did, please come back and give this recipe a big 5-star rating! I absolutely love seeing your creations on social media—tag me so I can admire your wonderful nooks and crannies. I love hearing how you’re using them, whether they’re going onto your next breakfast board or just smothered in butter. Happy baking!
PrintThe Best Classic Homemade English Muffins with Nooks and Crannies
Make bakery-style English muffins at home that are soft, fluffy, and loaded with those signature nooks and crannies. This reliable recipe uses a stovetop finish for a perfect texture every time.
- Prep Time: 25 min
- Cook Time: 25 min
- Total Time: 145 min
- Yield: 10 servings 1x
- Category: Breakfast
- Method: Griddle Cooking
- Cuisine: American
- Diet: Vegetarian
Ingredients
- 1 cup warm milk (about 105-115°F)
- 2 1/4 teaspoons active dry yeast
- 1 tablespoon granulated sugar
- 3 cups all-purpose flour, plus more for dusting
- 1 teaspoon salt
- 1/4 cup unsalted butter, melted
- Cornmeal or semolina, for dusting
Instructions
- Combine the warm milk, yeast, and sugar in a large bowl. Let this stand for 5 to 10 minutes until foamy. This confirms your yeast is active.
- Stir the melted butter into the yeast mixture.
- In a separate bowl, whisk together the flour and salt.
- Gradually add the dry ingredients to the wet ingredients, mixing until a shaggy dough forms.
- Turn the dough out onto a lightly floured surface. Knead for about 5 to 7 minutes until the dough is smooth and elastic. It will remain slightly soft.
- Place the dough in a lightly oiled bowl, turning to coat. Cover the bowl with plastic wrap or a clean towel. Let the dough rise in a warm place for 1 to 1.5 hours, or until doubled in size.
- Gently punch down the risen dough. Turn it out onto a surface dusted generously with cornmeal or semolina.
- Pat or lightly roll the dough out to about 3/4 inch thickness. Do not overwork the dough.
- Use a 3-inch round cutter to cut out the English muffins. Place the cut rounds onto a baking sheet heavily dusted with cornmeal.
- Cover the cut muffins loosely and let them rest for a second rise for 30 minutes.
- Heat a large, dry griddle or cast-iron skillet over medium-low heat. The temperature is important; too high and they will burn before cooking through.
- Carefully place the muffins onto the hot griddle, leaving space between them. Cook for 8 to 10 minutes per side until golden brown. Do not press them down with a spatula.
- The muffins should be cooked through but still pale on the sides. Remove them from the griddle and let them cool completely on a wire rack.
- To serve, split the cooled muffins using a fork, not a knife, to maximize the nooks and crannies. Toast them until golden brown.
Notes
- For the best nooks and crannies, avoid pressing the dough down too much after the first rise, and use a fork to split them open before toasting.
- You can substitute semolina flour for cornmeal for a slightly different texture on the exterior.
- These freeze well. Cool completely, place in an airtight bag, and freeze for up to three months. Toast directly from frozen.
Nutrition
- Serving Size: 1 muffin
- Calories: 180
- Sugar: 2
- Sodium: 280
- Fat: 4
- Saturated Fat: 2
- Unsaturated Fat: 2
- Trans Fat: 0
- Carbohydrates: 31
- Fiber: 1
- Protein: 6
- Cholesterol: 15