
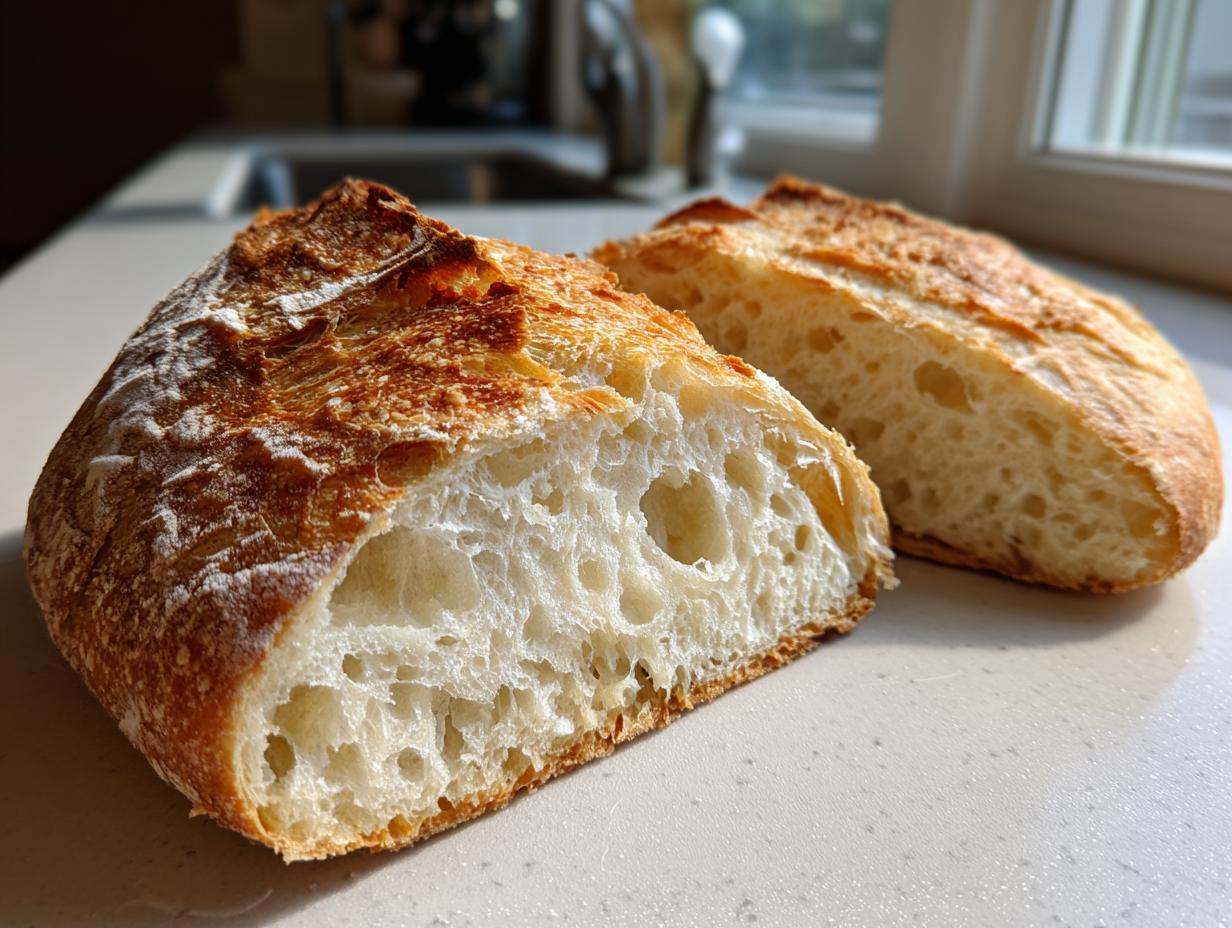
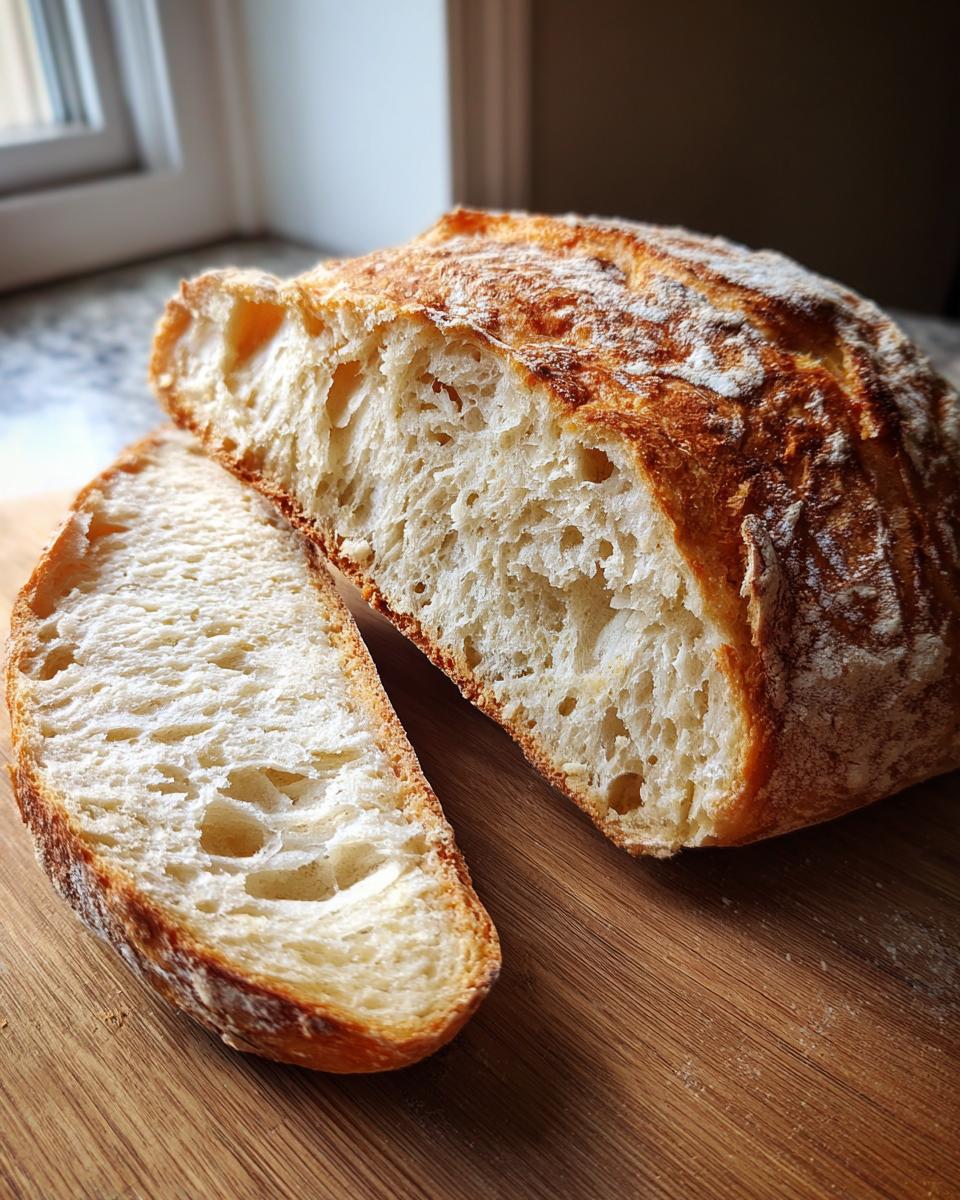
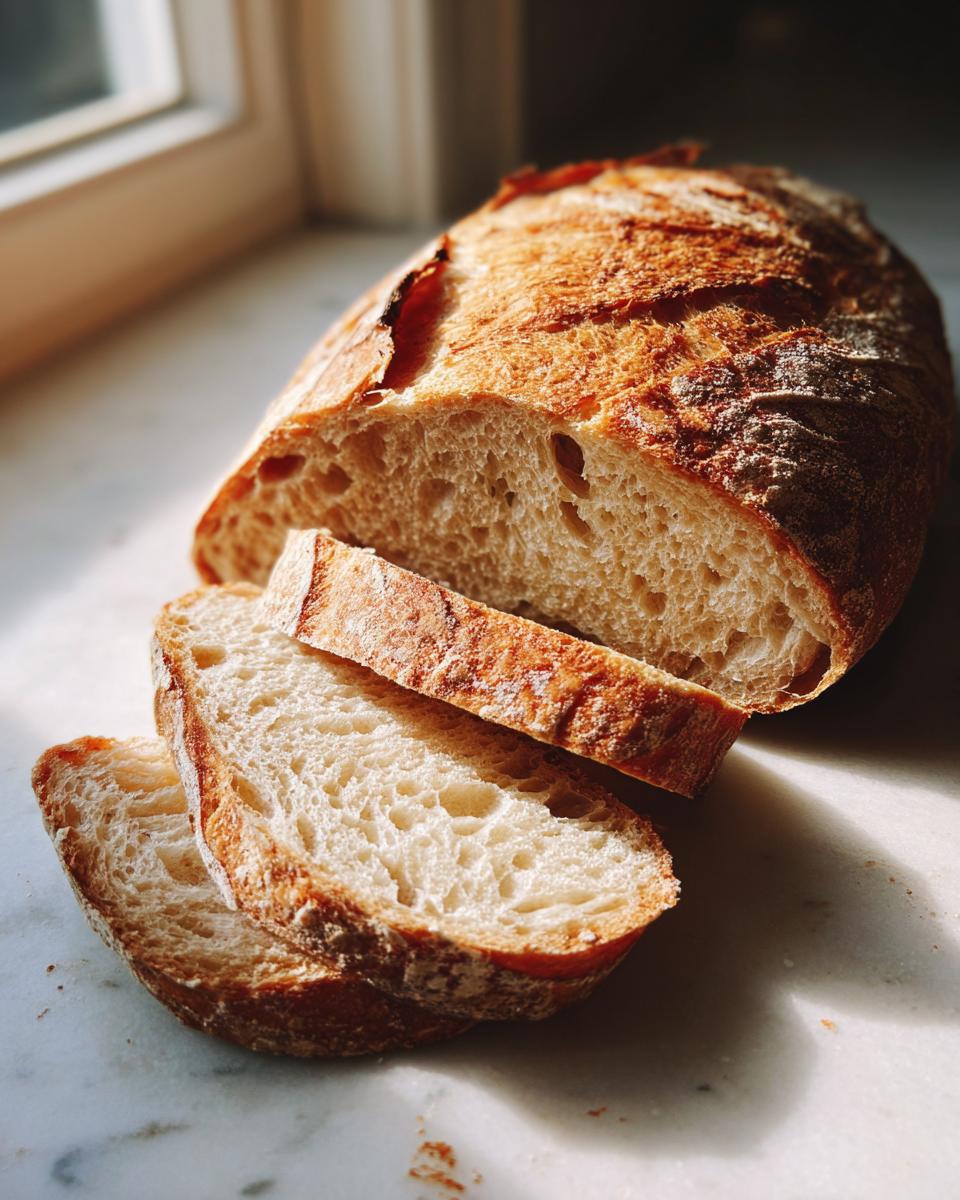
Oh, that smell! There is truly nothing like the aroma of fresh french bread baking right in your own kitchen. It just takes me right back to simpler times, that feeling of warmth and connection I always strive for when I cook. Forget those sad, plastic-wrapped loaves from the grocery store! My heart when I developed this classic recipe was to give you that authentic, bakery-style loaf, meaning something beautifully crusty on the outside and wonderfully airy and soft inside. This isn’t just bread; it’s the centerpiece of a happy home meal. Trust me, putting in that little bit of effort for this homemade french bread is worth every second when you hear that shatter as you slice into it. If you love soft, pillowy dinner rolls, you are going to adore this bread too. Check out those dinner rolls while you’re here!
- Why This Classic Homemade french bread Recipe Works (Expert Tips)
- Gathering Ingredients for Your french bread Loaves
- Step-by-Step Instructions for Baking french bread at Home
- Ingredient Notes and Substitutions for Your french bread
- Tips for Success When Baking french bread
- Serving Suggestions for french bread for Dinner
- Storage and Reheating Instructions for Homemade french bread
- Frequently Asked Questions About Making french bread
- Estimated Nutritional Data for Classic french bread
- Share Your Homemade french bread Creations
Why This Classic Homemade french bread Recipe Works (Expert Tips)
Many recipes rush the process, but to get that true bakery result, you have to respect the dough! This classic method works because we let the yeast do its job slowly, which builds amazing flavor beneath that stunning crust. Think of the faster recipes—they skip steps that guarantee that fantastic contrast. Making incredible french bread at home is all about technique, especially what happens in those last ten minutes.
If you love the idea of truly crackly loaves like those you see online, check out this technique for crusty homemade french bread. It really shows the difference quality steam makes!
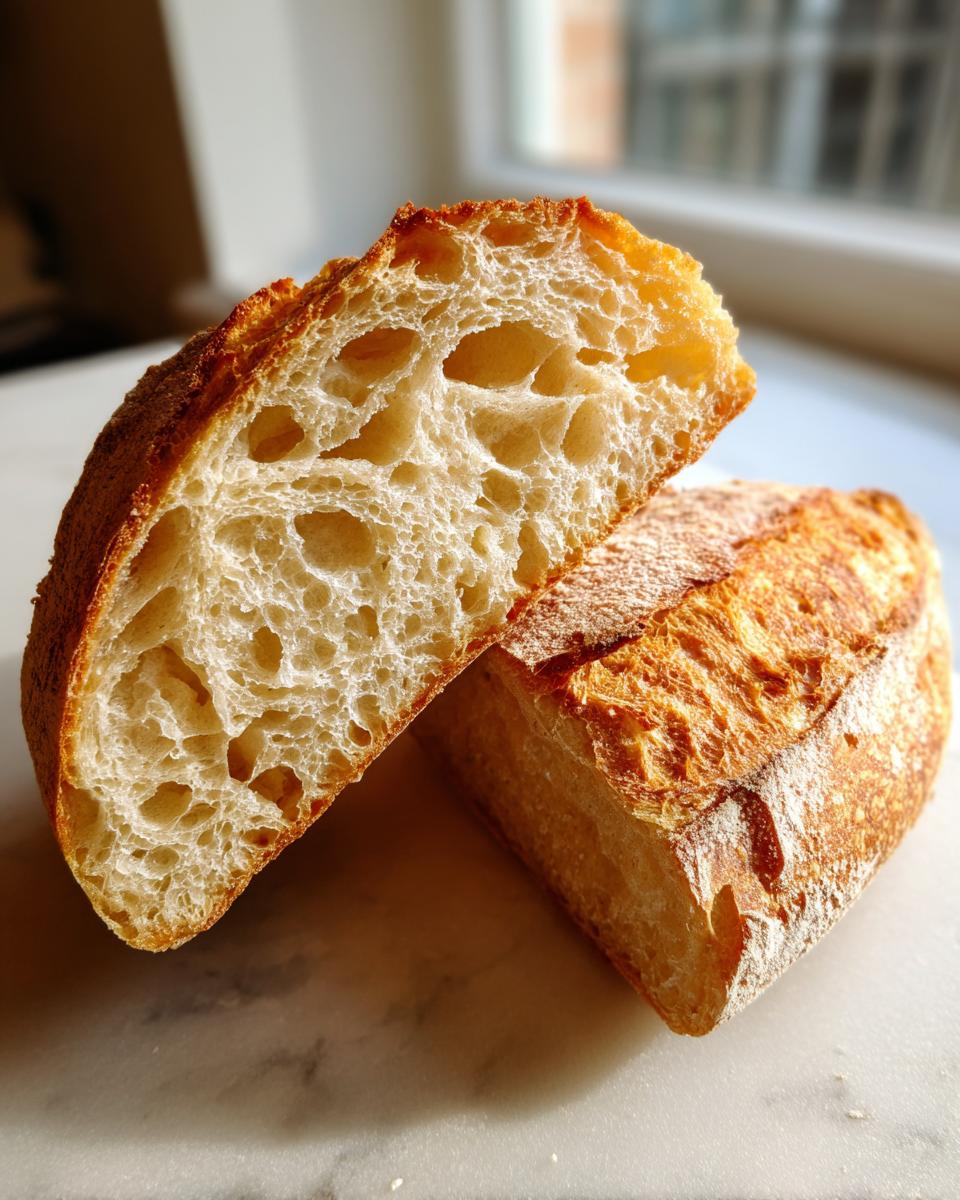
Achieving the Perfect Crusty bread Recipe Texture
The secret weapon here is steam, hands down. When the piping hot water hits the bottom of your oven, it creates a super humid environment. This steam keeps the outside of the dough soft just long enough for the bread to spring up dramatically in the heat. Once the steam dissipates a bit, that high heat hardens the surface, giving you that signature, brittle crackle. High heat plus steam equals the perfect crusty bread recipe texture!
Tips for Soft Fluffy french bread If You Prefer It
Now, I know some days you just want that softer interior slice for sandwiches. It’s easy to tweak this! If you want soft fluffy french bread instead of a crackly crust, just hold back on the steam. Skip pouring water in that hot pan entirely, or just do one quick spray and close the door fast. A slightly shorter bake time, maybe just 20 minutes instead of 25, will keep things tender. Easy adjustments for different cravings!
If you often make things like garlic cheese bread, you’ll appreciate how simple it is to manipulate bread dough for different outcomes.
Gathering Ingredients for Your french bread Loaves
For your classic french bread, we need just the essentials, which is part of why this recipe is so wonderful—no fancy extras needed! You must make sure your water temperature is right for the yeast; we’re aiming for that 105°F to 115°F sweet spot. I always keep my measuring cups ready before I even touch the yeast jar. We’re using basic all-purpose flour and salt, plus just a tiny bit of sugar to wake up that yeast. It’s so rewarding when you realize such simple things make this incredible loaf!
If you also make a delicious date and nut bread, you’ll recognize the importance of precision in the early stages!
Step-by-Step Instructions for Baking french bread at Home
Okay, deep breath! This is where the magic happens. Remember, baking french bread is a process of patience, not speed, even though we’ve simplified the ingredient list. Follow these steps closely, especially around mixing and rising times. You’ll see how quickly the dough transforms from a sticky mess to something beautiful. Check out this guide for more ideas on achieving that crusty baguette look!
Activating Yeast and Mixing the Dough
First things first: we wake up that yeast! Mix your yeast and sugar right into that warm water (remember, 105°F to 115°F is the perfect bath temperature). Let it sit until it looks foamy—that’s the visual confirmation that your yeast is happy and alive. Once foamy, pour that over your flour and salt mixture, add the olive oil, and mix everything until you have a real shaggy dough. Don’t try to make it perfect yet; just get it combined!
Kneading and First Rise for Your french bread
Time to get your hands messy! Turn that shaggy dough out onto your lightly floured surface. You’re looking for about eight to ten minutes of good, rhythmic kneading. I know it sounds like a lot, but this develops the structure we need. Once it’s smooth and elastic, place it in an oiled bowl, cover it loosely, and let it hang out in a warm spot for 1 to 1.5 hours. We wait until it’s doubled in size—no peeking for the first hour!
Shaping and Final Proofing
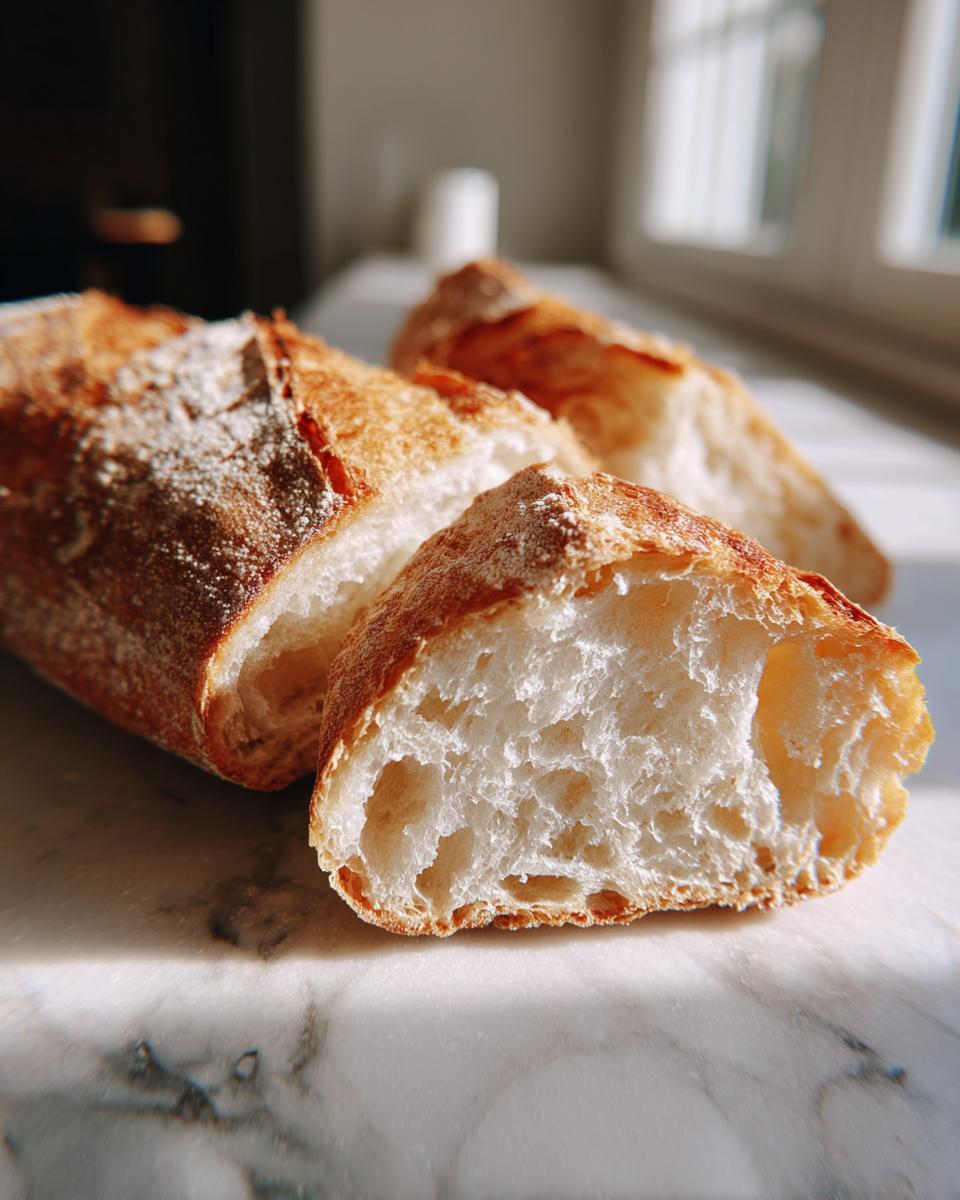
Gently punch that air out—don’t deflate it completely, just knock the excess gas out. Divide the dough right in half. This is where you shape it into the classic long, narrow loaf, kind of like a skinny log or a small baguette shape. Place these lovelies on your parchment-lined sheet, cover them again, and let them proof for just 30 minutes. This quick second rise sets the internal crumb structure for that airy texture we crave.
Scoring and Steaming for Bakery Style Bread
Time to preheat that oven to a screaming hot 450°F! Crucially, put a shallow baking pan on the bottom rack while it heats up. Just before the loaves go in, take a very sharp knife and score the tops diagonally, about three or four times per loaf. This allows the bread to expand beautifully! Then, slide the loaves in and, super carefully, pour about a cup of hot water into that bottom preheated pan. Close that door fast to trap that steam for the best bakery style bread crust!
When you’re ready for your next baking adventure, don’t forget to look at my recipe for soft dinner rolls; they are addicting!
Ingredient Notes and Substitutions for Your french bread
You know, when it comes to french bread, the ingredients are few, but their quality really shines through! Because there aren’t many things hiding the flavor, we need to be precise. For instance, that water temperature for activating the yeast? It’s not just busywork; too cold and the yeast just sleeps, too hot and you scald it! Aiming for that gentle 105°F to 115°F ensures you get a vigorous, healthy rise.
Most folks ask me about flour. The recipe calls for all-purpose (AP) flour, and honestly, it gives you a lovely, slightly softer crumb that works great for home ovens. If you really want that super chewy texture comparable to high-end bakeries, you can absolutely swap it out for bread flour. Bread flour has more protein, which means more gluten development during that 10-minute knead we talked about. Either way works beautifully for homemade loaves!
If you’re ever needing a decadent treat after all that bread baking, you have to try my no-bake chocolate eclair cake. It’s the perfect easy dessert!
Tips for Success When Baking french bread
Even the best recipe can run into hiccups if we don’t pay attention to the details! These little tricks are what pushed my french bread from “tasty” to “I can’t believe I made this at home.” Remember, we are aiming for that artisan look and feel, and it’s the small adjustments that make all the difference in your final loaf texture.
If you want to see how the experts handle the shaping for that perfect baguette, check out the tips on this French baguette recipe. It’s great supplemental reading!
For those of you who love a truly robust, thick crust—the kind that screams “bakery”—you’re going to want to listen up about managing the oven environment. It’s all about maximizing that burst of steam at the start.
Here’s my favorite trick, especially if you’re worried about getting that deep golden color: During the first 10 minutes while the bread is steaming and setting its shape, keep your oven door slightly ajar, but then, periodically (maybe every two minutes), give the inside walls of the oven a quick spritz with a clean spray bottle full of water. Careful not to spray the heating element, of course! This constant infusion of moisture keeps the crust delicate longer so the bread can achieve maximum oven spring, leading to a better *crusty bread recipe* result later.
Another thing that helps immensely is what you bake the bread on. If you have a pizza stone or a baking steel, use it! Preheat that stone inside the oven for at least 30 minutes before you slide the loaves in. Baking directly on a preheated thermal mass transfers immediate, intense heat to the bottom of the dough, which helps with that wonderful lift and sets the bottom crust perfectly. If you don’t have one, the parchment paper works just fine, but the stone makes a huge difference for that authentic texture.
If you love getting creative, these same oven tricks work wonders when I make my soft dinner rolls too; it just adds a little extra something to the crust!
Serving Suggestions for french bread for Dinner
Honestly, the best part about mastering homemade french bread is realizing you no longer need a side dish—the bread IS the best part of the meal! This loaf is so versatile, which is why I preach making two loaves every time you bake; one loaf never lasts long enough to see the main course.
For me, nothing beats having this bread ready for a cozy night when I make my hearty old-fashioned hamburger soup. We use the crusty ends of the loaf to actually scoop up every last bit of that savory broth. It’s completely rustic, and my kids just love it!
If you’re looking for other ways to use your fresh bake, here are my favorite easy ideas for serving this amazing french bread for dinner:
- Dipping Oil: Heat up some good quality olive oil with a little garlic powder, dried oregano, and a sprinkle of red pepper flakes. It’s so simple, but the fresh bread just soaks it up perfectly.
- Garlic Bread Conversion: Slice the loaf open halfway, slather it with softened butter mixed with fresh garlic and parsley, wrap it in foil, and bake for about 10 minutes until gooey inside. Classic comfort!
- The Ultimate Sandwich Bread: Because this loaf has a good structure, it holds up perfectly to heavy fillings. It’s my go-to for meatball subs or big deli sandwiches. The crust keeps everything contained!
- Soup & Salad Companion: Whether it’s a creamy tomato soup or a huge Italian chopped salad, having this light, airy bread alongside helps you clean your plate beautifully.
It truly makes any simple weeknight meal feel like a little celebration when you have fresh bread warming up on the table!
Storage and Reheating Instructions for Homemade french bread
So, you have this perfect, crackly loaf of french bread, and you’re wondering how to keep it tasting just-baked for tomorrow? This is the make-or-break moment for crusty bread! Once that beautiful exterior cools completely—and I mean completely, otherwise you trap steam and get sogginess—you need to wrap it correctly.
For day-one freshness, the best approach is to wrap the cooled loaf loosely in a clean kitchen towel and keep it somewhere dry at room temperature. Avoid plastic bags! Plastic traps moisture right against that lovely crust we worked so hard for, turning it soft and chewy almost immediately. A towel offers just enough protection without suffocating those crisp edges.
If you need to keep it longer than a day, no worries! This bread freezes beautifully. You can wrap individual, cooled loaves tightly in plastic wrap first, and then stick them in a heavy-duty freezer bag. That way, they keep safe until you’re ready for them.
For reheating day-old bread, we need to reverse the moisture barrier. If the crust is just a little soft, slice the bread and pop those pieces under the broiler or in a toaster oven for just a minute or two until they crisp up again. If you are reheating a whole loaf, spritz the crust lightly with water—just a tiny mist!—and wrap it loosely in foil. Pop it into a 350°F oven for about 10 minutes until warm throughout. That water turns to steam inside the foil, reviving that nice texture. It’s almost as good as fresh!
When you’re done with bread, you might want a simple dip to go with your next batch. My recipe for creamy garlic sauce goes wonderfully with slightly crusty day-old bread, too!
Frequently Asked Questions About Making french bread
It’s funny how many questions pop up once you start talking about yeast bread baking! When you’re making something classic like french bread, people often want to know how to make it faster or if they can skip a step entirely. I’ve gathered the most common things folks ask me when they’re trying to get that gorgeous, airy loaf. Don’t stress if you have questions; that’s why I’m here!
Can I make this a no knead french bread recipe?
That is a great question, especially if you’re looking for truly easy bread recipes! While there are some lovely no knead french bread variations out there, for this specific classic recipe, I really, really advise against skipping the kneading. Kneading is what develops the gluten structure needed to support all those gorgeous air pockets. If we skip it, the dough won’t have the elasticity to hold up when it hits that hot oven, and you’ll end up with a dense brick instead of light french bread. Stick to that 8 to 10 minutes; it’s the backbone of this recipe!
How long does this french baguette recipe take if I skip the first rise?
Oh, I totally get the pull toward a quick french bread recipe! We all have busy days. However, skipping that first rise completely just isn’t realistic if you want a quality loaf. That long, slow first proof is where all the flavor develops. If you are truly pressed for time, you can try warming up your rising spot to speed it up—like placing the bowl in a slightly warm oven that’s been turned off—but seriously, shortening that first rise to less than an hour usually sacrifices the depth of flavor needed for a genuinely amazing loaf. I can get both loaves done in under two hours if I’m careful, so it’s not too bad!
What is the best way to get a truly artisan bread recipes look?
For that stunning visual appeal that screams artisan bread recipes, it all comes down to two things: scoring and oven spring. Make sure your knife is razor sharp—a dull blade will just tear the dough, not slice it. You want deep, deliberate diagonal slashes, about a quarter-inch deep, angled at about 45 degrees. When you slide that loaf onto that preheated surface (stone or steel is best!) and blast the moisture in, the dough should instantly puff up along those cuts, creating those beautiful, uneven crests—that’s oven spring!
If you’re looking for more inspiration after mastering this loaf, you can check out some fun ways to use leftovers in my guides for easy breakfast ideas!
Estimated Nutritional Data for Classic french bread
Now, let’s talk about the good stuff—the breakdown of what makes up these glorious loaves of french bread. Since this recipe is so straightforward, using just flour, water, yeast, salt, and a tiny bit of oil, it’s surprisingly modest in a lot of areas. But remember, I always say this is an *estimate*! Your exact kitchen measurements and the brand of flour you grab can shift things a little. These numbers are based on dividing the whole recipe yield into two loaves, giving you an idea of what’s in one slice.
It’s nice to know that when you enjoy this bread with dinner, you aren’t overloading things, especially if you’re already having a rich main course. It’s just simple goodness!
Here is the breakdown per serving slice:
- Serving Size: 1 slice
- Calories: 150
- Total Fat: 1.5g (Saturated Fat: 0.2g)
- Carbohydrates: 30g
- Protein: 4g
- Sugar: 0.5g
- Sodium: 180mg
- Cholesterol: 0mg
I hope seeing these numbers makes you feel zero guilt about having that second slice, especially when it’s paired with something healthy from your dinner table. If you’re looking for an even more protein-packed experience, you should definitely check out my recipe for easy protein muffins sometime!
Share Your Homemade french bread Creations
Alright, my friends, the oven is off, the cooling rack is full, and your kitchen smells absolutely heavenly—what now? Now we celebrate! I truly want to see the gorgeous loaves you’ve pulled out of your ovens. Did you score them perfectly? Are they shimmering golden brown?
Don’t keep that success to yourself! Come back here and leave a rating for this french bread recipe right below. Seriously, those star ratings help other home bakers feel confident trying this classic recipe for the first time. Tell me in the comments what you served it with tonight.
Was this the perfect french bread for dinner companion, or did you turn it into amazing garlic bread? Every comment helps me see which traditions you are building around your tables. And if you ever have a question about the kneading or the steaming, drop it below too! We’re building a community of happy home bakers here.
If you ever want to reach out directly with a photo or a question that’s not for the public comments, my contact page is always open. You can reach me over at the contact page!
Happy baking, and enjoy every single perfect, crusty slice!
PrintClassic Homemade Crusty French Bread Recipe
Learn to bake bakery-style French bread at home. This recipe focuses on achieving a crisp, crackly crust and a soft, airy interior using simple ingredients.
- Prep Time: 20 min
- Cook Time: 25 min
- Total Time: 1 hour 55 min
- Yield: 2 loaves 1x
- Category: Baking
- Method: Baking
- Cuisine: French
- Diet: Vegetarian
Ingredients
- 1 packet active dry yeast
- 1 teaspoon sugar
- 1 cup warm water (105-115°F)
- 3 cups all-purpose flour
- 1 teaspoon salt
- 1 tablespoon olive oil
- Water for steaming
Instructions
- Dissolve the yeast and sugar in the warm water. Let stand for 5 minutes until foamy.
- In a large bowl, combine the flour and salt. Pour in the yeast mixture and olive oil.
- Mix until a shaggy dough forms. Turn the dough out onto a lightly floured surface.
- Knead the dough for 8 to 10 minutes until it is smooth and elastic.
- Place the dough in a lightly oiled bowl, turning to coat. Cover the bowl and let it rise in a warm place for 1 to 1.5 hours, or until doubled in size.
- Gently punch down the dough. Divide it into two equal pieces. Shape each piece into a long, narrow loaf (baguette shape).
- Place the loaves on a baking sheet lined with parchment paper or on a pizza stone. Cover loosely and let rise for 30 minutes.
- Preheat your oven to 450°F (232°C). Place a shallow pan on the bottom rack while the oven heats.
- Just before baking, score the tops of the loaves diagonally 3 to 4 times with a sharp knife.
- Carefully pour 1 cup of hot water into the preheated shallow pan to create steam. Immediately place the loaves in the oven.
- Bake for 20 to 25 minutes, or until the crust is deep golden brown.
- Remove the bread from the oven and cool completely on a wire rack before slicing.
Notes
- For an extra crusty exterior, spray the inside walls of the oven with water a few times during the first 10 minutes of baking.
- If you want soft fluffy french bread, reduce the baking time slightly and skip the heavy steaming step.
- This recipe makes great french bread for dinner or sandwiches.
Nutrition
- Serving Size: 1 slice
- Calories: 150
- Sugar: 0.5
- Sodium: 180
- Fat: 1.5
- Saturated Fat: 0.2
- Unsaturated Fat: 1.3
- Trans Fat: 0
- Carbohydrates: 30
- Fiber: 1
- Protein: 4
- Cholesterol: 0