
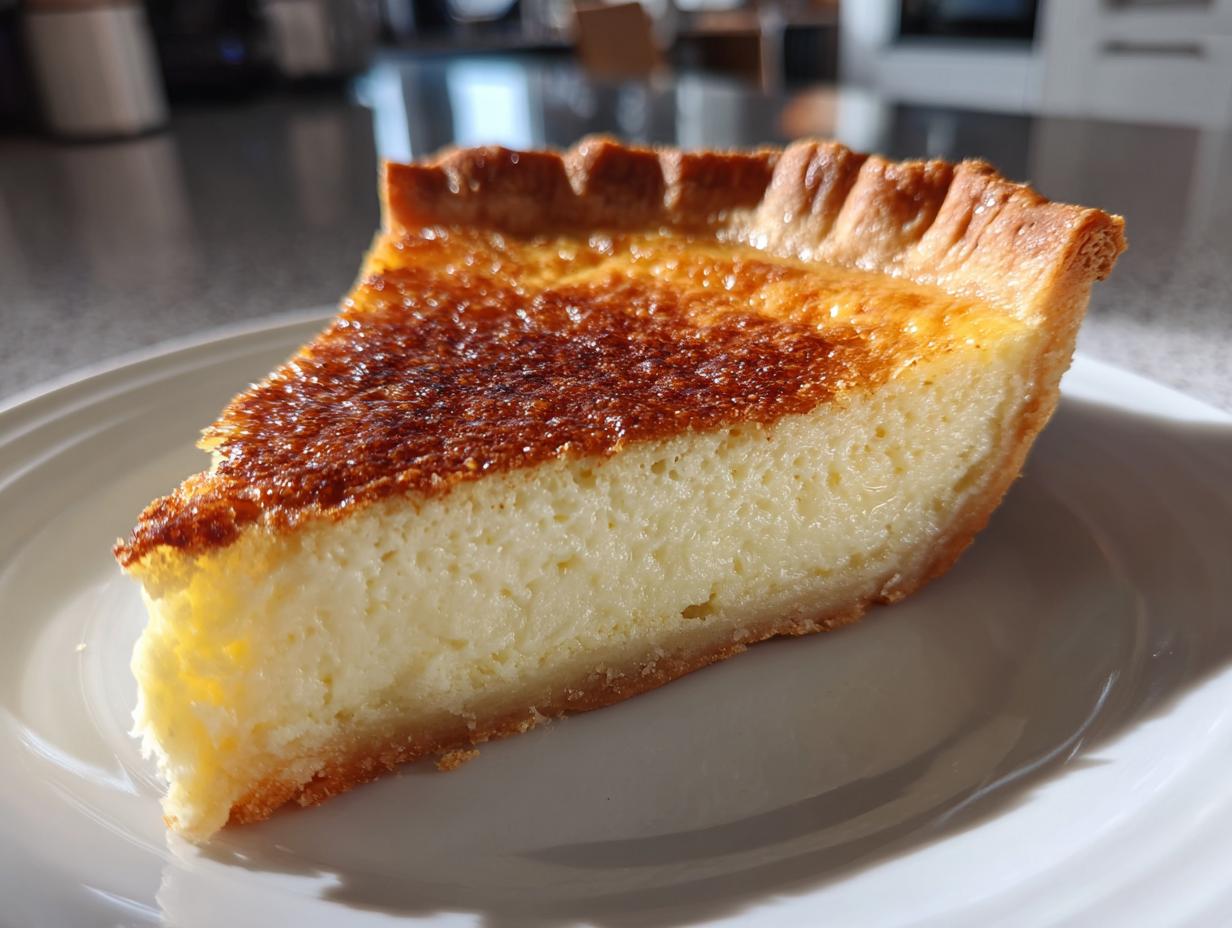
If you grew up listening to the gentle clinking of spoons against porcelain in a warm kitchen, you already know the kind of comfort this pie brings—even if you haven’t baked it yet! This Classic Old-Fashioned Southern Buttermilk Pie Recipe is pure magic. It’s the definition of Southern comfort food, delivering that unbelievably creamy, velvety texture we all dream about, balanced by just the right hint of tang. It truly doesn’t get much better than this simple, nostalgic bake. My mom always brought this pie to gatherings, and I learned from her that the best family stories are baked right into the crust. You really can achieve a spectacular, deeply satisfying dessert using just pantry staples! I share more about my journey preserving these traditions over at my About Page.
- Why This Classic Buttermilk Pie Recipe is a Family Favorite
- Gathering Ingredients for Your Homemade Buttermilk Pie
- Step-by-Step Instructions for the Old Fashioned Buttermilk Pie
- Tips for a No-Fail Buttermilk Pie Every Time
- Serving Suggestions for Your Southern Buttermilk Pie
- Storage and Make Ahead Dessert Options for Buttermilk Pie
- Frequently Asked Questions About Making Buttermilk Pie
- Estimated Nutritional Data for Classic Buttermilk Pie
- Share Your Homemade Buttermilk Pie Creations
Why This Classic Buttermilk Pie Recipe is a Family Favorite
I just love how this pie nails that perfect Southern Comfort Food feeling without any fuss. It’s one of those truly Simple Baking Recipes that delivers way above its effort level. When I was little, this was always the pie my grandmother would pull out after a heavy Sunday dinner, never even mentioning it took just a few minutes to mix up the filling. It’s just that good, reliable comfort wrapped in a flaky crust!
Velvety Texture Without the Fuss
Seriously, you won’t believe how smooth and creamy this custard sets up! It’s that magical density—not quite firm like a baked cheesecake, but perfectly set so it doesn’t run everywhere when you slice it. This is the definition of an Easy Buttermilk Pie. We skip all the complicated simmering or chilling steps; you just mix and pour. That’s it!
The Perfect Sweet and Tangy Pie Balance
What sets this apart from a simple chess pie is definitely that gentle zip from the buttermilk itself, boosted by a tiny splash of lemon juice. It cuts through the sweetness perfectly. That mild acidity gives you the absolute best Sweet and Tangy Pie experience, making you want another piece right away. It’s subtle, but it makes all the difference!
Gathering Ingredients for Your Homemade Buttermilk Pie
Okay, this is the best part about our Classic Buttermilk Pie Recipe—the ingredient list is wonderfully short! You likely have most of these things sitting in your pantry right now, which is why this is such a reliable Make Ahead Dessert. We need just a handful of components to develop that gorgeous, creamy custard. Don’t go running to the store just yet; check your fridge first!
- 1 (9-inch) unbaked pie crust—gotta start with a good base!
- 1 1/2 cups granulated sugar—straight sweetness, no fancy sugars needed here.
- 3 tablespoons all-purpose flour
- 1/4 teaspoon salt
- 1/4 teaspoon ground nutmeg—don’t skip this tiny pinch; it’s the secret warmth!
- 3 large eggs, and they need to be lightly beaten
- 1 1/2 cups buttermilk
- 1 teaspoon vanilla extract
- 1 tablespoon lemon juice
- 2 tablespoons unsalted butter, melted
Ingredient Notes and Substitutions for Buttermilk Pie
Let’s talk specifics, because those little details make a huge difference in that final texture. First, that crust: you absolutely need an unbaked, 9-inch crust ready to go. If you’re buying one, that’s fine, but if you’re making your own? Great job—we want that Flaky Crust Pie texture!
Now, for the star: the buttermilk. If you opened the fridge and realized you’re out, don’t panic! This is an old trick my mom taught me years ago. You can easily make your own substitute that works perfectly for this buttermilk dessert. Just take 1 1/2 cups of regular milk (whole milk is best, but 2% works) and stir in 1 tablespoon of white vinegar or lemon juice. Let that sit on the counter for about 10 minutes until it looks slightly thickened and curdled. That’s your buttermilk replacement, ready to go right into the mix!
Step-by-Step Instructions for the Old Fashioned Buttermilk Pie
Ready to put this beautiful, simple recipe into action? Making this Old Fashioned Buttermilk Pie is almost purely mixing, which I absolutely adore. We have to be mindful of our timing, though. Since we are dealing with a custard filling, getting the oven hot first is key. Go ahead and preheat that oven to 350°F (175°C) right now so it’s ready when your batter is. Then, get that unbaked pie crust nestled perfectly into your 9-inch pie plate.
Mixing the Buttermilk Filling Components
We handle this like two separate sides meeting later. First, grab a medium bowl and whisk together all your dry bits—the sugar, flour, salt, and nutmeg—so they are perfectly blended. In a *different* bowl, whisk up your wet things: the eggs (they should be lightly beaten), the buttermilk, vanilla, and lemon juice. Now, here is the crucial part for getting that lovely Creamy Custard Pie texture: slowly pour the dry mix into the wet ingredients. Mix it until it’s just combined. I mean it—do not overmix! We just want the streaks gone. Finally, stir in that melted butter until everything is incorporated smoothly.
Baking and Setting the Classic Buttermilk Pie
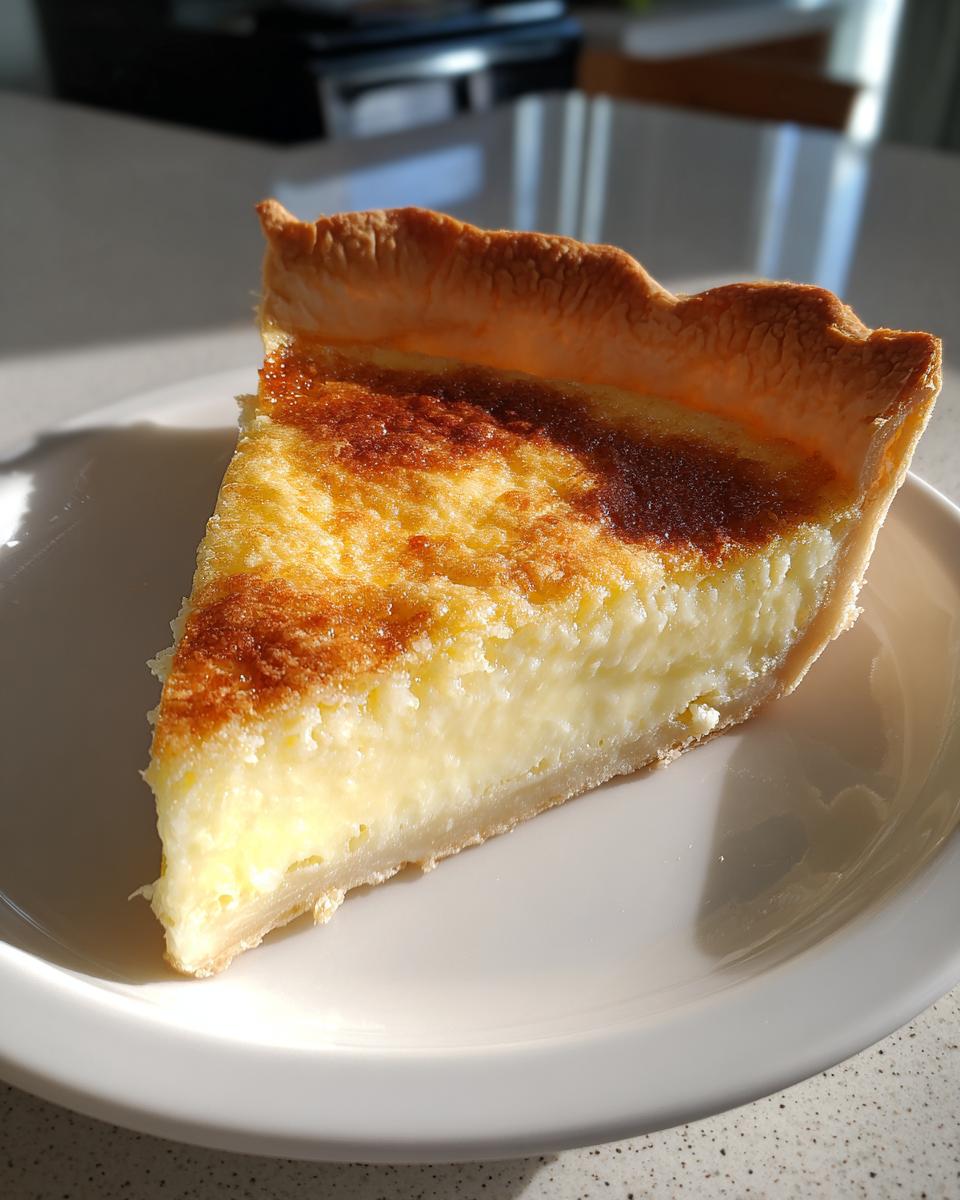
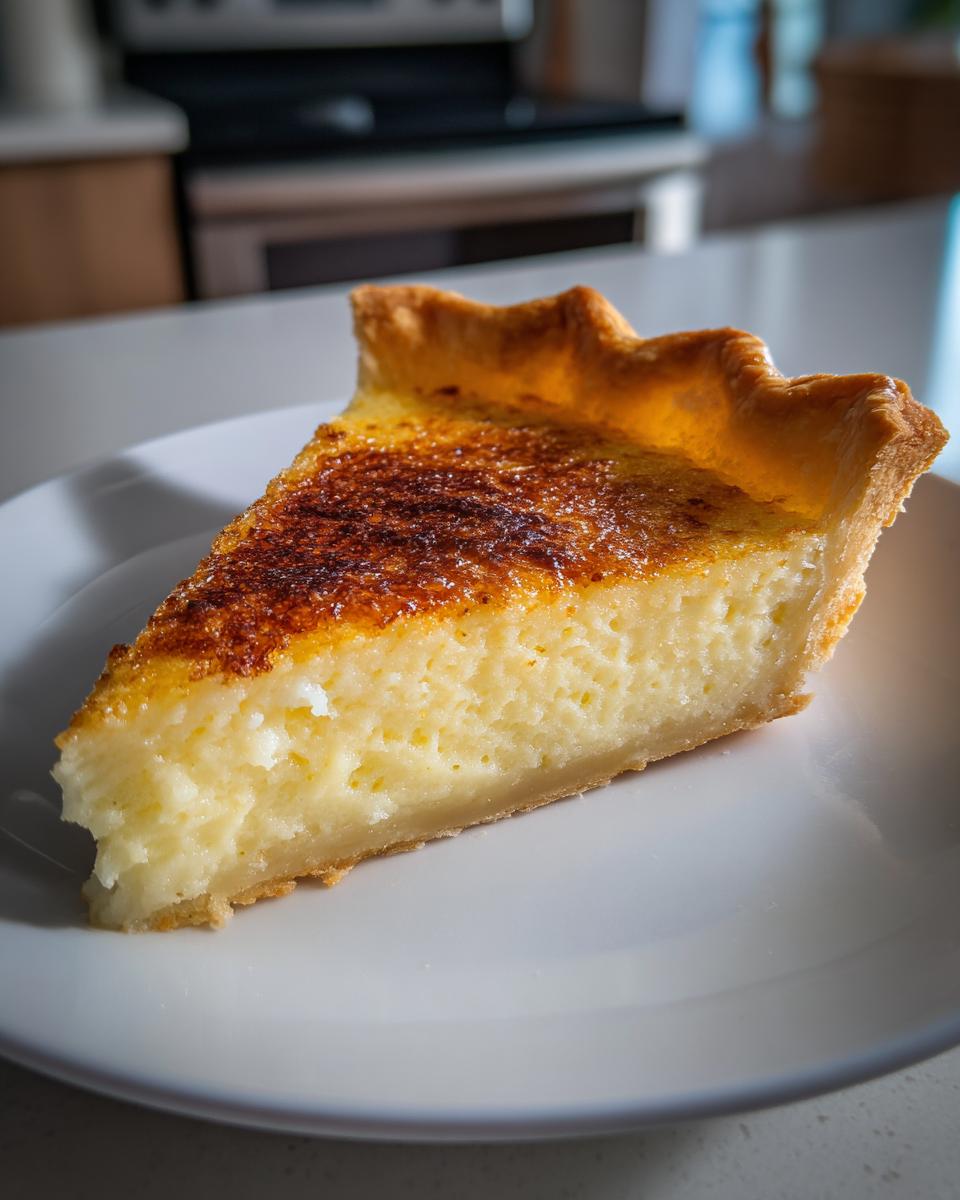
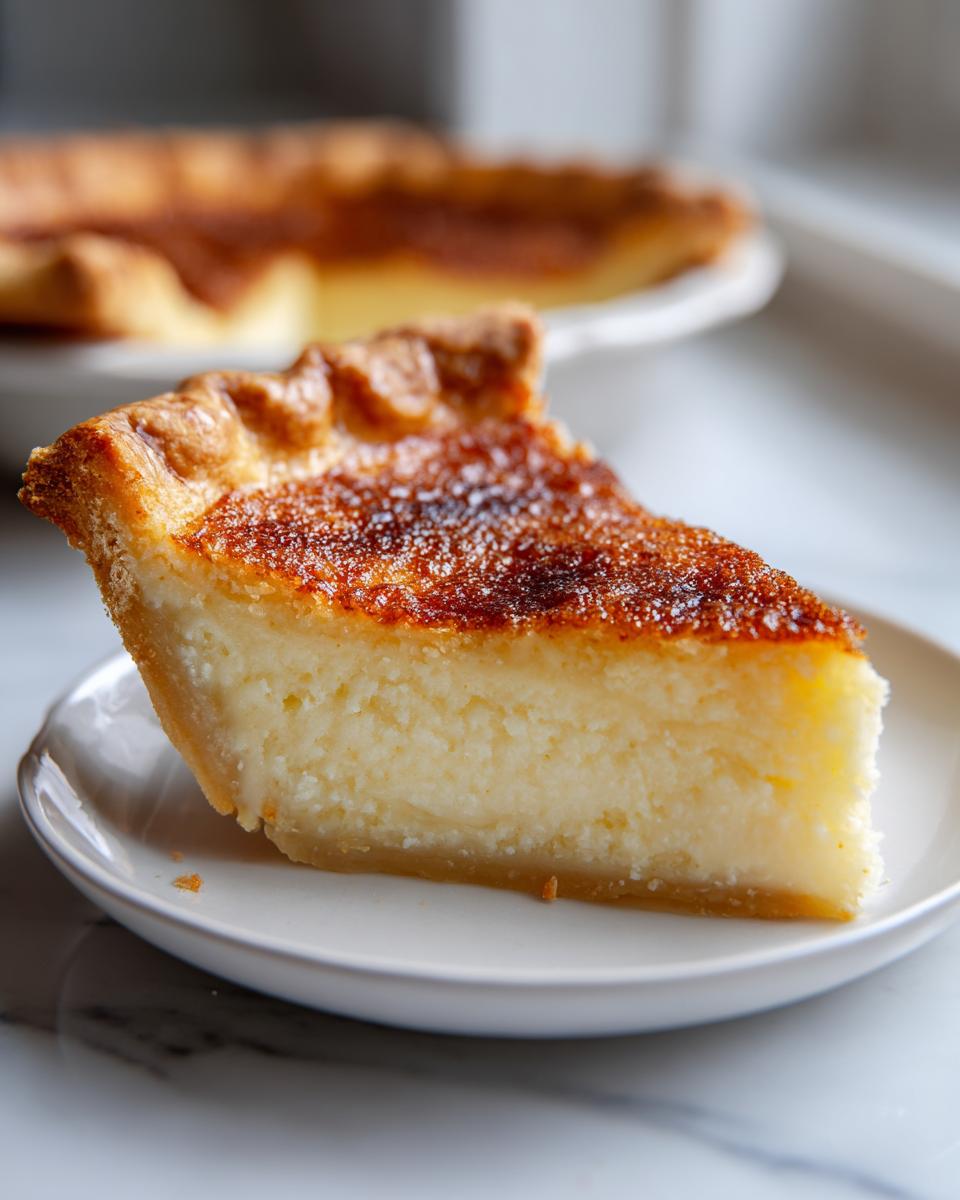
Pour that entire beautiful filling right into your waiting pie crust. If you need a reminder on handling pastry, I have some great tips on handling dough that might help you out! Pop the pie into the oven and let it bake for about 45 to 55 minutes. How do you know when it’s done? Don’t just rely on the timer! You’re looking for a golden brown top, and when you gently shake the pan, the center should have a very slight, tiny jiggle—think like firm Jell-O, not liquid. This is my trust method for this Traditional Custard Pie. Then, here’s the hardest part: you must let it cool completely on a rack so the custard can firm up all the way. Seriously, don’t rush that cooling! If you cut it warm, it will run everywhere. Once it’s fully cooled, it’s ready for the fridge, or you can see some other great ideas for serving it over at this great recipe for inspiration!
Tips for a No-Fail Buttermilk Pie Every Time
I want everyone to experience the joy of pulling a perfect pie from the oven, so let’s talk about how to guarantee you end up with a gorgeous, crack-free, perfectly set No-Fail Buttermilk Pie. Even though this recipe is simple, custard pies can be a little fussy if you rush them, which is why paying attention to these few details is so important. Trust me, these little tricks came from years of baking this for my own family!
The number one thing that causes issues is *overbaking*. Remember that jiggle test we talked about? If you bake it until the center doesn’t move at all—like a sponge cake—it’s going to crack when it cools down because it shrinks too much. Keep that slight wobble for removal from the oven. Cooling slowly is your best friend here!
Another thing to watch out for is the edge of your crust browning too fast—especially since we bake this at 350°F. If you notice the edges getting dark brown before the pie is actually done in the middle, just grab a ring of aluminum foil and gently tuck it over the rim of the crust. It shields it from the direct heat, letting the center custard catch up without burning the pastry. It’s really just like covering your fruit pies, you know? I use the same method when I make my sugar cookies because the edges always want to rush ahead!
And finally, for that lovely golden top—if your pie seems to be set but the color isn’t quite there when you pull it out, don’t sweat it. You can always stick it under the broiler for just 30 seconds to a minute, but you have to stand right by the oven and watch it like a hawk! I know The Pioneer Woman often mentions quick broiler sessions, but if you smell burning sugar, pull it out immediately. A slightly paler pie is always better than a burnt one. For more ideas on timing and temperature, you can check out this helpful resource.
Serving Suggestions for Your Southern Buttermilk Pie
Once you’ve managed the hardest part—waiting for that glorious Buttermilk Dessert to chill completely—it’s time for the fun part: deciding how to serve it! Honestly, this pie is so perfect on its own that you don’t need much fuss, but a little extra something never hurt anyone, right? I remember my mom never added a thing, just sliced it straight from the fridge, but I like to dress mine up a tiny bit for company.
You need to know that you can serve this pie either chilled or at room temperature. If you serve it slightly chilled, the custard is firmer and really satisfying. If it’s ambient temperature, it gets a little softer and almost tastes richer, closer to a silky set pudding. Both ways are wonderful, so bake it for the occasion!
For a truly classic Southern presentation, you simply cannot go wrong with a generous dollop of freshly whipped cream. I like to sweeten my whipped cream just a tiny bit—not much, just enough to hold its shape softly. A dusting of extra nutmeg right over the top of the cream catches the light beautifully. It’s elegant without being fussy!
If you want to lean into the slight tang this pie has, fresh fruit is your best friend. Think bright berries! A small handful of fresh, sweet strawberries or perhaps some lightly macerated blueberries—just toss them with a teaspoon of sugar and let them sit for about 15 minutes until they release some of their juices. That tartness from the berries just sings right alongside the creamy pie. It’s lovely, especially if you’re serving it warm rather than cold. It reminds me a bit of how I pair sweet potatoes; you can see my thoughts on complementing starch and sweet flavors in my creamy mashed potatoes recipe, but in reverse!
If you are feeling really adventurous, a thin drizzle of caramel sauce is fantastic, but watch out—you don’t want to overpower that beautiful, subtle lemon and vanilla flavor we worked so hard to achieve!
Storage and Make Ahead Dessert Options for Buttermilk Pie
This is honestly one of my favorite things about this Classic Buttermilk Pie Recipe: it loves being made ahead of time! If you’re baking for a big holiday meal or potluck, knowing you can check an item off your list early is a lifesaver. Because this pie is essentially a rich custard, it actually sets up better and tastes even more complex after it has had time to rest in the cold.
The biggest rule here is patience—you absolutely cannot skip the cooling step before you even think about putting it away. I know it smells divine coming out of the oven, but remember what I said about the ‘jiggle test’? If you chill a warm pie, you are asking for a soupy mess when you cut into it later. Let it cool completely on the counter until it reaches room temperature first.
Once it’s cool, this pie needs to be wrapped up well and tucked into the refrigerator. Covering it tightly will prevent it from absorbing any funky fridge smells. The notes above mention it, but I’m stressing it again: it truly tastes best once it’s had a full chill. I personally aim to have it made at least 4 hours before serving, but honestly, overnight is perfection. The texture firms up beautifully, and the tanginess really shines when cold, making it the ultimate Make Ahead Dessert.

How long does it last? If you keep it well-covered in the fridge, you can count on this pie to be fantastic for about three, maybe four days. It’s a robust little dessert! If you’re planning way out, you can even freeze the whole cooled pie, un-sliced, for up to two months. Just wrap it tightly in a couple of layers of plastic wrap and an outer layer of foil. When you’re ready to thaw, move it to the fridge the night before you plan to serve it. It’s a real trooper! You can check out how I handle my Maple Brown Sugar Cookies for freezing tips, as they often need similar careful wrapping too over at my cookie page.
For more scheduling fun, check out the make-ahead timing over at Melanie Cooks’ schedule tips. It’s always good to see how other folks handle their holiday planning!
Frequently Asked Questions About Making Buttermilk Pie
I always get questions after people try this recipe because, even though it’s Easy Baking Recipes, custard pies can sometimes be a little mysterious! Don’t worry if you run into a snag; most issues are super simple fixes for next time. I’ve gathered up the most popular questions I hear about getting that perfect texture and flavor right every single time.
Why did my buttermilk pie crack on top?
Oh, the dreaded crack! This is the number one sign that the pie got a little too hot or baked just a hair too long. Remember how I stressed that slight jiggle when you take it out? If you wait until the center is totally firm while it’s still in the oven, that filling keeps cooking on the counter as it cools down, shrinking too much and causing those surface cracks. It’s a classic issue with any Traditional Custard Pie. The fix? Pull it when it wobbles slightly, and for goodness sake, let it cool slowly at room temperature before chilling it completely!
Can I substitute regular milk for buttermilk in this pie?
Yes, absolutely! Life happens, and sometimes the store is out of buttermilk, or you just don’t keep it stocked because, let’s be honest, who uses a whole quart before it expires? If you need to whip up this Easy Buttermilk Pie right now, you can make your own substitute really quickly. Take your regular milk—whole milk is always my preference for richness, but 2% works fine—and for every cup of buttermilk you need, just stir in one tablespoon of white vinegar or lemon juice. Stir it gently and let it sit on the counter for about 10 full minutes. You’ll see it start to look a little bit curdled; that’s it! It’s ready to give you that essential tang. It’s how I make sure I can always have this Southern Buttermilk Pie on hand, even when I forget to run to the store!
I cover a lot of basic baking swaps and ideas for quick fixes, especially for beginner bakers who want to make sure their first attempt at a new recipe goes smoothly. You can find some other handy tips over in my post about easy breakfast ideas, though the principles of substitution often carry over!
Estimated Nutritional Data for Classic Buttermilk Pie
I always feel like it’s only fair to give you a heads-up on what we’re getting into nutritionally when we bake up a classic like this. Remember, this is the ultimate comfort food, so we aren’t looking for diet food here—we’re looking for pure, sweet, traditional enjoyment! This data is based on the recipe using a standard, store-bought crust, just to keep things consistent.
Please know these numbers are just wonderful estimates! Since we are using standard USDA tracking, your actual results can swing a bit depending on the brand of butter you use or if you decide to go fancy with your pie crust. If you decide to add a big mountain of whipped cream, that will change things up too, of course! These numbers are just here for planning purposes so you know what you’re enjoying.
- Serving Size: 1 slice
- Calories: 350
- Sugar: 35g
- Sodium: 250mg
- Fat: 18g
- Saturated Fat: 9g
- Carbohydrates: 45g
- Protein: 6g
- Cholesterol: 110mg
For everything else—the fiber, the unsaturated fat measurements, and so on—you can find those detailed breakdown numbers next to the recipe card above. But the bottom line is this: this Southern Buttermilk Pie is rich, sweet, and worth every single calorie when shared with folks you love. If you ever have questions about the process or a specific ingredient, please don’t hesitate to reach out; I love hearing from readers!
Share Your Homemade Buttermilk Pie Creations
Now for the best part! I’ve given you my most treasured, no-fuss recipe for this Traditional Custard Pie, and now I absolutely need to see what you’ve done with it! Seriously, nothing makes my day more than seeing that gorgeous, golden-brown top pop up in my feed. This pie is all about connection, and sharing your success only keeps that feeling alive.
When you finish baking this perfectly creamy, tangy delight, please don’t disappear! Head right down to the comments section below and let me know how it turned out. Did you serve it plain, or did you listen to me and add those fresh berries? I love hearing all the little ways you personalize your baking. And if you can, snap a picture!
If you share your photos on Instagram or Facebook, please tag me! Seeing your homemade results reminds me every day that bringing that cozy, comforting feeling back into busy modern kitchens is exactly why I created Mia’s Meals. If you’re looking for more desserts that bring people together, you can browse my full collection of delicious dessert recipes!
And hey, if you think this pie truly knocked your socks off and deserves a spot in your regular rotation, please leave a rating! Five stars is always amazing, but even a few words about how much your family loved it helps other home cooks feel brave enough to try this classic Southern treat. Happy baking, y’all!
PrintClassic Old-Fashioned Southern Buttermilk Pie Recipe

This recipe delivers a classic Southern Buttermilk Pie with a creamy, velvety custard filling and a slightly tangy flavor, all baked in a flaky crust. It uses simple ingredients for an easy, nostalgic dessert perfect for family gatherings.
- Prep Time: 15 min
- Cook Time: 50 min
- Total Time: 1 hour 5 min
- Yield: 8 servings 1x
- Category: Dessert
- Method: Baking
- Cuisine: American Southern
- Diet: Vegetarian
Ingredients
- 1 (9-inch) unbaked pie crust
- 1 1/2 cups granulated sugar
- 3 tablespoons all-purpose flour
- 1/4 teaspoon salt
- 1/4 teaspoon ground nutmeg
- 3 large eggs, lightly beaten
- 1 1/2 cups buttermilk
- 1 teaspoon vanilla extract
- 1 tablespoon lemon juice
- 2 tablespoons unsalted butter, melted
Instructions
- Preheat your oven to 350°F (175°C). Place the unbaked pie crust in a 9-inch pie plate.
- In a medium bowl, whisk together the sugar, flour, salt, and nutmeg until combined.
- In a separate bowl, whisk the lightly beaten eggs, buttermilk, vanilla extract, and lemon juice together.
- Gradually add the dry ingredients to the wet ingredients, mixing until just combined. Do not overmix.
- Stir in the melted butter until incorporated.
- Pour the buttermilk filling into the unbaked pie crust.
- Bake for 45 to 55 minutes, or until the center is mostly set but still has a slight jiggle when gently shaken. The top should be golden brown.
- Remove the pie from the oven and let it cool completely on a wire rack before slicing. This allows the custard to fully set.
- Serve chilled or at room temperature.
Notes
- For an extra tangy flavor, you can add 1 teaspoon of lemon zest to the filling mixture.
- If the crust edges brown too quickly during baking, cover them loosely with aluminum foil strips.
- This pie tastes best when fully chilled, so plan to make it ahead of time for best results.
Nutrition
- Serving Size: 1 slice
- Calories: 350
- Sugar: 35
- Sodium: 250
- Fat: 18
- Saturated Fat: 9
- Unsaturated Fat: 9
- Trans Fat: 0
- Carbohydrates: 45
- Fiber: 1
- Protein: 6
- Cholesterol: 110