
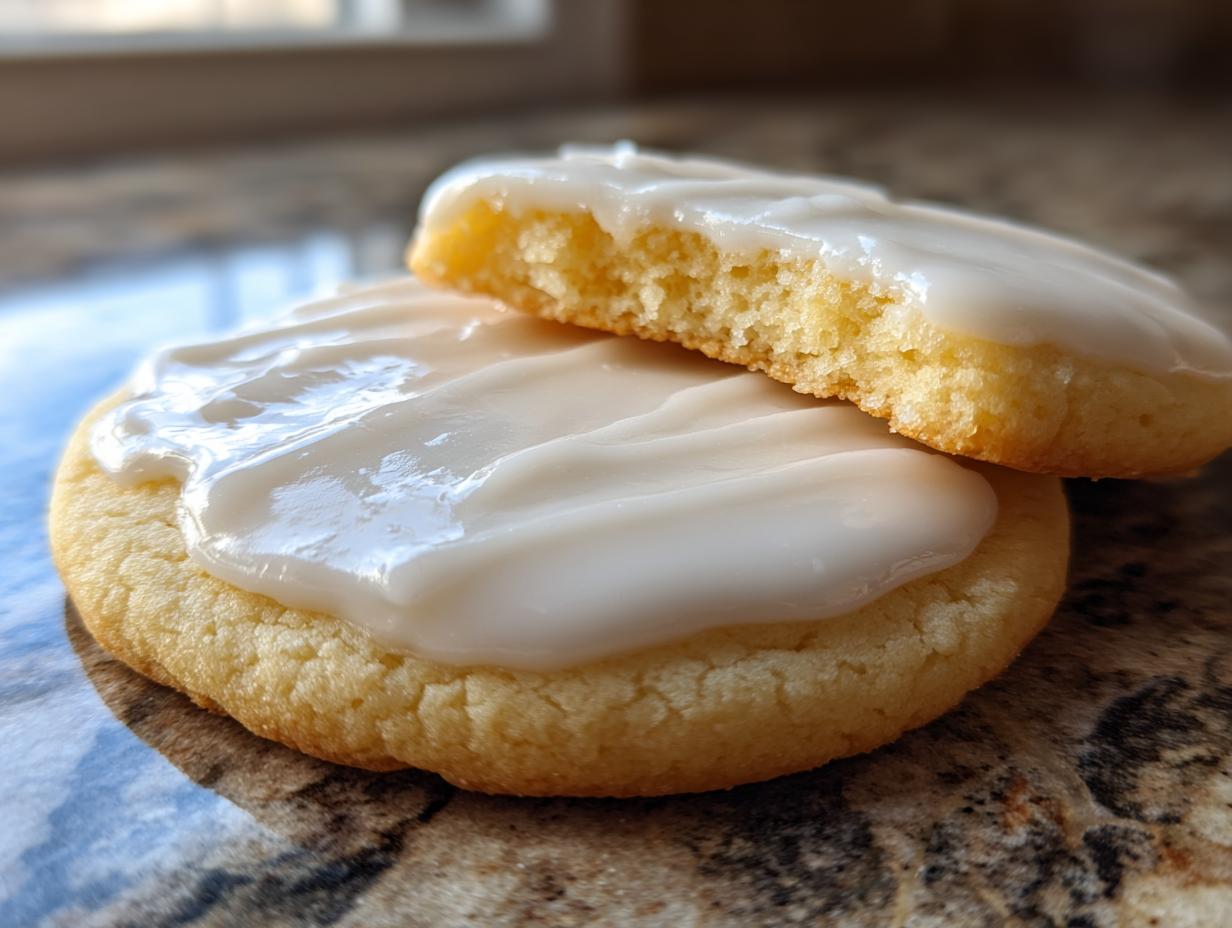
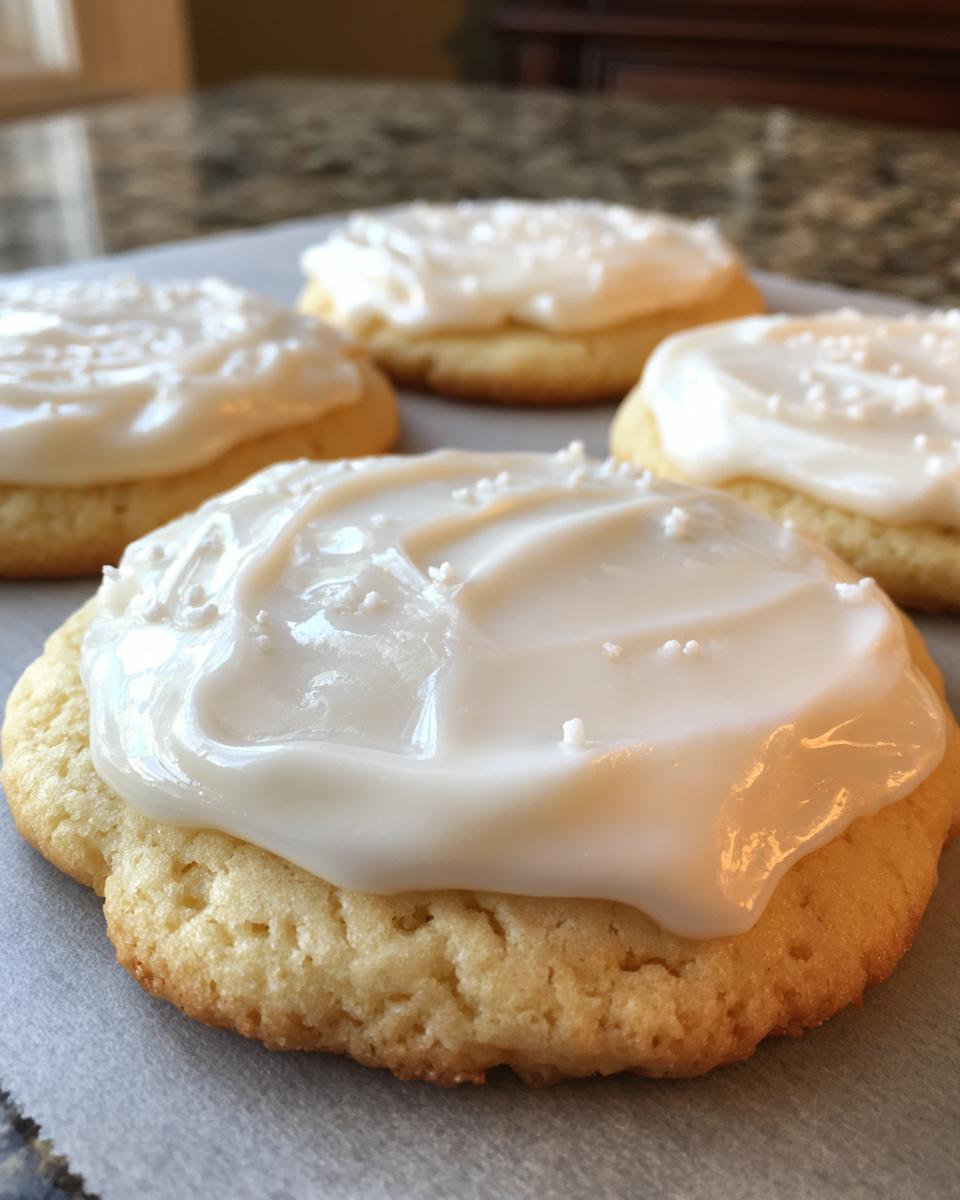
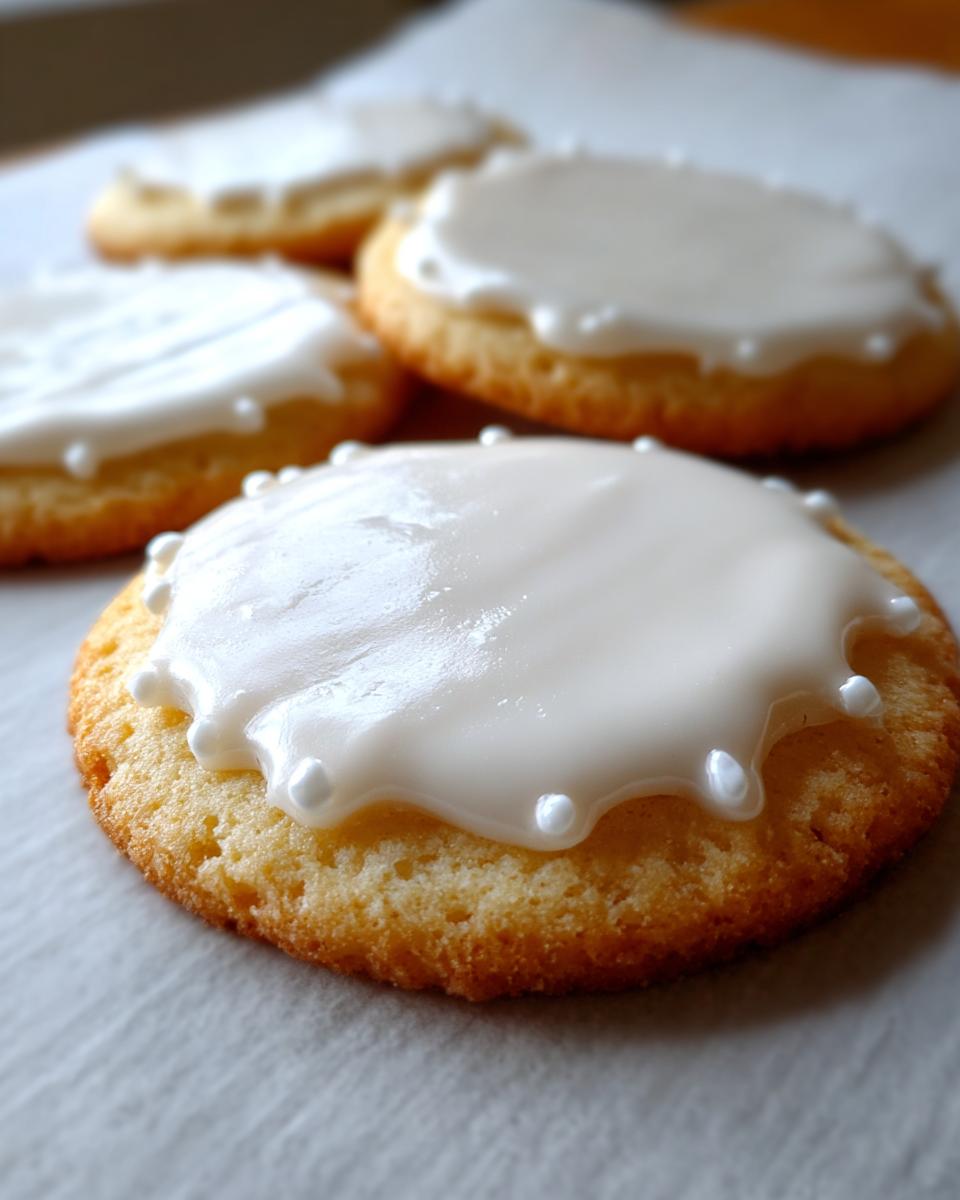
Oh, the tragedy of beautiful sugar cookies ruined by sloppy icing! We’ve all been there, right? You spend hours cutting out perfect shapes, and then you end up with a sticky, runny mess that never quite sets. I remember trying dozens of glazes back home in Ohio, always aiming for something dependable for holiday treats. Forget that frustration! This sugar cookie icing recipe is my absolute winner. It uses meringue powder to give you that perfect, smooth, glossy finish that dries hard as a rock. This means you can stack those Christmas cookies or mail them out without worrying about smudges. Trust me, this is the best sugar cookie icing for beginners who want professional-looking, stress-free results. If you want more ideas for stress-free sweets, check out my collection of delicious dessert recipes. It makes creating those cherished memories around the table so much easier!
- Why This Is the Best Sugar Cookie Icing Recipe for Hardening (E-E-A-T Focused)
- Gathering Ingredients for Your Easy Cookie Icing
- How to Make Sugar Cookie Icing: Step-by-Step Instructions
- Tips for Success When Decorating with Your Hard Drying Cookie Glaze
- Versatile Holiday Cookie Icing Ideas and Techniques
- Troubleshooting Common Sugar Cookie Icing Issues
- Frequently Asked Questions About This Easy Cookie Icing Recipe
- Estimated Nutritional Data for This Sugar Cookie Icing
- Share Your Perfect Sugar Cookie Icing Creations
Why This Is the Best Sugar Cookie Icing Recipe for Hardening (E-E-A-T Focused)
When I started baking seriously, I got so tired of standard powdered sugar glazes that stayed tacky forever. If you want to decorate cutout cookies for gifting or mailing, you need icing that hardens, plain and simple. This recipe delivers that durable, bakery-quality shell because we are using meringue powder. That’s the secret ingredient that turns basic ingredients into a fantastic sugar cookie icing recipe that sets up beautifully firm. When I share recipes here, I want you to know I’ve tested every single one—you can read a bit more about my background in my About Me section.
I spent ages testing batches until I found this combination—it’s my personal no fail cookie icing. It beats runny royal icing any day because it’s easier to manage but gives you that great structure. Unlike simple glazes, this one produces that incredible smooth glossy icing look you see online. For those of us in the Midwest, we need things that are dependable, and this icing that hardens is exactly that. You can trust this method; I link to other great hard-drying recipes elsewhere, but honestly, this one is what I use year after year because it just performs.
Quick Facts: Prep Time, Yield, and Why This Sugar Cookie Icing Recipe Works
The speed of this recipe is just one more reason it made the cut for Mia’s Meals. No long waiting around here!
- Prep Time: 10 minutes
- Total Time: 10 minutes (plus drying time!)
- Yield: Covers about 2 dozen 3-inch cookies
The meringue powder is key because it replaces raw egg whites, making it safer and super consistent. It creates the necessary structure so the icing dries completely hard, perfect for stacking your cookies high. When you mix it well, you incorporate just the right amount of air for that glassy shine.
Gathering Ingredients for Your Easy Cookie Icing
Okay, let’s get the very simple shopping list sorted out. Since this is an easy cookie icing recipe, we don’t need a giant supply run. Precision matters here, though! Don’t just pour things in; we want that smooth finish, remember? Everything needs to be measured carefully.
You absolutely must start by shifting those four cups of confectioners’ sugar. If you skip that step, I promise you’ll end up with little lumps, and we are aiming for perfection here!
- Four cups confectioners’ sugar, sifted.
- Three tablespoons of meringue powder—this is our structure builder!
- Six tablespoons of warm water—warm, not boiling, just warm enough to help things dissolve nicely.
- One teaspoon of standard vanilla extract.
- And here’s my little secret for stunning holiday cookie icing ideas: a tiny splash (1/4 teaspoon) of clear vanilla extract. It keeps the icing perfectly white if you’re doing bright colors or delicate pastels!
Mix the dry stuff first, then add your liquids. It’s straightforward, which is why this recipe is perfect for when you’re rushing to get those quick weeknight dinners sorted!
How to Make Sugar Cookie Icing: Step-by-Step Instructions
Now we get to the fun part—mixing! Don’t panic if you don’t have a fancy stand mixer; your hand mixer will do the job fine, though you’ll need to scrape those bowl edges a lot more often. Remember, we are making easy cookie icing here, so keep it simple and follow the sequence.
- First, whip your dry ingredients—the sifted sugar and the meringue powder—together until they look happily combined in the bowl.
- Next, dollop in the warm water and that vanilla, maybe the clear vanilla if you’re going for dazzling white this time. Mix it slowly at first so the sugar sugar doesn’t fly everywhere and make a huge mess throughout your kitchen.
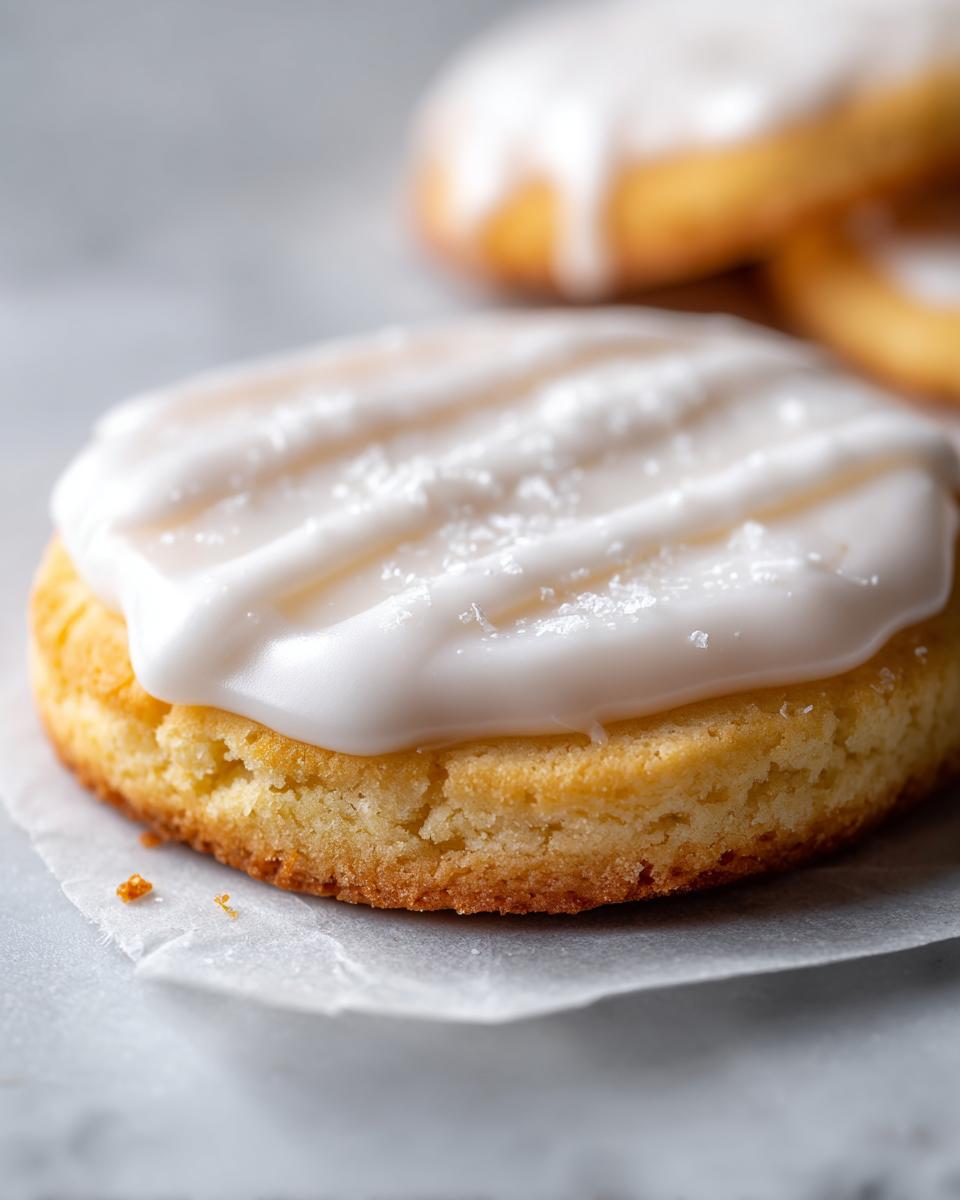
- Here’s the critical part: crank that mixer up to medium-high and let it run for a solid 5 to 7 minutes. I know, it feels like a long time! But this aeration step is what incorporates the air necessary for that gorgeous, smooth glossy icing finish. It should look ultra-smooth and start holding little soft peaks when you lift the beaters.
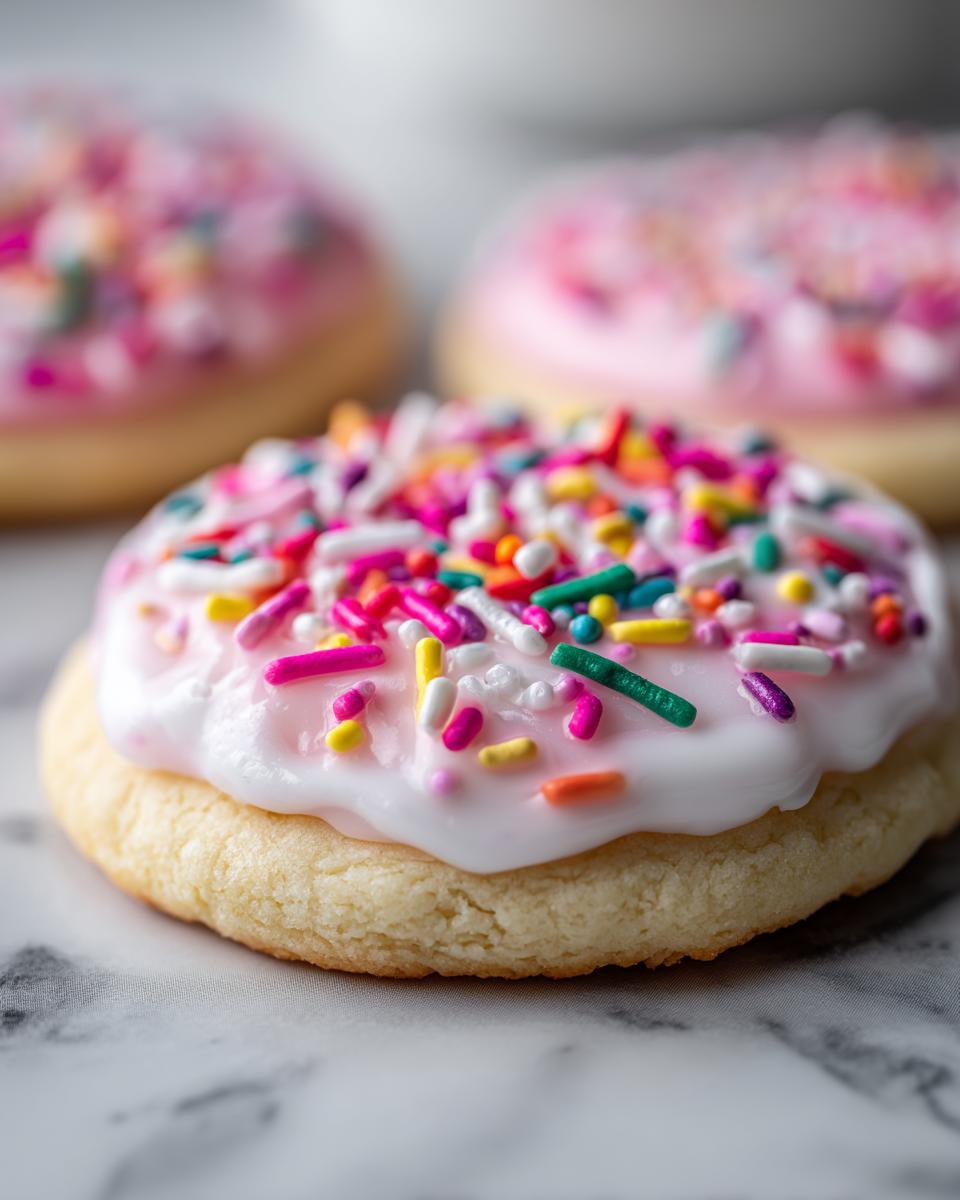
- Once it looks right, color your icing in separate bowls if you are planning a big Christmas cookie decorating session. If you want to flood cookies, you need to test the flow!
- When you’re ready to decorate, always use a thicker icing first to pipe the outline around your cookie edge. Let that outline set for about five minutes. Then, thin out a portion of your remaining icing to the flooding consistency and fill in the middle. This two-step process gives you those clean, professional lines. If you need more general tips on great baking, I’ve put some useful resources on appetizers and snacks too, for when you need a palate cleanser!
Achieving Perfect Cookie Glaze Consistency
Consistency is everything when we talk about how to flood cookies cleanly. For filling in those outlines (flooding), you want a thinner flow, but you definitely don’t want soup! To test the cookie glaze consistency, lift your spoon and let the icing drizzle back into the bowl. If the trail you make on the surface slowly disappears after about 10 seconds? You’ve hit that sweet spot. That’s the ribbon test!
If it’s too thick and doesn’t flow down smoothly, stir in water just one teaspoon at a time until that ribbon vanishes. If you accidentally went too thin and it’s looking soupy, don’t panic! Just whisk in a tablespoon of sifted confectioners’ sugar. This simple adjustment takes your beginner cookie decorating icing from messy to magnificent. Remember, check out this technique for reference if you’re struggling.
Tips for Success When Decorating with Your Hard Drying Cookie Glaze
Once you’ve got that perfect consistency—that lovely, workable icing—the last thing you want is to ruin it during coloring or drying. When I first started making this, I was so excited to display them for a neighborhood potluck that I hadn’t let them dry long enough. Oops! They stuck together in the box like glue. It taught me a huge lesson: patience is the final ingredient in this beginner cookie decorating icing process. You must let them set completely! If you want more general tips on connecting family over food, feel free to browse my About Me page.
When you’re coloring, please, please skip the liquid food coloring if you can help it. Liquid coloring adds extra water, which messes with the consistency we worked so hard to achieve. Grab some gel food coloring instead; it gives you vibrant hues without thinning out your beautiful mixture. This recipe is fantastic for vibrant colors, especially for Christmas cookie decorating.
Coloring and Storing Leftover Sugar Cookie Icing
If you have icing left over once you’re finished flooding—and you probably will, since this batch is so generous—you need to protect it immediately. If you leave it out, you’ll wake up to a hard, useless layer on top. The trick I use is simple: take a piece of plastic wrap and press it directly onto the surface of the icing inside the bowl. That way, no air gets to it, and it stays perfectly soft for the next day.
If you want to save colors for later, just put them in small, airtight tupperware containers. Just remember, when you revive it later, it might need a tiny splash of water stirred in to loosen it back up. This whole method is what keeps this recipe reliable and versatile for bakers like me who don’t want any waste.
Versatile Holiday Cookie Icing Ideas and Techniques
This sugar cookie icing isn’t just good; it’s adaptable enough for every holiday decorating challenge you throw at it. If you’re tackling intricate designs for Christmas cookie decorating this year, you’ll use the stiff peak consistency straight from the mixer for piping borders and fine details. That’s where the meringue powder really shows off its strength!
For the centers of those shapes, you use the thinner flood consistency we talked about earlier, which leads to that beautiful, flat, glossy surface. And if you want to get really fancy, you can try the wet-on-wet technique—quickly dropping dots of color onto the wet flood layer and gently swirling them with a toothpick before the icing sets. It’s so fun! It creates these gorgeous marbled patterns instantly. This ability to switch easily between firm piping consistency and flowing flood consistency is why I love this recipe so much. It lets you be creative without switching to a whole new type of icing. If you need ideas for other festive treats, check out my Christmas tree cheesecake recipe for inspiration, or see how others are using hard-drying icing over on Pinterest!
Troubleshooting Common Sugar Cookie Icing Issues
Even though this is my favorite, most reliable little mixture, sometimes things just don’t behave in the kitchen! That’s totally normal, and it’s why understanding how to adjust your sugar cookie icing is so important. Don’t run to the sink just yet; most issues are fixable in about 30 seconds. When I learned how to make sugar cookie icing, I learned to fix issues on the fly, which is what I want to pass on to you now.
The #1 problem I run into? It’s too thick! If you’re working on a big batch of flood icing and it seems sluggish or you have to push it around the cookie, it just needs hydration. Fix it by stirring in just a tiny splash of water. I mean, literally a quarter of a teaspoon at a time. Too fast, and you’re back to the runny consistency nightmare!
Conversely, if you have been busy coloring different bowls and suddenly your icing seems runny or won’t hold that nice clean outline edge you piped earlier, it needs backbone! This is usually when I just stir in a tablespoon of sifted confectioners’ sugar until it thickens up again. Stir gently so you don’t introduce too much air if you’re trying to keep it slightly thinner for flooding.
What about graininess? That’s almost always because the sugar wasn’t sifted well enough at the start, or maybe you didn’t whip it long enough to get it perfectly smooth. The solution here is simply to keep mixing! Give it another minute or two on medium-high speed. Most of the time, the friction and the whipping action smooth out those tiny rough spots, leaving you with that beautiful, glossy shell we are chasing. If you ever run into a problem I didn’t cover, don’t hesitate to reach out via my contact page!
Frequently Asked Questions About This Easy Cookie Icing Recipe
I get so many questions about this recipe after people try it the first time, which just proves how much everyone loves a good, dependable sugar cookie icing recipe! Here are the big ones I hear most often when folks are making their initial batch.
Can I use real egg whites instead of the meringue powder?
That’s a classic question, especially if you don’t keep meringue powder stocked! You absolutely can substitute the meringue powder with three fresh, large egg whites. However, I strongly recommend sticking to the meringue powder when you can. Why? Because the meringue powder gives you incredible consistency without the food safety worry of using raw eggs, and it always yields that gorgeous, smooth glossy icing finish. If you use egg whites, you might need to adjust your water slightly depending on the whites.
How long does this icing take to dry completely hard?
This is critical for gifting! Since this is a true hard drying cookie glaze, it takes time. At room temperature, with good air circulation, expect them to be dry enough to handle after about 4 to 6 hours. But if you want them rock solid, especially if you are stacking them, leave them overnight uncovered. They will be fully hardened by morning, ready to go!
Does this taste better than standard royal icing?
Oh, yes, in my opinion, it’s the best tasting cookie icing! Standard royal icing made just with egg whites and sugar can sometimes taste a bit sterile, almost chalky, once it dries hard. Because this recipe uses a touch of vanilla and relies on the meringue powder blend, it has a much softer, sweeter flavor that pairs perfectly with a buttery sugar cookie. It doesn’t taste medicinal at all!
Can I use this icing for piping fine details?
Absolutely! That is why we whip it for those full 5 to 7 minutes. When you pull the beaters out, the icing should hold stiff peaks that stand up tall and don’t slump over immediately—that’s your piping consistency. This allows you to flood the centers, but use the same batch (just slightly thicker) for outlining details or piping little dots and writing all over them. It’s such a versatile mixture!
If you’re looking for some simple weekday treats to practice on before the holidays, take a peek at some of my easy breakfast ideas. Sometimes setting up for baking just feels easier after a nice, simple morning!
Estimated Nutritional Data for This Sugar Cookie Icing
I know, I know, when you’re making something this delicious, you probably don’t want to think about the numbers! But since we are striving for honesty and a good overview of what we’re serving up, I put together the estimated nutritional data for this glorious, hard-drying glaze. Remember, since this is just the icing part, the final count depends on how much you use per cookie, but this gives you a general idea based on the recipe yield.
These figures are purely estimates based on the ingredients listed and the yield of about 1/4 cup per serving. For most baking projects, we focus on the joy, but it’s nice to know what we are working with! You’ll see that the bulk of the calories really comes from the sugar content, as expected for any great sugar cookie icing recipe.
Here are the key numbers for a 1/4 cup serving:
- Calories: 180
- Total Carbohydrates: 45g
- Total Sugar: 45g
- Protein: 1g
You can see that we’ve got virtually no fat in this icing, which is great for keeping things light. Honestly, when I’m making these for Christmas, I focus on how beautiful they look on the tree platter, not the calorie count—but you wanted the facts, so here they are! It keeps things simple so you can focus on the decorating fun.
Share Your Perfect Sugar Cookie Icing Creations
Well, that’s the whole process! You’ve got the key—the best sugar cookie icing that dries flawlessly hard, looks glossy, and tastes amazing. I’m so excited for you to try this out because decorating should be fun, not frustrating. I truly hope this recipe has taken the stress out of your holiday baking sessions.
When you finish up your decorating marathon, I would absolutely love—and I mean love—to see what you create! Did you go with simple white dots, or did you mix up some bold colors for the kids? Head over to the comments section below and give this recipe a rating. A solid five stars lets me know that this easy method is working just as well for your family as it does for mine back in Ohio.
Tell me what your favorite holiday design was this year! Whether it’s gingerbread men, simple circles, or some complex Christmas cookie decorating masterpiece, drop a photo link if you can, or just let me know what shapes you iced up. I always get my best ideas from you all! If you ever need to ask me a follow-up question while you’re working on your next batch, don’t hesitate to reach out through my contact page. Happy decorating, friends!
PrintThe Best Easy Sugar Cookie Icing Recipe That Dries Hard and Glossy

Make smooth, glossy sugar cookie icing that hardens perfectly for decorating and gifting. This simple recipe is foolproof for beginners and ideal for holiday baking.
- Prep Time: 10 min
- Cook Time: 0 min
- Total Time: 10 min
- Yield: Covers about 2 dozen 3-inch cookies 1x
- Category: Dessert
- Method: Mixing
- Cuisine: American
- Diet: Vegetarian
Ingredients
- 4 cups confectioners’ sugar, sifted
- 3 tablespoons meringue powder
- 6 tablespoons warm water
- 1 teaspoon vanilla extract
- 1/4 teaspoon clear vanilla extract (optional, for pure white color)
Instructions
- In a medium bowl, whisk together the sifted confectioners’ sugar and meringue powder until fully combined.
- Add the warm water and extracts to the sugar mixture.
- Using an electric mixer on low speed, mix the ingredients until just combined. Scrape down the sides of the bowl.
- Increase the mixer speed to medium-high and beat for 5 to 7 minutes until the icing is very smooth, glossy, and holds soft peaks. This step incorporates air and creates the smooth finish.
- Test the consistency. For piping details, the icing should be thick (stiff peaks). For flooding large areas, add water one teaspoon at a time until the icing flows slowly off the spoon in a ribbon that disappears into the bowl after about 10 seconds.
- Separate the icing into bowls for coloring, if desired. Use gel food coloring for best results.
- Use the icing immediately for decorating cookies. For flooding, outline the cookie edge first with a thicker consistency icing, let it set for 5 minutes, then fill in the center with the thinner flood consistency icing.
- Allow the decorated cookies to dry uncovered at room temperature for several hours, or overnight, until the icing is completely hard to the touch.
Notes
- For a pure white icing, use clear vanilla extract instead of standard vanilla extract.
- If the icing becomes too thick while decorating, stir in a few drops of water. If it is too thin, mix in a tablespoon of sifted confectioners’ sugar.
- This hard-drying cookie glaze is excellent for stacking and gifting because it sets firm.
- Store unused icing covered tightly with plastic wrap pressed directly onto the surface to prevent a crust from forming.
Nutrition
- Serving Size: 1/4 cup
- Calories: 180
- Sugar: 45
- Sodium: 5
- Fat: 0
- Saturated Fat: 0
- Unsaturated Fat: 0
- Trans Fat: 0
- Carbohydrates: 45
- Fiber: 0
- Protein: 1
- Cholesterol: 0