
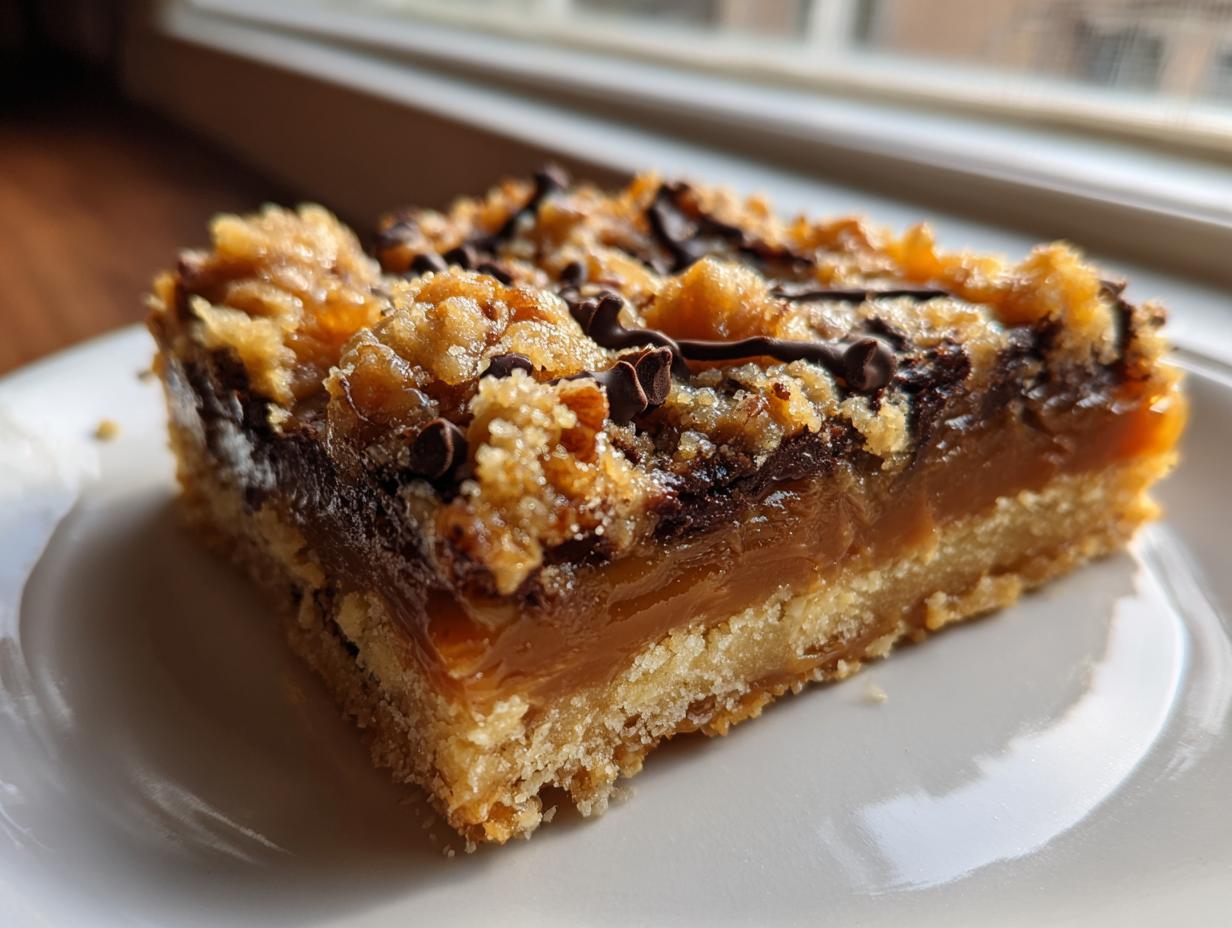
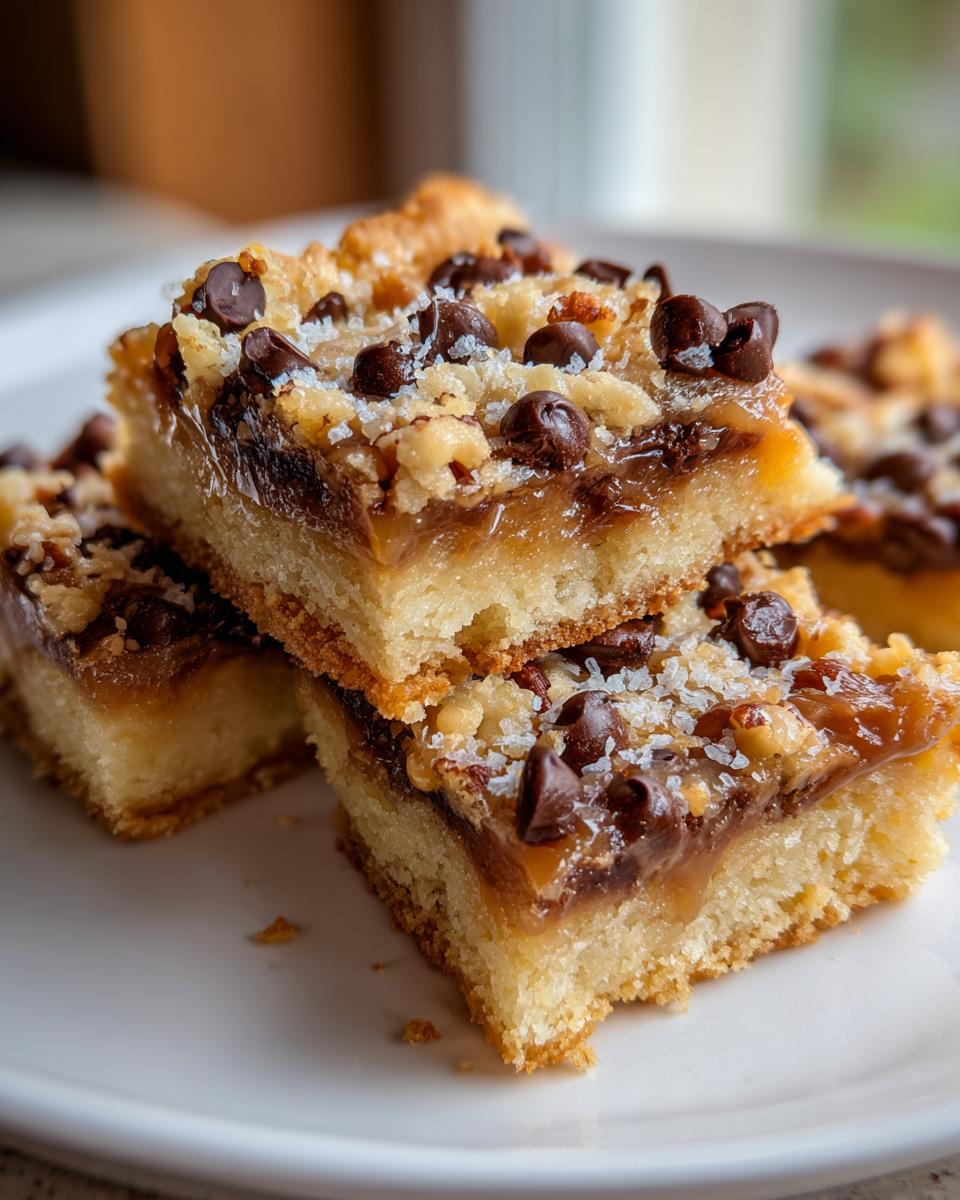
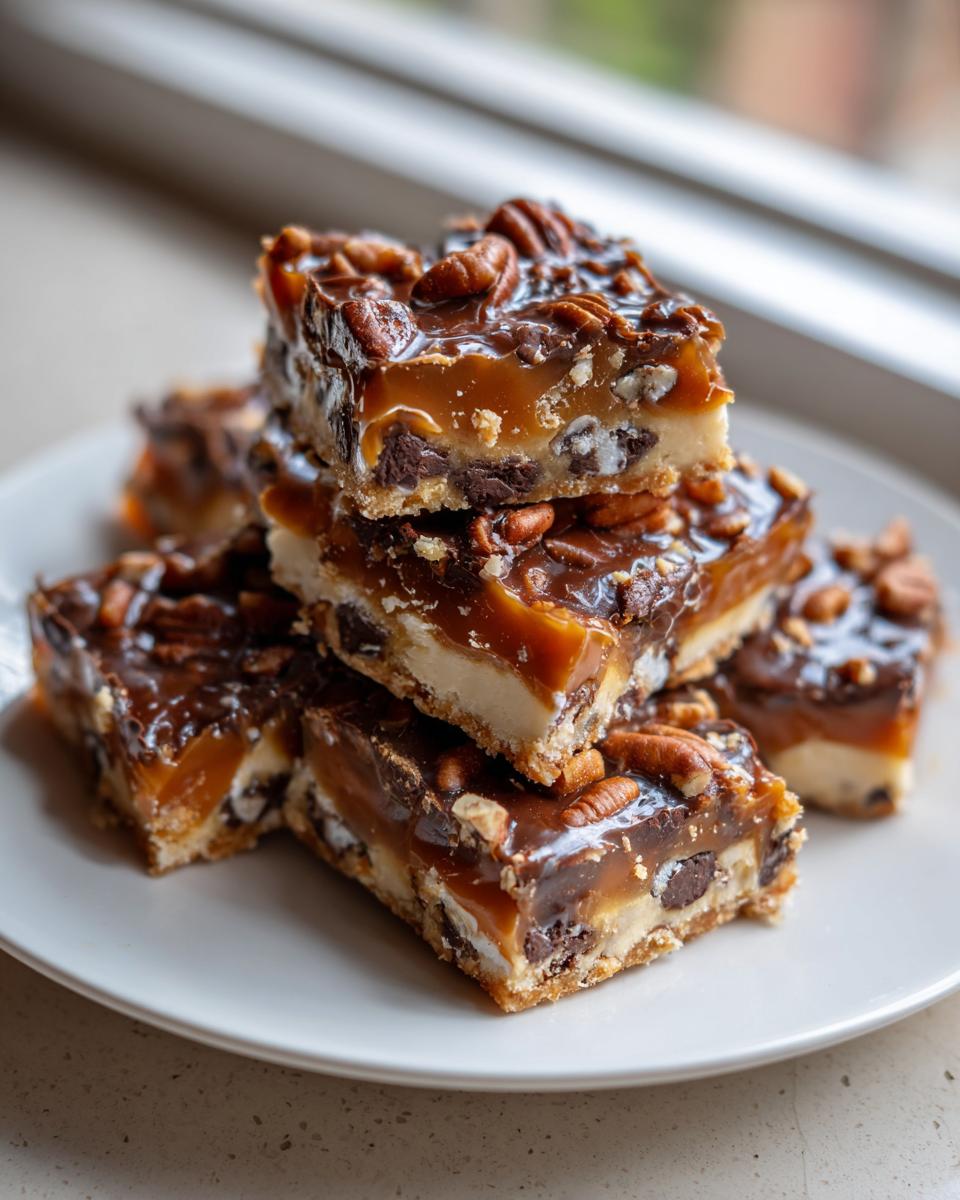
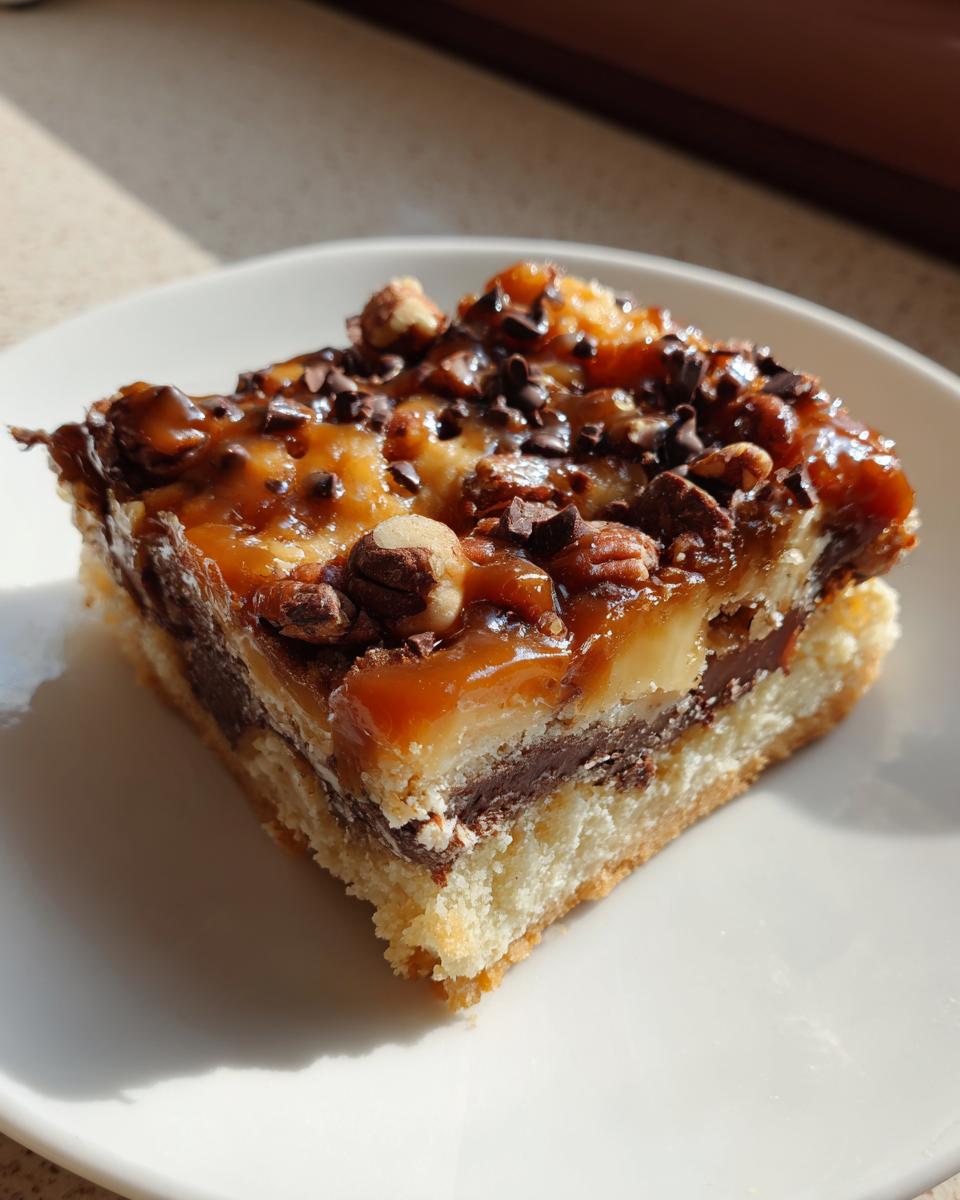
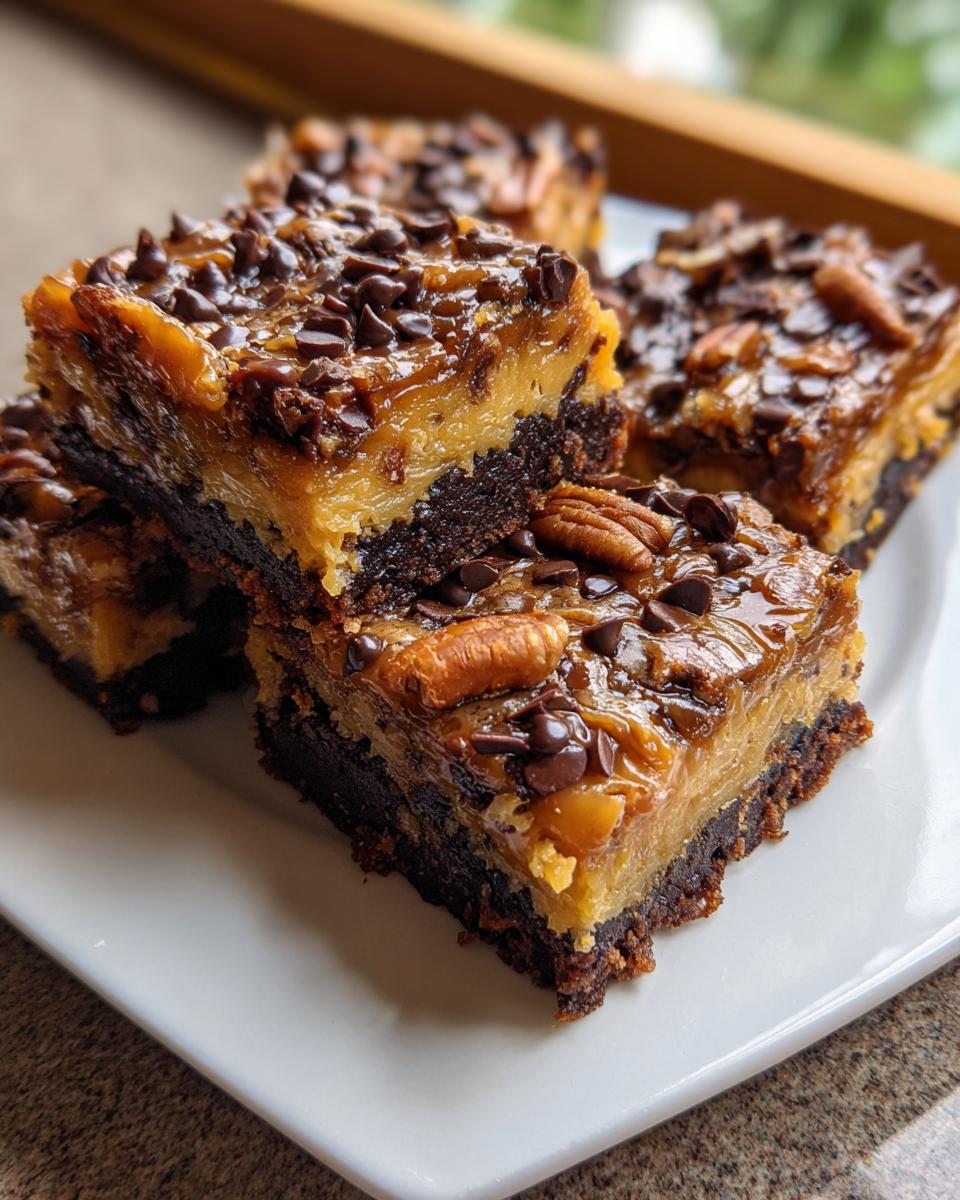
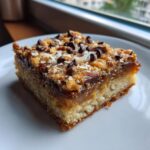
You know how sometimes you just need a dessert that completely takes over your senses? Something so rich, so buttery, and so wonderfully gooey that everything else just disappears for a minute? That’s exactly what happened when my family first discovered what we affectionately call the knock you naked bars. These aren’t just cookies; they are pure, layered indulgence, and I promise to show you the simplest path to this deliciousness. Here at Mia’s Meals, we focus on making memorable food without the fuss, and these bars are the absolute best example of that philosophy. They bake up dependably every single time, delivering that rich, decadent texture we all crave. Trust me, once you see these layered beauties, you’ll want to pin this recipe for later!
- Why You Need to Make These Knock You Naked Bars Today
- Gathering Ingredients for Your Knock You Naked Bars
- Step-by-Step Guide to Perfect Knock You Naked Bars
- Tips for Making the Best Gooey Dessert Bars
- Ingredient Notes and Simple Substitutions for Knock You Naked Bars
- Storage and Reheating Instructions for Your Rich and Sweet Baked Goods
- Frequently Asked Questions About Knock You Naked Bars
- Estimated Nutritional Data for These Decadent Sweet Treats
- Share Your Experience Making These Ultimate Comfort Food Bars
Why You Need to Make These Knock You Naked Bars Today
I’m not going to play coy—these bars live up to their fantastic, slightly scandalous name. If you’re looking for ‘Over the Top Bar Cookies,’ stop scrolling right now because you’ve found them. Seriously, these are the definition of an indulgent dessert bar that feels like a celebration in square form.
Here’s why these are going into heavy rotation at my house, and why they should be in yours:
- The center is just insane. We’re talking warm, molten chocolate mixed with gooey, sweet caramel that barely holds itself together. It’s the perfect ‘gooey dessert bar.’
- They are deceptively simple. You don’t need any fancy equipment. It’s just a crust, a pour, and a sprinkle. That’s it!
- We nailed the texture balance. That buttery shortbread crust gives you the perfect sturdy base to hold up against all that creamy, chewy filling.
- These are fantastic for any gathering. They are easy to slice and transport, and everyone always asks for the recipe for these irresistible bar desserts.
- They taste like you spent all day in the kitchen, but honestly, they only take about 40 minutes to bake!
Gathering Ingredients for Your Knock You Naked Bars
Keeping things simple is my motto, and that extends right to the ingredient list for these decadent sweet treats. You probably have most of this stuff hanging out in your pantry already, which is half the battle won! Remember, precision matters here, especially when we are building these wonderful layers.
For these bars, you’ll need the groundwork for the crust, the liquid gold for the middle, and all those wonderful things we sprinkle on top:
- 1 cup unsalted butter, softened (Don’t use melted, we need soft for the crust!)
- 1 1/2 cups all-purpose flour
- 1/2 cup granulated sugar
- 1 (14 ounce) can sweetened condensed milk (This is the miracle ingredient!)
- 1 cup semi-sweet chocolate chips
- 1 cup butterscotch chips
- 1 cup shredded sweetened coconut
- 1 cup chopped pecans
- 1 teaspoon vanilla extract
- 1/4 teaspoon salt
Seriously, just lining up these ingredients makes me excited. It’s so straightforward, and soon you’ll have the richest, buttery dessert squares!
Step-by-Step Guide to Perfect Knock You Naked Bars
Okay, let’s get baking because this is where the magic happens! Making these fantastic easy bake bar cookies is really more about assembly than complicated baking. We’re going to build this dessert layer by layer, and timing is our best friend, especially right after that first quick bake.
Preparing the Buttery Crust and Initial Bake
First things first: get that oven preheated to 350 degrees Fahrenheit. You absolutely must line a 9×13 inch pan with parchment paper, making sure you let the edges hang over—that overhang is your handle later! Now, for the crust. Mix your softened butter, flour, and sugar until it looks like, well, coarse, sweet sand. I always press this mixture firmly into the base of the pan. If you pack it down tight, you guarantee a sturdy base that won’t crumble when you try to move it later. Bake this crust for just 15 minutes until it’s lightly golden around the edges.
Layering the Gooey Filling for Your Knock You Naked Bars
This next step is crucial for those incredible layers! As soon as that crust comes out of the oven—while it’s still piping hot—pour the entire can of sweetened condensed milk right over the top. Don’t dawdle! Spread it gently to cover everything. Immediately, sprinkle on your chocolate chips, butterscotch chips, coconut, and pecans. I like to take a spatula and just gently encourage the toppings to sink just a tiny bit into that warm milk layer. That’s what guarantees that glorious, gooey texture when it sets.
The Final Bake and Cooling Process
Pop the whole beautiful mess back into the oven for another 20 to 25 minutes. You’re looking for the edges to be bubbly and set, but honestly, if the center looks even a *teensy* bit soft, that’s perfect for maximum gooeyness. Now comes the hardest part: cooling. You *have* to let these bars cool completely, which usually takes a good two hours on the rack. Resist the urge! If you slice them warm, it’s an absolute sticky disaster. Patience here ensures beautiful, clean squares.
Tips for Making the Best Gooey Dessert Bars
Listen, anyone can throw chips into a pan, but achieving that perfect, melt-in-your-mouth, ooey-gooey texture that defines these Knock You Naked Bars takes just a couple of little secrets. These aren’t just sweet squares; they are texture experiences! If you’re aiming for the title of ‘Best Gooey Dessert Bars’ on your next potluck, pay close attention to these tips based on my family’s baking adventures.
Here’s what I’ve learned about creating that irresistible center:
- Don’t Overbake—Seriously! This is my biggest rule for any gooey bar recipe. If those center squares look totally firm when you pull them out, you’ve gone too far. They need to look slightly soft in the middle. They firm up as they cool, so trust the process!
- Salt is Your Friend: Don’t skip that tiny sprinkle of salt right when the bars come out of the oven. That little bit of salinity cuts through the richness of the chocolate and caramel perfectly. It balances the overwhelming sweet factor.
- The Vanilla Finish: I drizzle that teaspoon of vanilla over the top while the bars are still hot. It smells amazing, and it seems to really help infuse that final, complex flavor into the whole top layer.
- Patience Pays Off: I know I keep saying it, but it’s worth repeating: cooling completely is non-negotiable for clean cuts. If you cut them too soon, you end up with a beautiful, messy puddle, which is tasty but not great for serving to guests. Think about chilling them for a few hours before slicing.
If you love making these kinds of festive holiday treats, you have to check out my favorites for Christmas cookie bars too—many of the same gooey principles apply!
Ingredient Notes and Simple Substitutions for Knock You Naked Bars
One thing I love about these recipes, especially for things as over the top as our Knock You Naked Bars, is how forgiving they can be! While I stand by the exact measurements because they create that perfect structure, I know sometimes you’re missing one small thing or want to tweak the flavor profile. Don’t panic! You can absolutely make some manageable swaps here.
Let’s talk about the unsung hero first: that can of sweetened condensed milk. You cannot substitute this with evaporated milk or regular cream—it just won’t set up right. That high sugar content mixed with the heat is what creates that irresistible, thick, chewy layer that holds everything together. It’s the glue for these decadent sweet treats!
Now, for the fun part, the chips! The recipe calls for both chocolate and butterscotch, which gives you that signature sweet/salty depth. But if you’re a big fan of peanut butter, I have a great option for you. You can easily swap out the butterscotch chips for peanut butter chips. Trust me, when you combine peanut butter with chocolate and that gooey layer, you’re creating an entirely new level of irresistible bar desserts. Just measure them equally! That’s all you need to do.
Storage and Reheating Instructions for Your Rich and Sweet Baked Goods
Once you manage to let these Knock You Naked Bars cool completely—which is half the battle won—you’ll wonder how to keep them tasting like they just came out of the oven forever. Because of the gooey nature of that condensed milk middle layer, how you store these matters a lot if you want them to stay chewy and delicious!
For the absolute best texture, especially if you’re making these as part of a batch of rich and sweet baked goods for a gathering, I strongly recommend storing them in the refrigerator. Place the cut bars in an airtight container, separated by sheets of wax paper or parchment paper so they don’t stick together. They will hold up beautifully this way for nearly a week!
When you pull them straight from the fridge, they will be quite firm—and that’s okay! The best way to eat them is after they’ve warmed up just a little on the counter for about 30 minutes. If you are in a rush, you can even microwave a single square for about 10 seconds. Just be careful not to overheat them, or you’ll end up with too much gooey liquid!
If, by some miracle, you have leftovers after a week, you can freeze them! Wrap individual squares tightly in plastic wrap, put them in a freezer bag, and they should be perfect for up to three months. Thaw them overnight in the fridge, then let them sit on the counter for a bit before enjoying.
Frequently Asked Questions About Knock You Naked Bars
I get so many questions whenever I post these, and honestly, I love talking about how to get these perfect! These truly are some of the best, most irresistible bar desserts you’ll ever meet, but everybody worries about messing up those layers. Let’s tackle a few of the things I hear most often about getting the texture just right!
Are these Knock You Naked Bars difficult to make?
Oh, goodness, no! If you can stir ingredients in a bowl and pour something out of a can, you can make these! They are one of my favorite simple bar recipes for parties because they look so impressive but require absolutely zero skills beyond basic mixing. It’s just a crust, a pour of milk, and a sprinkle of toppings. You’ve got this!
What makes these Layered Cookie Bars Recipe so gooey?
That gooey factor comes down almost entirely to two things working together: that can of sweetened condensed milk and *not* overbaking! The milk turns into this chewy, almost caramel-like blanket once baked. If you bake it until it looks dry, it becomes tough instead of luscious. You want visible bubbles, a little wobble in the very center, and then you pull them out! They firm up as they cool, keeping all that wonderful moisture locked inside.
Do I absolutely have to use butterscotch chips?
You don’t *have* to, but I really recommend it if you want that classic flavor profile that makes these bars so addictive! The butterscotch works with the chocolate chips to create that sweet/salty complexity we all talk about. If you skip them, you obviously miss that note, but you can substitute them with an equal measure of peanut butter chips or even another cup of semi-sweet chips if that’s what you have on hand. As long as the bottom crust and the condensed milk layer are there, you’ll still have a wonderful dessert square!
Estimated Nutritional Data for These Decadent Sweet Treats
When you’re indulging in something as rich as these Knock You Naked Bars, you might be curious about what exactly you’re digging into! I always say, knowing is half the fun, especially with comfort food this good. Because we pack so much goodness—butter, chocolate, those lovely sweet chips—into every bite, they are definitely on the richer side, which is why we cut them into square servings!
Every serving of these fantastic, layered cookie bars is a powerhouse of flavor. Please remember that these numbers are just estimates based on standard store-bought ingredients. Actual values can shift based on the brands of chips or the exact amount of nuts you pack on top!
- Serving Size: 1 bar
- Calories: 280
- Fat: 18g (with 9g Saturated Fat)
- Carbohydrates: 28g
- Sugar: 25g
- Protein: 3g
- Sodium: 110mg
- Cholesterol: 35mg
There you have it! A little insight into these decadent sweet treats. They are certainly something to save for a day when you truly deserve a rich and sweet baked good!
Share Your Experience Making These Ultimate Comfort Food Bars
Well, friend, that is the complete roadmap to achieving absolute bliss in baking form! We’ve walked through every wonderful, messy, gooey step of creating what I firmly believe are the best ultimate comfort food bars you’ll ever have the pleasure of making—and eating, of course.
Now that you have the secret to these irresistible desserts, I truly want to hear all about it! Did they live up to their name? Did you try the peanut butter chip swap? Don’t be shy! Head down to the comments section below and tell me how they turned out. Seeing your pictures and reading your feedback is genuinely the best part of my day here at Mia’s Meals.
Your success in the kitchen is what this whole journey is about. If you loved these, why not check out more about me, Mia Thompson, and see what other simple comfort foods I’m perfecting for the busy home cook? Happy baking, and enjoy every single bite of those glorious bars!
PrintKnock You Naked Bars: The Ultimate Indulgent Dessert
Make these rich, layered dessert bars featuring a buttery crust, gooey caramel, and chocolate chips. This easy bake bar cookie recipe delivers maximum flavor with simple steps for a truly irresistible treat.
- Prep Time: 15 min
- Cook Time: 40 min
- Total Time: 3 hours 55 min
- Yield: 24 servings 1x
- Category: Dessert
- Method: Baking
- Cuisine: American
- Diet: Vegetarian
Ingredients
- 1 cup unsalted butter, softened
- 1 1/2 cups all-purpose flour
- 1/2 cup granulated sugar
- 1 (14 ounce) can sweetened condensed milk
- 1 cup semi-sweet chocolate chips
- 1 cup butterscotch chips
- 1 cup shredded sweetened coconut
- 1 cup chopped pecans
- 1 teaspoon vanilla extract
- 1/4 teaspoon salt
Instructions
- Preheat your oven to 350 degrees Fahrenheit. Line a 9×13 inch baking pan with parchment paper, leaving an overhang for easy removal.
- Prepare the crust: In a medium bowl, combine the softened butter, flour, and granulated sugar. Mix until the mixture resembles coarse crumbs.
- Press the crust mixture evenly into the bottom of the prepared pan. Bake for 15 minutes until lightly golden.
- Remove the crust from the oven. Immediately pour the entire can of sweetened condensed milk evenly over the hot crust.
- Sprinkle the chocolate chips, butterscotch chips, coconut, and pecans over the condensed milk layer. Gently press the toppings down slightly.
- Bake for an additional 20 to 25 minutes, or until the edges are bubbly and the topping is set.
- Remove the bars from the oven. While still warm, sprinkle with salt and drizzle with vanilla extract.
- Let the bars cool completely in the pan on a wire rack, about 2 hours, before lifting out using the parchment overhang.
- Cut into squares. These are best served at room temperature or slightly chilled.
Notes
- For an extra gooey texture, do not overbake. The center should still look slightly soft when you remove them from the oven.
- You can substitute the butterscotch chips with peanut butter chips for a different flavor profile.
- Chill the bars for at least 4 hours, or overnight, before slicing for cleaner cuts.
Nutrition
- Serving Size: 1 bar
- Calories: 280
- Sugar: 25
- Sodium: 110
- Fat: 18
- Saturated Fat: 9
- Unsaturated Fat: 9
- Trans Fat: 0
- Carbohydrates: 28
- Fiber: 1
- Protein: 3
- Cholesterol: 35