
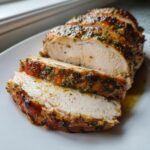
Oh, let’s just get real for a second: the sheer panic that sets in when you think about that huge bird sitting in the fridge. Holiday cooking stress is a real thing, especially when everyone’s expecting that show-stopping centerpiece. You want that golden, crispy skin, right? But more than anything, you just want to avoid serving dry meat. Trust me, I’ve been there! That’s exactly why I developed this Herb Butter Roast Turkey recipe. It’s my secret weapon for guaranteeing a moist turkey with beautifully browned skin, every single time. Here at Mia’s Meals, we focus on simplifying flavor, making sure you nail the big moments without working yourself ragged. This recipe is the definitive answer to your holiday cooking woes!
- Why This Herb Butter Roast Turkey Recipe Delivers the Perfect Turkey
- Ingredients for Your Flavorful Turkey
- Step by Step Turkey Roasting Instructions
- Tips for Success with Your Roast Turkey Recipe
- Serving Suggestions for Your Holiday Turkey Dinner Ideas
- Storage and Reheating Instructions for Leftover Turkey
- Frequently Asked Questions About This Turkey Recipe
- Nutritional Data for This Savory Turkey Recipe
- Share Your Holiday Feast Centerpiece Success
Why This Herb Butter Roast Turkey Recipe Delivers the Perfect Turkey
I promise you, this isn’t just another roast turkey recipe. This is what I call the Best Turkey Recipe for moisture and flavor because it tackles the two biggest holiday fears head-on. No more sad, pale skin or meat that tastes like sawdust! We’re aiming for that golden, crispy skin centerpiece that makes everyone pull out their phones. If you want the secrets to a truly moist turkey guaranteed, this is it. You’ll want to check out how other folks have turned their holiday bird into a showstopper at this amazing guide!
- It creates a seal with the fat, locking in all the good juices.
- The high-heat start gives you that gorgeous, golden color everyone wants.
- It’s designed to give you a truly Juicy Thanksgiving Turkey.
Moist Turkey Secrets Revealed
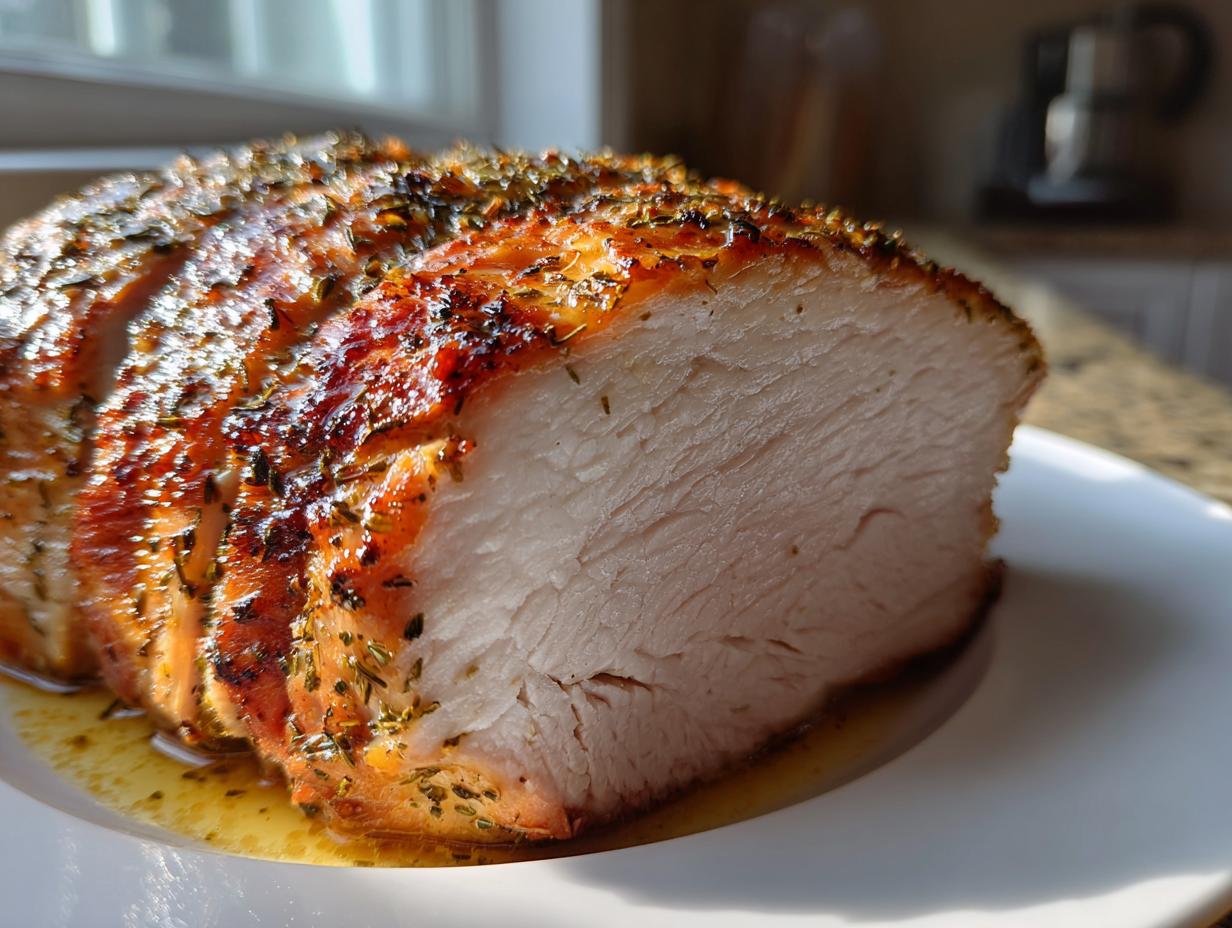
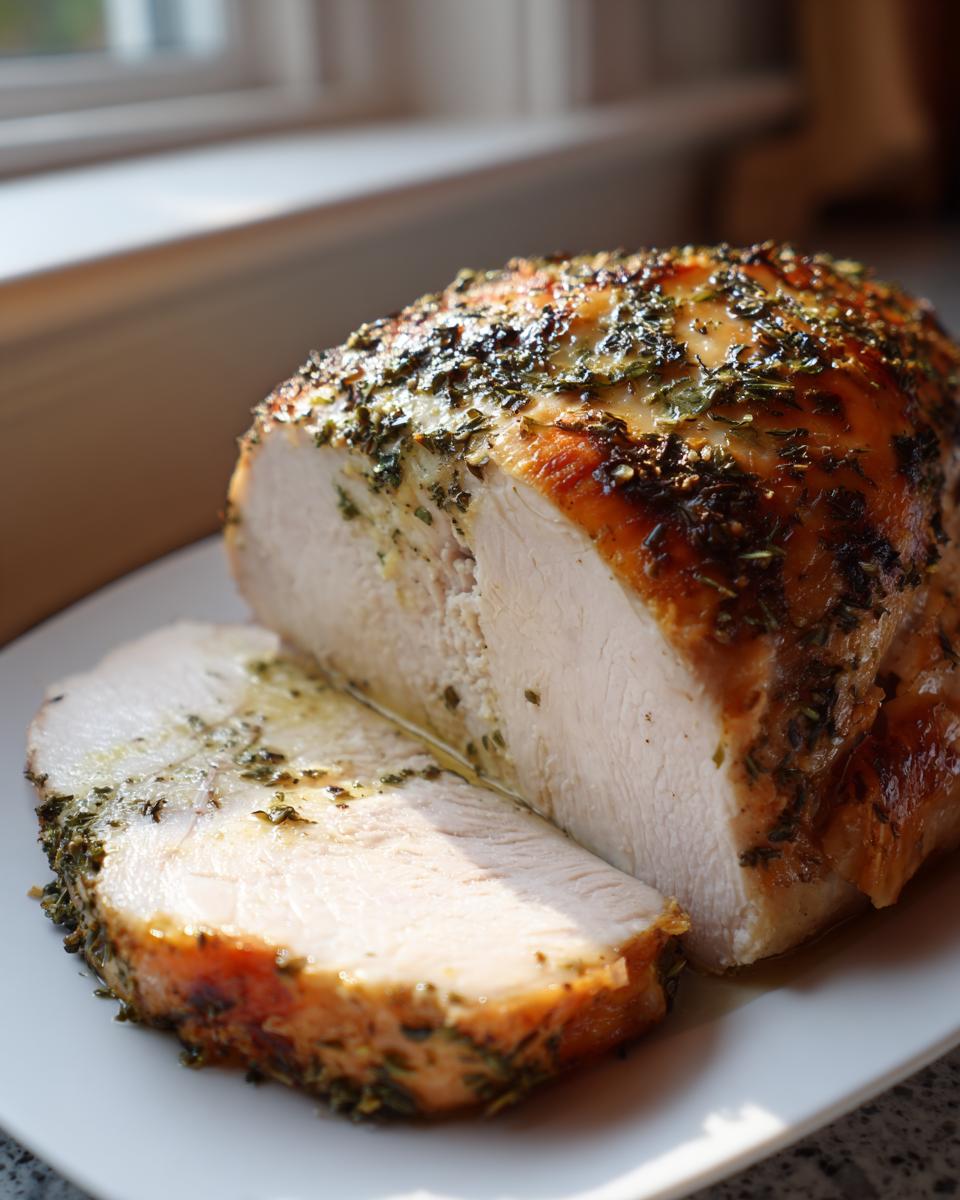
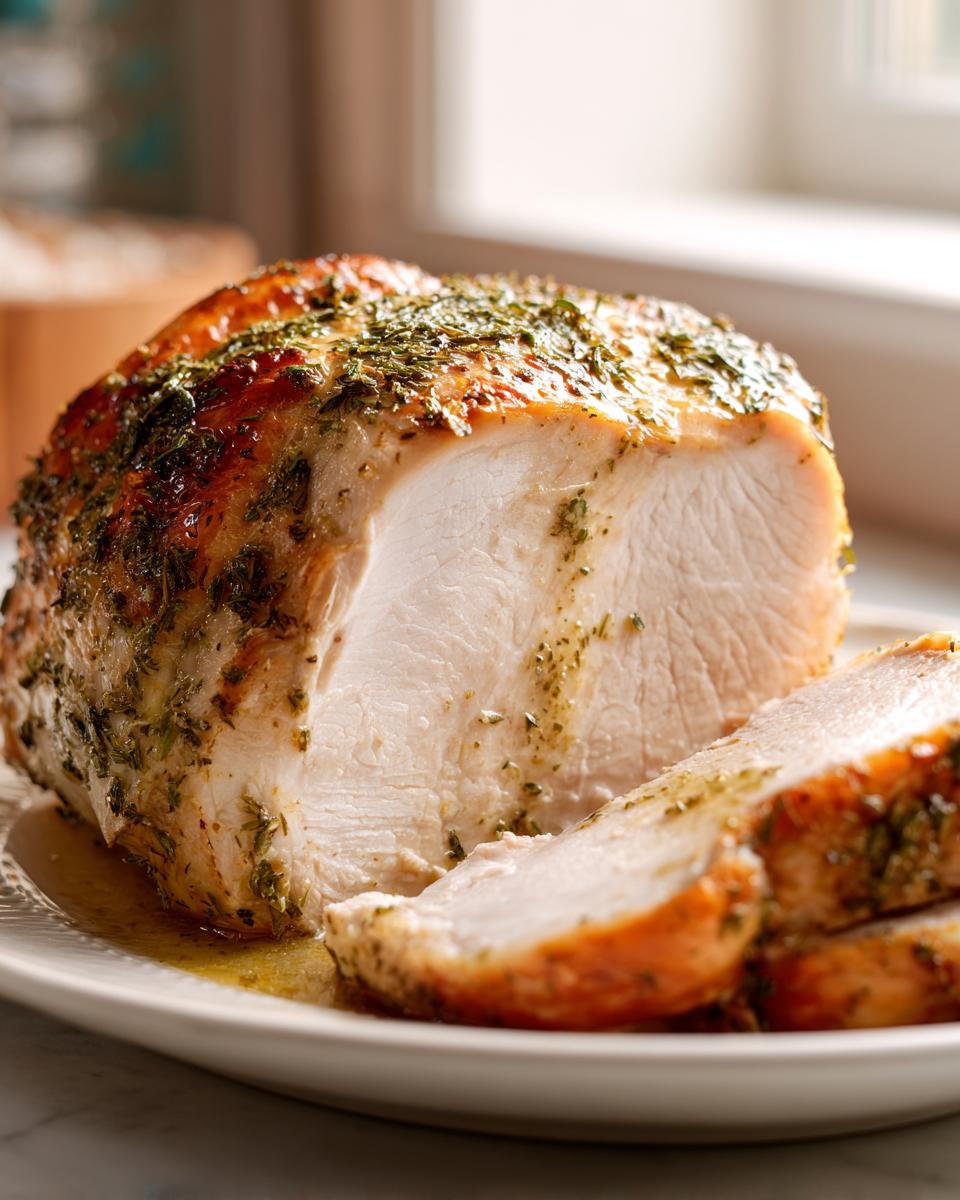
The secret weapon here is getting that herb butter *under* the skin. Just rubbing it on top is fine, but tucking that herby, salty goodness directly over the breast meat acts like a built-in basting agent. It melts down slowly, self-seasoning and bathing the white meat in flavor and fat as it roasts. So forget dry turkey—this method protects the delicate breast meat from drying out!
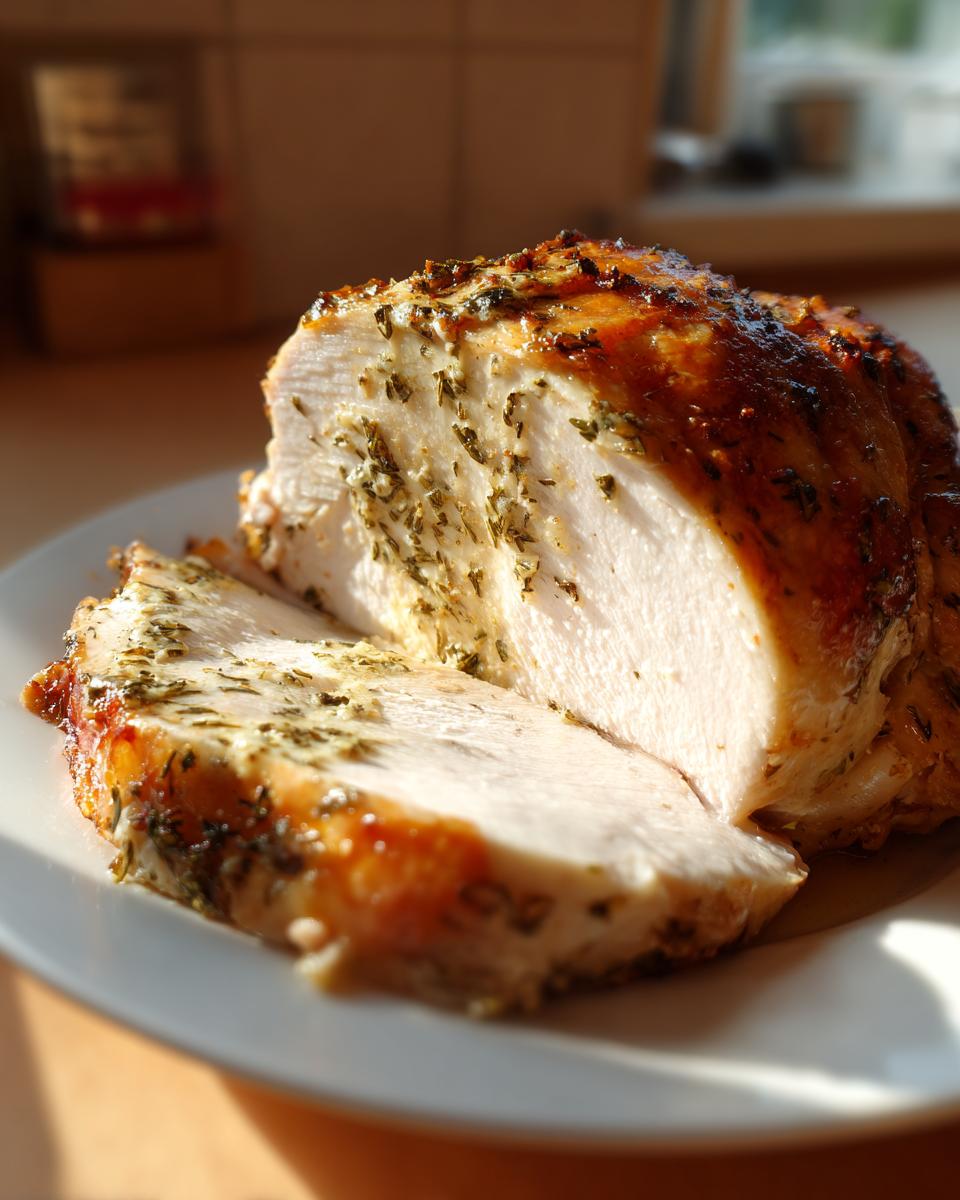
Achieving Crispy Skin Turkey Every Time
Crispy skin is all about preparation, friends. You absolutely have to pat that bird dry—I mean, bone-dry—with paper towels before anything else happens. Then, that initial blast of heat at 425°F is non-negotiable! It shocks the skin into crisping up beautifully before we cut the temperature down to cook the inside slowly. It’s a simple trick that makes this a genuine Crispy Skin Turkey champion.
Ingredients for Your Flavorful Turkey
Okay, now listen up! This is what you’ll need to create that incredible aroma filling your whole house. Remember, we want maximum flavor here, which is why those fresh herbs are so important for this Flavorful Turkey. Don’t try to substitute dried herbs unless you absolutely have to—the fresh stuff makes all the difference. I’ve included everything we need for the bird itself and the aromatics to sit inside the pan for that extra steam and taste. If you want to get ahead, you can whip up my simple easy homemade cranberry sauce while you gather these!
For the bird, you’ll need one whole turkey, about 12 to 14 pounds, and make sure you’ve pulled out the neck and giblets—we save those for stock, not roasting! For the star of the show, the herb butter, you need one cup of unsalted butter that’s softened perfectly, not melted, mind you. Then grab four cloves of garlic that are minced up fine, two tablespoons of fresh rosemary chopped really well, two tablespoons of fresh thyme leaves, and one tablespoon of fresh sage that’s chopped up. Don’t forget your seasoning: one tablespoon of kosher salt and one teaspoon of black pepper.
To fill the cavity and perfume the drippings, cut up one large onion into quarters, take one lemon and slice it right in half, and chop about four good celery stalks roughly. Finally, you’ll need one cup of dry white wine or chicken broth to go into the bottom of the roasting pan to keep things steamy down there. That’s everything; prep your ingredients, and you’re halfway to the most delicious holiday centerpiece!
Step by Step Turkey Roasting Instructions
This is where the magic happens, but don’t rush it! If you follow these steps exactly, you’re going to nail that perfect roast. We need to start ahead of time, so make sure you pull that bird out of the fridge the day before; letting it thaw completely is the first crucial step for even cooking. Remember to pat it totally dry when you’re ready—moisture is the enemy of crispy skin, remember?
- First things first: Remove the turkey from refrigeration 24 hours before cooking to allow it to fully thaw. Take out the neck and giblets from the cavities—we save those for gravy later! Pat the entire turkey surface completely dry with paper towels. Seriously, be thorough here; this is key for crispy skin.
- Get your oven preheated! We are going to start hot: 425 degrees Fahrenheit.
- Now, let’s get that amazing flavor bomb ready in a small bowl. Combine the softened butter, minced garlic, rosemary, thyme, sage, salt, and pepper to create your herb butter rub.
- This next part is important for juiciness: Gently loosen the skin over the turkey breast and thighs. You want to create little pockets. Rub half of the herb butter directly onto the meat under the skin. Then, rub the rest of that beautiful mixture all over the outside of the turkey skin.
- Stuff the inside cavity gently. Place the onion quarters, lemon halves, and celery stalks inside the main cavity of the turkey. Don’t pack it tight! Just let them sit in there to steam the inside flavorfully.
- Get the turkey onto a roasting rack set inside a large roasting pan. Pour the white wine or broth into the bottom of the pan. This prevents the drippings from burning too fast.
- Time for the oven introduction! Place the turkey in the preheated 425°F oven and roast for just 30 minutes to kickstart that skin crisping process.
- After that initial blast, reduce the oven temperature down to 325 degrees Fahrenheit. Continue roasting. You’ll want to baste the turkey every 45 minutes with those lovely pan drippings you’re collecting.
- If you notice the skin starting to look too dark too early—which is a good sign, honestly!—just loosely tent the breast with aluminum foil.
- Keep roasting until your meat thermometer inserted into the thickest part of the thigh honestly reads 165 degrees Fahrenheit. Don’t pull it out early! For a 12-14 lb bird, this usually means about 3 to 3.5 hours total cooking time.
- This last step is the most important for a Juicy Thanksgiving Turkey. Remove the turkey from the oven. Tent it loosely with foil and for heaven’s sake, let it rest on the counter for at least 30 minutes before you even *think* about carving it. This allows those juices to redistribute. If you skip the rest, you skip the moisture! You can check out how to cook a turkey breast in the slow cooker while you wait, if you need some other ideas: slow cooker turkey breast recipe.
Preparing the Herb Butter Turkey Rub
This is the foundation of your flavor, so take your time here. You need that butter to be soft enough to combine easily but not oily. Once you’ve mixed the butter with all those fresh herbs—rosemary, thyme, and sage—and the garlic, you’re ready for the fun part. Use your fingers, gently working under the skin, separating it from the meat without tearing it. Push that herb butter mixture deep under so it touches the meat directly over the breast and the leg joints. This guarantees flavor right where it matters most!
Roasting Schedule for the Perfect Turkey
We are doing a two-temperature roast, which is my go-to for the Perfect Turkey. Start high at 425°F for half an hour. This sets the skin so it won’t get soggy later. Then, immediately drop it down to 325°F. From here on out, you baste roughly every 45 minutes using the pan juices. If you peek at this guide, you’ll see they recommend similar techniques for getting that even cook. Keeping that oven temperature steady at 325°F allows the inside to cook thoroughly without burning the outside.
Tips for Success with Your Roast Turkey Recipe
Even with a foolproof recipe like this, a few little tips can turn a great roast into an absolute showstopper. I pulled these straight from my mom’s notes, honestly, because she was the queen of the Perfect Turkey. If you want to make sure every single bite is memorable this holiday, keep these pointers in mind while you’re working!
First up, let’s talk herbs. I stressed this before, but it bears repeating: use fresh herbs! Dried herbs just don’t have the punch needed to flavor that huge bird properly. The fresh rosemary, sage, and thyme actually release essential oils when they heat up in the butter, creating that fragrant environment while they cook. You can even find a recipe for homemade garlic butter to make sure your butter base is top-notch.
Another biggie that always guarantees moisture, especially if you’re nervous about the meat drying out: consider brining! You don’t need to do it if you follow the herb-under-the-skin tuck method, but if you have the time the day before, a simple overnight brine will add an extra layer of insurance. It draws the salt deep into the muscle fibers, making it much harder to dry out, even if your oven runs a little hot. If you want a truly amazing garlic flavor profile for your bird, check out this great garlic recipe for pairing inspiration!
And finally, remember my golden rule: No Stuffing! I know it feels traditional, but stuffing the turkey cavity means the center of the bird won’t cook properly until the outside is already way overdone. We put our onions and lemon in the cavity just to steam the inside gently, not to cook a full bread casserole. If you want to try a different take on holiday flavor, you might look into this incredible garlic turkey recipe for next year!
Serving Suggestions for Your Holiday Turkey Dinner Ideas
Now that you have conquered the huge task of roasing the most amazing, juicy turkey ever, we need to talk about what goes on the plate around it! A Holiday Feast Centerpiece like this deserves friends who can keep up, flavor-wise. Since we went heavy on the savory herbs and garlic in the butter rub, you want sides that balance that richness without fighting it.
My first suggestion, which is mandatory at every holiday meal in my house, is something sweet and bright to cut through all that lovely turkey fat. You absolutely have to have a stellar sweet potato dish. If you want to really wow people, try my recipe for Southern Candied Yams—they are decadent and perfectly complement the savory herbs on the bird. Trust me on this one; the sweet and salty contrast is divine!
Next, you need something green and earthy. A simple green bean casserole is classic, of course, but if you want something a little fresher, go for roasted Brussels sprouts tossed with a little bit of balsamic vinegar right when they come out of the oven. The slight acidity helps cleanse the palate after a big bite of that rich turkey meat.
And finally, never, ever forget the stuffing equivalent! Since we skipped stuffing the bird for moisture (smart choice, by the way!), you need a fantastic bread side dish. A simple sourdough bread stuffing baked separately, loaded with mushrooms and onions, soaks up all those glorious pan drippings you saved. You’ve done the hard part with the turkey; now, layer up the sides and enjoy planning the rest of your spectacular Turkey Dinner Ideas!
Storage and Reheating Instructions for Leftover Turkey
Phew! You survived the roasting, carved the bird, and now you have… a mountain of delicious turkey left over? This is a good problem to have, honestly! Even the best holiday feast leaves extras, but we need to make sure that juicy meat stays juicy when we eat it later in the week. We want to save this incredible flavor, not dry it out!
First things first: you have to get it cooled down and into the fridge quickly. If you leave that big platter sitting out while everyone’s taking a third helping of pie, you risk setting yourself up for issues later. Once the turkey has cooled down enough that it’s just warm (not piping hot), carve off any remaining meat and get it into airtight containers. You should safely keep that cooked turkey in the refrigerator for about three to four days. Any longer than that, and you should freeze it right away.
When it comes to reheating, please, please do not zap big chunks of turkey in the microwave! That is the expressway to leathery dryness. The trick is low and slow, and adding moisture back in. When you’re ready to eat those amazing leftovers, the best way is to treat them like you’re poaching them gently.
Take your slices—or you can even shred the meat—and put them in a pan. Add just a splash of liquid to the bottom of the pan. This could be broth, or even better, the drippings you saved from roasting! Cover that pan tightly with a lid or foil and heat it up slowly on the stove over medium-low heat. You just want to warm it through, not cook it again. The steam trapped in that pan is the secret to enjoying leftovers that taste almost as heavenly as they did straight out of the oven. If you’re looking for a complete next-day meal, check out my recipe for leftover turkey casserole—it’s pure comfort!
Frequently Asked Questions About This Turkey Recipe
I know you’ve got a few things swirling around in your brain as you plan the big meal. It’s totally normal! Having a good Holiday Turkey Guide means knowing the answers before the oven is even hot. I’ve gathered up the most common questions folks have about making this roast turkey recipe to make sure your day is as stress-free as possible. Knowing these little details is what separates a good bird from that incredible bird everyone talks about!
What temperature should the turkey reach internally?
This is the number one question, and the answer is non-negotiable for safety: the turkey is done when the internal temperature, measured in the thickest part of the thigh without touching the bone, hits a firm and safe 165 degrees Fahrenheit. That’s the magic number! But I have to remind you again—don’t take it out right then! That thirty minutes (or even forty!) of resting under foil is crucial. If you skip that, all those delicious juices you worked so hard to keep inside will just run right out onto the cutting board. Check out this ultimate guide for even more temperature specifics!
Can I use this method for a smaller turkey breast recipe?
Absolutely! While this herb butter method is designed for the whole bird, it works wonderfully for a bone-in turkey breast too. Since you don’t have the dark meat weighing down the cook time, the breast cooks much faster. Usually, you can cook a 5 to 7-pound turkey breast at the same starting temperature (425°F), but you’ll drop it to 325°F much sooner, maybe after just 15 minutes. Total cook time will likely be closer to 2 to 2.5 hours. Just rely on that thermometer—165°F in the thickest part is always the goal for a Juicy Thanksgiving Turkey!
Is this considered an Easy Roast Turkey recipe?
I sure hope so! My whole philosophy here is taking those big holiday dishes and making sure they fit into a busy life. While you do need to pat the skin dry and mix that butter, the actual cooking is mostly hands-off once it’s in the oven. The two-temperature method is simple to monitor, and you don’t have to do any complicated spatchcocking or deep frying. It’s a very straightforward recipe, especially if you prep the butter the day before. It’s definitely one of my go-to methods for an Easy Roast Turkey that looks fancy! If you’re looking for a lighter dessert idea to follow that rich turkey, you might want to check out my recipe for easy puff pastry apple strudel recipe.
Why is drying the skin so important for crispy skin?
If you try to crisp skin that’s damp, you’re basically just steaming it! Water on the skin has to evaporate first before any browning or crisping can happen, and that wastes precious oven time, usually resulting in rubbery skin. By patting it bone-dry, the high heat immediately starts working on rendering the fat and drying out the surface layers, giving you that immediate golden crunch we’re looking for. It’s the fastest route to the best Crispy Skin Turkey!
Nutritional Data for This Savory Turkey Recipe
Alright, now let’s talk numbers for a second. I know for me, cooking a huge feast means I’m focused on flavor and timing, but it’s always good to have an idea of what you’re serving up, especially when it comes to something decadent like this bird. Below you’ll find the estimates for this Savory Turkey Recipe based on the ingredients we used here.
Just remember, this is my kitchen estimation! Since we are dealing with a whole bird and different cuts of meat, these numbers can shift a bit based on how much fat you skim off the drippings or how much of that amazing herb butter ends up on your plate. Think of this as a helpful guide, not a laboratory printout!
- Serving Size: 6 oz cooked meat
- Calories: 350
- Fat: 18g (This includes the goodness from that skin and butter!)
- Saturated Fat: 8g
- Unsaturated Fat: 10g
- Cholesterol: 150mg
- Sodium: 450mg (This is why using that salt carefully in the butter is important!)
- Carbohydrates: 2g
- Protein: 45g (That’s a powerhouse of protein right there!)
- Sugar: 1g
- Fiber: 0g
- Trans Fat: 0g
We keep the carbs pretty low here, mostly getting them from the mirepoix we roast in the pan, which we usually discard or use for stock. The high protein content is exactly what you want in a centerpiece meal, and honestly, 45 grams of protein per serving is fantastic!
Share Your Holiday Feast Centerpiece Success
Whew! We made it through the cooking, and I truly hope that beautiful, herb-rubbed turkey is sitting proudly on your table right now. It was a joy walking you through how to get that incredible flavor and moisture.
But listen, the story isn’t over yet! I want to hear all about it! When you tackle a big meal like this—your Holiday Feast Centerpiece—it becomes a tradition, and I want to celebrate that success with you. Did the skin get as golden as you hoped? Did your family rave about how juicy the meat was?
Please, don’t just leave that success a secret! You absolutely have to let me know how it went down in your kitchen. Take a minute after you carve that bird to stop by the comments below and leave me a star rating. Even better, tell me specifically how that two-temperature roasting trick worked out for you!
If you managed to snap a picture of your perfectly roasted bird—maybe it’s glistening under the holiday lights—I’d love to see it! You can tag me on social media, or just tell me about it in the comments. It genuinely means the world to me to see my recipes transforming into your family memories. Thinking about carving time reminds me that down the road, if you need ideas for leftovers, you should check out my maple brown sugar cookies to have a sweet finish!
If you’re looking for some visual inspiration for your next big meal or maybe just need a beautiful background visual for your turkey pictures, check out these stunning visuals over at Idyllic Pursuit. Happy eating, everyone, and enjoy those leftovers!
Print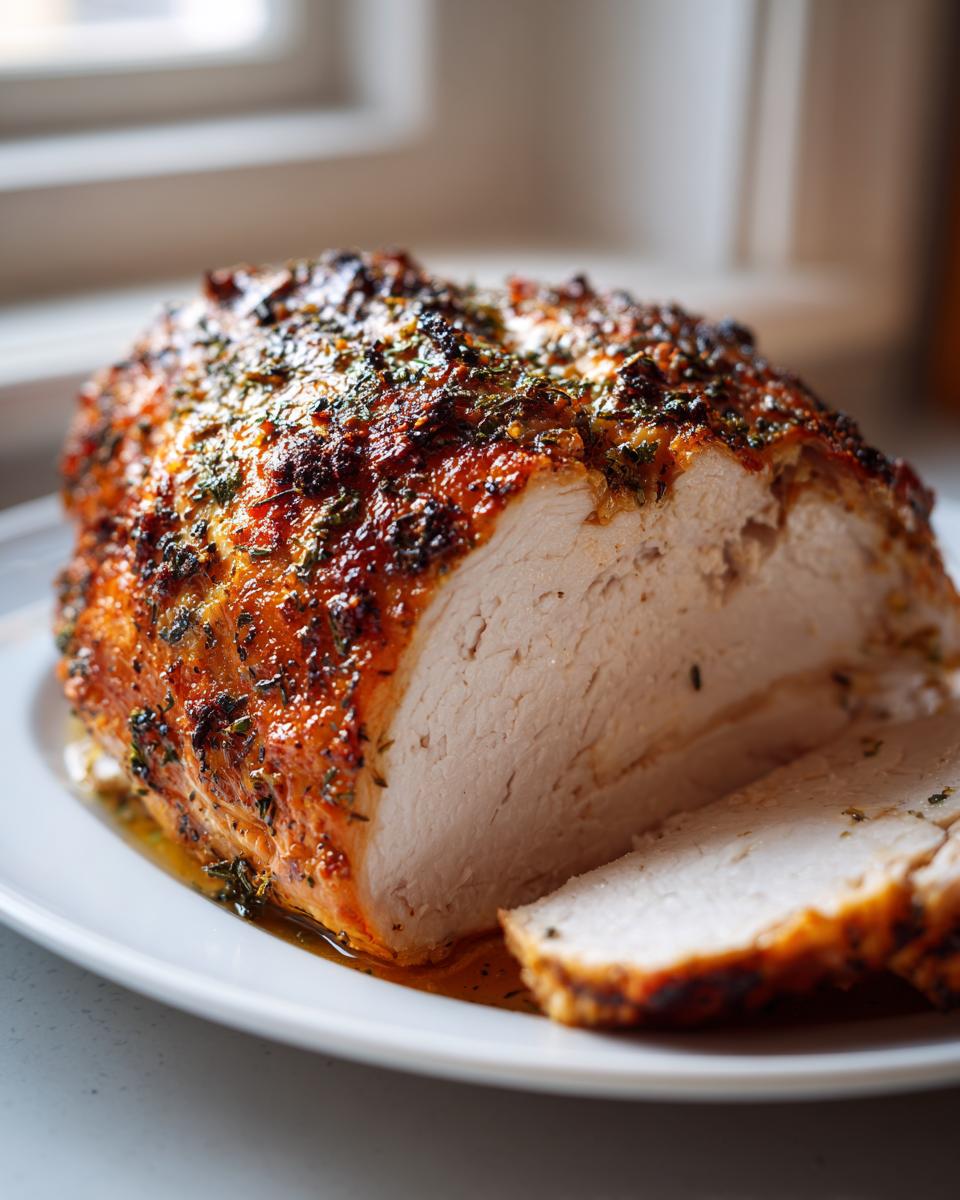
The Ultimate Herb Butter Roast Turkey for a Juicy Holiday Feast
Follow this step-by-step guide to roast the perfect turkey, featuring an herb butter rub that guarantees incredibly juicy meat and golden, crispy skin for your Thanksgiving or Christmas centerpiece.
- Prep Time: 30 min
- Cook Time: 3 hr 30 min
- Total Time: 4 hr 0 min
- Yield: 10 servings 1x
- Category: Holiday Dinner
- Method: Roasting
- Cuisine: American
- Diet: Low Fat
Ingredients
- 1 whole turkey (12–14 lbs), neck and giblets removed
- 1 cup unsalted butter, softened
- 4 cloves garlic, minced
- 2 tablespoons fresh rosemary, chopped
- 2 tablespoons fresh thyme leaves
- 1 tablespoon fresh sage, chopped
- 1 tablespoon kosher salt
- 1 teaspoon black pepper
- 1 large onion, quartered
- 1 lemon, halved
- 4 celery stalks, roughly chopped
- 1 cup dry white wine or chicken broth
Instructions
- Remove the turkey from refrigeration 24 hours before cooking to allow it to fully thaw. Remove the neck and giblets from the cavities. Pat the entire turkey surface completely dry with paper towels. This step is key for crispy skin.
- Preheat your oven to 425 degrees Fahrenheit.
- In a small bowl, combine the softened butter, minced garlic, rosemary, thyme, sage, salt, and pepper to create the herb butter.
- Gently loosen the skin over the turkey breast and thighs. Rub half of the herb butter directly onto the meat under the skin. Rub the remaining herb butter all over the outside of the turkey skin.
- Place the onion quarters, lemon halves, and celery stalks inside the main cavity of the turkey.
- Place the turkey on a roasting rack set inside a large roasting pan. Pour the white wine or broth into the bottom of the pan.
- Place the turkey in the preheated 425°F oven and roast for 30 minutes to start crisping the skin.
- Reduce the oven temperature to 325 degrees Fahrenheit. Continue roasting. Baste the turkey every 45 minutes with the pan drippings.
- If the skin begins to brown too quickly, loosely tent the breast with aluminum foil.
- Continue roasting until a meat thermometer inserted into the thickest part of the thigh (not touching bone) reads 165 degrees Fahrenheit. For a 12-14 lb turkey, this usually takes about 3 to 3.5 hours total cooking time.
- Remove the turkey from the oven. Tent it loosely with foil and let it rest on the counter for at least 30 minutes before carving. This resting period keeps the meat moist.
Notes
- For the crispiest skin, do not stuff the turkey; cook aromatics like onion and lemon inside the cavity instead.
- To ensure you get the best turkey flavor, use fresh herbs rather than dried ones in your butter rub.
- If you are worried about dry meat, you can brine the turkey overnight before applying the herb butter.
Nutrition
- Serving Size: 6 oz cooked meat
- Calories: 350
- Sugar: 1
- Sodium: 450
- Fat: 18
- Saturated Fat: 8
- Unsaturated Fat: 10
- Trans Fat: 0
- Carbohydrates: 2
- Fiber: 0
- Protein: 45
- Cholesterol: 150