
Hosting a big group doesn’t have to mean spending the whole party tethered to a hot grill, trust me! If you’ve ever tried to flip fifty tiny burgers individually, you know the struggle. That’s why I rely on my Sheet Pan Cheeseburger Sliders recipe. It takes that absolute classic comfort food—the perfect mini burger—and turns it into the easiest sheet pan meal you can make.
This method is my secret weapon for any large cookout or a busy graduation party menu. We get that rich, savory beef flavor, melted cheese, and soft, buttery buns all baked together in one dish. It’s all about getting maximum flavor with minimal effort, which is exactly what Mia’s Meals is built on. For me, cooking is about connection, just like my mother and grandmother taught me. You can learn more about my philosophy over at Mia’s Meals. These little beauties show you how simple food, made with a little love, brings everyone right back to the table.
- Why This Sheet Pan Method Makes Perfect Cheeseburger Sliders (Primary Keyword Focus)
- Ingredients for Your Crowd-Pleasing Cheeseburger Sliders
- How to Prepare Sheet Pan Cheeseburger Sliders: Step-by-Step
- Tips for Success When Making Cheeseburger Sliders for a Crowd
- Serving Suggestions for Your Graduation Party Menu Cheeseburger Sliders
- Storage and Reheating Instructions for Leftover Cheeseburger Sliders
- Frequently Asked Questions About Making Cheeseburger Sliders
- Estimated Nutritional Information for These Cheeseburger Sliders
- Share Your Perfect Party Sliders Experience
Why This Sheet Pan Method Makes Perfect Cheeseburger Sliders (Primary Keyword Focus)
Look, when you’re making food for a crowd, efficiency is everything. That’s why these cheeseburger sliders are baked instead of grilled. I tested this relentlessly to make sure it held up for parties, and trust me, it’s reliable! This sheet pan meal delivers that amazing, cheesy, savory hit you want, all while keeping your oven doing the heavy lifting. It’s the best way to manage an easy dinner for a crowd because you season one big sheet of meat, bake it, and bam—you’re done! If you love quick oven meals, you should check out some of my other fixes for busy nights over at quick weeknight dinners!
Serving Up Classic Flavor with Party Sliders
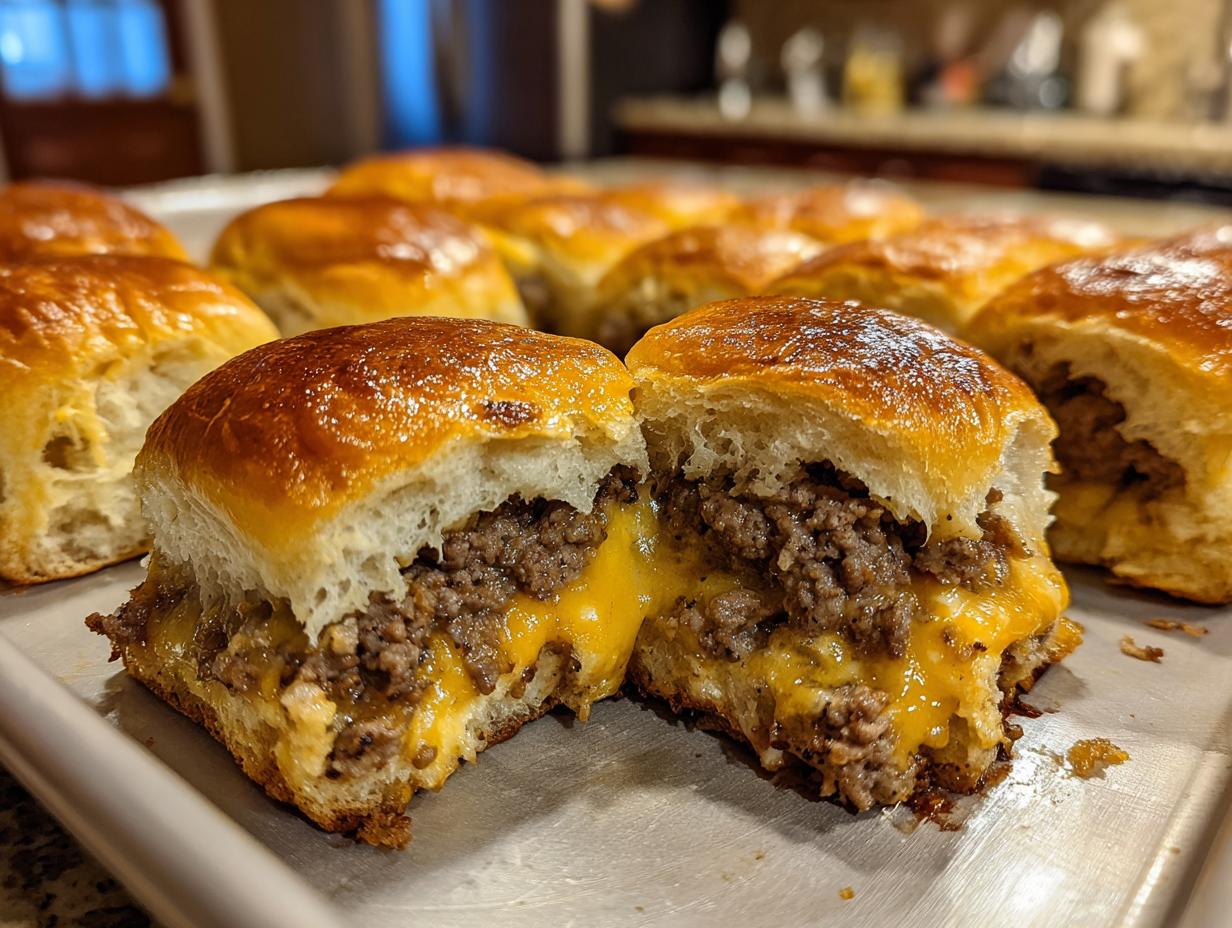
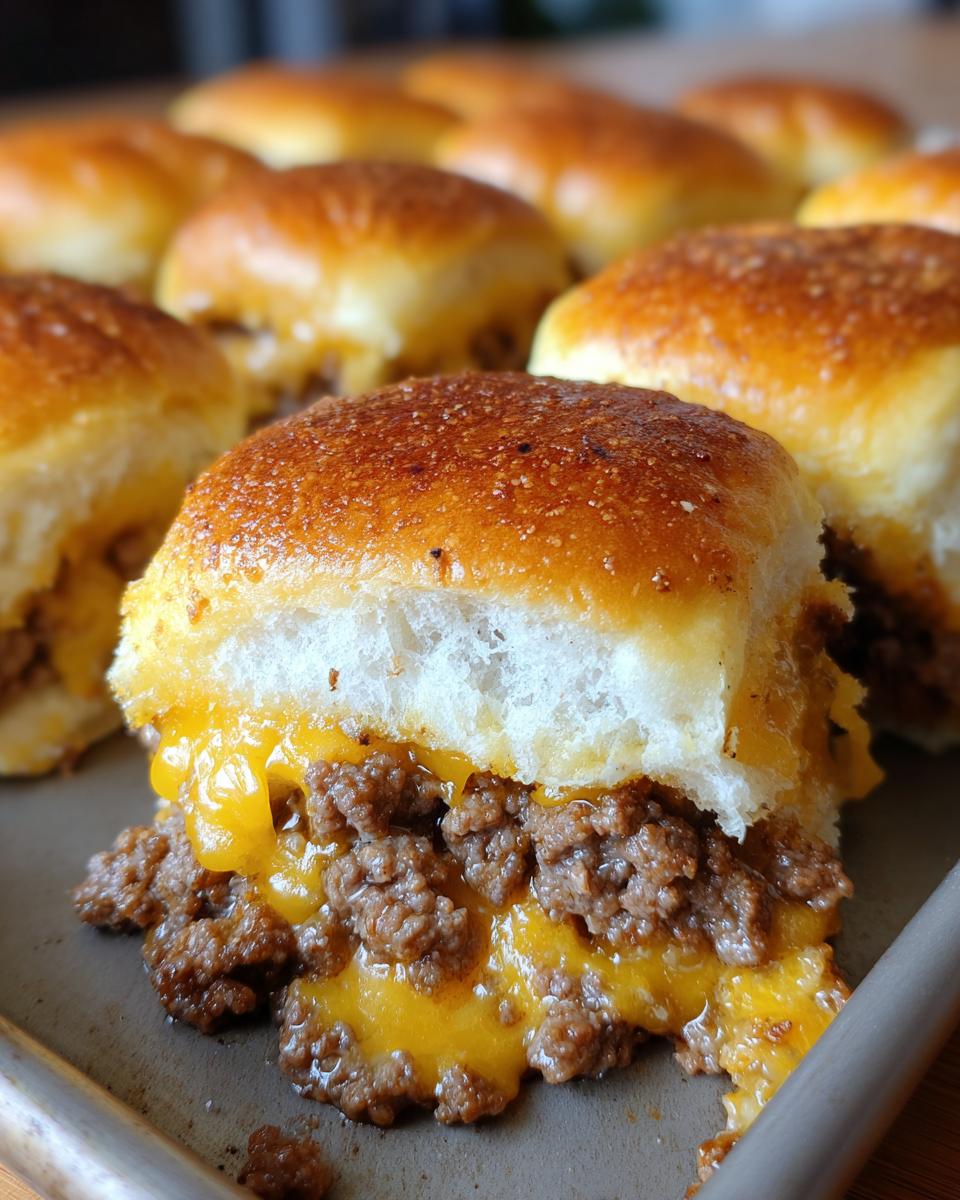
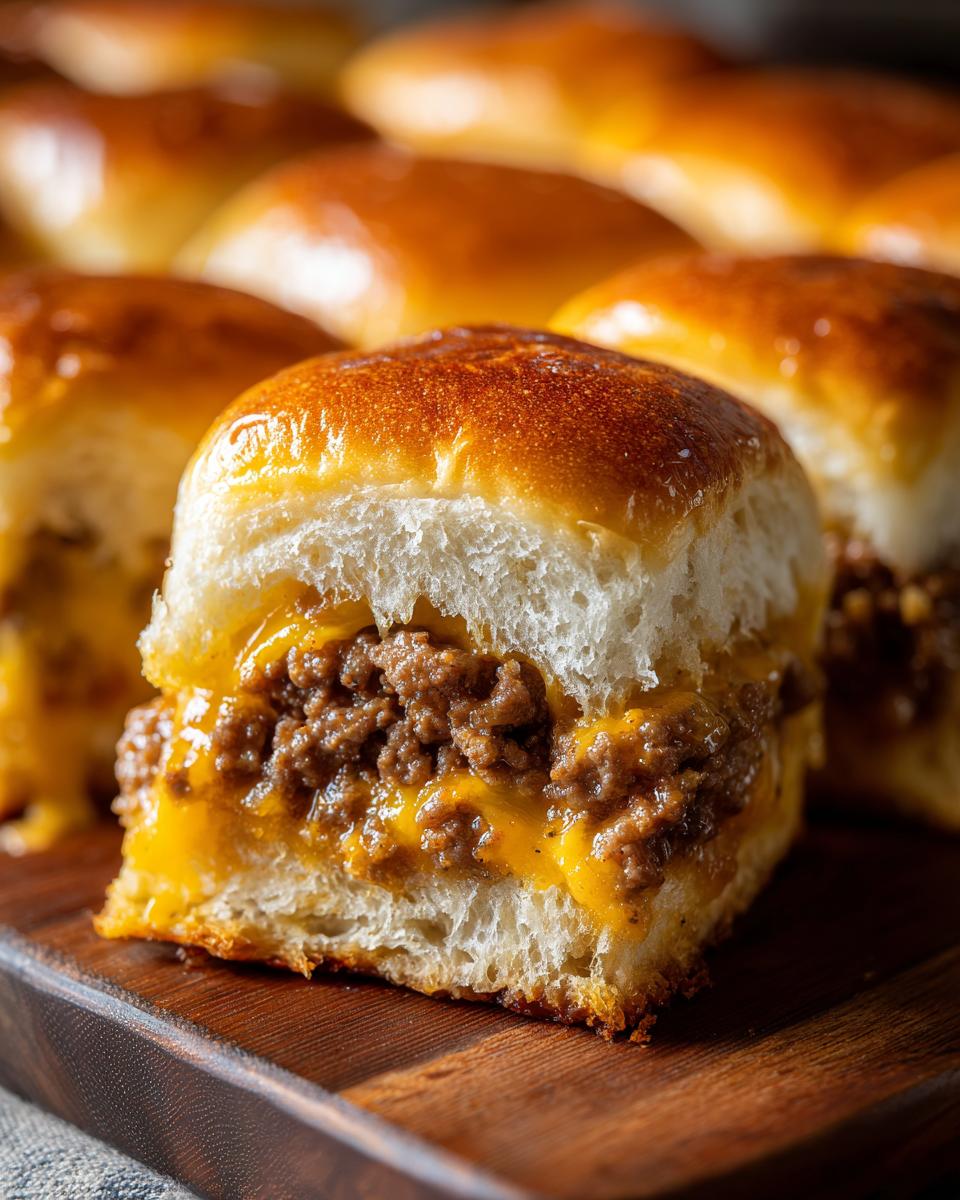
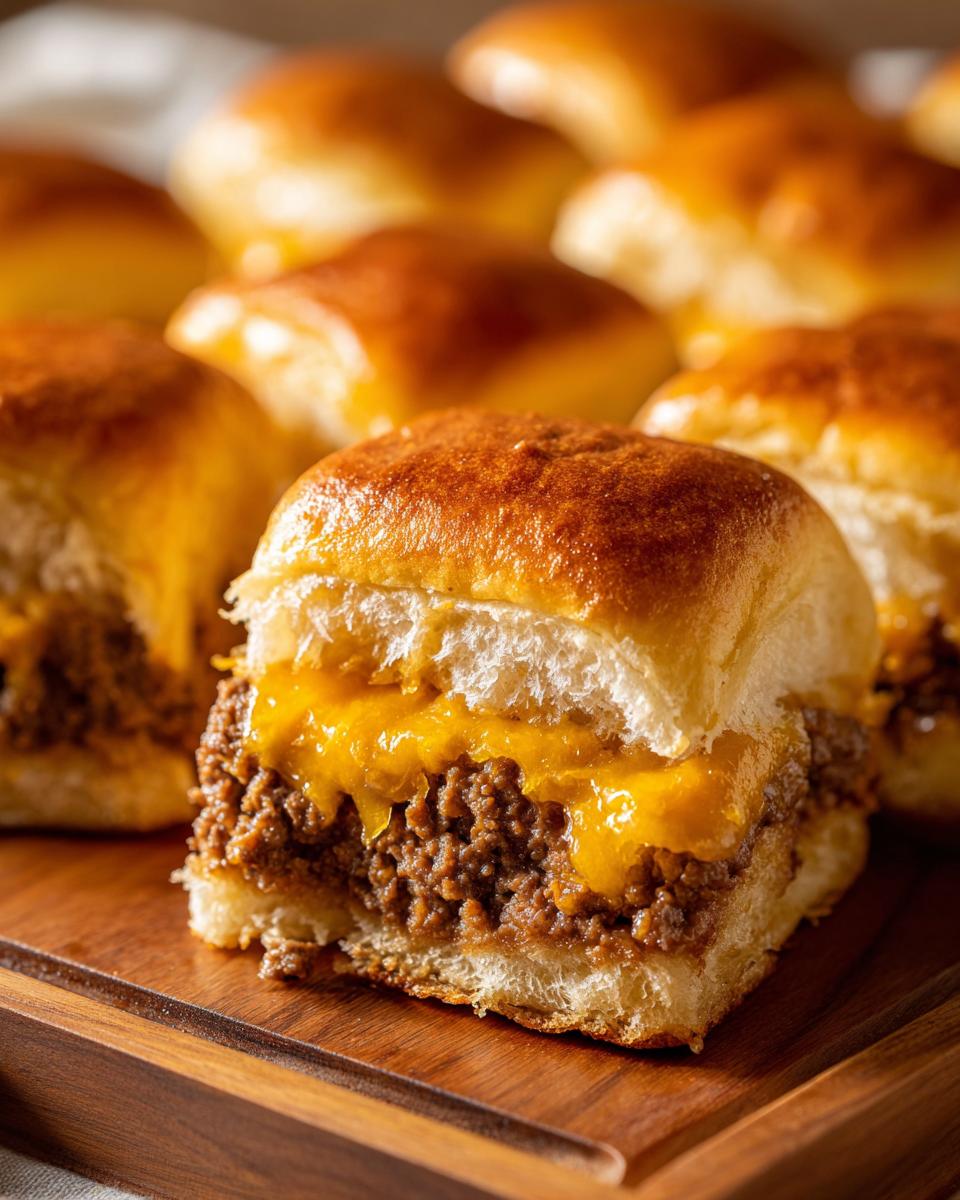
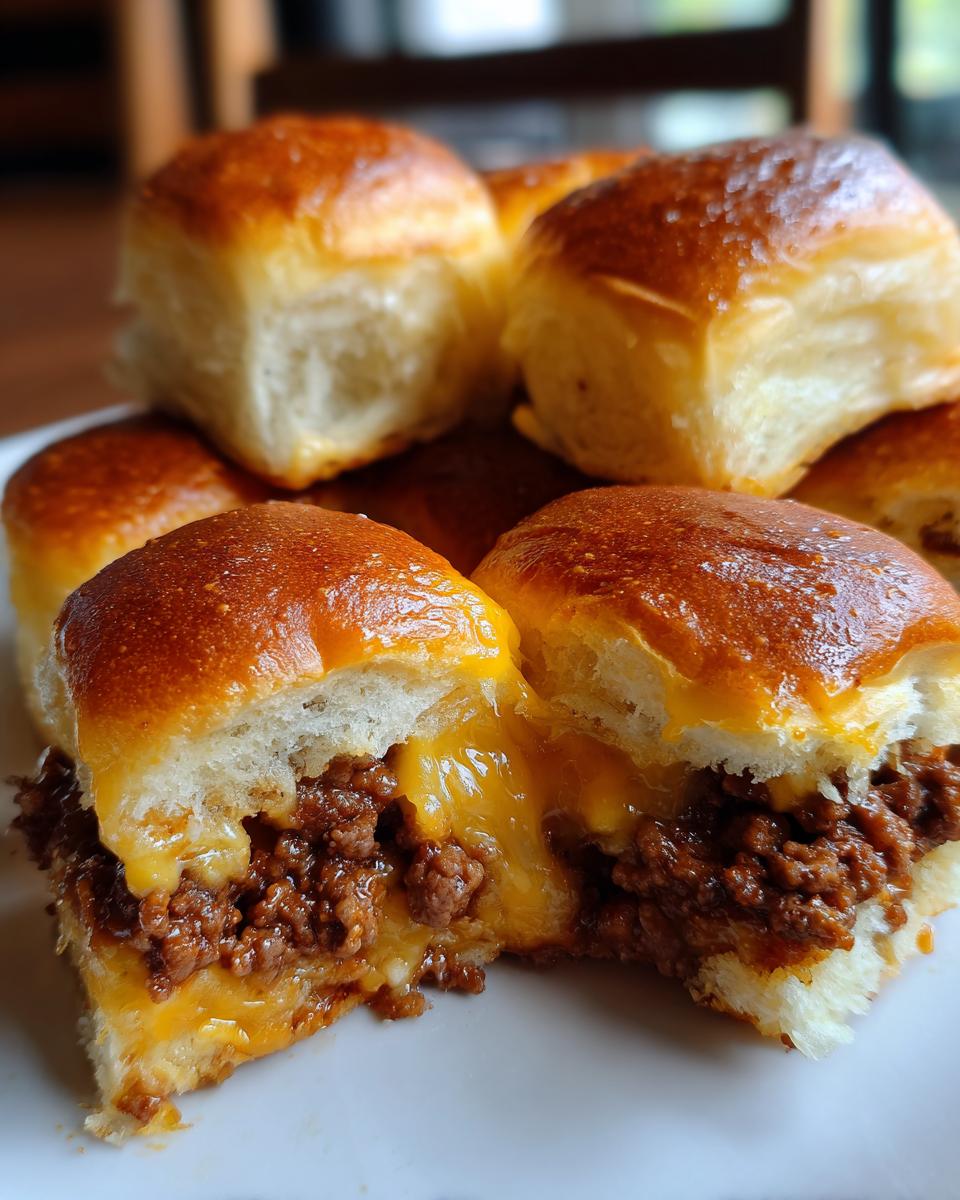
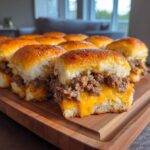
We aren’t reinventing the wheel here, we’re just making it easier to serve! You get the perfectly soft texture from the sweet rolls paired with seasoned, cheesy beef. These party sliders taste just like the cheeseburger you crave, only bite-sized. They stay warm beautifully in the pan while you’re catching up with guests, which is a lifesaver when you’re hosting!
Ingredients for Your Crowd-Pleasing Cheeseburger Sliders
When you’re making these for a crowd, buying quality ingredients really pays off, especially for the meat. Remember, great beef recipes start with the right foundation! If you’ve ever loved my bacon cheeseburger casserole, you know I love taking comfort food and making it easy for groups. We are using the whole package of rolls, so make sure you have everything ready to go.
Here’s what you need to gather for this recipe, which yields a full 12-count party:
- 1 (12 count) package Hawaiian sweet rolls – don’t skip these, they caramelize perfectly!
- 2 pounds ground beef – I recommend 85/15 lean for the best flavor without too much grease runoff.
- 1 teaspoon salt
- 1/2 teaspoon black pepper
- 1 tablespoon Worcestershire sauce – this adds that essential savory depth!
- 1 teaspoon onion powder
- 1/2 teaspoon garlic powder
- 1/2 cup water (Yes, water! It keeps the large meat layer tender while baking.)
- 1 cup shredded cheddar cheese
- 1/2 cup shredded Swiss cheese – mixing the cheeses gives you great flavor and that perfect melt.
- 4 tablespoons butter, melted
- 1 tablespoon Dijon mustard
- 1 teaspoon poppy seeds
Ingredient Notes and Substitutions for Cheeseburger Sliders
For your ground beef, if you go leaner than 85/15, the sliders might get a little dry, so stick to that range. You absolutely must use the Hawaiian rolls; others don’t have the right sweetness or density. If you don’t have Swiss, Colby Jack works great, but please don’t skip the Worcestershire sauce. It gives these cheeseburger sliders that classic grilled tang we’re looking for. It’s one of those secret flavor boosters that separates a good slider from a truly great one!
How to Prepare Sheet Pan Cheeseburger Sliders: Step-by-Step
Okay, this is where the magic happens, and honestly, it’s shockingly quick for how many hawaiian roll sliders you end up with. First things first, get that oven warming up to 375 degrees Fahrenheit and make sure your 9×13 dish is greased. We always want to be prepared! You can find my guide on maximizing oven space for those large meals here: easy dinner for a crowd.
Mixing and Pre-Baking the Beef Base for Your Cheeseburger Sliders
In a big bowl, dump in your ground beef along with all those seasonings—salt, pepper, Worcestershire, onion, and garlic powder. Now, here is the expert tip for killer texture: only mix until everything is just combined, maybe 10 or 12 gentle stirs. If you overmix, your meat gets tough, and nobody wants chewy cheeseburger sliders! Press that seasoned beef evenly over the bottom of your prepared pan. Bake it for about 15 minutes until it looks mostly done—it’s basically pre-cooking it. When it comes out, carefully drain off every bit of excess grease, which keeps our sliders from getting soggy.
Assembling and Glazing the Hawaiian Roll Sliders
While the meat is baking, slice your whole package of rolls horizontally, keeping the top and bottom halves connected—it’s the secret to easy handling! Once the beef is drained, put the bottom halves right over the meat in the pan. Sprinkle that beautiful mix of cheddar and Swiss cheese over the top! Then, place the roll tops on next. Now for the flavor bomb: whisk your melted butter with the Dijon mustard and poppy seeds. Brush that mixture completely over the tops of the rolls. This glaze is what makes these such a hit as kid friendly party food! Bake it again for just 10 to 15 minutes until the cheese is bubbling and the tops are golden brown. Let them sit for just five minutes, then slice them apart individually. Perfection!
Tips for Success When Making Cheeseburger Sliders for a Crowd
Even though these are simple cheeseburger recipes, a few tricks ensure they come out absolutely flawless for your big event. Don’t skip the resting step! Letting the sliders sit for five minutes after they come out of the oven lets the cheese set up just enough. When you go to slice them, use a very sharp serrated knife and go straight down slowly. This keeps those gorgeous, fluffy buns from getting completely mashed.
Also, if you are hosting a huge bash, you can absolutely prep the seasoned beef mixture a day ahead of time and keep it covered in the fridge. That takes a huge chunk of stress off the day of the party! If you want to elevate these party sliders even more, throw some thinly sliced dill pickles right on top of the cheese before you put the top bun on. Trust me, the tang cuts through the richness perfectly. For more easy sharing ideas, take a peek at my simple appetizers and snacks!
Serving Suggestions for Your Graduation Party Menu Cheeseburger Sliders
Now that you’ve got a giant, bubbly pan of cheesy goodness, what are we going to serve these amazing mini burgers with? Since the whole point of this recipe is making hosting easy, we want sides that are mostly make-ahead or just need a quick warm-up. For a big graduation party menu, you can’t go wrong with a big bowl of slow-cooker baked beans—they just simmer away all day!
A simple, colorful crunchy slaw is also fantastic because the coolness and vinegar cut through the richness of the beef and cheese. Or, if you’re feeling like staying completely true to the classic American theme, just set out bowls of potato chips and some carrot sticks.
And please, don’t forget the condiments! Even though we built amazing flavor into these cheeseburger sliders, everyone likes their own mix. Set out small bowls of ketchup, mustard (we already have Dijon, but an extra bit helps!), mayo, and maybe even some fun secret sauce. Keep things running smoothly by checking out my guide on easy homemade sides—some of those ideas work perfectly here, even if you swap cranberries for something savory!
Storage and Reheating Instructions for Leftover Cheeseburger Sliders
If you’re lucky enough to have any of these amazing cheeseburger sliders left over—which I seriously doubt after a party—storage is simple. Just let them cool down completely, then pop them into an airtight container in the fridge. They should be good for about three days max.
When you want to reheat them, please skip the microwave if you can! Microwaving turns those sweet Hawaiian rolls gummy and sad. Instead, wrap the leftover batch loosely in foil and warm them up in a 350-degree oven for about 10 minutes. This brings the cheese back to life and keeps the bun from getting soggy. For more tips on handling leftovers, you might find my post on leftover turkey casserole helpful since the reheating principles are similar!
Frequently Asked Questions About Making Cheeseburger Sliders
It’s funny, even when a recipe seems straight-forward, people always have little questions, especially when you’re trying to feed a huge group for a big event! These little mini burgers are foolproof, but let me cover the biggest things people ask me about when they are planning their graduation party menu.
Can I use something other than ground beef for these party sliders?
You can, but you might change the dynamics slightly! Since this recipe is built around that classic American flavor, ground beef works best. If you use ground turkey or chicken, you’ll need to boost the flavor with extra Worcestershire and maybe some smoked paprika because poultry isn’t as inherently savory. Also, if you use leaner meat, you may need to add a tiny bit of oil during the mixing stage to keep that meat layer from drying out during baking. Stick with 85/15 ground beef for the best cheeseburger recipes.
How far ahead of time can I assemble the Hawaiian roll sliders?
This is the million-dollar question for all party hosts! You can absolutely prepare the seasoned meat mixture a day ahead and keep it covered in the fridge. But for assembly—putting the meat, cheese, and rolls together—I recommend doing it no more than two hours before you plan to bake. If you assemble them too far in advance, the moisture from the meat can start to make the bottom buns soggy before they even hit the oven. We want a crispy bottom, not a wet one!
Are these sliders really a good sheet pan meal for leftovers?
Oh, they are a fantastic sheet pan meal contender! The great thing about baking them on a sheet pan is that the residual heat keeps the whole block of sliders warm for a long time after you pull it out, meaning people can graze at their own pace. If you do have extras, follow my reheating tips above—the oven works best to maintain the texture. They make an excellent, quick lunch the next day, too!
What’s the best way to keep these kid friendly party food appetizers warm during a long party?
If you baked them fresh, you can keep the whole dish lightly covered with foil and placed near the edge of a low-temperature oven (like 170°F) or in a warming drawer. If you don’t have that option, just bake them in waves! Bake half, serve them until they run out, and then pop the next batch in. Since the prep is so minimal, you can whip up a fresh batch of these party sliders every 45 minutes and they’ll taste like they were just made!
Estimated Nutritional Information for These Cheeseburger Sliders
I always try my best to give you a realistic picture of what goes into the food we make here at Mia’s Meals. When I put together these cheeseburger sliders for a big event, I know people appreciate knowing what they are digging into, especially with big crowds.
Now, you have to remember that since we are using an entire package of rolls and a good quantity of beef, the total yield is high, which keeps the individual serving size reasonable. These estimates are based directly on the ingredient breakdown, but the final numbers can swing a little depending on the exact brand of ground beef you grab or how much of that delicious glaze soaks into your specific buns. We always want to be upfront about that!
Here’s the general breakdown per one slider:
- Serving Size: 1 slider
- Calories: 350
- Fat: 18g (with 8g saturated fat)
- Carbohydrates: 25g
- Protein: 22g
- Sodium: 550mg
- Sugar: 8g
See? Even though these are satisfying comfort food, they pack a great punch of protein, which is perfect for keeping everyone satisfied at a long party. As always, for full details on how we handle your data, you can read our full privacy policy. It’s just another way we try to be totally transparent here at our table!
Share Your Perfect Party Sliders Experience
Honestly, seeing your creations makes all the recipe testing worth it! If you’ve made these easy cheeseburger sliders for your own gathering, whether it was a major graduation party menu or just a fun Friday night dinner that fed the whole neighborhood, I absolutely want to hear about it.
Don’t be shy! Head down to the comments, leave a quick star rating, and tell me how they went over. Did everyone ask for the recipe immediately? Did you add those pickles I suggested, or did you try some other secret topping? Snap a photo and share it so we can all celebrate together!
Bringing people together over simple, delicious food is the whole point of Mia’s Meals, and these mini burgers truly nail that feeling. If you’re done with the savory side of things and need a sweet finish for your party, be sure to check out some of my delicious dessert recipes. Happy cooking, and I can’t wait to see your amazing party sliders!
PrintSheet Pan Cheeseburger Sliders for a Crowd
Make easy party sliders for your next gathering using this simple sheet pan method. This recipe feeds a crowd quickly with classic cheeseburger flavor.
- Prep Time: 15 min
- Cook Time: 30 min
- Total Time: 45 min
- Yield: 12 servings 1x
- Category: Main Course
- Method: Baking
- Cuisine: American
- Diet: Low Fat
Ingredients
- 1 (12 count) package Hawaiian sweet rolls
- 2 pounds ground beef
- 1 teaspoon salt
- 1/2 teaspoon black pepper
- 1 tablespoon Worcestershire sauce
- 1 teaspoon onion powder
- 1/2 teaspoon garlic powder
- 1/2 cup water
- 1 cup shredded cheddar cheese
- 1/2 cup shredded Swiss cheese
- 4 tablespoons butter, melted
- 1 tablespoon Dijon mustard
- 1 teaspoon poppy seeds
Instructions
- Preheat your oven to 375 degrees Fahrenheit. Lightly grease a 9×13 inch baking dish.
- In a large bowl, mix the ground beef, salt, pepper, Worcestershire sauce, onion powder, and garlic powder. Add the water and mix until just combined. Do not overmix.
- Press the beef mixture evenly into the prepared baking dish, forming a single layer that matches the size of the rolls. Bake the beef for 15 minutes until mostly cooked through. Drain any excess grease from the pan.
- While the beef bakes, slice the entire package of Hawaiian rolls horizontally, keeping the rolls connected.
- Remove the beef from the oven. Place the bottom half of the rolls over the cooked beef layer in the baking dish. Sprinkle the cheddar and Swiss cheese evenly over the meat.
- Place the top half of the rolls over the cheese.
- In a small bowl, whisk together the melted butter, Dijon mustard, and poppy seeds. Brush this mixture evenly over the top of the rolls.
- Return the dish to the oven and bake for an additional 10 to 15 minutes, or until the cheese is melted and bubbly and the tops of the rolls are golden brown.
- Remove from the oven. Let the sliders rest for 5 minutes before slicing them individually between the rolls. Serve immediately for your graduation party menu.
Notes
- For extra flavor, add thinly sliced dill pickles on top of the cheese before adding the top roll layer.
- You can prepare the seasoned beef mixture a day ahead and store it covered in the refrigerator.
- Serve these mini burgers with your favorite condiments like ketchup and mustard on the side.
Nutrition
- Serving Size: 1 slider
- Calories: 350
- Sugar: 8
- Sodium: 550
- Fat: 18
- Saturated Fat: 8
- Unsaturated Fat: 10
- Trans Fat: 0.5
- Carbohydrates: 25
- Fiber: 1
- Protein: 22
- Cholesterol: 65