

You know that amazing feeling when you bite into something crispy that immediately melts into rich, cheesy comfort? That is exactly what we’re chasing today! Forget fussy, hours-long projects; my mission here at Mia’s Meals is to bring those incredible, cherished meals right into your busy week. That’s why I’m sharing my recipe for the ultimate Italian Arancini rice balls. These aren’t just snacks; they are golden, savory spheres stuffed with that gooey mozzarella and meat sauce dream combo. We are taking this classic comfort food and making it totally approachable, so you can serve up something spectacular without spending all day in the kitchen!
- Why These Cheesy Italian Rice Balls Are Your New Favorite Appetizer
- Ingredients for Ultimate Cheesy Italian Rice Balls
- How To Make Arancini At Home: Crispy Fried Rice Balls Tutorial
- Alternative Cooking Methods for Healthier Rice Balls
- Flavorful Rice Ball Combinations and Variations
- Serving Suggestions for Party Appetizers Using Rice Balls
- Storage and Reheating Instructions for Leftover Rice Balls
- Frequently Asked Questions About Homemade Rice Balls Recipe
- Share Your Cheesy Rice Balls Creations
Why These Cheesy Italian Rice Balls Are Your New Favorite Appetizer
I know you’re busy, so let’s get straight to why these Arancini are worth making right now. They hit all the right notes for a perfect party appetizer, but honestly, they are amazing as a Saturday afternoon snack too. These aren’t your grandma’s fussy, complicated recipe—I tweaked these to be quick comfort food!
- They achieve that restaurant-quality crunch without requiring complicated work.
- They are versatile! They work perfectly as savory rice ball snacks or as the star of your holiday spread.
- The flavor combo of sharp Parmesan mixed with creamy mozzarella is addictive.
- These are simple ingredients rice balls; nothing exotic required to create something truly gourmet.
- They freeze beautifully, making future snack times super easy!
Perfectly Crispy Fried Rice Balls Texture
This is where we separate the *good* from the *unforgettable*. We use Panko breadcrumbs, and you have to trust me on this. Panko are lighter and flakier than standard crumbs, so when they hit that hot oil, they puff up instantly. This gives you the most satisfying crunch right when you bite in. That crispy exterior texture is the perfect contrast to the warm, soft rice balls hiding underneath.
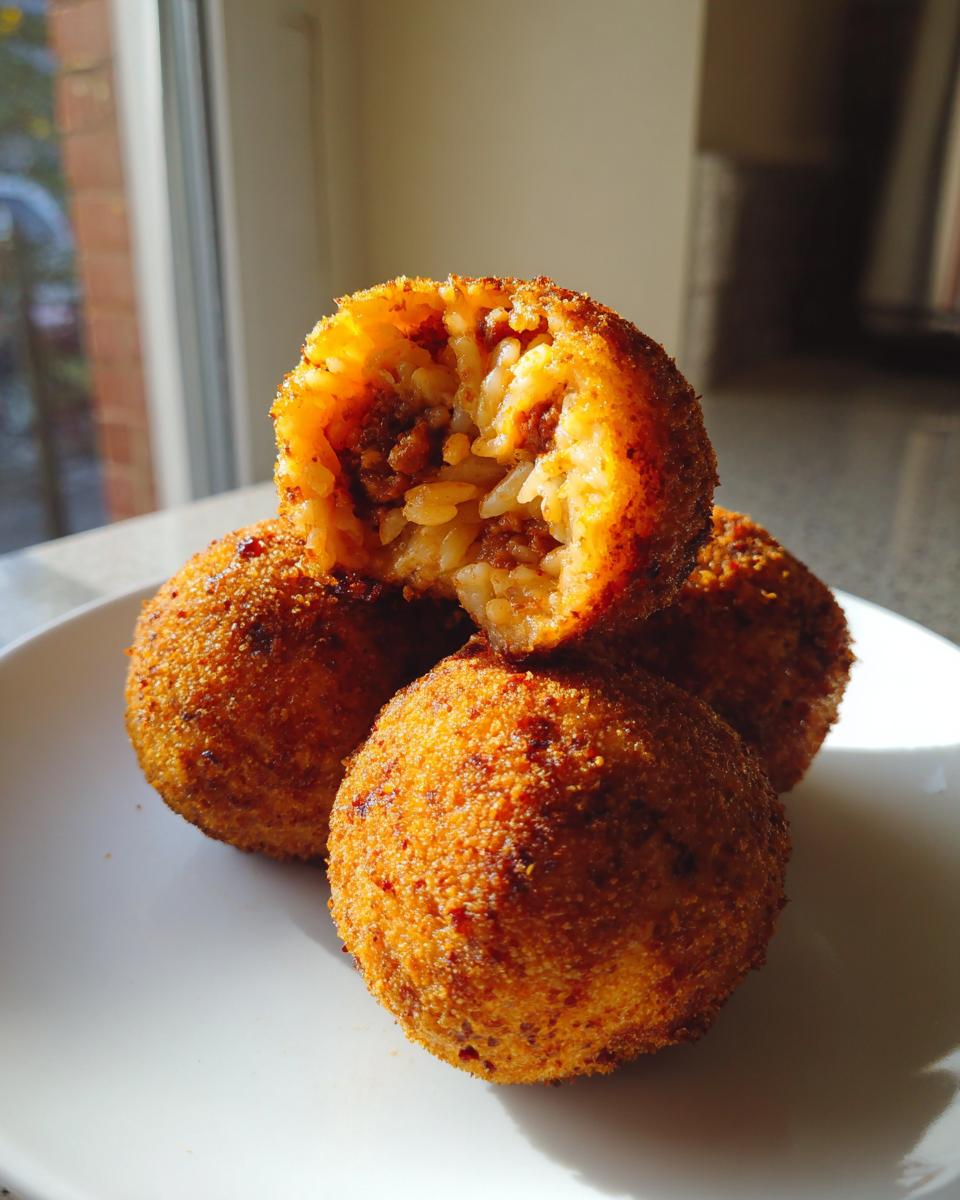
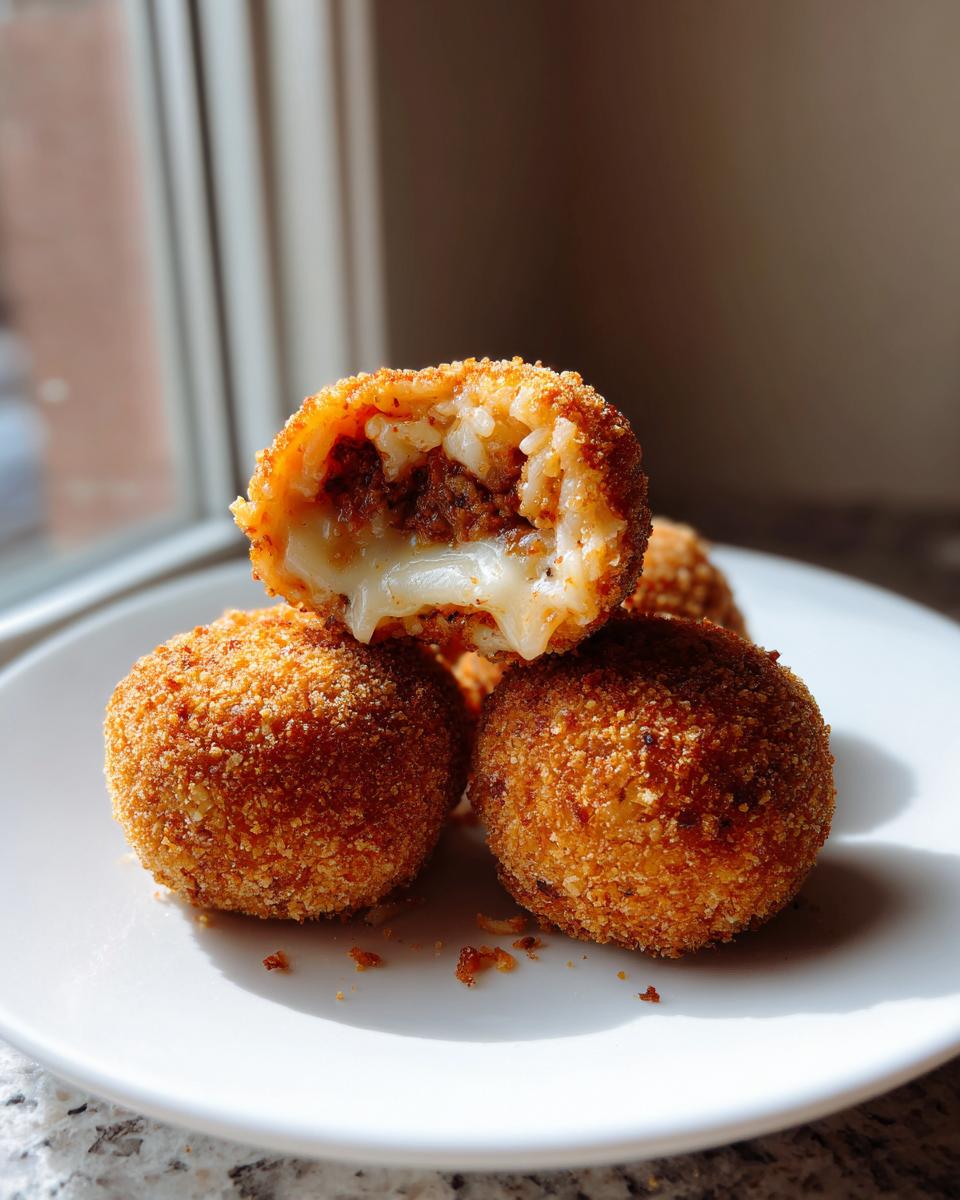
Gooey, Stuffed Rice Ball Center
Oh, the filling! If you love cheese pulls, you are going to adore these stuffed rice balls. We use little cubes of mozzarella that melt into puddles inside the rice. Paired with that rich, thick meat sauce? It’s heaven. Every single one of these rice balls creates a little molten core of savory, cheesy goodness. Seriously, nobody ever complains about the filling!

Easy Ingredients Rice Balls for Weeknights
I hear you—Arancini sounds fancy. But because we already have the cooked rice ready (day-old risotto works best, but leftover plain rice is fine!), the assembly is incredibly fast. My goal with Mia’s Meals is to simplify flavor, and these rice balls prove you don’t need six hours to make something memorable. You can have these formed, breaded, and ready for the fryer in about 25 minutes flat!
Ingredients for Ultimate Cheesy Italian Rice Balls
Gathering your supplies is the easy part! Since we are making Italian rice balls that need to form a tight shape, the quality of the rice really matters here. If you have leftover risotto—that’s the absolute gold standard for that perfect creamy mouthfeel!
If you are starting from scratch, I highly recommend using Arborio rice. It just has the right starch content to hold everything together without feeling gummy. Make sure your rice and your meat sauce are completely cooled down before you start rolling—warm fillings melt the cheese too fast and make the rice impossible to handle. You don’t want sloppy rice balls!
- 3 cups cooked Arborio rice (must be cooled!)
- 1 cup meat sauce (It needs to be thick, so simmer it down if it’s watery)
- 4 ounces mozzarella cheese, cut into small cubes (No shredded cheese for the center, please!)
- 1/2 cup grated Parmesan cheese (We divide this later)
- 1 large egg, beaten
- 1/2 cup all-purpose flour
- 1 1/2 cups breadcrumbs (Panko recommended for crispiness)
- Vegetable oil, for frying (You’ll need about 2 inches deep)
- Salt and black pepper to taste
Ingredient Notes and Substitutions for Rice Balls
A few quick tips so your rice balls turn out perfectly cheesy and hold their shape when they hit the oil. Remember, these are comfort food, but they still need a little bit of technique!
First, that rice—it absolutely must be cold, ideally made the day before. Cold rice means less moisture to fight against, which helps keep your rice balls sealed tight. If you’re worried about the filling sticking, try using an ice cream scoop to portion everything out, not just using your hands!
If you want to skip the meat sauce and go vegetarian, ricotta cheese is a fantastic substitute; just drain it really well first. Or, go half-and-half: mozzarella and ricotta mixed together is amazing! And don’t forget that little bit of Parmesan you mix directly into the rice itself—it really boosts the savory flavor profile of the humble rice balls.
How To Make Arancini At Home: Crispy Fried Rice Balls Tutorial
Alright, time to roll up our sleeves! Making these Italian rice balls at home sounds intimidating, but once you break down the steps, it’s really just organized assembly work. The secret to getting that beautiful golden shell that doesn’t fall apart is patience, especially with the chilling time. Once everything is cold, these rice balls are surprisingly sturdy!
Preparing the Rice Mixture and Forming the Rice Balls
First things first, get your cooled rice mixed up with half of that grated Parmesan, plus a good pinch of salt and pepper. This seasoned rice is the glue that holds everything together! Next, take about a quarter cup of that rice mixture and flatten it out in your palm—it should be like a small, rough pancake. Pop a cube of mozzarella and a teaspoon of that thick meat sauce right in the middle. This is the moment of truth: you need to wrap the rice completely around that filling. Pinch the top and gently roll it between your hands until you have a tight, smooth ball. If you see any tiny gaps where the filling could peek out, seal them up immediately! Make sure every one of your rice balls is fully encased.
The Triple Breading Station for Crispy Rice Balls
Now we build the armor! Set up three shallow dishes. I call this the triple breading station. Dish one is just your flour. Dish two is your beaten egg. And dish three is where the magic happens: your Panko breadcrumbs mixed with the rest of the Parmesan cheese. You’ve got to do this methodically! Roll the rice sphere first in the flour—this helps the egg stick. Shake off the extra! Then dip it quickly into the egg wash, letting any drips fall off. Finally, roll it generously in the Panko mixture. Really press those crumbs on! I like to press them lightly onto the surface with my palms to make sure I don’t get any bare spots on my rice balls.
Frying Technique for Golden Rice Balls
Frying is fast, so be ready! Heat about two inches of vegetable oil in a heavy pot to exactly 350°F (175°C). If it’s not hot enough, the breading gets greasy; if it’s too hot, the outside burns before the cheese melts. Once you hit that temp, gently lower your breaded rice balls in. Seriously, only drop in about three or four at a time. If you crowd the pot, the oil temperature drops instantly, and you end up with soggy rice balls instead of crispy ones! Turn them gently for about 4 to 6 minutes until they are a deep, gorgeous golden brown all over. Scoop them out with a slotted spoon and let them drain on paper towels or, better yet, a wire rack. They are ready when they smell incredible! If you want a dipping sauce suggestion that isn’t marinara, try whipping up a quick whipped ricotta dip—it’s dreamy with the salty fried crust.
Alternative Cooking Methods for Healthier Rice Balls
Look, I’m a firm believer that if you’re going to eat something fried, it should be *really* good, and deep frying Arancini definitely qualifies! But I totally get it; sometimes you want that same amazing flavor profile without the oil bath, especially when making these rice balls for lunch boxes or a lighter snack after a big dinner.
The good news is that this recipe is incredibly flexible! If you’re hunting for a baked rice balls healthy option solution, or if your air fryer is your best friend, we have you covered. This keeps them crisp on the outside while still delivering that cheesy, comforting center we love so much.
If you’re using the oven, you really need to focus on coating. Before you send them in, the breaded rice balls need their protective layer of fat. Brush them very lightly, but completely, with a neutral oil—olive oil works if you don’t mind a slightly more pronounced flavor, but I usually go with vegetable or canola oil for baking breaded things.
Bake them at 400°F (200°C). Give them about 15 to 20 minutes, flipping them halfway through. They won’t get that deep, uniform golden color you get from frying, but they will be nicely toasted and crunchy enough! If you’re making veggie-heavy balls, the oven tends to be gentler on those fillings too.
For the air fryer, which is my go-to for quick reheating, you’ll want a slightly lower temperature, maybe 375°F (190°C). Spray them well with cooking spray. They usually take about 10 to 12 minutes, shaking the basket halfway through. Those air fryers really nail that crispy texture without needing an inch of oil! Either way, these healthier versions still give you that fabulous, satisfying Arancini experience.
Flavorful Rice Ball Combinations and Variations
The best part about making your own savory rice ball snacks is that you are completely in charge of what goes inside! While I absolutely adore the rich, cheesy mozzarella and meat sauce filling, these rice balls are just begging for you to experiment. Once you’ve mastered the base technique using the risotto rice, you can switch up the fillings weekly and never eat the same thing twice.
When looking for truly flavorful rice ball combinations, think about balancing texture and tang. Instead of the heavy meat sauce, maybe you want something lighter? Consider blending in some finely chopped, sautéed mushrooms with Swiss cheese instead of mozzarella. Or perhaps you have some leftover roasted chicken? Shred it up, toss it with a tiny bit of barbecue sauce, and boom—you have a completely different kind of comfort food rice ball!
We aren’t just limited to Italian flavors when we talk about rice balls, of course. This general concept—stuffing rice and rolling it—translates across the globe, giving us some fantastic other options to try out when we need quick rice ball lunch ideas.
Exploring Japanese Rice Balls Variations (Onigiri)
If you want to see how the rest of the world handles their rice balls, you have to look at Japanese Onigiri! Onigiri are usually much simpler than the heavy, fried Arancini we’ve been making. They skip the deep frying altogether and rely on the stickiness of short-grain rice to hold their shape. They are usually molded into triangles or simple spheres and rarely stuffed in the same dramatic way we stuff our Arancini rice balls.
Classic Onigiri fillings are usually savory but tangy—think pickled plum (umeboshi), salted salmon flakes, or that super popular tuna mayo mix. If you want to try a less messy snack, skip the breading and just form your cold rice into shapes, maybe brush them with soy sauce and toss them on a hot pan to get a little crust, which turns them into Yaki Onigiri. It’s a different vibe entirely—lighter, quicker, and perfect for a snack that doesn’t demand frying. But hey, for pure, over-the-top comfort, my cheesy Italian creations still win!
Serving Suggestions for Party Appetizers Using Rice Balls
When you pull these gorgeous, golden rice balls out of the oil, half the battle is won—they are already looking incredible! Since these are definitely meant to be show-stopping party appetizers, presentation is everything. You made crispy fried rice balls; let’s make sure everyone knows it!
First tip: never serve them directly from the draining paper towels. You want them to look hot, fresh, and inviting. I always transfer them immediately to a wide, shallow serving platter lined with clean parchment paper or a pretty cloth napkin. This looks much nicer and buys you a few extra minutes before the residual oil soaks in too much.

For dipping sauces, marinara is a classic, and it’s totally delicious, but sometimes you need options for your guests! If you’re serving these cheesy rice balls at a party, offer at least two dips. If you used the meat sauce filling, a simple, bright dipping sauce cuts through the richness perfectly. Try whipping up a quick garlic aioli—it’s just mayonnaise, crushed garlic, lemon juice, and a tiny bit of Dijon mustard. It’s creamy, a little sharp, and fantastic with the salty crust of the fried rice balls.
For presentation, you can stack them pyramid-style if you have big ones, or just arrange them neatly and garnish the platter. A little sprinkle of fresh, chopped parsley or basil over the top gives the whole serving dish a burst of color that screams “freshly made.” Trust me, these rice balls disappear FAST when they look this good!
Storage and Reheating Instructions for Leftover Rice Balls
If you managed to have any of these amazing Italian rice balls left over—seriously, good job!—you’ll want to handle the leftovers carefully because we want to save that beautiful crunch we worked so hard for.
First rule of leftover fried food: do not put them straight into the fridge while they are still warm and sitting in a sealed container. That is a guaranteed way to steam the crust and wake up to soggy disappointments the next day. When they first come out of the fryer, let them cool completely on that wire rack we talked about. This lets any residual steam escape before sealing in what’s left.
Once they are totally cooled—and I mean room temperature, folks—transfer them to an airtight container. You can even put a small paper towel layer between stacked rounds if you want to absorb any tiny bit of moisture, but try not to stack them too high! These rice balls will keep just fine in the refrigerator for about three to four days.
Now, the reheating part is crucial. If you try to nuke these babies in the microwave, they will turn into steaming hot, chewy lumps, and we definitely don’t want that sad texture!
The Best Way to Restore Crispy Rice Balls
To get that satisfying, crackly crust back, you need dry, intense heat. The oven or the air fryer are your best friends here. Set your conventional oven to about 375°F (190°C). You don’t need to grease a baking sheet, but placing the rice balls directly on the rack (maybe on top of a baking tray if you’re worried about cheese dripping) helps air circulate underneath.
Heat them for about 10 to 15 minutes, checking them around the 10-minute mark. What you’re looking for is that satisfying sizzle sound and that perfectly golden resurfacing of the crust. They should be piping hot all the way through, with the mozzarella center gooey again but not actively leaking everywhere.
If you are using the air fryer, this is even faster! Set your temperature a little lower, maybe 350°F (175°C). Air frying for about 6 to 8 minutes usually does the trick. Shake the basket halfway through. They puff right back up and you get that fantastic crispiness back in no time flat. Honestly, forgetting to save leftovers is usually my bigger problem than figuring out how to reheat them!
Frequently Asked Questions About Homemade Rice Balls Recipe
I know when you look at a recipe like this—deep-fried, cheesy, stuffed—your brain goes straight to the troubleshooting questions! That’s perfect, because understanding the little details is how we nail these savory rice ball snacks every time. I’ve gathered the most common things people ask me about making their own yummy rice balls.
Can I use leftover risotto instead of plain cooked rice?
Oh, yes, please! If I’m being totally honest, using leftover risotto is actually my favorite way to make these Italian rice balls. Risotto has the perfect creamy consistency from the starch release, so it molds beautifully without feeling dry or crumbly. If your risotto is already cheesy, you might want to reduce the extra Parmesan you add later, just so they don’t get too salty. It’s cheating, but it’s delicious cheating!
What oil temperature is best for frying crispy rice balls?
This is probably the most important technical question for achieving that perfect golden crust on your rice balls! You absolutely need that oil to be steady at 350°F (175°C). If you dip the breaded rice balls in cooler oil, they just soak up grease and get heavy. If it’s smoking hot, the outside burns instantly, leaving the mozzarella cold inside. If you don’t have a thermometer, drop a tiny pinch of breadcrumbs in; they should sizzle happily right away but not instantly turn mahogany brown. Keep checking that temperature!
Can I freeze these rice balls before or after frying?
Yes, you totally can freeze them, which is a huge bonus for meal prepping or for future quick lunch ideas! For the best results, I highly recommend freezing them *after* you’ve breaded them but *before* you fry them. Line a baking sheet with parchment, place the breaded rice balls flat (don’t let them touch), and freeze until solid. Then transfer those hard little treasures into a freezer bag. When you’re ready to cook, fry them straight from frozen—just add about 2 minutes to the frying time. Do not try reheating fried ones in the microwave, though; that ruins the texture!
Do I have to use meat sauce, or are there good vegetarian rice balls?
Never feel locked into a filling! While the meat sauce is classic for Arancini, there are so many other amazing savory rice ball snacks you can make. If you skip the sauce, you can make super cheesy rice balls by using only mozzarella and ricotta, maybe spiking the cheese mixture with a pinch of dried basil or oregano. Another great option is sautéed spinach mixed with feta cheese for a Greek-inspired take. The key is making sure whatever you use is not too wet, or your rice ball will burst when it hits the oil!
Share Your Cheesy Rice Balls Creations
Okay, so now that you’ve had a chance to play around in the kitchen and roll up your own batch of these amazing cheesy rice balls, I really want to know how they turned out! Honestly, seeing your successes is what keeps me going in the kitchen, especially when I’m simplifying a classic like Arancini.
Did you stick with the meat sauce, or did you try one of the veggie variations we talked about? Maybe you perfected your own dipping sauce? Don’t be shy! Head down to the comments section and let me know how your rice balls held up in the hot oil. Were they perfectly spherical? Did you get that amazing cheese pull everyone dreams about?
If you snap a picture of your glorious, golden-brown creations—especially if you got a great cross-section shot showing off that gooey mozzarella center—I’d be thrilled if you shared it on social media! Tag me so I can see them. I love when you use my recipes to bring comfort and joy to your own family table. For questions about ingredient swaps or tweaking the breading for your next batch, don’t hesitate to reach out on my contact page, but first, tell me about the finished product!
PrintUltimate Cheesy Italian Arancini Rice Balls

Make crispy fried Italian rice balls stuffed with mozzarella and meat sauce. These are perfect as party appetizers or satisfying comfort food snacks.
- Prep Time: 25 min
- Cook Time: 15 min
- Total Time: 40 min
- Yield: 12 servings 1x
- Category: Appetizer
- Method: Frying
- Cuisine: Italian
- Diet: Vegetarian
Ingredients
- 3 cups cooked Arborio rice (cooled)
- 1 cup meat sauce (thickened, cooled)
- 4 ounces mozzarella cheese, cut into small cubes
- 1/2 cup grated Parmesan cheese, divided
- 1 large egg, beaten
- 1/2 cup all-purpose flour
- 1 1/2 cups breadcrumbs (Panko recommended for crispiness)
- Vegetable oil, for frying
- Salt and black pepper to taste
Instructions
- In a bowl, mix the cooled cooked rice with half of the Parmesan cheese, salt, and pepper.
- Take about 1/4 cup of the rice mixture and flatten it in your palm. Place one cube of mozzarella and a spoonful of meat sauce in the center.
- Carefully fold the rice around the filling, sealing it completely to form a tight ball. Repeat until all filling is used.
- Set up a breading station: one shallow dish with flour, one with the beaten egg, and one with the breadcrumbs mixed with the remaining Parmesan cheese.
- Roll each rice ball first in the flour, shaking off excess. Then dip it completely in the egg. Finally, coat it thoroughly in the breadcrumb mixture, pressing gently so the crumbs adhere well.
- Heat about 2 inches of vegetable oil in a deep pot or Dutch oven to 350°F (175°C).
- Carefully fry the rice balls in batches, turning occasionally, until they are deep golden brown and crispy, about 4 to 6 minutes. Do not overcrowd the pot.
- Remove the cooked arancini with a slotted spoon and place them on a wire rack lined with paper towels to drain excess oil.
- Serve the crispy rice balls hot, perhaps with marinara sauce for dipping.
Notes
- For best results, chill the formed, breaded rice balls for at least 30 minutes before frying. This helps them hold their shape.
- If you prefer a less messy method, you can bake or air fry these rice balls instead of deep frying. Brush them lightly with oil before baking at 400°F (200°C) until golden.
- You can substitute the meat sauce filling with ricotta cheese or leftover risotto for different variations.
Nutrition
- Serving Size: 2 balls
- Calories: 350
- Sugar: 4
- Sodium: 550
- Fat: 18
- Saturated Fat: 7
- Unsaturated Fat: 11
- Trans Fat: 0
- Carbohydrates: 35
- Fiber: 2
- Protein: 14
- Cholesterol: 55