
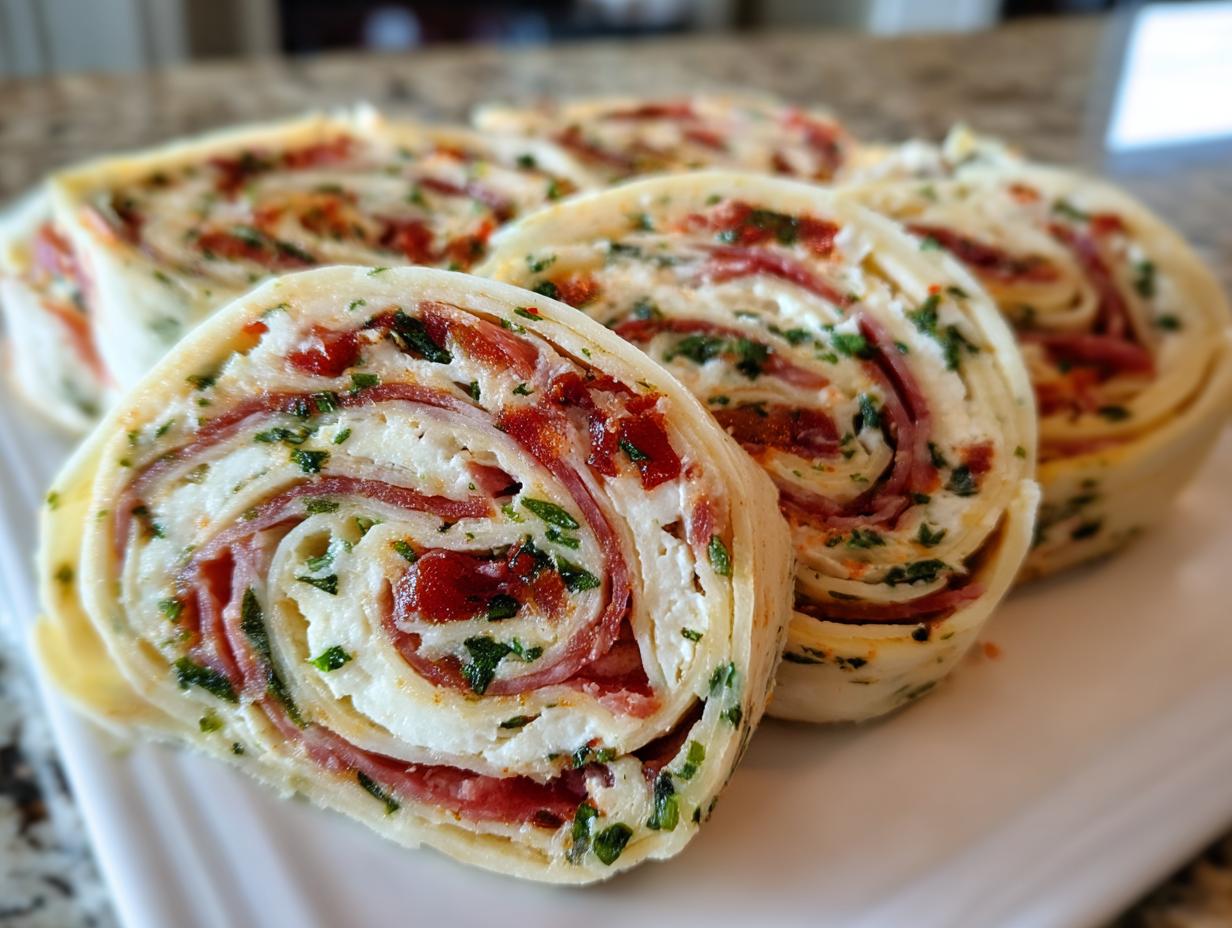
When I think about hosting friends or needing a dish for a potluck, my mind immediately goes to anything I can assemble ahead of time that still tastes incredible. Nobody wants to be stuck in the kitchen while the party is happening! That’s why my recipe for the Best Easy Make-Ahead Italian Sub Pinwheels is my absolute secret weapon. These little bites capture all the zesty, savory goodness of a classic Italian sub, just rolled up neatly. These italian pinwheels are pure magic because they prove that memorable food for connection doesn’t have to be complicated. They always disappear first!
- Why These Are The Best italian pinwheels for Parties and Picnics
- Ingredients for Zesty italian pinwheels
- How to Make italian pinwheels: Step-by-Step Instructions
- Tips for Success with Deli Meat Pinwheels
- Storage and Make Ahead Appetizers Timeline for italian pinwheels
- Serving Suggestions for Game Day Snacks
- Frequently Asked Questions About italian pinwheels
- Nutritional Estimate for italian pinwheels
- Share Your Crowd Pleasing Appetizer Creations
Why These Are The Best italian pinwheels for Parties and Picnics
I’ve made my fair share of appetizers, but these italian pinwheels truly stand out because they handle hosting stress for you! You get that amazing, layered flavor of an Italian sub—salty meats, sharp provolone, and that zesty spread—all in one perfect bite that doesn’t require a fork.
Here’s why I keep coming back to this recipe when company is coming over:
- They are the ultimate Make Ahead Appetizer; seriously, you make them the day before to save all your precious party time.
- Everyone loves something they can grab easily, making these perfect Party Finger Food straight off the platter.
- The flavors meld together beautifully overnight, making them even better the next day!
Quick Party Snack Preparation
You won’t sweat over the oven with this one. There is absolutely zero cooking involved—it’s a true No Bake Appetizer! Active hands-on time is less than 30 minutes, and then you just let the fridge do the rest of the work for you. Easy peasy!
Perfect Picnic Food Ideas
Because these Italian Pinwheel Sandwiches are served cold and wrapped up tight, they are my go-to for any picnic or outdoor gathering. They travel beautifully! As long as you keep them chilled until serving time, they hold their shape perfectly. They’re so much easier than packing up bulky sandwiches for a day out.
Ingredients for Zesty italian pinwheels
When I lay out the ingredients for these italian pinwheels, I feel like I’m prepping for a party in my own kitchen! Getting the prep on the little bits right is what seals the deal on that authentic Italian deli flavor. Trust me, having your sun-dried tomatoes and pepperoncini chopped finely makes the spread so much better. Clarity here means maximum flavor later on, which is what we want!

For the Cream Cheese Spread
- 1 (8 ounce) package cream cheese, softened—this is key, don’t try to rush cold cheese!
- 1/4 cup mayonnaise
- 1 tablespoon Italian salad dressing mix (the dry packet works wonders here)
- 1 teaspoon dried Italian seasoning
- 1/2 teaspoon garlic powder
- 1/4 cup finely chopped sun-dried tomatoes (packed in oil, drained)
- 1/4 cup finely chopped pepperoncini peppers (drained)—use the jarred ones!
- 1/4 cup finely chopped fresh basil
For the italian pinwheels Assembly
- 10 large flour tortillas (about 10 inches each)—make sure they are soft and fresh so they don’t crack when rolling!
- 8 ounces thinly sliced provolone cheese
- 4 ounces thinly sliced salami
- 4 ounces thinly sliced pepperoni
- 4 ounces thinly sliced ham
- 1 cup shredded iceberg lettuce (this adds the fresh crunch!)
How to Make italian pinwheels: Step-by-Step Instructions
Putting these italian pinwheels together is just like building a mini Italian sub on a flat tortilla! Grab your softened cream cheese and get ready to mix up something zesty. The process is simple, but attention to detail in the rolling and chilling phases guarantees you get those perfect, pretty spirals rather than a messy dinner roll. It’s worth it! We need to get this right so they look perfect when we slice them later.
Creating the Flavorful Cream Cheese Pinwheels Spread
First things first, we whip up that spread that gives us the fantastic Zesty Italian Pinwheels profile. In a bowl, beat the softened cream cheese, mayonnaise, Italian salad dressing mix, Italian seasoning, and garlic powder until it looks perfectly smooth. Once it’s creamy, gently fold in your finely chopped sun-dried tomatoes, those tangy pepperoncini pieces, and the fresh basil. Don’t overmix once the solids are in; we just want them evenly distributed. This mix is what makes everything delicious!
Assembling and Rolling the italian sub roll ups
Now for the fun layering part! Lay one tortilla flat. Take about two tablespoons of that amazing spread and smear it across the surface, leaving a small border so nothing squishes out. Layer on your provolone cheese first, nice and flat. Then stack your salami, pop on the pepperoni, and finally the ham. Finish with just a light sprinkle of shredded lettuce right down the middle. Starting from one end, roll that tortilla up as tightly as you possibly can. I always try to visualize a tight tube when I roll it!

Once rolled, wrap that log very snugly in plastic wrap. Seriously, wrap it tight! Repeat this until all your ingredients are used up. If you want more inspiration on quick party bites, check out my tips on simple appetizers. I always recommend wrapping them tightly before moving on.
Chilling and Slicing for Perfect Presentation
This next step is non-negotiable if you want picture-perfect Savory Roll Ups! You must chill those wrapped logs. I always aim for at least 2 hours, but honestly, up to 24 hours chilling is best for the firmest logs—which means cleaner cuts. When you’re ready to serve, unwrap them and slice carefully into 1-inch thick pinwheels. If the knife sticks, wipe the blade clean and go again. This chilling is what makes all the difference for presentation when hosting! People often ask how others get such crisp edges, and the secret is often chilling—you can see a great example of how crisp others make theirs over at The Soccer Mom Blog.
Tips for Success with Deli Meat Pinwheels
Even though this recipe is super straightforward, a few little nudges can turn great Deli Meat Pinwheels into absolute showstoppers. I picked up these little tricks over years of playing around with recipes, often inspired by things folks mentioned in my comments section. My goal is always to make sure you feel totally confident serving these up, whether it’s for a low-key family lunch or a big game day crowd. If you want to see other spins on similar recipes, checking out the tips from Kroll’s Korner is always helpful!
Ingredient Adjustments for Custom italian pinwheels
The beauty of these is that you can totally customize them to your taste! If you aren’t a big ham fan, swap it out for prosciutto for a saltier pop, or use mortadella for a smoother texture. Remember, these are your italian pinwheels, so make them yours! If you happen to love a little fire—and I often do—make sure you amp up that zestiness.
The original notes mention adding red pepper flakes, and I totally endorse this. Toss about a teaspoon of dried red pepper flakes right into that cream cheese spread when you mix it. It doesn’t make them blow-your-head-off spicy, but it just enhances that zesty Italian dressing mix we used. I used a similar trick when I was making my cottage cheese chicken salad—sometimes a little hidden spice makes all the difference!
Keeping Cold Cut Pinwheels Fresh
Once you slice these beautiful Cold Cut Pinwheels, they look their absolute best, but we know parties last longer than five minutes! Since these are served cold anyway, the safest bet is to serve them on a platter that has been chilled for about 15 minutes in the freezer beforehand (just make sure it’s completely dry). This buys you an extra hour or so before you need to worry about them getting warm.
If I know they are going to be sitting out for a while, I only slice half the batch at a time. I keep the remaining logs wrapped tightly in the fridge. That way, as soon as one platter looks sparse, I unwrap and slice the next fresh batch. They taste best within a few hours of slicing, but honestly, the *make-ahead* factor is what wins this recipe every time!
Storage and Make Ahead Appetizers Timeline for italian pinwheels
One of the absolute best parts about these italian pinwheels is how beautifully they fit into a busy schedule. If you’re planning a big event, you can completely assemble the logs and have them chilling overnight—up to 24 hours in the fridge! This really positions them perfectly as stress-free Make Ahead Appetizers.
Once you slice them, things change a little. They are best served the day they are cut, so try to slice them within about three to four hours of when you plan to serve them. The lettuce tends to soften the longer they sit sliced. If you’re worried about leftovers, well, that’s never been an issue around my house, but they stay tasty in an airtight container in the fridge for a couple of days!
Serving Suggestions for Game Day Snacks
When it comes to Game Day, you need food that’s easy to eat standing up while cheering on your team, and these italian pinwheels are the kings of handheld snacking! Because they pack such a rich, savory punch with all the meats and cheese, I always try to serve them with something lighter or something that gives a nice cooling contrast. They are fantastic all by themselves, which makes them an easy win as Kid Friendly Pinwheels—just skip the extra hot pepperoncini in the spread if the little ones are eating!
I’ve found that a simple little vinegar-based dipping sauce really cuts through the richness of the cream cheese spread nicely. Think about a quick vinaigrette mixed with a dollop of ranch, or maybe even some fresh cherry tomatoes and olives served on the side for grazing.
If you are looking for something to pair them with that is more robust for a serious spread, something like my buffalo chicken chili is amazing, though that’s a whole different level of dedication for game day! If you do want another easy dip, a simple fresh bruschetta mix (just diced tomatoes, olive oil, garlic, and basil—no cooking!) served with sturdy crackers works well alongside the rolls. I saw a great list of pairings over at Savory Experiments that really highlighted how well they stand up to bolder flavors!
Frequently Asked Questions About italian pinwheels
I always get questions when I bring these to gatherings, and usually, it’s just about how long they last or how to make them fit a certain diet. Since these are so versatile, people get creative! I’m happy to clear up any last little bits of confusion here—it’s all about setting you up for success so these amazing snacks turn out perfectly every time. If you’re looking for other quick ideas, I’ve got some great easy breakfast ideas that are just as fuss-free!
Can I make these Italian Pinwheel Sandwiches vegetarian?
Oh, absolutely! That’s a great idea, especially if you have vegetarian friends coming over. When you skip the meat in these Italian Pinwheel Sandwiches, you really want to boost the texture and flavor in that layer. I suggest using thinly sliced, grilled zucchini or roasted red bell peppers instead of the cold cuts. You could also load up on extra provolone or even add some chopped Marinated Artichoke Hearts right on top of the spread for a nice tang. Just make sure whatever you add is sliced thin enough so your log rolls up without too much bulging!
What is the best way to slice the logs neatly?
This goes back to the most important rule: chilling! You absolutely must let those logs get rock solid in the fridge—at least two hours, but overnight is ideal. When you go to slice, don’t reach for the bread knife; those serrated edges tend to tear the tortilla. Instead, use a very sharp, thin chef’s knife that isn’t serrated. For really clean cuts when slicing these Tortilla Roll Ups Appetizer logs, I actually wipe the knife blade clean with a damp paper towel after every two or three slices. If the blade sticks, it means cheese or spread is warming up! A quick wipe and you’re back to perfect spirals.
How long do these Cream Cheese Pinwheels last if not sliced?
This is where the make-ahead magic really happens. If you have left your finished rolls tightly wrapped in plastic wrap, they do great! You can safely store them in the refrigerator for up to 24 hours. That means you can roll them up completely on Saturday afternoon and slice them fresh for your Sunday football party needing Game Day Snacks. Honestly, I think the flavors deepen a tiny bit when they rest overnight. Just make sure they are sealed well so they don’t dry out near the edges of the tortilla.
Nutritional Estimate for italian pinwheels
Now, I always tell folks here at Mia’s Meals that we focus on flavor first, but it’s good to have a general idea of what you’re serving! Because these are packed with quality meats and cheese, they definitely count as satisfying party food. Keep in mind that these numbers are truly just an estimate based on the full yield of the recipe (about 40 pieces) and the brands I tend to grab at the store, so take them with a grain of salt!
Here is the baseline estimate per serving (2 pinwheels):
- Serving Size: 2 pinwheels
- Calories: 185
- Fat: 14g
- Carbohydrates: 5g
- Protein: 10g
Since we’re using deli meats and cream cheese, the sodium content is higher, which is typical for these kinds of Crowd Pleasing Appetizer roll-ups. If you are sensitive to sodium, look for lower-sodium ham or provolone brands!
Share Your Crowd Pleasing Appetizer Creations
Well, friend, that’s all there is to it! We took inspiration from the classic deli counter and turned it into the easiest, most flavorful appetizer you’ll ever serve. I truly believe that getting food on the table—especially something as reliably delicious as these italian pinwheels—is a beautiful way to tell the people you care about that you care about them. It’s exactly what we aim for here at Mia’s Meals!
Now, I absolutely love hearing from you! Did you try the zesty spread as written, or did you sneak in some extra spicy pepperoncini? Maybe you used a different cheese blend? Don’t be shy—come tell me how your Crowd Pleasing Appetizer turned out!
Take a minute to rate this recipe right here on the page when you’re done, and if you snap a picture of your beautiful pinwheel platter, tag me on social media! Seeing your creations and knowing they brought a little extra joy and connection to your table is the best reward for me. You can read more about how we try to keep things simple and joyful over on my About Page. Happy snacking, everyone!
PrintEasy Make-Ahead Italian Sub Pinwheels

Make these simple Italian pinwheels using classic Italian deli meats, cheese, and a zesty cream cheese spread. They are perfect party finger food or game day snacks.
- Prep Time: 25 min
- Cook Time: 0 min
- Total Time: 145 min
- Yield: 40 pinwheels 1x
- Category: Appetizer
- Method: No Bake
- Cuisine: Italian-American
- Diet: Vegetarian
Ingredients
- 1 (8 ounce) package cream cheese, softened
- 1/4 cup mayonnaise
- 1 tablespoon Italian salad dressing mix (dry packet)
- 1 teaspoon dried Italian seasoning
- 1/2 teaspoon garlic powder
- 1/4 cup finely chopped sun-dried tomatoes (packed in oil, drained)
- 1/4 cup finely chopped pepperoncini peppers (drained)
- 1/4 cup finely chopped fresh basil
- 10 large flour tortillas (about 10 inches each)
- 8 ounces thinly sliced provolone cheese
- 4 ounces thinly sliced salami
- 4 ounces thinly sliced pepperoni
- 4 ounces thinly sliced ham
- 1 cup shredded iceberg lettuce
Instructions
- In a medium bowl, beat the softened cream cheese, mayonnaise, Italian salad dressing mix, Italian seasoning, and garlic powder until smooth.
- Stir in the chopped sun-dried tomatoes, pepperoncini peppers, and fresh basil until combined. This is your spread.
- Lay one tortilla flat on a clean surface. Spread about 2 tablespoons of the cream cheese mixture evenly over the entire surface, leaving a small border around the edges.
- Layer the fillings: place one slice of provolone cheese over the spread. Top with a single layer of salami, then pepperoni, and then ham. Sprinkle lightly with shredded lettuce.
- Starting from one edge, roll the tortilla up tightly into a log shape. Wrap the log tightly in plastic wrap.
- Repeat the process with the remaining tortillas and fillings.
- Refrigerate the wrapped logs for at least 2 hours, or up to 24 hours, to allow them to firm up. This step is essential for clean slicing.
- When ready to serve, unwrap the logs and use a sharp knife to slice each roll into 1-inch thick pinwheels.
- Arrange the Italian pinwheels on a platter and serve cold.
Notes
- For a zesty kick, add 1 teaspoon of red pepper flakes to the cream cheese spread.
- If you plan to serve these as picnic food ideas, keep them chilled until serving time.
- You can substitute the meats with your favorite Italian cold cuts for custom deli meat pinwheels.
Nutrition
- Serving Size: 2 pinwheels
- Calories: 185
- Sugar: 1
- Sodium: 450
- Fat: 14
- Saturated Fat: 6
- Unsaturated Fat: 8
- Trans Fat: 0.5
- Carbohydrates: 5
- Fiber: 0
- Protein: 10
- Cholesterol: 35