
Oh man, if you’re anything like me, you know the weeknight dinner struggle is real. We want something fast, something the kids will devour without complaint, and honestly? Something that doesn’t feel like a total health disaster. That usually means settling for freezer-aisle cardboard coated in mystery oil. Nope! Not anymore. I spent ages perfecting these homemade chicken nuggets because I refuse to compromise on texture just because we ditched the deep fryer. Trust me when I say these bake up impossibly crispy on the outside and stay super juicy inside, delivering that satisfying *crunch* every single time. This method proves great flavor doesn’t need tons of effort, making it perfect for those busy nights we talk about over at my quick weeknight dinners collection. Welcome to Mia’s Meals—where we simplify the classics and bring that happy, connected feeling back to your quickest family meals.

- Why This Homemade Chicken Nuggets Recipe Works for Busy Families
- Essential Ingredients for Perfect Homemade Chicken Nuggets
- Step-by-Step Instructions for Crispy Baked Homemade Chicken Nuggets
- Variations: Air Fryer Chicken Nuggets and Copycat Flavor
- Serving Suggestions for Your Homemade Chicken Nuggets Recipe
- Storage and Make Ahead Chicken Nuggets Tips
- Frequently Asked Questions About Homemade Chicken Nuggets
- Nutritional Estimates for Homemade Chicken Nuggets
- Share Your Best Homemade Nuggets Experience
Why This Homemade Chicken Nuggets Recipe Works for Busy Families
I hear you when you say you don’t have time for complicated recipes. That’s why I developed this method specifically for you, the busy parent, or anyone needing a dependable, amazing homemade chicken nuggets dinner. We cut out the mess of frying but kept all the flavor and, best of all, the crunch! If you’re looking for more lightning-fast ideas, check out some of my favorites over on my ideas for easy breakfast ideas too—goodness around here starts early!
Achieving Crispy Baked Chicken Nuggets Texture
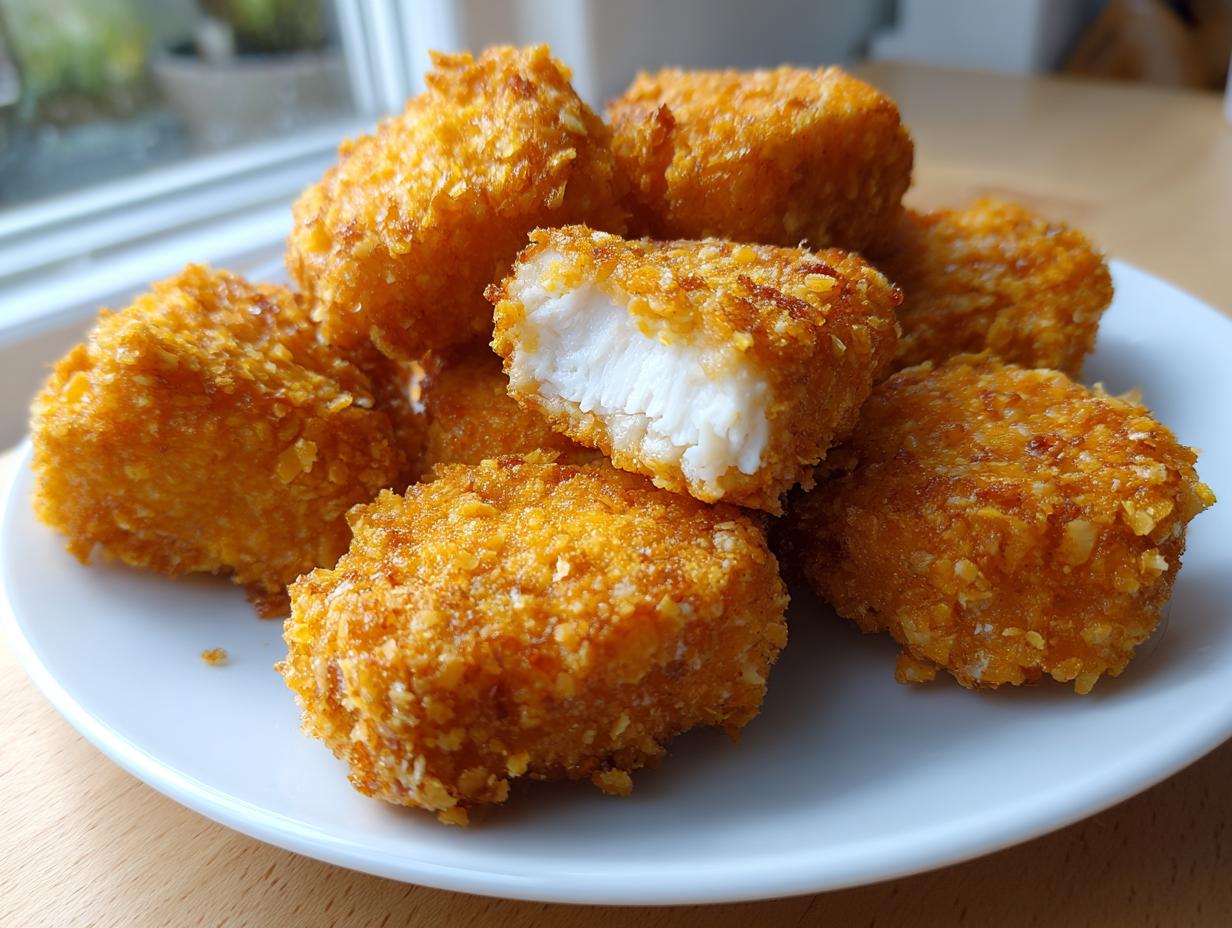
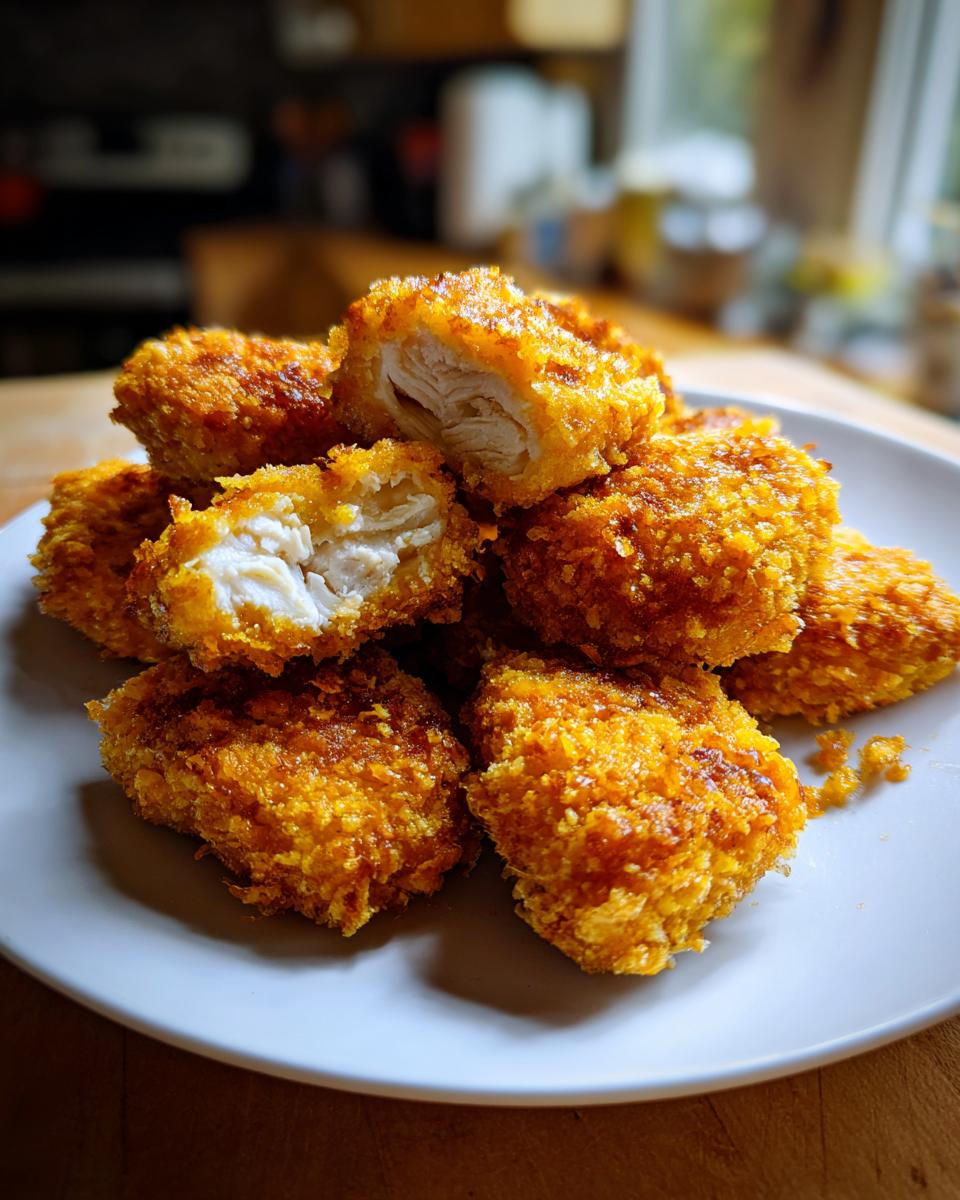
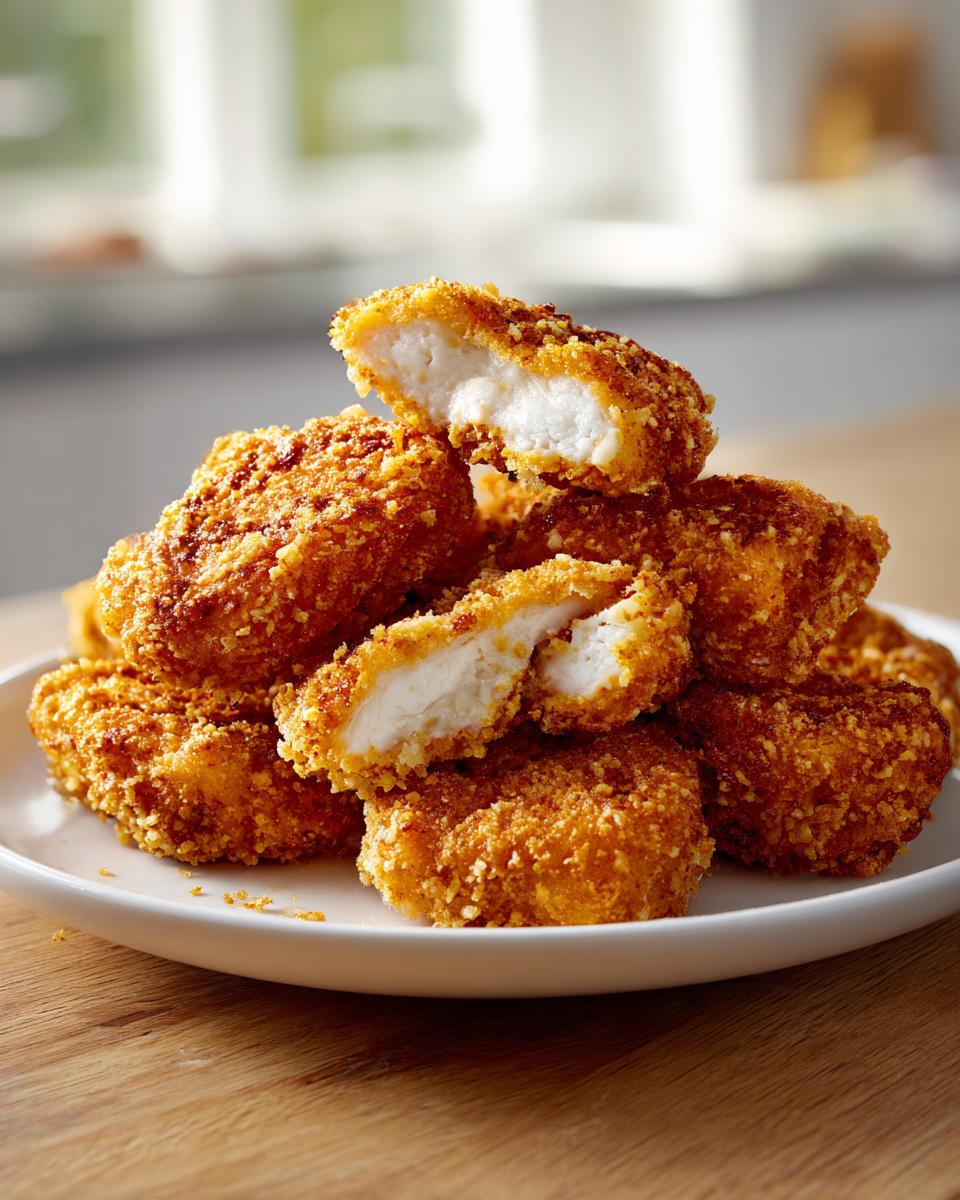
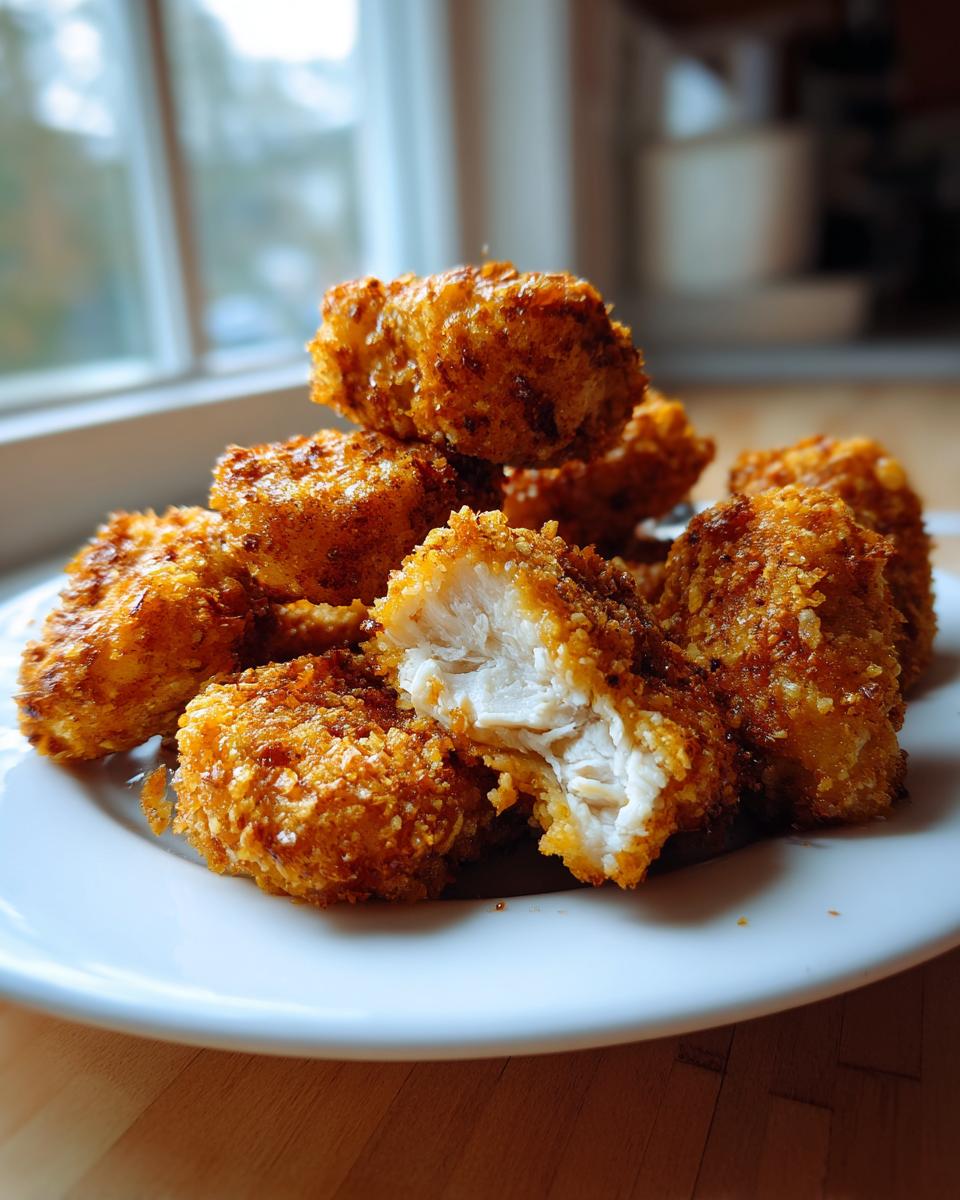
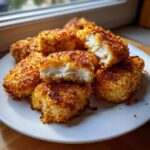
This is where Panko breadcrumbs walk in like the heroes they are! Panko is just flaky Japanese breadcrumb, and it creates those light, airy pockets that get wonderfully shatteringly crisp in the oven. Standard breadcrumbs just absorb too much moisture, giving you that sad, soggy texture we are trying to avoid. The absolute non-negotiable step for crunch, though? That cooking spray! You need to spray them generously before they go into the heat. This little bit of fat mimics the quick sizzle of frying and is the secret to getting phenomenal Crispy Baked Chicken Nuggets without turning on the deep fryer.
Keeping Your Homemade Chicken Nuggets Juicy
It’s a common fear: baking chicken breast means drying it out. Not here! We use good, solid pieces of chicken breast cut into uniform chunks, which helps them cook evenly. The triple coating method—flour cling, egg seal, Panko crust—acts like a little insulation blanket around the meat. Once the egg and flour lock down, the Panko seals everything in during the bake. When you pull these perfect homemade chicken nuggets out, you’ll find the inside is tender and shockingly moist every single time. It’s the perfect combination of protecting the meat while maximizing the crunch on the outside, I promise!
Essential Ingredients for Perfect Homemade Chicken Nuggets
Okay, let’s talk about what actually goes into these things because this is where quality really shows up. You can’t fake flavor when it comes to delicious homemade chicken nuggets, and for me, that means using real, recognizable ingredients. I’ve got the exact measurements down low that ensure every nugget turns out perfectly sized and perfectly seasoned. Forget trying to substitute the breadcrumbs—Panko is the boss here! When you gather these items, you’re halfway to the best family dinner idea you’ve had all month, period. If you’re looking for other ways to boost your family’s protein intake easily, check out my guide on easy protein muffins!
The Chicken and Breading Components
First off, grab about 1.5 pounds of good, solid boneless, skinless chicken breast. The key is cutting them uniformly into nice, sturdy 1-inch pieces—these become your chicken breast nuggets. Don’t make them tiny, or they’ll dry out before they get golden!
For the coating, you absolutely need Panko breadcrumbs in that third dish. If you use regular breadcrumbs, you’re going to end up disappointed, trust me. Panko is what gives us that airy, crackly exterior. Then we have our seasoning blend in with the Panko: 1 teaspoon of salt, half a teaspoon of black pepper, half a teaspoon of garlic powder, and just a quarter teaspoon of paprika. That little bit of paprika just wakes everything up nicely.
The other two components are simple: one cup of flour for the first dredge, and two large eggs, beaten lightly for the middle. We use spray oil generously later, but these are the main players that build our crispy shell!
Step-by-Step Instructions for Crispy Baked Homemade Chicken Nuggets
Alright, the prep work is done, and now it’s time for the fun part! Making these nuggets assembly-line style is the key to keeping your kitchen clean and your nuggets perfectly coated. This is where we make sure that gorgeous Panko crust adheres beautifully without getting too thick or clumpy. Remember, even cooking is essential here so we don’t end up with a half-baked center, which nobody wants from their homemade chicken nuggets! For more oven-based crispiness magic, you have to check out my guide on crispy baked chicken wings—it uses the same crunch principles!
Setting Up Your Breading Station
First things first: preheat that oven to 400°F (200°C)$! Seriously, don’t skip this. We want that heat waiting for the nuggets. Now, set up three shallow dishes close together. Dish one gets your flour. Dish two gets the lightly beaten eggs. Dish three holds your seasoned Panko mixture. Remember the rule: Flour first, shake off all the loose stuff. Then a quick dip in the egg, and finally, press that piece firmly into the Panko!
Coating and Arranging the Chicken Breast Nuggets
When you move the piece from the egg into the Panko, take a moment to really press that coating on. We want full coverage, so no bare spots show through! Once coated, place your little chicken breast nuggets onto a baking sheet lined with parchment paper—and this part is crucial—make sure they aren’t touching! If they snuggle up, they steam instead of crisping. Spread them out like they’re sunbathing!
Baking for Juicy Chicken Nuggets
Before they even hit the oven, give the tops of all those perfectly coated nuggets a good, generous spray of cooking spray. This helps them brown beautifully! Bake them for 10 minutes, then pull them out, flip every single one over, and give the uncooked side another quick light spray of oil. Pop them back in for another 8 to 10 minutes. We are aiming for an internal temperature of 165°F (74°C)$—that’s how you ensure they are safe and that you get those wonderfully Juicy Chicken Nuggets we talked about!
Variations: Air Fryer Chicken Nuggets and Copycat Flavor
I know not everyone has the same setup, and these nuggets are so good you’re going to want to make them constantly! If you’re looking to save a little time or just prefer basket cooking, we absolutely have options for your Air Fryer Chicken Nuggets. Plus, I have a little secret weapon if you’re trying to nail that familiar fast-food taste at home. It’s all about making the recipe fit your life, right? It’s the core philosophy here! For more ways to use that handy gadget, swing by my recipe for air fryer baked potato—it cooks up like magic!
Making Easy Chicken Nuggets in the Air Fryer
Using the air fryer is super hands-off, which is why I love it for a quick dinner. After you’ve done the whole breading dance, just arrange your coated nuggets in a single layer in the basket—don’t overcrowd it, or they won’t get truly crisp! Set the temperature to 380°F (195°C)$ and cook them for about 10 to 12 minutes total. Make sure you flip them halfway through so both sides get that beautiful golden color. They come out almost identical to the baked batch, just faster!
Secret Tip for Copycat Chicken Nuggets Flavor
Okay, leaning into the popular copycat craze? Lots of people ask how to get that slightly tangy, savory depth you find at those big chicken chains. My biggest tip, found in the notes, is to soak your chicken chunks in pickle juice for about 30 minutes before you even start dredging them in the flour. It sounds wild, but that acidity tenderizes the meat and adds a subtle flavor profile that really mimics what you’re probably hoping for in your Copycat Chicken Nuggets. If you try it, I sourced a great recipe focusing just on that flavor profile over here: Copycat Chick Fil A Nuggets Recipe.
Serving Suggestions for Your Homemade Chicken Nuggets Recipe
We did the hard work, now let’s eat! These homemade chicken nuggets recipe stars are begging for the right supporting cast. Since these are inherently Kid Friendly Chicken Nuggets, I always keep the sides easy for a speedy Quick Chicken Dinner. My absolute favorites are a side of crispy sweet potato fries or maybe some quick frozen peas you just steam for two minutes. For dipping? You can’t go wrong with ketchup, of course, but you’ve got to try a little BBQ sauce or my simple easy creamy garlic sauce recipe. Those three options cover every kid (and adult!) craving at my table!
Storage and Make Ahead Chicken Nuggets Tips
Listen, sometimes dinner prep is the only minute you have free all day! So yes, you can definitely make these nuggets ahead of time, which is a lifesaver when you need a fantastic quick chicken dinner later in the week. The trick for our Make Ahead Chicken Nuggets is freezing them *after* they’ve been breaded but *before* they ever touch the oven. Lay the fully coated raw nuggets on that parchment-lined baking sheet so none of them are touching, and just pop the whole sheet into the freezer until they are totally solid blocks.
Once they’re rock hard—usually after an hour or two—you can just sweep them into a big freezer bag. When it’s time to cook them from scratch, don’t even thaw them! Just put them straight into that 400°F oven or the air fryer, adding about five to seven extra minutes to the cook time they needed fresh. Whatever you do, skip the microwave; we are keeping these babies crispy!
Frequently Asked Questions About Homemade Chicken Nuggets
When I first started putting this recipe together, I had about a million questions bounce through my head, and I bet you do too! Cooking should be fun, not mysterious. So, I gathered up the ones I get asked the most often about making the best homemade nuggets. Hopefully, this helps you feel completely confident stepping into the kitchen! For more ideas on speedy, wholesome meals, take a peek at my healthy lunch recipes collection!
Can I use ground chicken instead of breast for these homemade chicken nuggets?
That’s a great question! You certainly can use ground chicken, and it will make for a texture that melts in your mouth almost like a patty. However, you need to make a few small adjustments since ground chicken behaves differently than solid chunks of breast meat. I highly recommend forming the ground chicken into your nugget shapes first and maybe chilling them for 15 minutes so they hold their form better during the breading process. You won’t get that distinct, fibrous texture of a true nugget chunk, but you will get something incredibly tender and still delicious!
What is the best way to reheat leftover crispy baked chicken nuggets?
Oh, please never, ever put a crispy nugget in the microwave! It just turns everything soft and sad instantly. If you have leftovers from a quick chicken dinner, you need to wake that crunch back up! The absolute best way is to use your air fryer. Pop the nuggets in for about 4 minutes at 375°F (about 190°C)$ and they’ll crisp right back up. If you don’t have an air fryer, using a regular oven at 350°F (175°C)$ for about 5 to 7 minutes on a baking sheet works wonders too. They’ll be piping hot and crunchy again!
How can I make these chicken nuggets healthier?
The great news is this recipe is already leaning into the healthy homemade chicken nuggets category because we are baking them instead of deep frying them! Frying adds so much unnecessary fat, so just following these steps handles the biggest health win right there. If you want to tweak it just a bit further, you can always swap out the all-purpose flour for whole wheat flour in the first dredging dish. It won’t change the crunch dramatically, but it certainly nudges the fiber up a notch. It’s all about small changes that stack up over time!
Nutritional Estimates for Homemade Chicken Nuggets
Okay, so we love that these are simple and tasty, but sometimes you just need to know the numbers, right? I always want to be transparent about what we’re eating, especially when I’m serving comfort food to my family. Remember that these figures are estimates based on using the specific ingredients and measurements listed above. These numbers are based on a single serving size, which for this recipe is about five of those beautiful little nuggets. It’s pretty clean eating for a beloved classic!
These estimates help cement this recipe as a great Weeknight Chicken Meal option because they are relatively low in fat compared to frying, and they pack a serious protein punch, which keeps everyone feeling full!
- Calories: Around 280 per serving
- Protein: A strong 34 grams! That’s fantastic for keeping you satisfied.
- Total Fat: About 8 grams. Huge difference from frying!
- Carbohydrates: Roughly 18 grams.
We keep the sugar incredibly low here, just about 1 gram, which is fantastic if you’re trying to keep those added sugars down for the kids. These baked homemade chicken nuggets really are a win-win for taste and balance!
Share Your Best Homemade Nuggets Experience
I truly hope these homemade chicken nuggets become a staple in your rotation—they certainly are here! If you loved the crispiness and the simplicity, please give this recipe 5 stars right down below. I’d also love to hear what dipping sauce you served them with; share your favorite additions in the comments! This recipe is such a fantastic go-to for a stress-free Family Dinner Idea, so share the goodness with a fellow busy parent!
PrintCrispy Baked Homemade Chicken Nuggets
Make crispy, juicy homemade chicken nuggets using chicken breast. This easy recipe bakes them to golden perfection, offering a healthier, kid-friendly alternative to fried versions.
- Prep Time: 15 min
- Cook Time: 20 min
- Total Time: 35 min
- Yield: 4 servings 1x
- Category: Dinner
- Method: Baking
- Cuisine: American
- Diet: Low Fat
Ingredients
- 1.5 lbs boneless, skinless chicken breast, cut into 1-inch pieces
- 1 cup all-purpose flour
- 2 large eggs, lightly beaten
- 1.5 cups Panko breadcrumbs
- 1 teaspoon salt
- 1/2 teaspoon black pepper
- 1/2 teaspoon garlic powder
- 1/4 teaspoon paprika
- Cooking spray
Instructions
- Preheat your oven to 400°F (200°C). Line a baking sheet with parchment paper and lightly coat it with cooking spray.
- Set up a standard breading station with three shallow dishes. Place the flour in the first dish.
- Place the beaten eggs in the second dish.
- Combine the Panko breadcrumbs, salt, pepper, garlic powder, and paprika in the third dish. Mix well.
- Take one piece of chicken and dredge it thoroughly in the flour, shaking off any excess.
- Dip the floured chicken piece into the egg mixture, allowing excess to drip off.
- Press the chicken piece firmly into the Panko mixture until it is completely coated.
- Place the coated chicken nugget onto the prepared baking sheet. Repeat this process for all chicken pieces, ensuring they do not touch.
- Spray the tops of the coated nuggets generously with cooking spray. This helps achieve a golden, crispy exterior.
- Bake for 10 minutes. Flip the nuggets over, spray the second side lightly with cooking spray, and bake for another 8 to 10 minutes, or until the internal temperature reaches 165°F (74°C) and the coating is golden brown and crispy.
- Serve immediately with your favorite chicken nugget dipping sauces.
Notes
- For an air fryer method, cook the coated nuggets at 380°F (195°C) for 10 to 12 minutes, flipping halfway through.
- You can make these ahead; freeze the raw, coated nuggets on the baking sheet until solid, then transfer them to a freezer bag. Bake from frozen, adding 5-7 minutes to the cook time.
- Use pickle juice to soak the chicken pieces for 30 minutes before breading if you want a copycat flavor profile.
Nutrition
- Serving Size: 5 nuggets
- Calories: 280
- Sugar: 1
- Sodium: 350
- Fat: 8
- Saturated Fat: 1.5
- Unsaturated Fat: 6.5
- Trans Fat: 0
- Carbohydrates: 18
- Fiber: 1
- Protein: 34
- Cholesterol: 95