
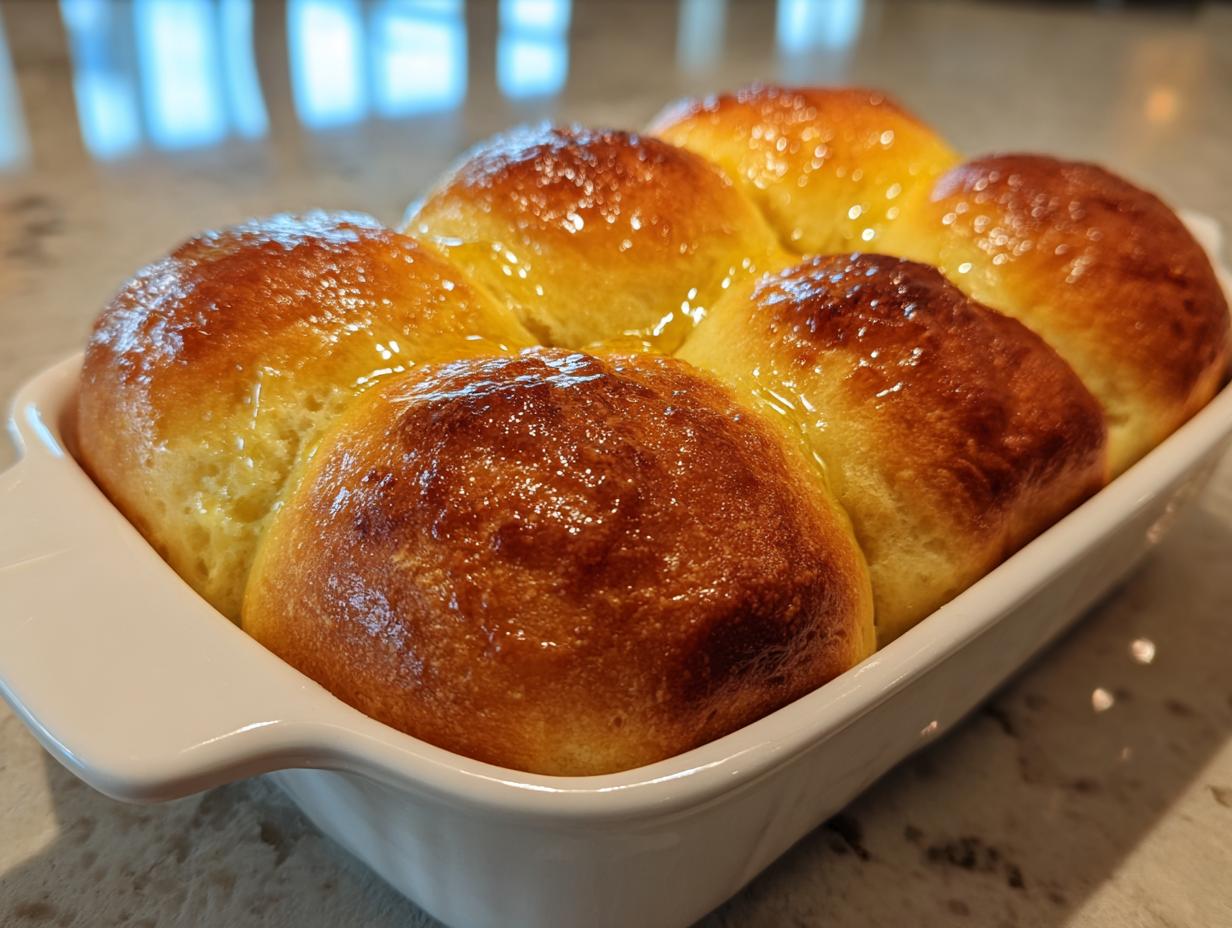
Oh, that smell! There is truly nothing in this world that says “welcome home” quite like the rich, yeasty aroma of freshly baked bread filling your kitchen. Forget those sad, pale rolls from the grocery store freezer bag. We are going to make the real deal: the most incredibly soft, pillowy homemade dinner rolls from scratch you’ve ever tasted. I know bread baking can seem intimidating, but trust me, my goal here at Mia’s Meals is to take all the guesswork out of it. We’re using time-tested, reliable home baking methods—the kind that feels comforting and connected, just like the philosophy you can read about over on our About Page—to give you tender, buttery rolls every single time. These aren’t fussy; they’re just pure, honest comfort food ready for your next big dinner.
- Why This Recipe Delivers the Best Homemade Dinner Rolls
- Gathering Ingredients for Soft Homemade Dinner Rolls
- Step-by-Step Instructions for Perfect Homemade Dinner Rolls
- Tips for Success When Making Homemade Dinner Rolls
- Make-Ahead and Storage for Your Homemade Dinner Rolls
- Serving Suggestions for Homemade Holiday Bread
- Frequently Asked Questions About Homemade Dinner Rolls
- Estimated Nutrition for Homemade Dinner Rolls
- Share Your Soft, Fluffy Dinner Rolls From Scratch
Why This Recipe Delivers the Best Homemade Dinner Rolls
You want rolls that are soft, buttery, and practically melt in your mouth, right? That’s exactly what we get here! This recipe isn’t just about mixing flour and yeast; it’s about building structure that keeps them irresistibly tender. We aren’t going for crusty French loaves; we are aiming for that perfect batch of fluffy dinner rolls from scratch! Here’s why you can trust this method:
- Pure, Melted Butter Flavor: Yes, we use it in the dough *and* brush it on top!
- Tender Texture: They bake up close together, creating those amazing soft sides.
- Reliable Results: It follows proven principles for yeast bread, so you don’t need to stress.
Achieving Peak Fluffiness in Your Homemade Dinner Rolls
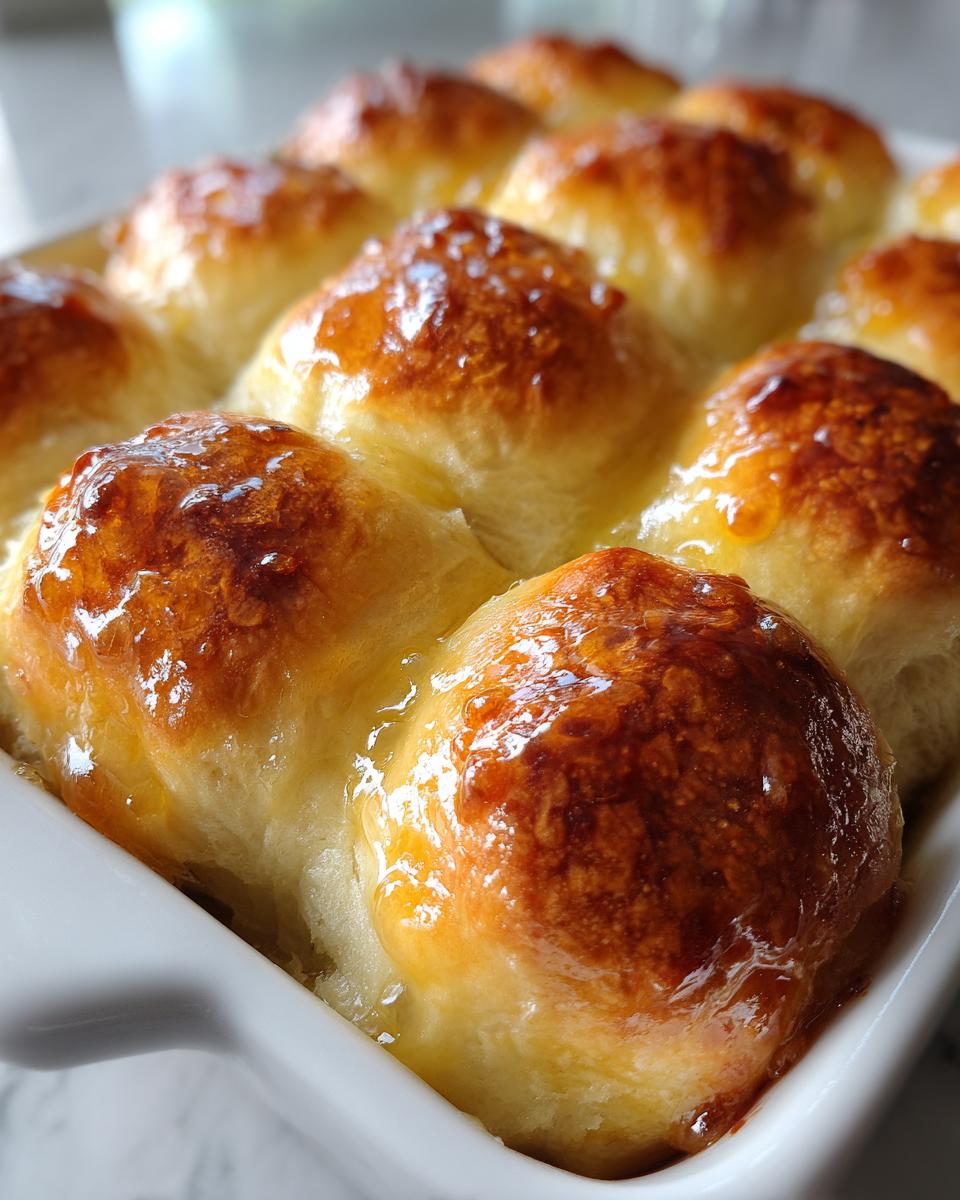
The secret lives mostly in the liquid and the proofing. By enriching the dough with milk instead of water, we add fat, which keeps the crumb delicate. Then there are those two rises! The first one develops the flavor and strength, and the second one—the one after you shape them—is what makes them truly puff up into those beautiful, light pillows. When they bake right next to each other in the pan, they steam each other just enough to stay incredibly soft. That’s how you get those perfect soft pull-apart rolls.
Gathering Ingredients for Soft Homemade Dinner Rolls
Okay, let’s get our mise en place ready! You’ll need some good quality basics to get these beautiful buns going. Don’t panic about having a million things; it’s a very straightforward shopping list, but quality really matters here, especially with something as simple as yeast bread buns.
You absolutely must have 1 cup of warm milk ready—and I mean *warm*, aim for between 105°F and 115°F. You’ll also need 2 1/4 teaspoons of active dry yeast, which sounds like a lot, but trust me, it gets busy! We balance that with 1/4 cup of granulated sugar. For richness, grab 1/2 cup of unsalted butter, and make sure it’s *softened*, not melted, that’s important. Don’t forget 1 teaspoon of salt and 2 large eggs, which really should be at room temperature. Finally, about 3 1/2 to 4 cups of all-purpose flour to bring it all together, plus a little extra melted butter for brushing after they come out of the oven.
Here’s a little trick for better incorporation: leaving those eggs out on the counter for about 30 minutes first makes a huge difference. Room temperature eggs mix smoother into the creamed butter and sugar, leading to a more uniform rise. It’s one of those small things that bakers in my family always insisted on doing!
Ingredient Spotlight: Milk Temperature for Yeast Bread Buns
This is where folks sometimes accidentally sabotage their dough, so listen up! Yeast is a living thing, honestly, and it needs a cozy environment to wake up and do its job, which is making those fluffy dinner rolls from scratch light up! If your milk is too cold, the yeast just sleeps, and you end up with dense hockey pucks. If the milk is too hot—say, over 120°F—you actually kill the yeast. It’s instant death for your rise!
We want that sweet spot between 105°F and 115°F. When you sprinkle the yeast over the warm milk and sugar, it should look foamy and bubbly after about five minutes. That foam is happiness! It means your yeast bread buns are going to have the perfect lift.
Step-by-Step Instructions for Perfect Homemade Dinner Rolls
This is where the magic happens, the transformation from wet ingredients to beautiful, yielding dough! We need to be methodical, but don’t let the steps scare you. Think of it as a rhythm you get into. First, we activate that yeast in the warm milk for about five minutes until it foams—that’s your green light! Then, you mix in the sugar, softened butter, salt, and room-temperature eggs. Don’t overmix here, just combine everything nicely.
Once the wet stuff is happy, we gradually introduce the flour, cup by cup. You’ll mix until it gets shaggy, and that’s when you turn it out onto a floured counter. Now, about the kneading—this is my favorite part. I like to do it by hand when I can, just to feel the dough change. It starts sticky and rough, but you push and fold, push and fold. When you hit that sweet spot, usually around 8 to 10 minutes by hand, the dough smooths out completely. It feels like silk! It should be elastic, meaning if you gently pull a piece, it stretches without ripping right away. If you use your amazing stand mixer, it’ll take about 6 to 8 minutes.
Kneading and the First Rise for Homemade Dinner Rolls
After you get that beautiful, smooth dough, put it into a lightly oiled bowl and turn it over so it gets coated. Then, cover that bowl up tightly—plastic wrap works great—and find a nice, warm spot in the kitchen. I like to put mine near a sunny window or just inside the oven that’s turned off. We let this dough hang out for about an hour to an hour and a half, or until it has happily doubled in size. Patience here pays off massively!
Shaping and Second Proofing for Soft Pull-Apart Rolls
When the dough is beautifully puffed, we gently deflate it—that’s the technical term for punching it down!—and divide that big cloud into 12 equal pieces. Honestly, the best way to make sure they look good together is to weigh them, but if you don’t have a scale, just try to eyeball them evenly. Roll each piece into a tight little ball. Now, here’s the critical part for that pull-apart effect: place those balls close together in a greased 9×13 baking pan. They should be snuggled up against one another!
Cover them loosely again, and let them have their second rest. This rise is shorter, usually 30 to 45 minutes. You aren’t looking for them to double this time; you want them to look visibly puffy and soft, like big pillows ready for their close-up. While they are having their second nap, go ahead and preheat your oven to 375°F (190°C). We want that oven hot and ready!
Tips for Success When Making Homemade Dinner Rolls
Making great rolls is about trusting your instincts once you know the basics. I’ve learned a few tricks over the years that save a lot of baking headaches. First, always preheat your oven fully before those beauties go in. Since these rolls are going to bake for only about 15 to 18 minutes, we can’t have a cold oven fighting us!
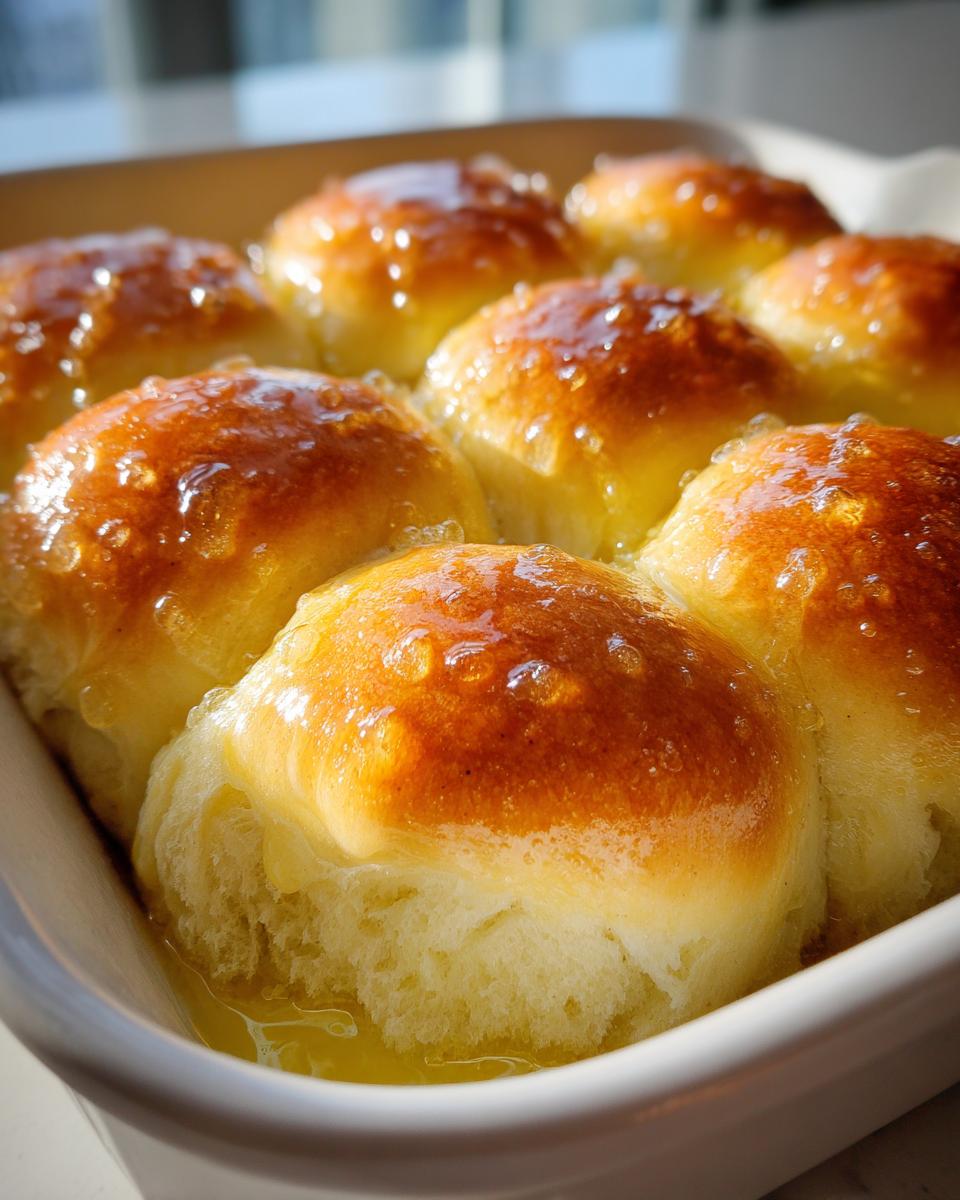
When they come out golden at 375°F, we need to decide on the finish. My personal preference, which keeps the crust soft so you can easily tear them apart, is brushing them right away with that two tablespoons of melted butter. Oh, the aroma when that hits the hot bread! It’s heavenly.
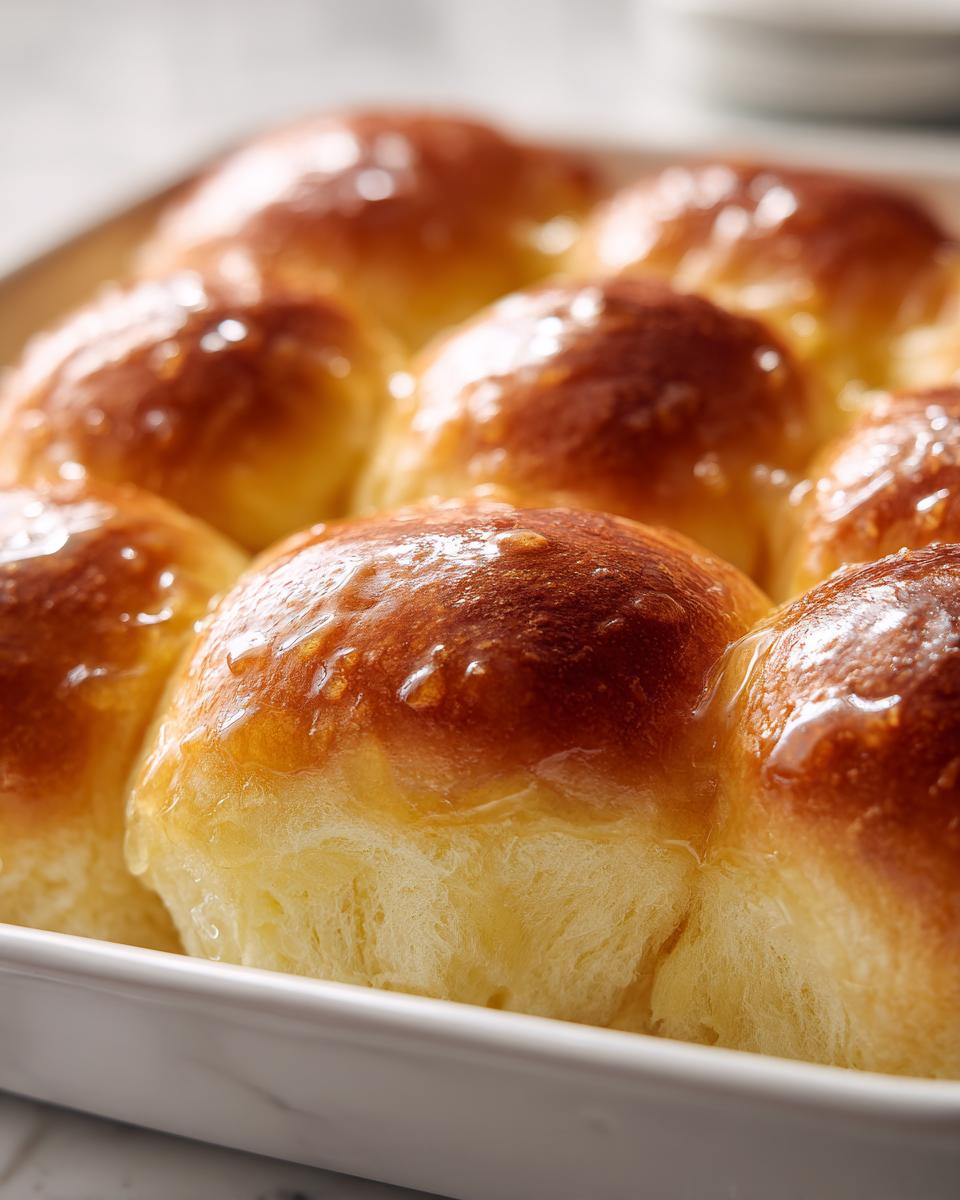
However, if you want that classic, shinier, slightly firmer crust that looks super professional, you can skip the butter brush and use an egg wash instead. Just beat one egg with a tiny splash of water—maybe a teaspoon—and brush that over the tops right *before* they go into the oven, not after. It seals the deal for a beautiful presentation, but remember, butter equals soft, egg wash equals shine. Both provide a gorgeous golden top, but pick your destiny!
Make-Ahead and Storage for Your Homemade Dinner Rolls
I totally get it—when you’re fixing a big family meal, every minute counts! The good news is that this dough is fantastic for making ahead. After you finish that first rise, you can gently punch the dough down, wrap it up really tightly in plastic wrap or foil, and tuck it into the fridge. It’s happy chilling there for up to 24 hours. Just remember, when you pull it out to shape your rolls, you need to let it sit on the counter for maybe 30 or 45 minutes to warm up a bit before you divide and shape it.
Now, for the baked rolls, keeping them soft is key! Once they are completely cool, store those beautiful soft pull-apart rolls in an airtight container or even a large zip-top bag on the counter. They stay wonderfully tender for two days this way. If you end up with leftovers after that, don’t fret! Just wrap them individually in foil and freeze them. Reheating them wrapped in the foil for about 10 minutes at 350°F brings them right back to bakery-fresh status!
Serving Suggestions for Homemade Holiday Bread
Honestly, these aren’t just rolls; they are the centerpiece of comfort on your table! While they are amazing all on their own with just butter, they are the perfect partner for serious holiday meals. Think about serving these alongside a savory roast turkey or maybe even a holiday ham—they soak up gravy like nothing else, which is exactly what you want in a good homemade holiday bread.
Of course, if you’re having a simpler Sunday dinner, they are still unbeatable. My family loves having these alongside a big bowl of hearty chili or maybe even thick, homemade tomato soup. They are so tender, they just disappear fast. You’ll want to plan on doubling the recipe if you have a big crowd!
Frequently Asked Questions About Homemade Dinner Rolls
I always get questions when I post pictures of these rolls online! It’s completely normal to have a couple of sticking points when working with yeast, so here are the things I hear most often when people are trying to bake the best fluffy dinner rolls from scratch.
Can I use instant yeast instead of active dry yeast for these soft pull-apart rolls?
Oh yes, you absolutely can! That step where we let the yeast sit in the warm milk is just to *prove* the active dry yeast is alive, but if you’re confident in your instant yeast, you can skip that little foam party. Just stir the instant yeast right in with your dry ingredients—the flour, sugar, and salt—before you add the liquid mixture. It still needs that warm liquid to wake up and get going, but you don’t need the dedicated 5-minute proofing step first. It saves a tiny bit of time!
Help! Why did my yeast bread buns not rise during the first proof?
This is almost always a temperature issue, honey. If they didn’t rise, the yeast was either too cold (sleeping) or too hot (dead). Go back and test your milk temperature next time—105°F to 115°F is the magic zone. Also, make sure your kitchen isn’t freezing cold! Yeast needs warmth to thrive. If your kitchen is chilly, cover the bowl tightly and put it somewhere truly warm for a while. If they still haven’t grown after two hours, the yeast probably didn’t make it, and you’ll need to try again with fresh yeast.
My rolls baked up nicely, but how do I reheat them to make them soft again?
This is my top tip for freshness the next day! You want to bring back that steam we talked about. If you have a bunch of rolls, wrap them tightly in aluminum foil—like a little packet—and pop them into a 350°F oven for about 10 minutes. That foil traps the moisture inside and steams them back to life. If you only have one or two, wrap them in a slightly damp paper towel and microwave them for about 15 seconds. That works fast to restore the soft tenderness!
What if I want a firmer, shinier crust instead of the buttery soft top?
That’s easy! We already talked about brushing with butter after baking, which gives you the softest finish perfect for tearing apart. If you want that beautiful professional shine, you need to use an egg wash *before* baking. Just whisk one egg with just one teaspoon of water until it’s pale and combined, and brush it lightly over the tops of the puffy rolls right before they slide into the oven. They’ll come out with a lovely golden sheen. Don’t worry about our next steps—you can always check our Privacy Policy for usage guidelines, but know that this tip works every time!
Estimated Nutrition for Homemade Dinner Rolls
Now, I know we aren’t baking these for a health kick, but sometimes it’s good to have a ballpark idea of what’s in that glorious, buttery goodness! Since everyone measures and kneads just a little differently, these numbers are estimates based on standard calculations for one roll serving size. They give you a general idea, but remember, homemade always tastes better than the label!
- Calories: About 180 per roll
- Fat: Roughly 6 grams
- Carbohydrates: Around 28 grams
- Protein: About 4 grams
- Sugar: On the lower side, around 4 grams
It’s important to remember that these figures are based on our ingredient list and serving size of one roll. If you use a richer butter or add a heavy glaze, those numbers will tick up slightly! These rolls have a nice balance for a treat, delivering that rich, comfortable flavor we look for in a perfect side dish. Just use your best judgment when counting—they’re worth every delicious crumb!
Share Your Soft, Fluffy Dinner Rolls From Scratch
Well, you did it! You made incredible, pillow-soft dinner rolls. I am so proud of you for tackling homemade bread. Now, I need to hear all about them!
Did they turn out perfectly tender? Did your family devour them the second they came out of the oven? Please tell me everything in the comments below. Leaving a star rating really helps other home cooks know this recipe is a winner.
We love seeing your success stories. Tag us when you share photos of your beautiful fluffy dinner rolls from scratch online. We always check in to see how your tables turned out great!
Remember, baking connects us, and those perfect rolls are proof of that connection. If you have any questions at all, drop them below—I check in frequently! Don’t forget to review our Terms of Use if you’re sharing your wonderful kitchen adventures. Happy baking, everyone!
PrintSoft Homemade Dinner Rolls

Make soft, pillowy dinner rolls from scratch for your next family meal. This recipe uses simple steps to achieve tender, buttery results.
- Prep Time: 25 min
- Cook Time: 18 min
- Total Time: 1 hour 58 min
- Yield: 12 servings 1x
- Category: Side Dish
- Method: Baking
- Cuisine: American
- Diet: Vegetarian
Ingredients
- 1 cup warm milk (105-115°F)
- 2 1/4 teaspoons active dry yeast
- 1/4 cup granulated sugar
- 1/2 cup unsalted butter, softened
- 1 teaspoon salt
- 2 large eggs, room temperature
- 3 1/2 to 4 cups all-purpose flour
- 2 tablespoons melted butter, for brushing
Instructions
- Pour the warm milk into a large bowl. Sprinkle the yeast over the milk and let it sit for 5 minutes until foamy. This proves the yeast.
- Add the sugar, softened butter, salt, and eggs to the yeast mixture. Mix until just combined.
- Gradually add the flour, one cup at a time, mixing until a shaggy dough forms.
- Turn the dough out onto a lightly floured surface. Knead by hand for 8 to 10 minutes, or use a stand mixer with a dough hook for 6 to 8 minutes, until the dough is smooth and elastic. Add only enough flour to prevent sticking.
- Place the dough in a lightly oiled bowl, turning to coat. Cover the bowl with plastic wrap or a clean towel and let it rise in a warm place for 1 to 1.5 hours, or until doubled in size.
- Gently punch down the risen dough. Divide the dough into 12 equal pieces.
- Shape each piece into a smooth ball. Place the balls close together in a greased 9×13 inch baking pan. They should be touching for pull-apart rolls.
- Cover the pan loosely and let the rolls rise again for 30 to 45 minutes, or until puffy.
- Preheat your oven to 375°F (190°C).
- Bake for 15 to 18 minutes, or until the tops are golden brown.
- Immediately brush the tops of the hot rolls with the 2 tablespoons of melted butter. Serve warm.
Notes
- For a shinier crust, brush the tops with one beaten egg mixed with 1 teaspoon of water before baking instead of butter.
- You can make this dough ahead. After the first rise, punch it down, wrap it tightly, and refrigerate for up to 24 hours. Allow the dough to warm up slightly before shaping.
- Use warm milk to activate the yeast; water that is too hot will kill the yeast.
Nutrition
- Serving Size: 1 roll
- Calories: 180
- Sugar: 4
- Sodium: 210
- Fat: 6
- Saturated Fat: 3.5
- Unsaturated Fat: 2.5
- Trans Fat: 0.1
- Carbohydrates: 28
- Fiber: 1
- Protein: 4
- Cholesterol: 30