

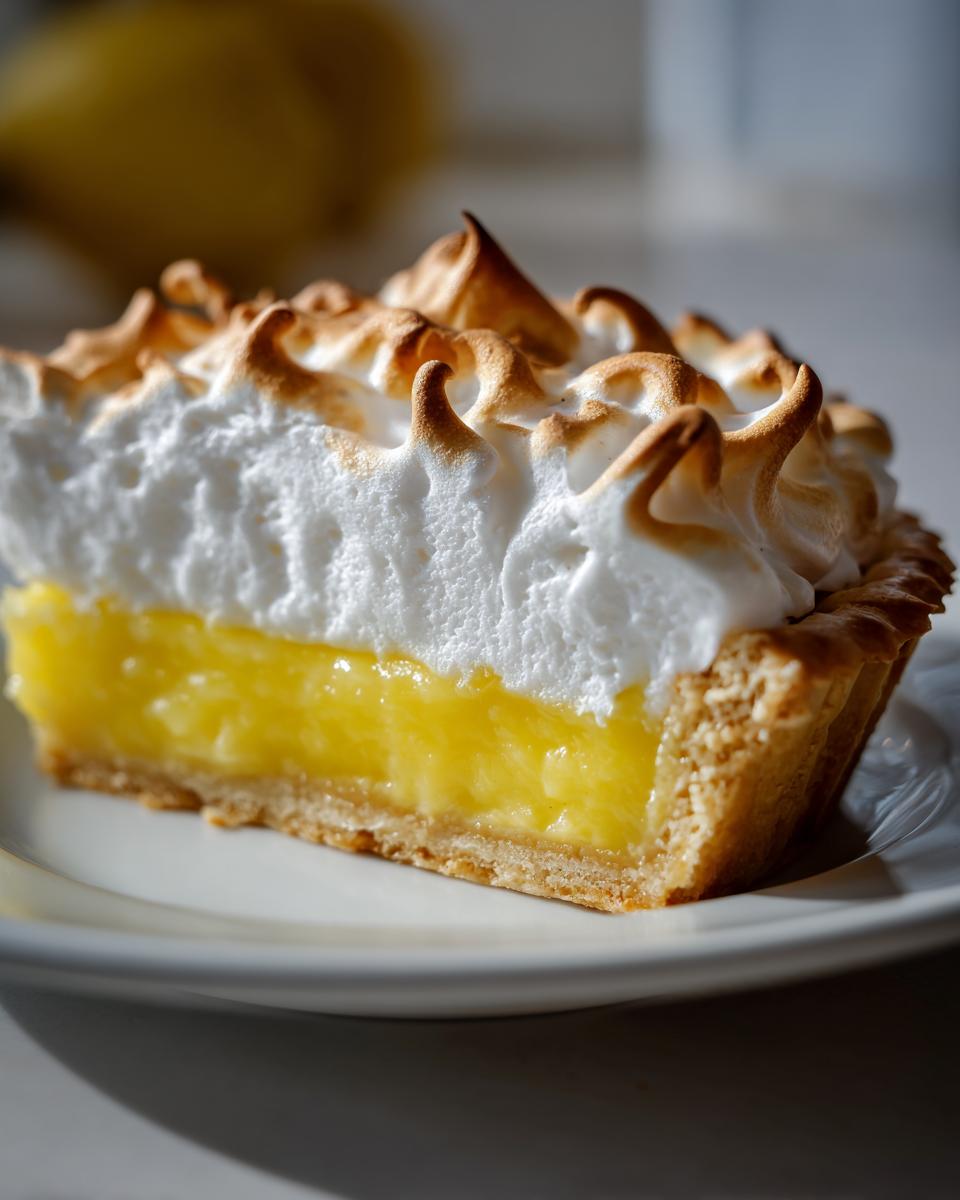
Oh, the sight of a tall, perfect slice of pie takes me right back to my childhood kitchen, doesn’t it? There’s nothing quite like that sweet and shockingly tart combination. When people ask me for my go-to showstopper dessert that captures nostalgia, I always share this recipe for classic **lemon meringue** pie. Forget the mixes—we’re making this completely from scratch. My grandmother taught me the tricks to making sure that fluffy meringue stays put and doesn’t weep, which is the secret to turning a good lemon pie into the *best* lemon meringue pie you’ve ever made. This recipe is tested, tried, and totally dependable.
- Why This Classic Lemon Meringue Pie Recipe Works (Best Lemon Meringue)
- Gathering Ingredients for Your Homemade Lemon Pie From Scratch
- Step-by-Step Instructions for the Lemon Meringue Filling
- Achieving a Fluffy Meringue Topping for Your Lemon Meringue
- Baking and Cooling the Perfect Lemon Meringue
- Tips for Success with Your Lemon Meringue Pie Recipe
- Serving Suggestions for This Tart and Sweet Pie
- Storage and Reheating Instructions for Lemon Meringue
- Frequently Asked Questions About Making Lemon Meringue
- Nutritional Estimates for This Showstopper Dessert
- Share Your Thoughts on This Lemon Meringue Creation
Why This Classic Lemon Meringue Pie Recipe Works (Best Lemon Meringue)
If you’ve been let down by flimsy fillings or weeping meringue before, I’m here to tell you why this particular recipe for **lemon meringue** pie is different. We aren’t cutting corners; we are creating a truly classic dessert using methods that stand the test of time.
- It’s genuinely from scratch, giving you vibrant flavor you just can’t get otherwise.
- The ratio of cornstarch to water in the custard is precise, guaranteeing a thick filling that doesn’t deflate.
- We use the hot filling method right under the meringue, which sets both layers perfectly. Trust me, this is what keeps the pie stable! For a great deep dive on traditional pie making, you should check out this resource here.
Buttery Pie Crust Tutorial for Your Lemon Meringue
Listen, the crust is the foundation, and it needs absolutely no moisture seeping into it before the filling goes in. That means you must blind bake your crust completely. Preheat your oven, line the shell with parchment and pie weights, and bake it until it’s golden brown and crisp. We need that crust cooled—I mean fully cool—before we even think about pouring in that hot lemon filling!
Gathering Ingredients for Your Homemade Lemon Pie From Scratch
Okay, let’s gather what we need for this incredibly zesty lemon dessert! Since we are going fully homemade, we have three main crews of ingredients: the crust, the filling, and the fluffy topping. Remember, the success of this classic lemon pie hinges on using high-quality components here.
- For the Buttery Pie Crust: You’ll need one full recipe for a 9-inch pie crust, already blind-baked and completely cooled.
- For the Lemon Filling: Grab 1 1/2 cups granulated sugar, 1/4 cup cornstarch, 1/4 teaspoon salt, 1 1/2 cups cold water, 3 large egg yolks (lightly beaten), 1/2 cup fresh lemon juice, 1 tablespoon lemon zest, and 2 tablespoons unsalted butter.
- For the Fluffy Meringue Topping: You’ll need 4 room temperature egg whites, 1/4 teaspoon cream of tartar, and 6 tablespoons granulated sugar for the meringue.
Ingredient Notes and Substitutions for Zesty Lemon Dessert
This is where we get picky! Please, please, please use fresh lemon juice. Bottled stuff just doesn’t have the same bright punch we need here. Also, your egg whites for the meringue absolutely must be at room temperature; cold whites refuse to whip up properly! And while cornstarch is our main thickener—it’s crucial for a firm custard—don’t try to swap it out for flour; the texture will be too dull.
Step-by-Step Instructions for the Lemon Meringue Filling
Now we get to the heart of the matter: creating that bright, zesty filling—essentially a fantastic, thick lemon curd recipe meant for a pie shell. I always work on this while the crust is doing its final cooling, just to keep the timing tight. I found this other wonderful, reliable recipe online that walks through the filling steps too, which you might find helpful if things get squirrely: check it out here.
First off, grab a medium saucepan. Whisk together your 1 1/2 cups of sugar, the cornstarch, and salt really well before you add anything wet. Keep whisking as you slowly pour in the cold water until you have a completely smooth slurry, no lumps allowed! Set that over medium heat and stir constantly. You have to stir it like you mean it! We need this mixture to thicken up and then, this is important, it needs an actual, full boil—boil it for one minute solid while stirring the bottom of the pan.
Once that minute is up, pull it off the heat. Now, for the delicate part: tempering those yolks! In a separate bowl, gently whisk your three egg yolks. Take about one cup of that super hot sugar liquid and slowly drizzle it into the yolks while whisking non-stop. If you just dump it, you’ll get scrambled eggs, which is a total disaster.
Once those yolks are warmed up and happy, pour that mixture right back into the pot with the rest of the hot liquid. Get it back on medium heat and stir constantly until it boils *again*. Yep, another full minute of boiling! That minute is what activates the cornstarch fully and makes sure your filling sets up firm. Take it off the heat immediately. Stir in your lemon juice, zest, and those final 2 tablespoons of butter until everything melts and blends beautifully. Pour this glorious, hot filling right into that cooled, baked pie crust before it tries to cool down on its own!
Achieving a Fluffy Meringue Topping for Your Lemon Meringue
This is the moment of truth, the grand finale for our beautiful lemon meringue pie! Making a truly high, fluffy meringue topping that doesn’t collapse or weep is the secret to mastering this classic lemon pie. First things first: your four egg whites must be completely clean and at room temperature. I mean surgically clean—any trace of fat or yolk is the enemy!
Get your mixer going and beat those whites until they form soft peaks. Now, add your cream of tartar; this little helper is crucial for stability. Next, you add that final 6 tablespoons of sugar in a slow, steady stream—don’t just dump it in! Keep beating until you have stiff, glossy peaks. When you lift the whisk, the peaks should stand straight up without curling over. That’s how to make perfect meringue!
No Weep Lemon Meringue Tips: Sealing the Filling
Here is the tip my grandmother swore by to prevent shrinkage and weeping meringue: you must seal the filling completely. As soon as that hot lemon filling is poured into the cooled crust, take your meringue and spread it all down immediately. Make sure the meringue makes firm contact with the edge of the crust all the way around the pie plate. This traps the steam and locks in the filling, giving you those gorgeous, stable peaks!

Baking and Cooling the Perfect Lemon Meringue
We’ve got the filling set and the meringue peaked high—now it’s time for the oven! We aren’t ‘cooking’ the meringue so much as we are just gently setting those gorgeous peaks and giving them a lovely golden hue. Pop that pie into a preheated oven at 350°F (175°C). It only needs about 12 to 15 minutes, tops.
Keep a close eye on it because meringue can brown fast! You want those tips to turn a pretty, light gold. If yours is browning too quickly, just slide a sheet of foil loosely over the top for the last few minutes. You can peek at other great topping ideas by checking out this recipe here.
The cooling process is just as important as the baking, so don’t rush it! Take that beautiful pie out and let it cool completely on a wire rack at room temperature. I know the temptation is huge, but putting it straight into the fridge is a recipe for condensation, which causes weeping down the sides. Seriously, let it sit for a solid 4 hours before you even think about slicing it!
Tips for Success with Your Lemon Meringue Pie Recipe
Baking this classic lemon pie involves just a few crucial steps where attention matters most, but I promise, once you know these tricks, you’ll get it right every time!
- Remember that clean bowl rule for the egg whites? It’s non-negotiable! I literally wash my mixer bowl with white vinegar before I start whipping just to be absolutely certain no grease is hanging around.
- Don’t cut into your dazzling lemon meringue pie straight out of the oven or fridge. Use a long, sharp knife, and here’s a little secret: dip the knife into a glass of hot water and wipe it dry between every single slice. It gives you those bakery-perfect, clean slices!
Serving Suggestions for This Tart and Sweet Pie
This vibrant, zesty lemon dessert is just screaming for a spot on your next holiday table! It’s the perfect bright note for any spring baking recipes you’re planning. This tart and sweet pie stands alone beautifully, but if you feel like pairing it, a tiny dollop of unsweetened whipped cream melts perfectly next to the meringue. If you’re eating leftovers the next day, this pie is fantastic with a hot cup of black coffee. You can see how beautifully styled these pies are over at this site for great serving inspiration!
Storage and Reheating Instructions for Lemon Meringue
Okay, let’s talk leftovers, because nobody wants weepy meringue on day two! This pie truly is best eaten the day it’s made, as the meringue texture naturally changes once it sits for a while. If you must store it, cover it loosely with plastic wrap or maybe a large bowl—don’t seal it tight, or you trap moisture! I usually keep ours on the counter at room temperature for about 12 hours maximum. If you need it to last longer, the fridge is necessary, but know that the meringue might start to sweat a little. If you have questions about serving or need to get in touch with me, feel free to use the contact page here!
Frequently Asked Questions About Making Lemon Meringue
Whenever I share this recipe, I always get the same handful of questions. It’s totally normal! Making a proper lemon meringue pie recipe involves a couple of tricky steps, but once you know the why behind them, you’ll be set for life. I swear, once you get this down, you’ll never go back to store-bought fillings again!
Can I make mini lemon meringue tarts instead of a full pie?
Oh, absolutely! Those mini lemon meringue tarts are adorable, aren’t they? You can definitely use this recipe for them. The main thing you have to watch out for is the baking time for the meringue. Since the filling is shallower in a tart shell, it will heat up much faster than a full 9-inch pie. Keep your eye right on those peaks, because they might only need 8 to 10 minutes to turn golden brown. You’ll have to experiment just a tiny bit!
What causes the lemon filling to be runny in a classic lemon pie?
This is almost always one of two things, and it almost always comes down to that cooking step in the filling! First, you didn’t let the mixture boil long enough, or you didn’t boil it at all after you added the tempered yolks back in. That final minute of boiling is what fully activates the cornstarch so it turns into that thick, glorious custard. If the cornstarch isn’t fully cooked, you’ll end up with a soupy mess, even when it cools. Make sure you hit that boil!
Is this easy lemon meringue recipe suitable for beginners?
If you are a beginner who is ready to pay close attention, yes, I think you can manage this! It’s not the *easiest* dessert on the planet because you have to temper eggs and whip meringue correctly, but that’s just part of learning the fundamentals of a great homemade lemon pie from scratch. If you follow the steps for tempering and don’t rush the meringue whipping, you’ll succeed! It’s straightforward, just not completely hands-off. You can read more about our philosophy, which focuses on simplifying baking, over on the About page.
Nutritional Estimates for This Showstopper Dessert
Now, let’s talk numbers, though honestly, when a dessert looks this good, I try not to dwell on the details too much! This whole beautiful lemon meringue pie is a real treat, and since it’s made with simple, whole ingredients, we have a decent baseline. Remember, this is just an estimate based on the standard ingredients we used for one slice of this showstopper dessert.
We used the standard 8-serving yield for these calculations. If you manage to stick to just one slice of this rich, tart, and sweet pie, here is what you can typically expect for the nutrition:
- Serving Size: 1 slice
- Calories: around 380
- Total Fat: about 18g
- Carbohydrates: around 52g
- Protein: roughly 6g
- Sugar: This one is high because of the filling and the meringue, coming in around 45g.
Because this pie relies on a very buttery crust and a sugar-heavy filling and topping, the fat and sugar content is naturally up there. But hey, that’s what makes it a reward! If you want to dive deeper into how we handle data privacy around sharing things like these estimates, you can check out our Privacy Policy. Enjoy every single bite!
Share Your Thoughts on This Lemon Meringue Creation
Now that you’ve made the best lemon meringue pie of your life, I absolutely need to hear about it! This is my favorite part of baking—seeing all your incredible creations come out of your ovens. Did that meringue stay perfectly high and golden? Did you successfully avoid any weeping? I want to know everything!
Please take a moment to leave a star rating for this lemon meringue pie recipe down in the comments below. Tell me how it went! Remember, every baker, even me and my mom, started somewhere, so don’t be shy about sharing any little hiccups or big successes.
If you snapped a picture of your gorgeous, tart and sweet pie, tag me on social media! I always check submissions and love seeing how you all present this classic dessert on your tables. If you’re curious about our site policies regarding sharing content or using this recipe, you can always peek at our Terms of Use. Happy baking, friends!
PrintGrandma’s Classic Lemon Meringue Pie From Scratch

Make this classic lemon meringue pie with a buttery crust, zesty lemon filling, and a high, fluffy meringue topping. This recipe focuses on simple steps for a tart and sweet showstopper dessert.
- Prep Time: 30 min
- Cook Time: 30 min
- Total Time: 3 hours 0 minutes
- Yield: 8 servings 1x
- Category: Dessert
- Method: Baking
- Cuisine: American
- Diet: Vegetarian
Ingredients
- 1 recipe for Buttery Pie Crust (for a 9-inch pie plate)
- 1 1/2 cups granulated sugar
- 1/4 cup cornstarch
- 1/4 teaspoon salt
- 1 1/2 cups cold water
- 3 large egg yolks, lightly beaten
- 1/2 cup fresh lemon juice
- 1 tablespoon lemon zest
- 2 tablespoons unsalted butter
- 4 large egg whites, room temperature
- 1/4 teaspoon cream of tartar
- 6 tablespoons granulated sugar (for meringue)
Instructions
- Prepare and partially bake your 9-inch pie crust according to your preferred recipe. Cool completely.
- Prepare the Lemon Filling: In a medium saucepan, whisk together 1 1/2 cups sugar, cornstarch, and salt. Gradually whisk in the cold water until smooth.
- Cook the mixture over medium heat, stirring constantly, until it thickens and boils. Boil for 1 minute, stirring constantly. Remove from heat.
- In a separate bowl, whisk the 3 egg yolks. Slowly temper the yolks by whisking about 1 cup of the hot sugar mixture into the yolks.
- Pour the tempered yolk mixture back into the saucepan with the remaining hot mixture. Cook over medium heat, stirring constantly, until the filling comes to a boil again. Boil for 1 minute. Remove from heat.
- Stir in the lemon juice, lemon zest, and 2 tablespoons of butter until the butter melts completely. Pour the hot lemon filling into the cooled, baked pie crust.
- Prepare the Meringue: In a clean, grease-free bowl, beat the 4 room temperature egg whites with an electric mixer until soft peaks form. Add the cream of tartar.
- Gradually add the 6 tablespoons of sugar, beating until stiff, glossy peaks form. Do not overbeat.
- Spread the meringue over the hot lemon filling, making sure the meringue touches the edges of the crust all around to prevent shrinking. Create decorative swirls with the back of a spoon.
- Bake the pie at 350°F (175°C) for 12 to 15 minutes, or until the meringue peaks are lightly golden brown.
- Cool the pie completely on a wire rack at room temperature for at least 4 hours before slicing. Avoid placing it in the refrigerator immediately to help prevent weeping.
Notes
- To prevent weeping meringue, make sure your mixing bowl and whisk attachments are completely free of any grease or fat before whipping the egg whites.
- For a more stable meringue, use the hot filling immediately after pouring it into the crust, then top with the meringue.
- Slice the pie using a sharp knife dipped in hot water between cuts for clean servings.
Nutrition
- Serving Size: 1 slice
- Calories: 380
- Sugar: 45g
- Sodium: 150mg
- Fat: 18g
- Saturated Fat: 9g
- Unsaturated Fat: 9g
- Trans Fat: 0g
- Carbohydrates: 52g
- Fiber: 1g
- Protein: 6g
- Cholesterol: 110mg