
If you need one dish that is guaranteed to cause a stampede at your next gathering, forget the fancy cheese boards—you need layers! And I mean literal layers of goodness. This recipe for the **best 7-layer dip** is the exact path to making that iconic Tex-Mex appetizer that vanishes first. When I started Mia’s Meals, my goal was to take those amazing, complex flavors and make them simple for busy folks like us. You can read more about how we keep things easy on our About page. Trust me, this recipe is nearly foolproof. You get all that amazing crunch and flavor without needing a whole afternoon in the kitchen. It’s designed to go from my counter to your party table, looking absolutely perfect.
- Why This Seven Layer Dip is the Ultimate Party Layered Dip (Easy Seven Layer Dip)
- Assembling Your Best 7-Layer Dip: Ingredients List
- How to Make Seven Layer Dip: Step-by-Step Assembly Instructions
- Expert Tips for the Perfect Seven Layer Dip (How to Make Seven Layer Dip)
- Variations for Your Party Layered Dip
- Serving Suggestions for Your Seven Layer Dip
- Storage and Make-Ahead Tips for the Best 7-Layer Dip
- Frequently Asked Questions About Seven Layer Dip
- Understanding the Nutrition of This Classic Seven Layer Dip
- Share Your Best 7-Layer Dip Creation
Why This Seven Layer Dip is the Ultimate Party Layered Dip (Easy Seven Layer Dip)
When you’re pulling together a big spread, you need a dish that’s reliable, fast, and always a total hit. That’s exactly what this recipe delivers! Forget fussy appetizers; this is the ultimate party layered dip because it looks spectacular without demanding fancy plating skills. It truly is an easy seven layer dip because we aren’t cooking anything—just assembling layers perfectly. Seriously, it takes about fifteen minutes, and you’re done! I promise this Tex-Mex treat will disappear before the chips even run out.
Key Benefits for Your Next Gathering
- It’s lightning fast to assemble—prep time is practically zero, which is a lifesaver!
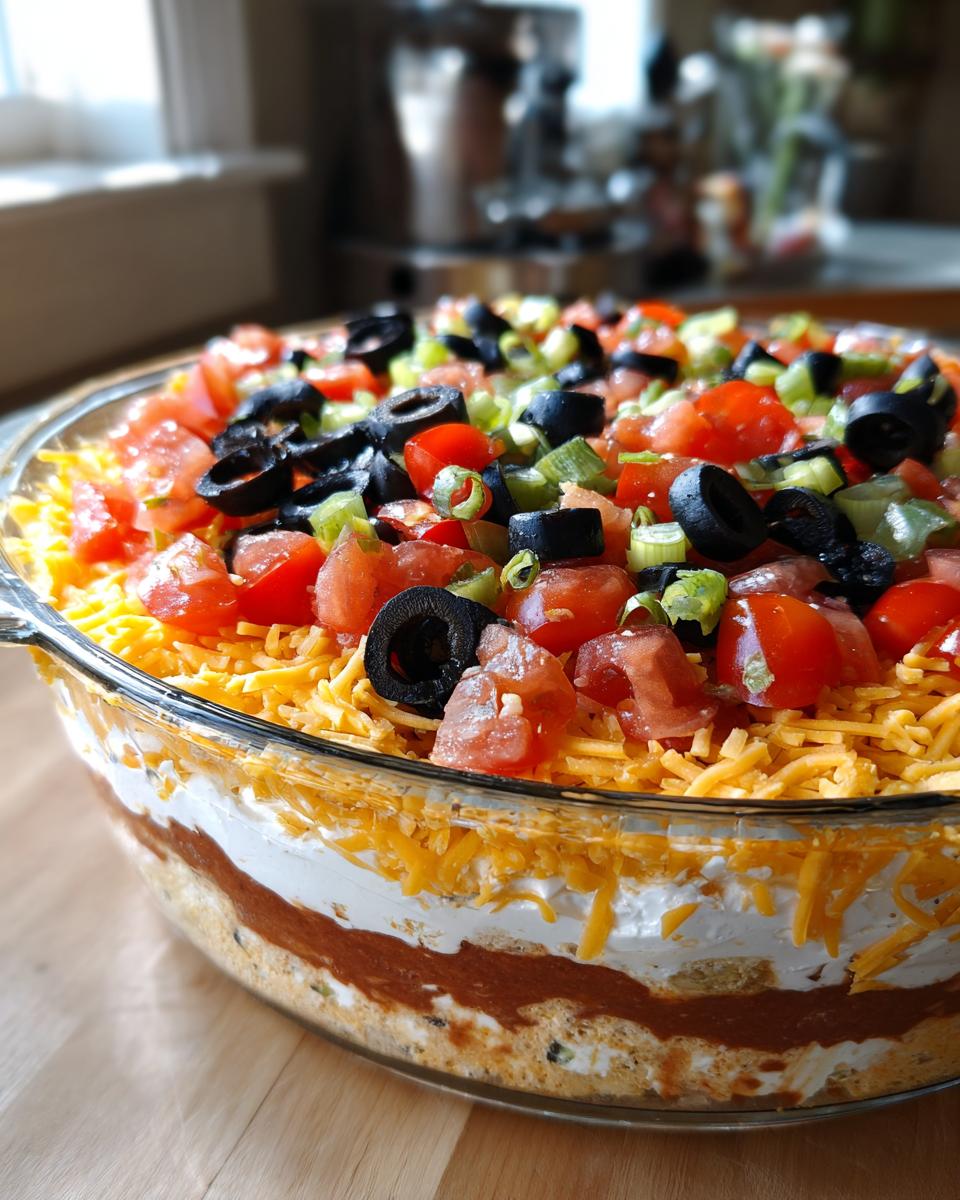
- The clear dish shows off every single layer, making the spread look amazing before anyone even takes a scoop.
- It gets better after chilling, so you can make it ahead feeling totally confident about the flavor and structure.
- Everyone loves it! It’s the kind of satisfying appetizer that guests always ask for the recipe for later.
Assembling Your Best 7-Layer Dip: Ingredients List
Okay, gathering the components for your Tex-Mex appetizer is the most important quality control step! Since we aren’t actually cooking this dip, the quality of what you buy really shines through in the final flavor. We only need a few simple, wholesome things here, but we need them ready to go. Everything should be at room temperature or cool, depending on the layer, so it spreads nicely across the dish. Don’t substitute quality ingredients here; this is where the magic begins to happen!
Ingredient Preparation Notes
You really need to pay attention to these prep steps before you start layering, or your dip might turn into a soupy mess—and we absolutely can’t have that! Trust me on these little tricks; they make all the difference in how this turns out looking when you serve it.
- When you get your refried beans, let them sit out for about 15 minutes first. Cold beans are just too stiff to spread smoothly without tearing up the dish underneath!
- The salsa is crucial: you MUST drain it well. I usually dump the salsa into a fine-mesh sieve and gently press down with a spoon to get all that extra liquid out. Watery salsa equals a sad dip.
- Get your sour cream mixed with the taco seasoning right away! Stir that seasoning in until it’s totally uniform—you want that creamy orange color right through the entire layer when you spread it.
How to Make Seven Layer Dip: Step-by-Step Assembly Instructions
Alright, this is the fun part where we turn those prepared ingredients into the masterpiece! Remember, since we are making a seven layer dip, the order is everything. Think heaviest and most robust on the bottom, and freshest toppings on the top, so everything stays in its own lane until someone scoops a chip down. Use a beautiful, clear serving dish—you bought all those beautiful ingredients to show them off!
Layering Technique for Perfect Seven Layer Dip Presentation
- First up, take those slightly softened refried beans and spread them gently all the way across the bottom of your dish. Don’t press too hard here; we just want an even canvas.
- Next, take that taco-seasoned sour cream you mixed and spoon it on top of the beans. Use the back of the spoon to glide it smoothly over the beans; try not to drag the bean layer upward.
- Now for the guacamole layer! This needs to be spread very delicately so you don’t break up the sour cream layer underneath. This is critical for keeping the distinct look of your seven layer dip.
- Once the guacamole is set, gently spoon your well-drained salsa over it. Remember that draining step? It saves us grief later!
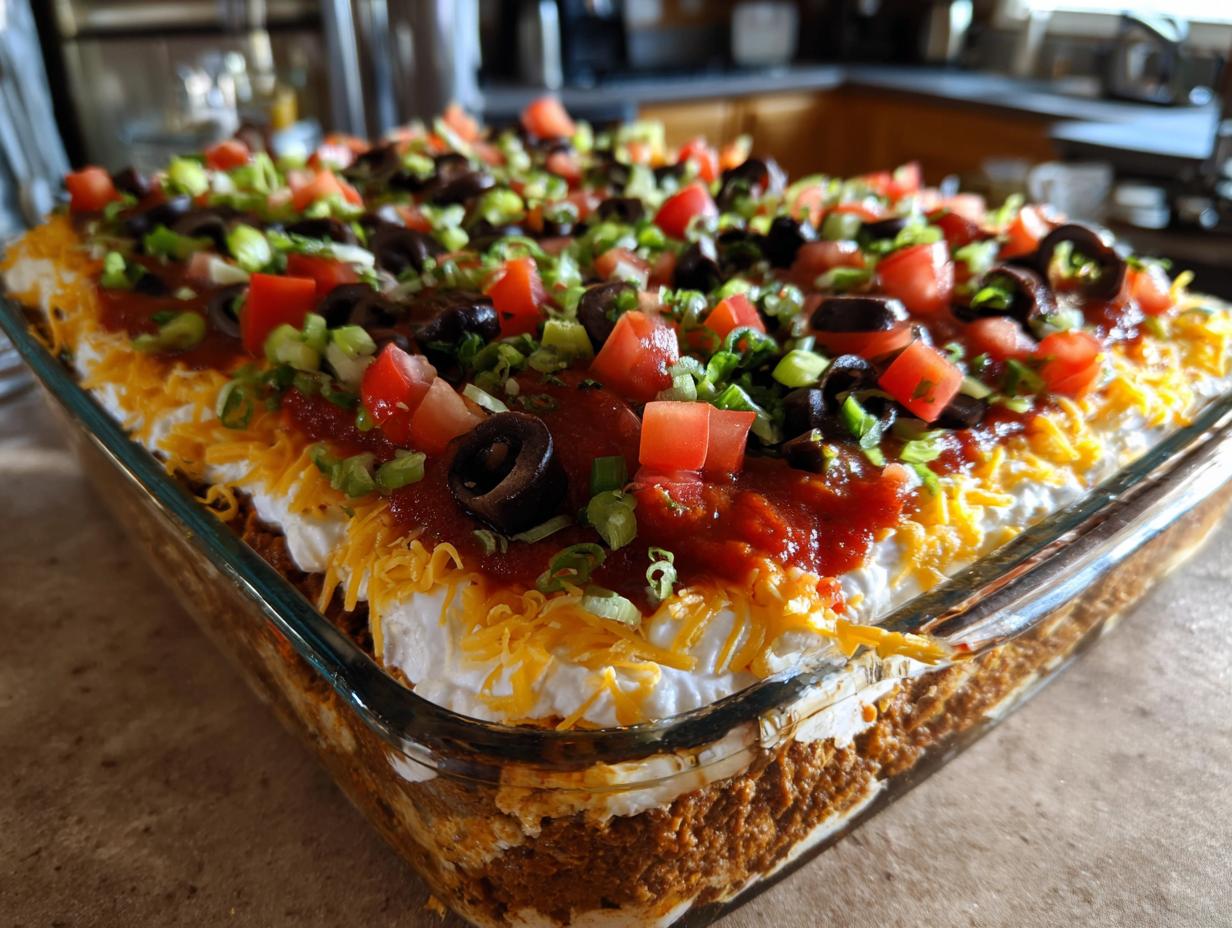
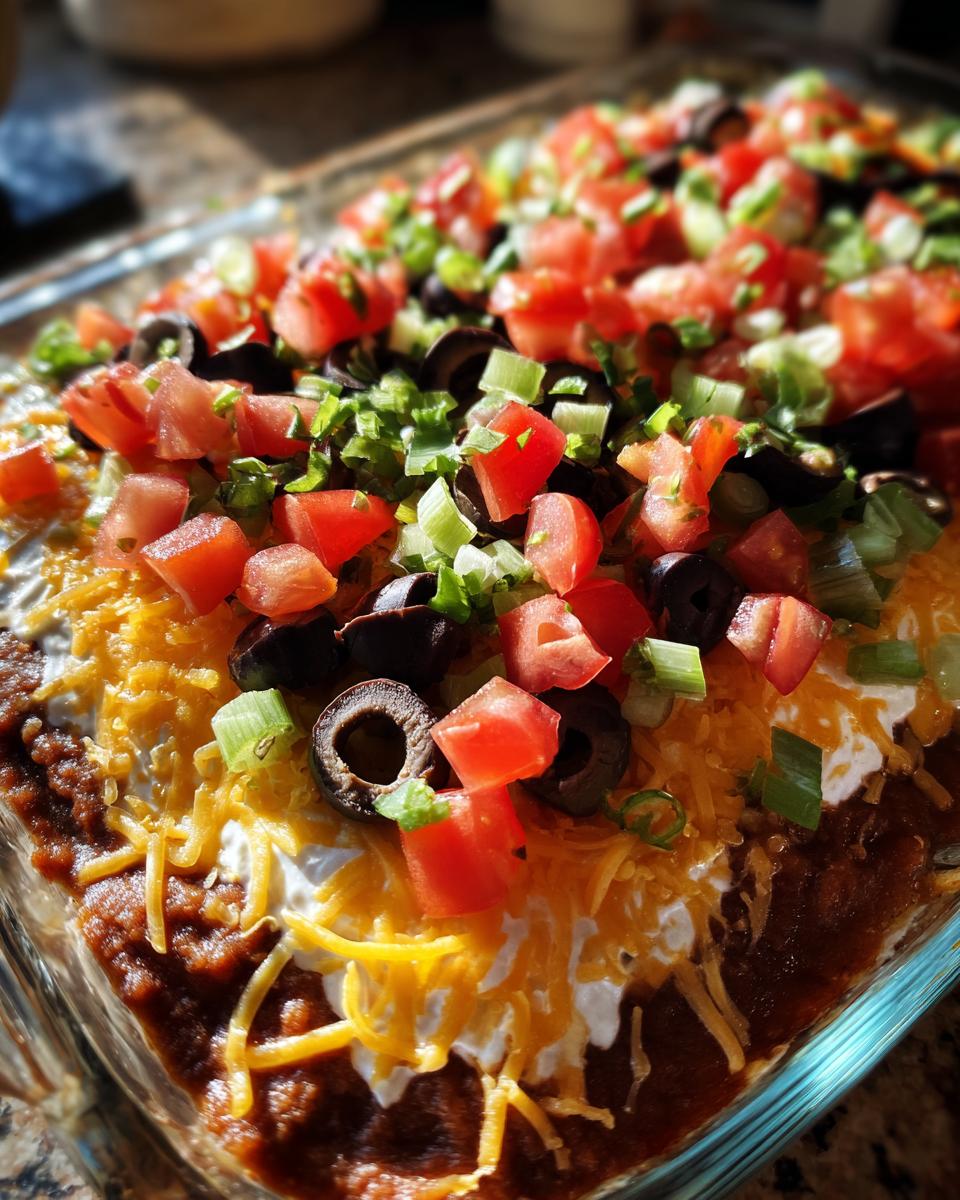
- Sprinkle your nice, cold shredded cheese evenly across the salsa layer. This creates a lovely textural block before the fresh toppings.
- Top that with your chopped, bright tomatoes.
- Finally, arrange those sliced black olives on top. They are the crown jewels!
- Cover the whole beautiful thing tightly and pop it into the fridge for at least 30 minutes. This chilling time is non-negotiable—it lets the layers bond just enough so they don’t mix the second a chip dives in.
Expert Tips for the Perfect Seven Layer Dip (How to Make Seven Layer Dip)
You’ve got your layers stacked heavenward, but serving a masterpiece means keeping it looking perfect even five minutes after you set it down. This is where you level up from just following instructions to really becoming a pro at the seven layer dip game! Paying attention to a few details will ensure your dip is still vibrant and firm when the last chip finds its home. Honestly, these little moves are what separate a good dip from the best 7-layer dip.
Preventing Browning and Maintaining Layer Separation
Okay, let’s talk about guarding that beautiful, vibrant green guacamole layer. As soon as the guac is spread, you need to act fast. Take a sheet of plastic wrap and gently press it directly onto the surface of the avocado. I mean *directly*—no air bubbles allowed!
The air is the enemy here; sealing it off keeps that guacamole looking fresh and green, not oxidized and sad. This trick works like a charm, so don’t skip it before moving on to the salsa! Also, remember those beans you spread first? If you feel like they are just too thick straight from the can, just pop the can (or the spread beans) in the microwave for about 30 seconds. Not hot, just enough to loosen them up so they glide over the bottom of the dish like silk. Smooth beans mean a stable foundation for the rest of your incredible layers!
Variations for Your Party Layered Dip
While the classic combination is fantastic, sometimes you want to shake things up just a little bit for your guests! You don’t need to reinvent the wheel, but a small tweak can make folks think you whipped up a whole new recipe. Since we keep the foundation layers (beans, sour cream, guac, salsa) locked down, it’s easy to customize the cheese and toppings.
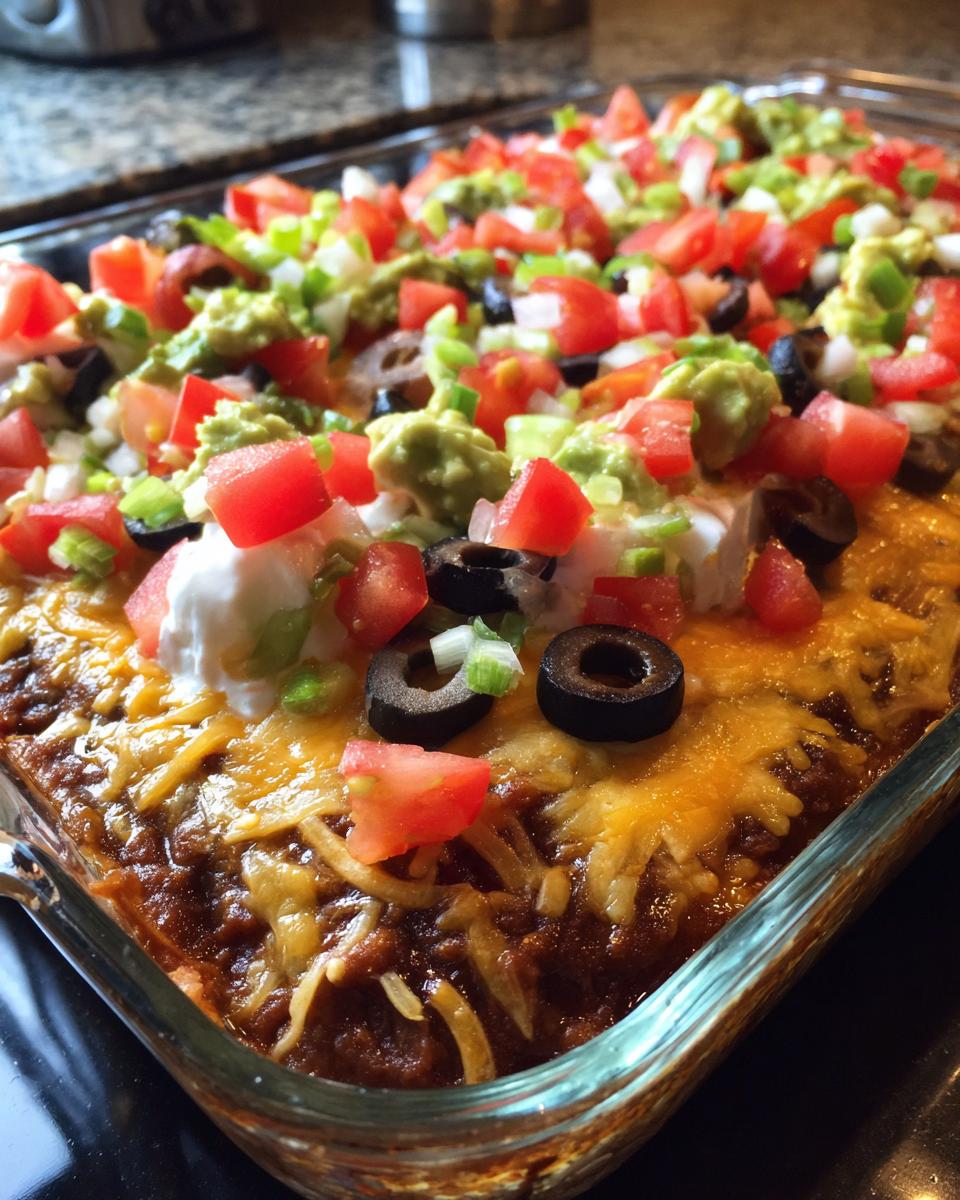
For example, if you love a little heat, swap out the plain shredded cheddar for a Pepper Jack cheese. My personal favorite addition is mixing in some chopped, pickled jalapeños right on top of the cheese layer before you add the tomatoes. Wow, talk about a flavor kick!
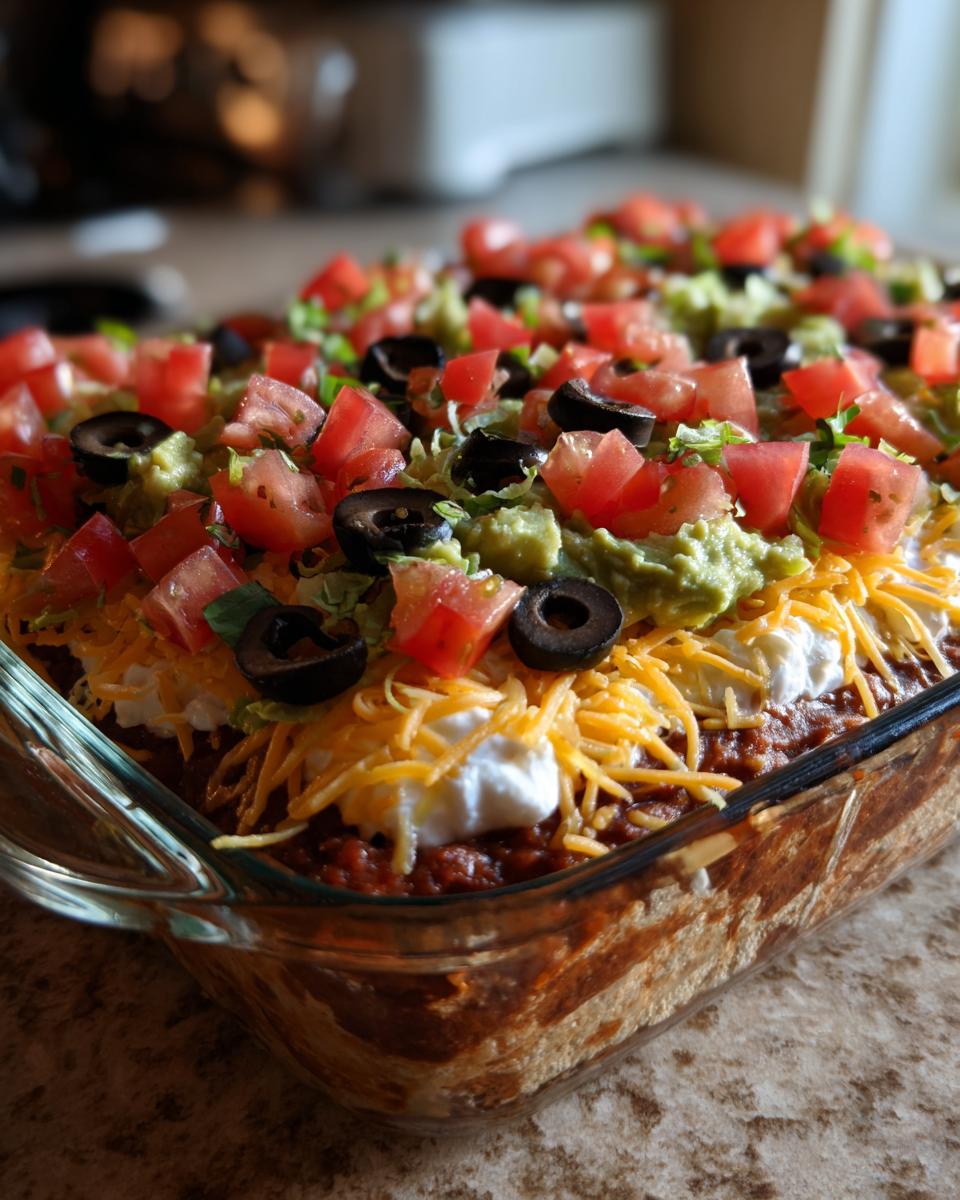
Another fun switch for this Tex-Mex appetizer is to swap out the black olives for sliced green onions (scallions). They add a wonderful, sharp freshness that cuts right through the richness of the sour cream. Just make sure whatever you add stays on top so you don’t muddy the beautiful layers we worked so hard to create!
Serving Suggestions for Your Seven Layer Dip
The dip is ready, the layers are set, but what about the vehicle? You need the absolute best chips for scooping through all seven glorious layers of flavor! I am a total purist on this: You need sturdy, thick corn tortilla chips for this snack. Thin, delicate chips will snap under the weight of the refried beans and sour cream, leaving you sad and dipping chip-less.
Don’t be afraid to mix it up a bit! Offer up some classic scoops alongside some sturdy blue corn chips for color contrast. If you want to make it a full platter, serve this amazing Tex-Mex appetizer with bowls of fresh lime wedges and maybe some pickled carrots on the side. That little bit of acid really cuts through the richness perfectly!
Storage and Make-Ahead Tips for the Best 7-Layer Dip
Because this dip is so perfect for parties, knowing how to make it ahead of time is a total game-changer, right? You want to be hanging out with your guests, not frantically layering beans while the doorbell is ringing! The great news is that this best 7-layer dip is fantastic for prepping early.
I usually prep the beans and the seasoned sour cream up to a full day in advance. Keep those layers sealed tight in their containers in the fridge. The next day, you can put those two down first, no problem.
Now, here’s the catch: anything involving avocado—like that guacamole—you shouldn’t prep too far ahead, or it loses its vibrancy. I like to make the guacamole and have the salsa and toppings ready to go, but I assemble those top three layers right before serving, definitely within 3 hours maximum. Once it’s all together and has that 30 minutes to chill, the whole seven layer dip will keep beautifully in the fridge, covered, for about two days. But trust me, this thing never makes it past hour two at my house!
Frequently Asked Questions About Seven Layer Dip
Whenever I bring this dip to a party, I always get peppered with questions afterward! It’s funny how such a simple dish can get people so interested. Since these are the same things I wondered about when I first started making my easy seven layer dip, here are the answers I always give to folks who want to make their own perfect spread.
Can I substitute the refried beans in this easy seven layer dip?
You absolutely can, though the beans are what give it that classic heft! If you’re looking for a healthier or slightly different flavor profile in your easy seven layer dip, my go-to substitution is rinsing and pureeing plain black beans. Make sure you drain them *really* well, just like the salsa, or they can get a little watery at the bottom. Use a little bit of lime juice and cumin when pureeing them to keep that Tex-Mex vibe going strong!
What is the correct order of layers for a seven layer dip?
The order is crucial for success, otherwise, everything mixes into a brown mush before you even get to the chips! You always want your stable, heaviest, and least aesthetically sensitive layers on the bottom—that means refried beans first, then the seasoned sour cream. The guacamole follows, then the salsa (drained!), then the cheese, and finally, the fresh stuff like tomatoes and olives right on top so they look bright and beautiful. Stability first, decoration last!
I also always get asked about the dish size. I use a clear 9-inch pie plate, which is perfect for a standard batch. If you use a much wider, shallower dish, you’ll have thinner layers, and it might look less impressive. Keep it deep so you can really see all those beautiful bands of color when you serve your party layered dip!
We use standard pantry ingredients here, but you can check out the estimated nutritional breakdown just to see what you’re working with by heading over to our Privacy Policy page for general site information.
Understanding the Nutrition of This Classic Seven Layer Dip
Now, I know we all cook because we love making people happy with good food, not necessarily because we are tracking macros, but I think it’s responsible to know what’s in the deliciousness we spread out on the table! Since this is a rich, creamy Tex-Mex classic, it definitely has some satisfying fats and sodium, but it’s also got protein from the beans and cheese, which really helps keep everyone satisfied while they eat chips!
Here is the estimated information for one serving size (which is about 1/8th of the entire dip, assuming you stop yourself after one scoop—ha!):
- Serving Size: 1/8 of dip
- Calories: 180
- Sugar: 4g
- Sodium: 350mg
- Fat: 14g
- Saturated Fat: 7g
- Unsaturated Fat: 7g
- Trans Fat: 0.5g
- Carbohydrates: 10g
- Fiber: 2g
- Protein: 6g
- Cholesterol: 30mg
Just remember, this is a snapshot based on the standard ingredients I listed out earlier! If you decide to go heavy on the seasoned sour cream or use a full-fat cheese blend, those numbers are going to shift a bit. Think of this as a guide, because honestly, the nutrition that matters most is the joy on your guests’ faces when they realize they can actually see all those beautiful layers!
If you want to check out general information about how we handle data on the site, feel free to look over our Terms of Use. But really, go make the dip and enjoy!
Share Your Best 7-Layer Dip Creation
Well, I’ve shared all my secrets for getting those beautiful, distinct layers in your dip. Now it’s your turn! When you bring this Tex-Mex appetizer to a gathering, I just know it’s going to be a massive hit—it’s just too good not to be!
Once you’ve set this beauty out and watched everyone dive in with their chips, please come back here. I need to know the details! Leave a comment below and tell me how your party reacted. Did they gasp when they saw all seven layers? Did you try any of my trickier variations?
If you snapped a picture of your stunning creation, I would absolutely love to see it! Tag me on social media so I can swoon over your perfect layers. You can reach me easily through the Contact page if you have any questions, but mostly, go enjoy the party you’ve just made famous with the easiest, most delicious dip on the block!
PrintClassic Seven Layer Dip

A straightforward recipe for a popular Tex-Mex layered dip perfect for gatherings.
- Prep Time: 15 min
- Cook Time: 0 min
- Total Time: 15 min
- Yield: 8 servings 1x
- Category: Appetizer
- Method: Layering
- Cuisine: Tex-Mex
- Diet: Vegetarian
Ingredients
- 1 (16 ounce) can refried beans
- 1 cup guacamole
- 1 cup sour cream
- 1 teaspoon taco seasoning mix
- 1 cup salsa, drained well
- 1 cup shredded cheddar or Mexican blend cheese
- 1/2 cup chopped tomatoes
- 1/4 cup sliced black olives
Instructions
- Spread the refried beans evenly across the bottom of a clear 9-inch pie plate or serving dish.
- In a small bowl, mix the sour cream and taco seasoning until combined. Spread this seasoned sour cream mixture over the bean layer.
- Gently spread the guacamole layer over the sour cream.
- Spoon the drained salsa evenly over the guacamole layer.
- Sprinkle the shredded cheese over the salsa.
- Top with the chopped tomatoes.
- Arrange the sliced black olives over the tomatoes.
- Cover the dish and chill for at least 30 minutes before serving to allow the layers to set.
Notes
- Use a clear dish so guests can see all seven layers.
- Drain the salsa well to prevent the dip from becoming watery.
- To keep the guacamole layer from browning, press a piece of plastic wrap directly onto the surface of the guacamole before adding the next layer.
Nutrition
- Serving Size: 1/8 of dip
- Calories: 180
- Sugar: 4
- Sodium: 350
- Fat: 14
- Saturated Fat: 7
- Unsaturated Fat: 7
- Trans Fat: 0.5
- Carbohydrates: 10
- Fiber: 2
- Protein: 6
- Cholesterol: 30