
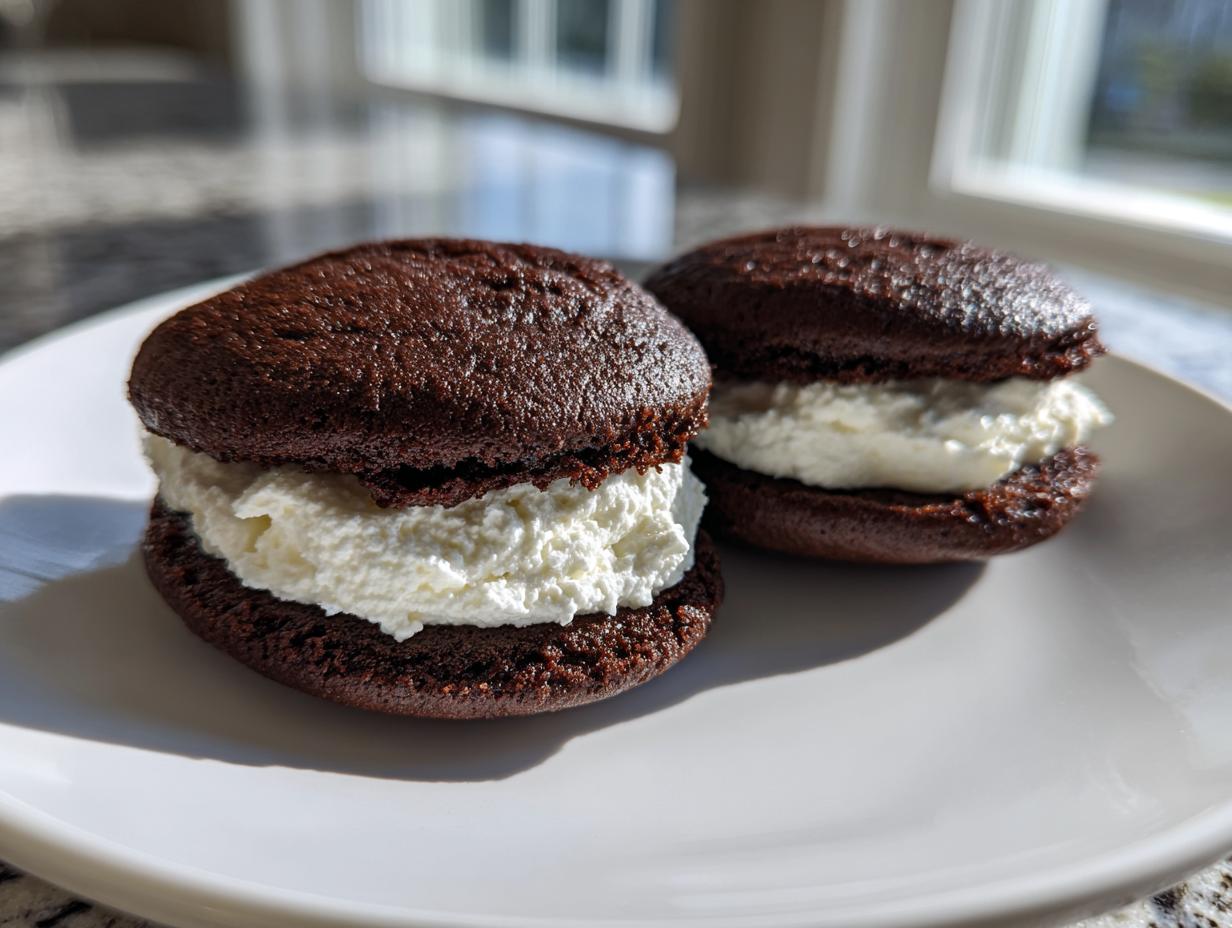
Oh, if there is one dessert that just teleports me right back to my childhood kitchen, it has to be a whoopie pie. These aren’t just cookies; they are proper, soft, cakey little hugs! I’ve been chasing the perfect recipe for the Classic Chocolate Whoopie Pies with Fluffy Marshmallow Filling for ages, trying to match the ones my mom used to bring home from church potlucks. This version? It’s the one. It’s simple, deeply comforting, and tastes exactly like tradition. We’re making these from scratch, proving that even the simplest nostalgic desserts tell the best family stories when you bake them right here at home. If you want to know more about how I got started sharing these simple recipes, check out my story over on the About Page!
- Why You Will Love These Classic whoopie pies
- Ingredients for the Best Ever whoopie pies
- How to Make Perfect whoopie pies: Step-by-Step Instructions
- Tips for Success When Baking whoopie pies
- Ingredient Notes and Substitutions for your whoopie pies
- Storage and Make-Ahead Tips for Classic whoopie pies
- Variations on Chocolate whoopie pies
- Frequently Asked Questions about whoopie pies
- Nutritional Estimate for Classic Chocolate whoopie pies
Why You Will Love These Classic whoopie pies
- They bake up beautifully into Soft Cakey Cookies—never flat or crunchy!
- Truly Homemade Whoopie Pies that use basic pantry staples.
- The filling is light, tall, and impossibly fluffy, just like you remember.
- They come together faster than you think, maybe 45 minutes total!
- That rich cocoa flavor is perfectly balanced by the sweet marshmallow center.
Honestly, these are the kind of desserts that just feel like home. You won’t regret making a double batch!
Ingredients for the Best Ever whoopie pies
Getting the ingredients just right is half the battle, my friends! I always lay everything out first—it saves so much cleanup stress later. For these chocolate whoopie pies, we need high-quality cocoa and, most importantly, that buttermilk to give the cake its signature slight tang and tender crumb. I promise, using the exact amounts here gets you those perfect, nostalgic results. If you’re looking for more easy homemade desserts, take a peek at my other favorite dessert recipes!
For the Soft Chocolate Cake Layers
- 1 3/4 cups all-purpose flour
- 1 teaspoon baking soda
- 1/2 teaspoon salt
- 1/2 cup unsalted butter, softened
- 1 cup granulated sugar
- 1 large egg
- 1 teaspoon vanilla extract
- 1/2 cup unsweetened cocoa powder
- 1/2 cup buttermilk
- 1/2 cup boiling water
For the Fluffy Marshmallow Cream Filling
- 1 cup (2 sticks) unsalted butter, softened
- 3 cups confectioners’ sugar, sifted
- 1 teaspoon vanilla extract
- 1/4 cup milk
- 1/4 cup marshmallow fluff or cream
How to Make Perfect whoopie pies: Step-by-Step Instructions
Okay, let’s get baking! Whoopie pies are surprisingly fast, but a little precision goes a long way here. Remember, we want soft cakes, not dense hockey pucks! If you want to see how I manage my quick baking schedule around weeknight meals, check out my tips for quick weeknight dinners, because sometimes we need that sugar rush fast!
Preparing the Chocolate Cake Bases
First things first, get your oven humming along at 350°F (175°C). Line those baking sheets—I always use parchment paper so I don’t have to scrub anything later. In one bowl, whisk your flour, baking soda, and salt together. Set that aside for a minute.
Now for the magic part: In your big mixing bowl, cream that softened butter and sugar until it looks light and fluffy, like soft clouds. Then add the egg and vanilla and beat it in well. Next, we alternate! Mix the cocoa powder with the buttermilk until it’s smooth, then alternate adding that chocolatey milk mixture with the dry flour mix into your butter mixture. Don’t add everything at once!
Here’s my big secret: mix it only until you see the last streak of flour disappear. Stop right there! Overmixing develops gluten, and we want cake, not chewiness. Finally, carefully stir in that boiling water; the batter will look thin, but trust me, that’s what gives us the dome! Drop rounded tablespoons onto your sheets, leaving plenty of space. Bake them for about 10 to 12 minutes. I watch them closely; the edges should look set and they’ll spring back lightly if you gently tap the top. Cool them completely before you even think about filling them!
Creating the Marshmallow whoopie pie filling
While those cakes cool down—this is crucial, they must be cool—we make the filling. Start by beating that softened butter until it’s really creamy on its own. Then, slowly start adding your sifted confectioners’ sugar, beating well after every addition so you don’t end up wearing it everywhere.
Once it looks pale and fluffy, we introduce the wet ingredients: vanilla extract and milk. Beat it until it’s smooth as silk. The very last thing is your marshmallow fluff! Gently fold that in until it’s perfectly incorporated. You want this filling to be light and almost cloud-like. It should hold a shape when you swirl a knife through it.
Assembling the Fluffy Whoopie Pie Sandwich Cookies
This is the fun part where they officially turn into Fluffy Whoopie Pie Sandwich Cookies! Take your cooled chocolate cakes and find two that are about the same size. Seriously, matching them up makes them look so professional when you’re done.
Take a good, healthy dollop of that beautiful marshmallow filling and spread it right onto the flat side of one cake. Then, take the flat side of its twin and gently press it down on top to make a perfect sandwich. That’s it! They are ready to eat right away, but they taste even better after sitting for a few hours.
Tips for Success When Baking whoopie pies
You want homemade whoopie pies that are soft and perfect every single time, right? I hear you! Baking these nostalgic beauties is easy when you stick to a few quality rules. These Whoopie Pie Baking Tips helped me stop making flat, crusty cakes years ago. Trust me, the payoff is huge!
First, make sure your butter for the cake layers is softened, but not melty. If it’s too warm, it won’t properly cream with the sugar, and you won’t get those little air pockets needed for that pillowy texture. That’s what keeps them from being dry!
My next biggest piece of advice is about the batter: once you add the flour, stop mixing as soon as you cannot see dry streaks anymore. Seriously, step away from the mixer! Overmixing is the number one reason these turn out tough instead of satisfyingly cakey.
Also, don’t skip the boiling water! I know it sounds wild when you’re dealing with a chocolate batter, but that step helps bloom the cocoa powder beautifully and thins the batter just enough to spread into that classic, slightly domed shape when dropped on the sheet. For more tips on making sure your pantry staples deliver the best flavor, you can always check out some of my favorite guides, like my cranberry sauce recipe, where attention to detail pays off!
Ingredient Notes and Substitutions for your whoopie pies
Now, let’s talk substitutions because I know not everyone keeps buttermilk hanging around in the fridge just waiting for whoopie pies! Don’t panic if you’re staring at regular milk and wondering what to do. The good news is, making your own buttermilk substitute is super simple and works perfectly here.
If you’re out of buttermilk, just take your regular milk—that 1/2 cup needed for the recipe—and stir in just about half a teaspoon of white vinegar or fresh lemon juice. Let it sit on the counter for five minutes until it looks slightly curdled. That’s your buttermilk! It keeps the cocoa happy and the cake light.
If you want to get *really* fancy and add an extra layer of tang that some folks swear by for the best flavor, you can actually swap the buttermilk for sour cream. If you do that, you’ll use the exact same amount—1/2 cup of sour cream—and skip adding that extra boiling water, as the sour cream is much richer. It makes an incredibly dense, flavorful cake that really holds up well. I use sour cream a lot in my sour cream beef noodle casserole, and it always delivers amazing moisture!
Also, a quick word on your cocoa powder: make sure you’re using unsweetened natural cocoa, not Dutch-processed, unless you adjust your baking soda, because the baking soda reacts with the acid in the buttermilk to give us the lift we need for these easy whoopie pies. It’s the little details that make the difference between good and *best ever*!
Storage and Make-Ahead Tips for Classic whoopie pies
The beauty of these Homemade Whoopie Pies is that they actually get better the next day, which is perfect if you’re making them for a gathering or just want a special treat ready for dessert later! Life is busy, right? So planning ahead is essential, and these keep wonderfully.
If you assemble the whole sandwich—cake and filling—right away, I find they are best enjoyed within about 24 hours. Keep them stored in a single layer in an airtight container at room temperature. If you stack them, that fluffy filling might squish out when you try to move them later, and nobody wants a sad, squashed whoopie pie!
But if you need to make them ahead of time (say, three days out?), that’s easy too. You can bake the chocolate cake shells and store them completely cooled in an airtight container at room temperature for up to three full days. The filling, too, is great made a day ahead! Keep the marshmallow cream tightly covered in the fridge—it will firm up a bit, which is okay.
When you’re ready to assemble, let the filling sit on the counter for about 30 minutes to soften up slightly so it’s easier to spread. If you want to freeze them for much longer, assemble the whole sandwich and then wrap each one tightly in plastic wrap, followed by a layer of foil. They freeze beautifully for up to two months! Thaw them in the fridge overnight first. For more cool ideas on making things ahead, you must try my puff pastry apple strudel recipe; it’s another make-ahead superstar!
Variations on Chocolate whoopie pies
While nothing beats the classic deep chocolate with that fluffy white filling, sometimes you just need to shake things up! These soft cakey cookies are such a great base, and once you master the chocolate version, getting creative is so much fun. It establishes your baking credibility, too, showing you know more than just one recipe path! If you want to explore other fall flavors, you absolutely should check out my recipe for pumpkin bars with cream cheese frosting for more seasonal inspiration.

We see so many amazing variations pop up online these days. Based on what folks really love, here are a few ideas you can adapt the base recipe for:
- Pumpkin Whoopie Pies: This is huge when autumn hits! You swap some of the liquid for canned pumpkin puree and add a teaspoon of pumpkin pie spice to the dry ingredients. The filling usually needs to change to a cream cheese frosting instead of marshmallow cream—it’s just divine together.
- Peanut Butter Whoopie Pies: For the ultimate indulgence, try making a peanut butter cake layer! You generally boost the fat content slightly when moving away from cocoa and ensure you’re using a lovely, thick peanut butter frosting, maybe even spiking it with a little chocolate ganache drizzle.
- Red Velvet Whoopie Pies: A stunning option, especially for holidays! You’d use the same buttermilk foundation but swap out the cocoa for red food coloring and a touch of vinegar for that classic tang. Of course, Red Velvet demands a rich, thick cream cheese filling—no marshmallow fluff in sight for that one!
It’s really fun to experiment once you get the hang of the basic technique. For tons more flavor ideas—things like Oreo or even lemon—you can check out some creative inspiration over at this collection I found!
Frequently Asked Questions about whoopie pies
Why are mine not soft like cake? Did I overbake them?
Oh, this is the number one heartbreak of making whoopie pies! If they weren’t soft, chances are they baked about 30 seconds too long, or maybe you overworked the batter once the flour went in. You want that batter thin—almost runny—because that’s what gives you the signature pillowy texture. If they come out stiff, try reducing your bake time by a minute next time. You want them sprung but still slightly tacky in the center when you pull them out! For tips on getting that perfect cakey dome, you can look over this great guide.
What is the history behind Amish Whoopie Pies versus Maine Whoopie Pies?
That’s a fun one! So many people ask about the origins of these treats, often called ‘gobs’ in Pennsylvania. Generally, the rich, dark chocolate version with marshmallow filling is strongly associated with the Amish Whoopie Pies tradition, particularly the Pennsylvania Dutch country. Meanwhile, down east in Maine, they claimed the title too, often linking their version to a specific bakery up there. Either way, the spirit is the same: comforting, giant, sandwiched goodies! They are truly one of the best easy whoopie pies because they don’t need fancy shaping.
Can I use cake mix to make these quicker?
I totally get the shortcut appeal! While I truly believe making these Classic Chocolate Whoopie Pies from scratch gives you that superior texture, yes, you absolutely can use a box mix. If you go that route—it’s an easy whoopie pies hack—I highly recommend ignoring the box’s instructions for liquids like milk or water. Instead, substitute it with buttermilk and perhaps add an extra egg, just to try and replicate the richness we get from my from-scratch recipe!
For even more delicious, stress-free treats, remember to check out my collection of easy dessert recipes!
Nutritional Estimate for Classic Chocolate whoopie pies
Now, I always feel I should mention this because my philosophy is real food for real life, not calorie counting nightmares! These are a treat, plain and simple. What follows is a general estimate per completed sandwich cookie based on the ingredients listed above. Keep in mind that homemade baking means things can vary based on your specific butter brand or how heavy your hand is when measuring sugar!
- Serving Size: 1 sandwich cookie
- Calories: 380
- Sugar: 45g
- Fat: 19g (11g Saturated)
- Carbohydrates: 50g
- Protein: 3g
Treat yourself! We bake these for connection and joy, so enjoy every single bite without worrying too much about the numbers!
PrintClassic Chocolate Whoopie Pies with Fluffy Marshmallow Filling

Make soft, cakey chocolate whoopie pies from scratch. This recipe delivers the nostalgic flavor of classic Amish or Maine whoopie pies with a light, fluffy marshmallow cream filling.
- Prep Time: 25 min
- Cook Time: 12 min
- Total Time: 37 min
- Yield: 12 servings 1x
- Category: Dessert
- Method: Baking
- Cuisine: American
- Diet: Vegetarian
Ingredients
- 1 3/4 cups all-purpose flour
- 1 teaspoon baking soda
- 1/2 teaspoon salt
- 1/2 cup unsalted butter, softened
- 1 cup granulated sugar
- 1 large egg
- 1 teaspoon vanilla extract
- 1/2 cup unsweetened cocoa powder
- 1/2 cup buttermilk
- 1/2 cup boiling water
- For the Filling:
- 1 cup (2 sticks) unsalted butter, softened
- 3 cups confectioners’ sugar, sifted
- 1 teaspoon vanilla extract
- 1/4 cup milk
- 1/4 cup marshmallow fluff or cream
Instructions
- Preheat your oven to 350°F (175°C). Line baking sheets with parchment paper.
- In a medium bowl, whisk together the flour, baking soda, and salt. Set aside.
- In a large bowl, beat the softened butter and granulated sugar with an electric mixer until light and fluffy. Beat in the egg and vanilla extract.
- In a separate small bowl, whisk together the cocoa powder and buttermilk until smooth.
- Gradually add the flour mixture to the butter mixture, alternating with the cocoa mixture, beginning and ending with the flour. Mix until just combined.
- Carefully stir in the boiling water until the batter is smooth. The batter will be thin.
- Drop rounded tablespoons of batter onto the prepared baking sheets, spacing them about 2 inches apart. You should get about 24 circles.
- Bake for 10 to 12 minutes, or until the edges are set. Do not overbake; the tops should spring back when lightly touched.
- Let the cakes cool on the baking sheets for 5 minutes before transferring them to a wire rack to cool completely.
- To make the filling, beat the softened butter until creamy. Gradually add the confectioners’ sugar, beating well after each addition.
- Beat in the vanilla extract and milk until the frosting is smooth and light. Stir in the marshmallow fluff until fully incorporated.
- Once the chocolate cakes are completely cool, pair them up by size. Spread a generous amount of filling onto the flat side of one cake and top with the flat side of another cake to form a sandwich.
Notes
- For the softest cake texture, do not overmix the batter once you add the flour.
- If you do not have buttermilk, mix 1/2 cup of regular milk with 1/2 teaspoon of white vinegar or lemon juice and let it sit for 5 minutes before using.
- You can make these whoopie pies ahead of time; store them in an airtight container at room temperature for up to 3 days.
Nutrition
- Serving Size: 1 sandwich cookie
- Calories: 380
- Sugar: 45g
- Sodium: 180mg
- Fat: 19g
- Saturated Fat: 11g
- Unsaturated Fat: 8g
- Trans Fat: 0.5g
- Carbohydrates: 50g
- Fiber: 1g
- Protein: 3g
- Cholesterol: 55mg