
Oh, I am so excited for you to try this one! If you’re like me, you’re constantly searching for that perfect, satisfying dessert that somehow manages to feel indulgent but keeps you feeling great afterward. I used to think that was impossible, but I was wrong! We’ve found the secret weapon in the dairy aisle: cottage cheese ice cream. Seriously, trust me on this one. It sounds wild, I know, but blending that cheese magic results in the creamiest, most crave-worthy, high-protein treat you’ll ever make. As I learned back in my mother’s kitchen, good food connects people, and this recipe is pure connection. It embodies everything I love about cooking—simple ingredients, zero fuss, and it brings that familiar joy. You can see more about our philosophy over at Mia’s Meals. Plus, it’s no-churn, so no fancy gadgets needed for that creamy goodness!
- Why This Creamy Cottage Cheese Dessert is Your New Favorite
- Gathering Ingredients for Perfect Cottage Cheese Ice Cream
- Simple 3 Ingredient Ice Cream Preparation Steps
- Making Ice Cream with Cottage Cheese: Equipment Options
- Ingredient Notes and Variations for Your Cottage Cheese Ice Cream
- Storage & Reheating Instructions for Homemade Ice Cream
- Frequently Asked Questions About Cottage Cheese Ice Cream
- Estimated Nutritional Data for This Healthy Ice Cream Alternative
- Share Your Simple Homemade Ice Cream Creations
Why This Creamy Cottage Cheese Dessert is Your New Favorite
I know what you’re thinking—cottage cheese in ice cream? But stick with me because this is easily one of the best healthy frozen dessert options I have ever developed. It truly delivers that rich texture we all crave when that sweet tooth strikes, but uses ingredients that make you feel genuinely good about indulging. It’s comfort food, Mia-style!
- It’s incredibly easy. With just a few minutes of active prep, you have literally the best High Protein Ice Cream ready for the freezer.
- It tastes decadent, not diet-y. You get amazing flavor without feeling guilty later on.
- It’s dependable! Unlike some homemade ice creams that turn icy, this one comes out beautifully every time.
Protein Packed Sweets That Satisfy
This is what sets our recipe apart from standard frozen treats. That humble cottage cheese packs a punch—we’re looking at about 18 grams of protein per serving in this vanilla version! Why does that matter? Well, protein keeps you feeling full and satisfied much longer. You grab a scoop because it tastes amazing, and it holds you over until dinner. It’s a win-win for your cravings and your goals.
Achieving the Best Cottage Cheese Ice Cream Texture
The absolute secret to getting something that rivals store-bought pints is the blending phase. Don’t skip this! If you just stir it together, you end up with lumpy cottage cheese, and nobody wants that. To get that perfect, velvety smooth cottage cheese ice cream finish, you must process it thoroughly in a high-powered blender or food processor until it’s completely silky. That step transforms lumpy curds into luxurious cream. You can grab some extra tips on making dependable recipes over here at our protein muffin post if you need more snack inspiration!
Gathering Ingredients for Perfect Cottage Cheese Ice Cream
When we aim for that absolutely perfect, creamy scoop of goodness, the ingredients list is short but mighty. I always stress that using full-fat cottage cheese is important here—trust me, it makes all the difference in achieving that rich finish we’re looking for in this Healthy Frozen Dessert. Don’t worry about finding unusual things; these items are super easy to keep stocked!
Ingredient List for Vanilla Cottage Cheese Dessert
You only need four core items to create the base for this delicious recipe:
Start with 2 cups of full-fat cottage cheese. Then, you’ll need 1/4 cup of your preferred sweetener, which could be maple syrup or whatever sugar substitute makes you happy. Next, grab 1 teaspoon of vanilla extract, and finally, just a tiny pinch of salt to make all those sweet flavors pop!
Simple 3 Ingredient Ice Cream Preparation Steps
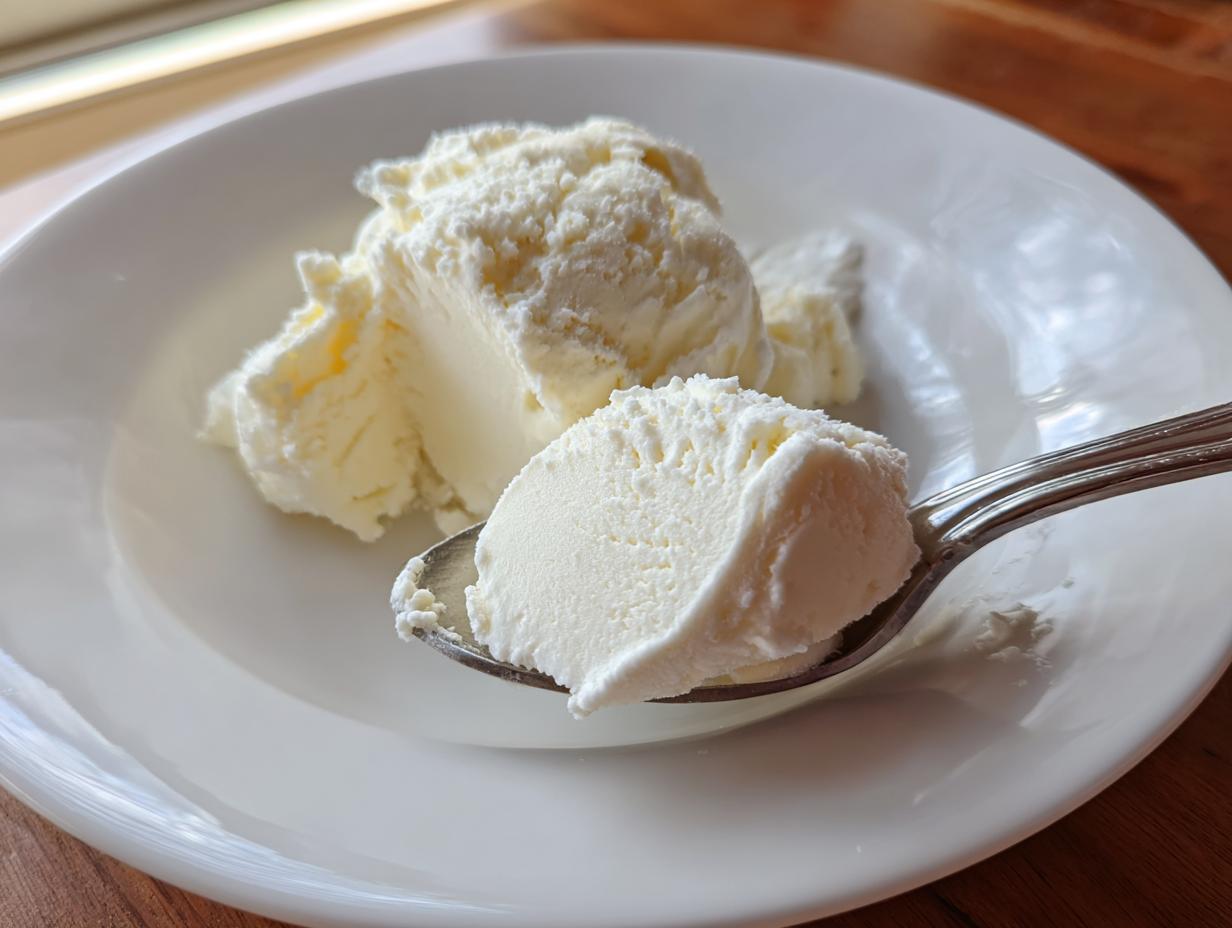
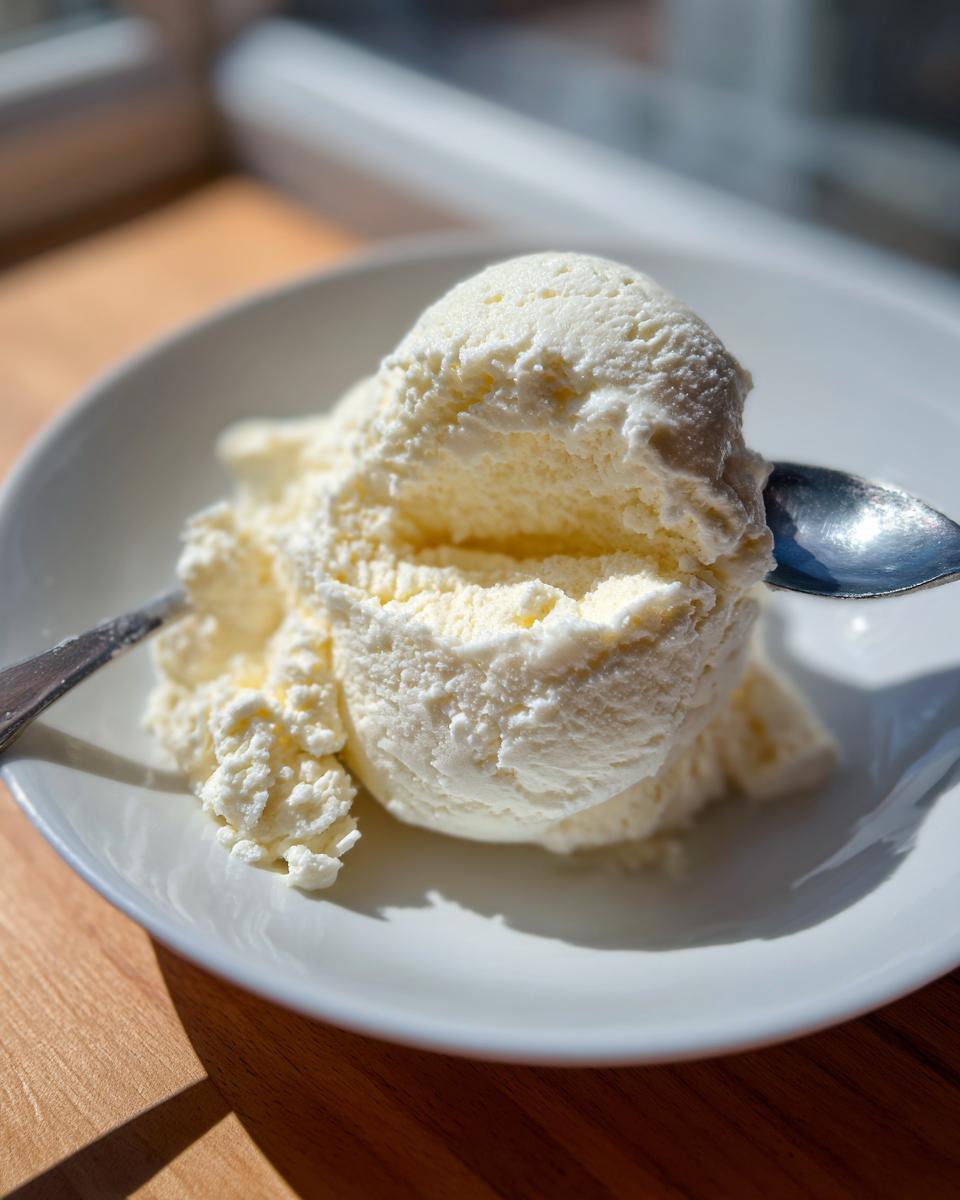
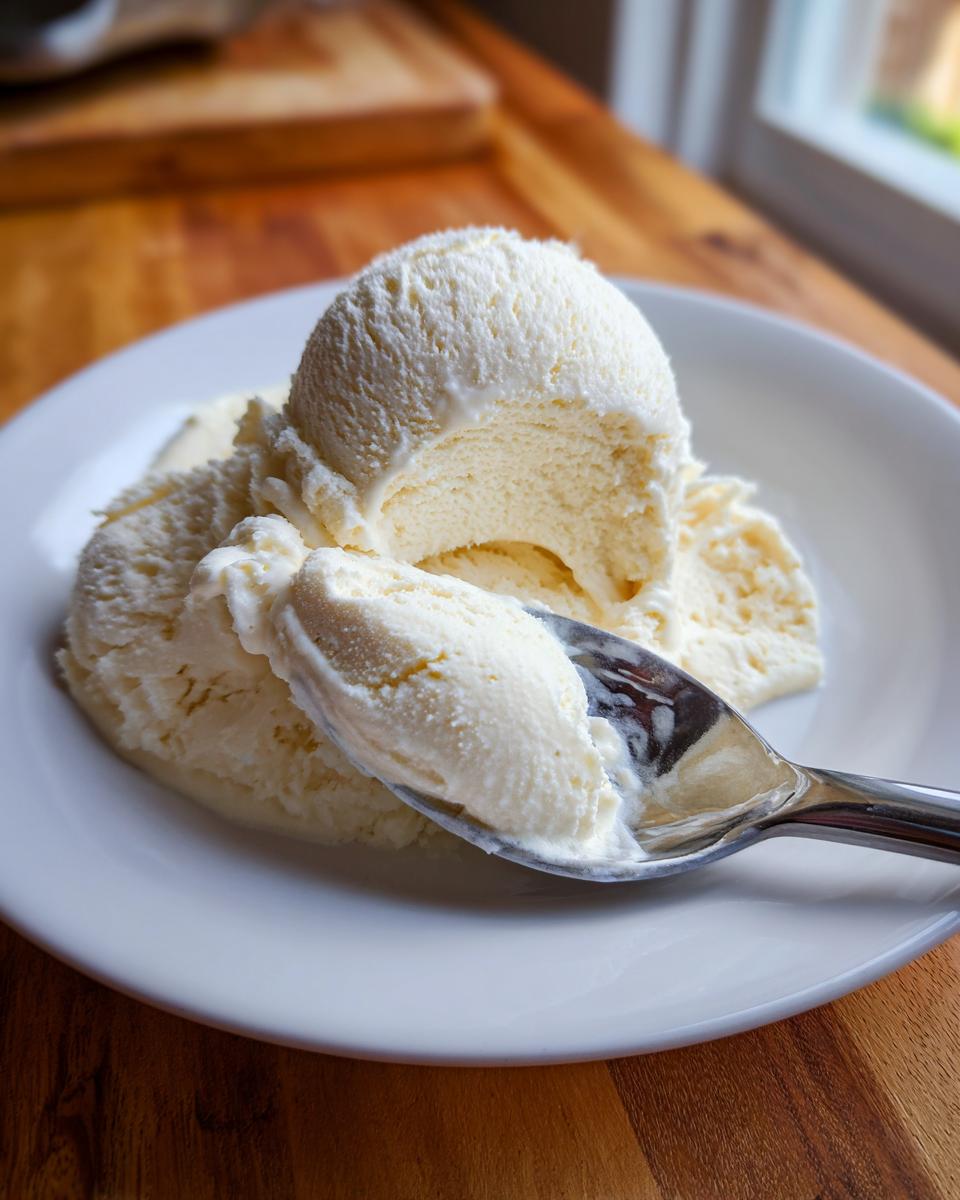
Even though this is a no churn protein ice cream, the preparation is where the magic happens! Since we aren’t using an ice cream maker, we have to work a little bit harder upfront to get that incredibly smooth result, but trust me, it takes less than ten minutes of active time. The key here is transforming those curds into something silky so that when it freezes, it actually scoops like real ice cream. We want delicious, not icy cement!
Blending for a Lumpy-Free Cottage Cheese Ice Cream
This is non-negotiable, friends. You need a high-speed blender or a sturdy food processor for this. Put all your ingredients—the cottage cheese, your sweetener, the vanilla, and that pinch of salt—right into the machine. Now, buzz it until it looks like a thick, pale frosting. In my kitchen, this blending step is where I pause and check the texture—it must be silky smooth before it hits the freezer. Scrape down the sides about halfway through! If you see one single lump, keep on blending until those curds disappear completely.

Freezing and Serving Your Guilt Free Ice Cream Recipe
Once you have that perfect, smooth base, pour it into a freezer-safe container. I usually just use a standard loaf pan, but be sure to press plastic wrap right onto the surface before putting on the lid—that keeps freezer burn away! Now, you wait. It needs a minimum of six hours to firm up properly; honestly, overnight is better for the best texture. When you’re ready to eat your amazing Guilt Free Ice Cream Recipe, take it out of the freezer about ten minutes beforehand. Letting it temper just slightly makes it so much easier to scoop. For extra tips on creating creamy desserts, check out my guide on soft chewy caramels; the patience pays off there too!
Making Ice Cream with Cottage Cheese: Equipment Options
One of the best things about this cottage cheese ice cream recipe is how versatile it is! You don’t need a fancy machine, but if you happen to have one of those trendy blenders, it works great too. The base recipe is designed to be a No Churn Protein Ice Cream champion. All you do is blend it up and freeze it solid in a pan, exactly like the instructions spell out. It will get firm, maybe a little harder than traditional ice cream, but it’s still totally scoopable after tempering.
Tips for Ninja Creami Cottage Cheese Success
Now, if you’re one of the lucky ones who owns a Ninja Creami, you have an extra smooth option ready to go! The key here—and please listen up—is that you must let this mixture freeze completely solid first. We are talking rock hard, just like the directions say (at least 6 hours). Then, you run that hard block on the standard ‘Ice Cream’ setting. If you try to process it before it’s fully solid, you’ll just get a soupy mess and you’ll be disappointed. Process it, and then you get the creamiest soft-serve texture imaginable!
Ingredient Notes and Variations for Your Cottage Cheese Ice Cream
The base recipe for our cottage cheese ice cream is perfect vanilla, but honestly, this is where you get to play! Because the texture is so inherently creamy, it takes flavor infusions beautifully. I always keep extra mix-ins ready in the freezer for when I need a quick change-up. You can easily turn this into a gorgeous dessert for any craving without changing the fundamental structure of the treat. It’s so much fun to experiment and see what combinations you love!
Creating a Strawberry Protein Dessert Variation
If you’re searching for that pink, fruity bliss, adding strawberries is the way to go. It transforms this into a delightful Strawberry Protein Dessert! You just need about a half cup of frozen strawberries. Toss them right in with the cottage cheese, sweetener, and vanilla before blending everything up. The frozen strawberries help cool the mixture down even faster, giving you a thicker yield. If you want to see how beautiful these fruit swirls can get, check out one of my friends’ amazing recipes for creamy strawberry cottage cheese ice cream—it looks divine!
Making a Chocolate Cottage Cheese Treat
For those days where you just need deep, rich chocolate, this variation is my go-to. It becomes an instant Chocolate Cottage Cheese Treat! To make this transformation, simply add about two tablespoons of unsweetened cocoa powder when you are blending your base ingredients. Make sure you scrape the sides down really well so that all that cocoa gets smoothed out into the mix. You end up with a flavor that tastes super decadent, and it’s a perfect way to use up any baking cocoa you have around. For more great dipping sauces and creamy additions, check out my recipe for creamy garlic sauce—it proves simple additions make all the difference!

Storage & Reheating Instructions for Homemade Ice Cream
Since we didn’t use all those fancy stabilizers found in store-bought tubs, we have to be smart about storage. The biggest enemy here is freezer burn and ice crystals, which happen if the mixture isn’t sealed up tight. Always make sure your container has a tight-fitting lid. If you really want to guarantee a smooth texture on day three, press a piece of plastic wrap right down onto the surface of the ice cream itself before you put the lid on. This blocks out any sneaky air pockets.
If it gets rock hard after a few days—which can happen!—just pull it out about 15 minutes before you plan to eat it. It thaws back to perfect scooping texture beautifully after sitting on the counter. Don’t even think about using a microwave; you’ll regret the texture!
Frequently Asked Questions About Cottage Cheese Ice Cream
It’s totally normal to have a few questions swirling around when you try a new trick in the kitchen, especially when it involves swapping out heavy cream for cheese! I want you to succeed in making this cottage cheese ice cream, so I gathered up the most common things folks ask me. Knowing these little secrets upfront will guarantee you end up with a truly satisfying, high-protein dessert that tastes amazing every single time.
Will I taste the cottage cheese in this cottage cheese ice cream?
Great question! If you use the full-fat version, which I really recommend for the best creamy result, you actually won’t taste it much at all. The powerful blending process we do breaks down those curds so thoroughly that they just blend into the creamy texture. Couple that with the vanilla and whatever sweetener you chose, and all you get is a sweet, cold, satisfying dessert. We aren’t aiming for salty cheese flavor here—we are aiming for ice cream flavor!
How can I make this a Keto Friendly Desserts option?
It’s already super low in sugar if you use the maple syrup, but if you’re sticking strictly to keto guidelines, swapping that liquid sweetener is simple! Just replace the 1/4 cup of maple syrup with your favorite keto-friendly granular or liquid sweetener. Things like monk fruit blends or erythritol work just fine in this recipe. Just make sure it dissolves well enough during the blending step. You can find tons of inspiration for other Keto Friendly Desserts when you check out what other bakers are doing, like this fun article I found over here.
Is this the Best Cottage Cheese Ice Cream for a quick snack?
Oh, absolutely! That’s why I love it so much for busy weeknights. Your active prep time is only about ten minutes—that’s the blending part. After that, it’s hands-off freezing time. You can whip this up right after dinner, and by the morning, you have a delicious, fresh, Best Cottage Cheese Ice Cream ready to go. It makes a fantastic, protein-packed snack or dessert when you genuinely need something sweet fast. You can find more ideas for healthy meals at my lunch section!
Estimated Nutritional Data for This Healthy Ice Cream Alternative
I always want to be super transparent about what we’re putting into our bodies! Since what you use for sweetener can totally change the numbers—maple syrup versus erythritol, for example—these figures are just estimates based on the core four ingredients listed. Whenever I calculate nutrition for my recipes, I use the base measurements for the Healthy Ice Cream Alternative, so adjust your totals based on your specific choices!
Here is the breakdown per serving (which is about a half-cup scoop):
- Calories: About 180
- Protein: A whopping 18g! That’s why I love this treat.
- Fat: 8g total
- Sugar: Around 10g (This will move if you use a zero-calorie sweetener!)
- Carbohydrates: 12g
- Cholesterol: 25mg
- Sodium: 250mg
It’s incredible to get that much protein in a dessert without resorting to chalky powders or overly processed ingredients. I hope seeing these numbers convinces you that you absolutely deserve this delicious and filling scoop tonight!
Share Your Simple Homemade Ice Cream Creations
Now that you’ve blended up your first batch of creamy goodness, I’d absolutely love to hear what you think! Did you try the strawberry version, or did you stick to the classic vanilla? Hop down to the comments below and give this recipe a rating so others know just how fantastic this Healthy Frozen Dessert is. If you snap a picture of your scoops, send it my way through the contact page—I always share reader photos on my stories!
PrintCreamy Vanilla Cottage Cheese Ice Cream (No Churn)

Make a high protein, creamy vanilla cottage cheese ice cream at home. This simple, no churn recipe creates a healthy frozen dessert that tastes indulgent.
- Prep Time: 10 min
- Cook Time: 0 min
- Total Time: 6 hr 10 min
- Yield: 4 servings 1x
- Category: Dessert
- Method: No Churn
- Cuisine: American
- Diet: Vegetarian
Ingredients
- 2 cups full-fat cottage cheese
- 1/4 cup sweetener (e.g., maple syrup or preferred substitute)
- 1 teaspoon vanilla extract
- Pinch of salt
Instructions
- Place the cottage cheese, sweetener, vanilla extract, and salt into a high-speed blender or food processor.
- Blend the mixture until it is completely smooth and creamy. Stop and scrape down the sides as needed to ensure no lumps remain. This step is key for a smooth texture.
- Pour the blended mixture into a freezer-safe container, such as a loaf pan or airtight container.
- Cover the container tightly with a lid or plastic wrap pressed directly onto the surface of the mixture.
- Freeze for at least 6 hours, or until firm. For the best texture, let it sit on the counter for 5 to 10 minutes before scooping.
- If using a Ninja Creami, process according to the machine’s instructions after the initial freeze.
Notes
- For an extra creamy result, you can blend in 1/4 cup of heavy cream or a splash of milk before freezing.
- To make a strawberry protein dessert, blend in 1/2 cup of frozen strawberries with the base ingredients.
- If you prefer a chocolate cottage cheese treat, add 2 tablespoons of unsweetened cocoa powder during blending.
Nutrition
- Serving Size: 1/2 cup
- Calories: 180
- Sugar: 10
- Sodium: 250
- Fat: 8
- Saturated Fat: 4
- Unsaturated Fat: 4
- Trans Fat: 0
- Carbohydrates: 12
- Fiber: 0
- Protein: 18
- Cholesterol: 25