
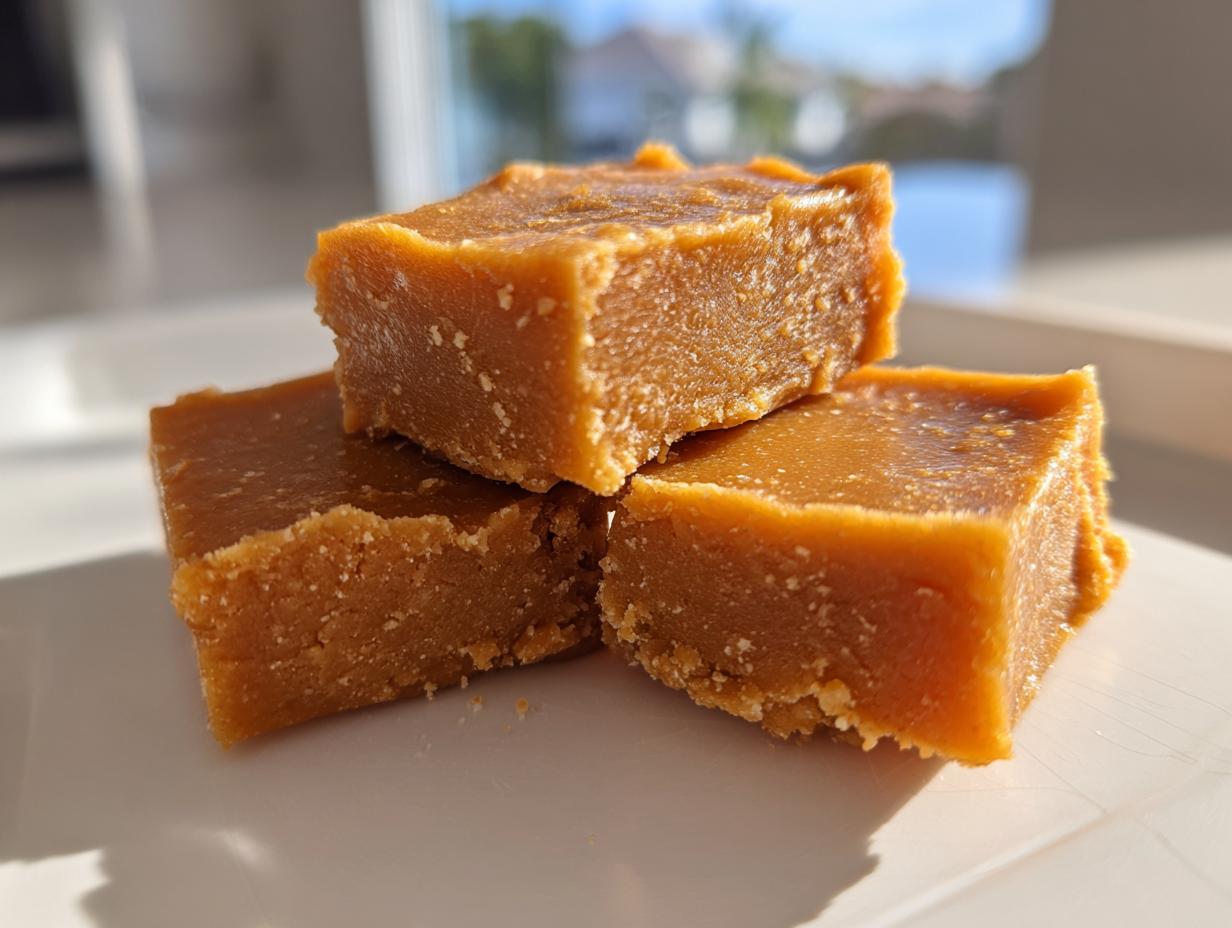
Remember those holidays years ago, where the candy dish was always overflowing with gorgeous, caramel-colored squares? That rich, warm sweetness that just melts on your tongue? That’s the magic of Penuche, and honestly, it’s one of my favorite sweet trips down memory lane. We are making the real deal today—the definitive, can’t-be-beat penuche fudge. My whole mission here at Mia’s Meals is to take those deeply comforting, classic American flavors and streamline them for our busy lives. This Old Fashioned Brown Sugar Fudge Recipe delivers that intensely nostalgic, slow-cooked flavor without needing all day in the kitchen. Trust me, once you taste this creamy confection, you’ll understand why this Brown Sugar Fudge Recipe holds such a special place in Southern candy traditions.
I remember my mom trying to teach me the ropes—it felt intense, but I promise you, with the right tools, it’s totally manageable! If you’re ready to skip the chocolate and dive into something truly rich, you might also want to peek at how I make my easy homemade soft chewy caramels while you wait for this fudge to set up.
- Why This Old Fashioned Brown Sugar Penuche Fudge Stands Out
- Gathering Ingredients for Classic Penuche Fudge Recipe
- Step-by-Step Instructions for Perfect Penuche Fudge
- Troubleshooting Common Penuche Fudge Setbacks
- Serving Suggestions for Your Old Fashioned Penuche Fudge
- Storage and Keeping Your Penuche Fudge Fresh
- Penuche Fudge Variations: Beyond the Classic Brown Sugar Fudge Recipe
- Frequently Asked Questions About This Candy
- Nutritional Estimates for This Classic Fudge Dessert
- Share Your Homemade Fudge Creations
Why This Old Fashioned Brown Sugar Penuche Fudge Stands Out
I know what you’re thinking: fudge is complicated because of all that temperature business. But this penuche fudge recipe is exactly what you need if you want that deep, buttery flavor without the fuss of chocolate tempering. It’s pure comfort in a square, and it’s easy to see why folks are always looking for this specific candy.
- It captures that authentic, slow-cooked taste of Old Fashioned Candy made generations ago.
- The ingredient list is short and relies on pantry staples—no weird items needed here!
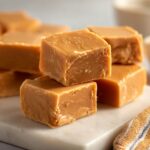
- It sets up beautifully, giving you those wonderful holiday candy tray-worthy squares.
Achieving That Creamy Fudge Dessert Texture
The real secret to getting that incredible, melt-in-your-mouth feel—the kind that makes it a true Creamy Fudge Dessert—comes down entirely to two steps: hitting the soft-ball stage precisely and then having the patience to let it cool before you beat it. You don’t want grainy fudge, and you definitely don’t want runny fudge. It’s all temperature control followed by that vigorous beating that brings the whole structure together right before it sets.
Gathering Ingredients for Classic Penuche Fudge Recipe
Okay, let’s talk about what goes into this glorious Classic Fudge Flavors confection. Since this is an Old Fashioned Candy recipe built primarily on sugar cooking, we need the best quality ingredients we can get. We aren’t hiding flavor behind chocolate here; the simple trio of brown sugar, white sugar, and milk carries the whole show. Don’t skimp on the butter, either; that’s where the richness truly kicks in!
Here is what you need for the essential batch of penuche fudge. It’s surprisingly short, which I love:
- 2 cups granulated sugar
- 1 cup packed light brown sugar
- 1 cup whole milk
- 1 tablespoon butter
- 1 teaspoon vanilla extract
- Pinch of salt
Before we move on to the cooking part, I always remind folks to grab their classic Southern fried cornbread recipe ingredients just in case we need a savory palate cleanser after all this sweetness! But honestly, the simplicity here is key to making this work for the busy cook.
Ingredient Notes and Substitutions for Penuche Fudge
Because I like to tweak things once in a while, I’ve definitely played around with the base, and Mia’s Meals always needs options! If you want to upgrade the creaminess just a touch, swap out half of that whole milk for heavy cream. It adds a lovely richness.
Now, if you want to turn this into something truly special for the holidays, listen up. If you love nuts, add about 1/2 cup of toasted, chopped pecans right before you pour it into the pan—hello, Butter Pecan Fudge! If you prefer something softer and nuttier, we talk about the peanut butter version down below, but even just adding pecans elevates this treat instantly.

The vanilla is crucial for rounding out that deep brown sugar aroma, so don’t skip it. We are extracting maximum flavor out of these straightforward staples!
Step-by-Step Instructions for Perfect Penuche Fudge
Alright, deep breaths! This is where we turn simple ingredients into amazing Homemade Fudge. While some desserts are super forgiving, sugar candy requires respect, especially when we are aiming for that classic, smooth texture. Don’t worry about the candy thermometer; think of it as your little helper guiding you to perfection. The main goal is to get the mixture to that perfect soft-ball stage—that’s 234 degrees F—before we do anything else.
First things first, get your 8×8 pan ready with parchment paper overhang so you can easily lift this beauty out later. Lightly grease that paper! Now, combine your sugars and milk in a heavy saucepan. We need to stir constantly over medium heat until those sugars are completely dissolved. Once they are happy and dissolved, we bring it up to a boil.
You’ll want to clip that candy thermometer in place now. Remember, it can’t touch the bottom of the pan, or you’ll get a wonky reading and scorched sugar, and nobody wants that on their weekend baking plan!
Mastering the Temperature for Penuche Fudge
Hitting 234°F is everything for this candy. If you go too low, it’ll never set up right; too high, and you’ve got hard candy instead of lovely, yielding fudge. Once it hits that 234 mark—that soft-ball stage—pull it straight off the heat immediately. Don’t let it sit for even a second! A little pro tip my mom taught me: If you don’t have a thermometer, you can test it by dropping a tiny bit of the boiling syrup into a cup of ice-cold water. If it rolls into a soft, flexible ball that flattens slightly when you pick it up, you’re good to go. If it’s too hard or too squashy, you need to adjust your heat and try again!
The Critical Beating Stage of Your Penuche Fudge
This is the part that separates the perfectly smooth from the grainy, and it’s crucial if you want that fantastic Soft Candy Recipe result. Once you stir in your butter and vanilla, just let the mixture cool down completely to about 110 degrees F on the stovetop. Don’t touch it! Once it’s cooled, you must beat it, and I mean *beat* it! Use a strong wooden spoon or an electric mixer. You’ll feel the texture change dramatically over about 5 to 10 minutes. It will go from glossy and runny to thick, matte, and stiff. When you see it losing that shiny look and just refusing to move easily, stop immediately and get it in that prepared pan. I always remind myself that if I hesitate here, I’ll end up with a lovely caramel sauce, not fudge!
If you’re looking for a fun, no-stir alternative for a lazy day, check out my recipe for easy no-bake chocolate eclair cake, just so you have something delicious ready even if you skip the sugar cooking part!
Troubleshooting Common Penuche Fudge Setbacks
Listen, I have definitely had batches of this penuche fudge look questionable halfway through the process. It happens! When you are working with sugar, things can sometimes go sideways, particularly if your heat wasn’t quite right or if you stirred when you weren’t supposed to. Don’t panic and definitely don’t throw it out; we can usually rescue these beautiful Old Fashioned Candy attempts.
The two biggest issues I see home cooks run into are graininess or the fudge just refusing to set up at all. Graininess usually means the sugar crystallized too early—maybe you stirred it while it was boiling, or perhaps a stray crystal fell in. If it’s grainy but still pourable, sometimes beating it a little longer *after* it cools *can* bring it back, but honestly, it’s often a lost cause for perfect smoothness.
If your fudge just won’t thicken or set, it probably didn’t reach that magic 234°F soft-ball stage. Don’t fret! As the ‘Notes’ section mentions, the beauty of this recipe is that we can often fix it. Carefully return the mixture to the saucepan over low heat. You’ll want to reheat the entire mixture slowly until it reaches the temperature again. Then, follow the instructions perfectly: cool it undisturbed down to 110°F, and *then* start beating it vigorously. Sometimes that second crystallization attempt, done correctly, saves the whole batch!
And if you scorched the bottom? Oh, that’s the worst smell! Quickly pour the unburnt top layer into a clean bowl while it’s still hot, leaving the blackened stuff behind. You might need to add a tablespoon of fresh milk to help it along, but there’s a good chance you can salvage most of your wonderful brown sugar candy.
Serving Suggestions for Your Old Fashioned Penuche Fudge
Now that you’ve successfully navigated the candy-making process and have your perfect squares of penuche fudge, you deserve to show them off! This isn’t just any candy; it’s a beautiful, naturally tinted Vintage Dessert that deserves a lovely presentation. Because it lacks the sharp contrast of chocolate, it looks stunning when paired with other treats.
The absolute best way to serve this? Alongside a hot cup of coffee or tea. That slight bitterness cuts through the rich caramel-like sweetness perfectly. You could offer a side of salted caramel dipping sauce, though honestly, it’s spectacular all on its own.
When it comes to holidays or gifting, this fudge shines. Pack small squares into clear cellophane bags tied with a rustic ribbon, or arrange them artfully on a tiered platter. They look absolutely gorgeous alongside brighter holiday candies. If you’re looking for another easy crowd-pleaser to add to that platter, swing by my recipe for moist lemon pound cake with a bright glaze—the citrus brightens up any spread of rich sweets!
These simple, decadent squares are seriously the best centerpiece for any collection of Holiday Fudge Treats. People always ask what they are because the color is so inviting! Just tell them it’s pure, old-fashioned comfort!
Storage and Keeping Your Penuche Fudge Fresh
Once you’ve put in the hard work getting that perfect temperature and beating it just right, you want to make sure your beautiful batch of penuche fudge lasts! Since this falls squarely into the category of Southern Fudge Candy, it definitely prefers to hang out at room temperature, much like my favorite date nut bread. Keeping it at room temperature actually helps maintain that soft, melt-in-your-mouth texture we worked so hard to achieve.
Here’s the deal: Store your fudge in an airtight container. That’s non-negotiable! Air is the enemy of soft candy; it dries out the sugar surface and can make the fudge slightly grainy over time. But as long as it’s sealed up tight, your Homemade Fudge should stay perfectly lovely—think soft, creamy, and delicious—for at least a week, sometimes longer, just sitting on the counter.
Now, should you put it in the fridge? If your kitchen is really hot and humid where you live, the fridge might prevent it from getting sticky. But be warned: chilling fudge can sometimes make the texture a little too firm, especially if it has a high butter content like ours does. If you *must* refrigerate it, make sure it’s sealed in two layers—first in plastic wrap, then in an airtight container—to protect it from absorbing weird fridge smells. Before serving any fridge fudge, let it sit out on the counter for a good 30 minutes so it can warm up and get back to that perfect, yielding consistency.
Never freeze it if you can help it. Sugar candies and freezers don’t usually get along well, and you risk moisture migration when thawing, leading to stickiness or weeping. Stick to the counter for the best experience!
Penuche Fudge Variations: Beyond the Classic Brown Sugar Fudge Recipe
I know the base recipe for this Brown Sugar Fudge Recipe is just about perfect, but sometimes you just crave a little something extra, right? That’s why I love how adaptable penuche is. It’s like the perfect canvas for all sorts of delicious additions. We talked briefly about tossing in some toasted pecans earlier, which immediately makes it feel fancier—like a genuine piece of Southern Fudge Candy that took days to make.
But the real showstopper variation, especially for those of you who love rich, savory-sweet combinations, is turning it into a proper Peanut Butter Fudge Recipe. It keeps that wonderfully dense structure but adds that unmistakable, salty-sweet punch we all adore. Plus, if you’re whipping up a big batch for gifts, having two different flavor profiles is always a win!
And just in case you are looking for a topping instead of a standalone treat, you can totally thin this mixture out slightly (add a touch more milk while it’s hot) and beat it for less time. It turns into the richest, most fantastic frosting imaginable for cakes or even those easy homemade peanut butter cookies you might be making!
Making Peanut Butter Fudge Recipe with Penuche Base
If you are converting our standard batch of penuche fudge to feature peanut butter, you need to pay attention to the cooling and beating steps. Remember when we let the mixture cool to 110°F before beating? That’s when you fold in your peanut butter.
For this ratio, I suggest cutting the vanilla down to just half a teaspoon—the peanut butter brings its own strong flavor—then, once the sugar syrup has cooled and you are ready to start your vigorous beating, mix in about 1/2 cup of creamy peanut butter. You’ll likely need to beat it a little longer than the plain version, maybe closer to 8 or 10 minutes, because that extra fat will try to keep it loose.
Keep beating until you see it really start to stiffen up and lose that wet shine. You are looking for the exact same stiffness required for the basic Homemade Fudge. Pour it fast into your prepared pan, smooth it quickly, and let it set up! It’s honestly one of the best flavor upgrades you can make to this Classic Fudge Flavors base. For an in-depth look at a similar flavor profile, you might find this article on making Penuche Fudge Frosting For Cakes And Desserts helpful, especially if you’re thinking about using it as a topping!
Frequently Asked Questions About This Candy
I always get a ton of questions when people try making their first batch of sugar candy! That’s totally normal; temperature cooking can feel a little intimidating at first. We want to make sure you feel totally confident tackling this Old Fashioned Candy. Here are some of the things I hear most often from folks trying to perfect their penuche fudge.
Can I make Penuche Fudge without a candy thermometer?
That is such a common question, and yes, you absolutely can, provided you trust your instincts a little bit! Remember how I talked a bit about the soft-ball test? This is where that comes in handy. You need ice-cold water—like, really cold—ready in a small bowl next to your stove. When you think the fudge mixture is done boiling, pull a tiny spoonful out and drop it carefully into the cold water.
If it forms a soft, pliable ball that you can easily squish between your fingers but it doesn’t dissolve right away, you’ve hit that soft-ball stage perfectly! If it dissolves too fast, it’s not ready. If it turns hard and brittle right away, you might have overcooked it slightly, but don’t worry, we talked about fixes above! If you skip the thermometer, just remember that dropping the mixture into water is your immediate backup plan for ensuring this Homemade Fudge sets correctly.
Is this considered an Easy Fudge Recipe?
That’s a great question! In terms of ingredients, it is absolutely an Easy Fudge Recipe. We are using basic pantry components—sugar, butter, milk—and there is no tricky melting or tempering involved like you see in chocolate recipes. Since my whole mission here is simplicity for the busy home cook, I definitely categorize the ingredient gathering as easy!
However, the cooking part requires attention. You do have to stand there and watch that candy thermometer, and the final beating takes a solid 5 to 10 minutes of focused effort. So, while the ingredient list is easy, the sugar-cooking step asks for your full attention for that short period. It’s definitely easier than making homemade divinity, but it’s not quite the ‘dump and mix’ experience of a No Bake Fudge recipe. It’s worth the little bit of active time, I pinky promise, because the flavor payoff is incredible!
If you’re looking for things that require absolutely zero cooking time, you should definitely check out my recipe for the best bread pudding recipe old fashioned style—it’s a true comfort toss-together!
Nutritional Estimates for This Classic Fudge Dessert
I always make sure to include this section because I believe in being upfront about what we are making here at Mia’s Meals! While this rich Old Fashioned Candy is certainly a treat and not an everyday staple (let’s be honest, it’s mostly sugar and butter!), it’s still good to have a ballpark idea of what’s in that delicious square you just served up.
Remember, because this is a homemade recipe, these numbers are just estimates based on the standard ingredients listed. If you made substitutions—like using heavy cream instead of milk, or adding a cup of pecans—your totals will shift!
For one standard square of this gorgeous, slow-cooked confection, here are the general nutrition estimates:
- Serving Size: 1 square
- Calories: 145
- Sugar: 25g
- Sodium: 25mg
- Fat: 4g
- Saturated Fat: 2g
- Carbohydrates: 27g
- Protein: 1g
As you can see, it’s a pure indulgence—perfect for setting out on a platter during holidays or serving with coffee after a big meal. It’s not exactly what I’d call a daily fuel source, but when you’re looking for that comforting, classic sugar rush, it hits the spot every single time. If you are looking for something high in fuel for your morning, you should totally check out my recipe for easy protein muffins!
Honestly, when you’re making true Homemade Fudge, you’re looking for flavor, not macros, right? It’s about that lovely, nostalgic connection to traditions built around simple, sweet treats.
Share Your Homemade Fudge Creations
Wow, I really hope you enjoyed this journey into making real, honest-to-goodness penuche fudge! I believe that cooking is better when we share our results, and honestly, seeing your photos makes my day. It proves that these Classic Fudge Flavors aren’t just stuck in the past; they are still absolutely perfect for today’s table.
If you followed along and created this smooth, lovely candy, please come back and leave a rating for the recipe! Was your texture perfect? Did you manage to nail that cooling time? Your feedback helps other home cooks feel confident tackling their first batch of old-fashioned sugar candy. Even a simple comment about how quickly your family devoured it helps signal that this recipe is a winner.
And if you took pictures—please, share them! Tag me on social media if you made one of the variations, like the Butter Pecan Fudge or the peanut butter version! I am always looking for new ways people are enjoying these simple, sweet recipes for a happy home.
If anything went wrong, or if you have a question that wasn’t covered in the FAQs, don’t just give up! Reach out to me directly. You can always get in touch through my contact page. I want every single person who visits Mia’s Meals to feel successful in the kitchen. Happy cooking, and I can’t wait to see what beautiful treats you’ve made!
PrintOld Fashioned Brown Sugar Penuche Fudge
Make this creamy, old fashioned Penuche Fudge using simple ingredients like brown sugar and butter for a classic homemade candy experience.
- Prep Time: 15 min
- Cook Time: 15 min
- Total Time: 30 min
- Yield: 36 pieces 1x
- Category: Dessert
- Method: Stovetop Cooking
- Cuisine: American
- Diet: Vegetarian
Ingredients
- 2 cups granulated sugar
- 1 cup packed light brown sugar
- 1 cup whole milk
- 1 tablespoon butter
- 1 teaspoon vanilla extract
- Pinch of salt
Instructions
- Line an 8×8 inch baking pan with parchment paper, leaving an overhang on two sides for easy removal. Lightly grease the paper.
- Combine the granulated sugar, brown sugar, and milk in a heavy-bottomed saucepan.
- Stir the mixture constantly over medium heat until the sugars dissolve and the mixture begins to boil.
- Attach a candy thermometer to the side of the pan, making sure the tip does not touch the bottom.
- Continue to cook, stirring occasionally to prevent scorching, until the mixture reaches 234 degrees Fahrenheit (soft-ball stage). This usually takes about 10 to 15 minutes after boiling begins.
- Remove the pan from the heat immediately. Stir in the butter and vanilla extract until the butter melts completely. Do not beat or overmix at this stage.
- Let the mixture cool undisturbed on the stovetop or a wire rack until it reaches 110 degrees Fahrenheit. Do not rush this cooling process.
- Once cooled, beat the fudge mixture vigorously with a wooden spoon or an electric mixer on medium speed until it becomes thick, loses its glossy shine, and starts to set. This may take 5 to 10 minutes.
- Quickly pour the thickened fudge into the prepared pan. Spread evenly with a spatula.
- Allow the fudge to set completely at room temperature for several hours, or chill briefly to speed setting.
- Once firm, lift the fudge out using the parchment paper overhang and cut into small squares.
Notes
- For a richer flavor, substitute half of the milk with heavy cream.
- If you want Butter Pecan Fudge, fold in 1/2 cup of toasted, chopped pecans just before pouring the fudge into the pan.
- If you prefer Peanut Butter Fudge, reduce the vanilla to 1/2 teaspoon and beat in 1/2 cup of creamy peanut butter when the mixture starts to thicken.
- If the fudge fails to set, you may need to reheat it to the soft-ball stage and cool it again without stirring until it reaches 110 degrees Fahrenheit.
Nutrition
- Serving Size: 1 square
- Calories: 145
- Sugar: 25
- Sodium: 25
- Fat: 4
- Saturated Fat: 2
- Unsaturated Fat: 2
- Trans Fat: 0
- Carbohydrates: 27
- Fiber: 0
- Protein: 1
- Cholesterol: 10