
Oh, you know that longing for something incredibly decadent but you just don’t have the time (or the patience for tricky candy making)? I totally get it! That’s why when I decided to tackle the world of rich, chocolatey homemade candy, I knew I had to crack the code on fool-proof fudge. Forget boiling sugar to 234 degrees; we’re bypassing the scary candy thermometer altogether. This Easy, No-Fail Creamy Chocolate Fudge recipe is my answer to needing truly decadent sweets, like, five minutes ago.
When I started Mia’s Meals, my mission was clear: take those amazing comfort food classics my mom and grandma made in Ohio and simplify them for our busy modern lives. This particular technique for making fudge relies on just a few pantry staples to create something that tastes like it took hours of stirring. Trust me, this simple dessert treats approach delivers a bite of pure, melt-in-your-mouth heaven, every single time.
- Why This Easy Fudge Recipe Is Your New Go-To
- Essential Ingredients for Perfect Creamy Fudge
- Step-by-Step Instructions for Making Homemade Fudge
- Expert Tips for Successful Fudge Making
- Creative Variations for Your Chocolate Fudge
- How to Store and Keep Your Homemade Fudge Fresh
- Serving Suggestions for This Simple Dessert Treats
- Frequently Asked Questions About Making Fudge
- Estimated Nutritional Data for This Fudge
Why This Easy Fudge Recipe Is Your New Go-To
I know you might be skeptical. Fudge sounds complicated, right? Like something that needs fancy equipment and years of practice. Nope! This recipe changed my whole outlook on homemade candy. It’s the reason I keep coming back to it whenever a craving hits, or when I need super fast party desserts.
- Lightning Fast Prep: Seriously, the active time here is less than 15 minutes. We are talking about turning basic ingredients into rich chocolate goodness before you can even decide what movie to watch.
- No Candy Thermometer Needed: This is the biggest win! I tossed my candy thermometer years ago when I discovered this trick. It removes the guesswork, which means no more grainy, seized-up messes.
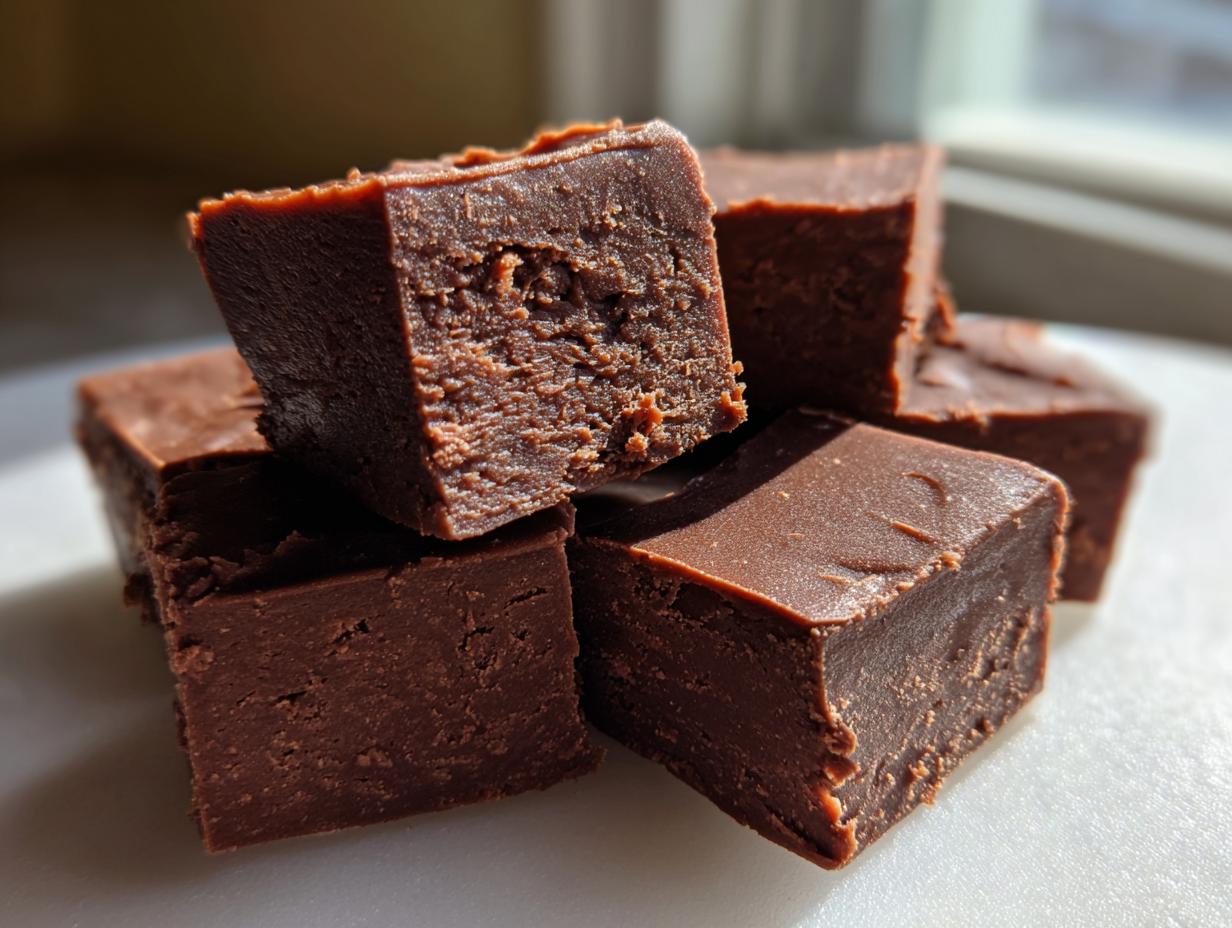
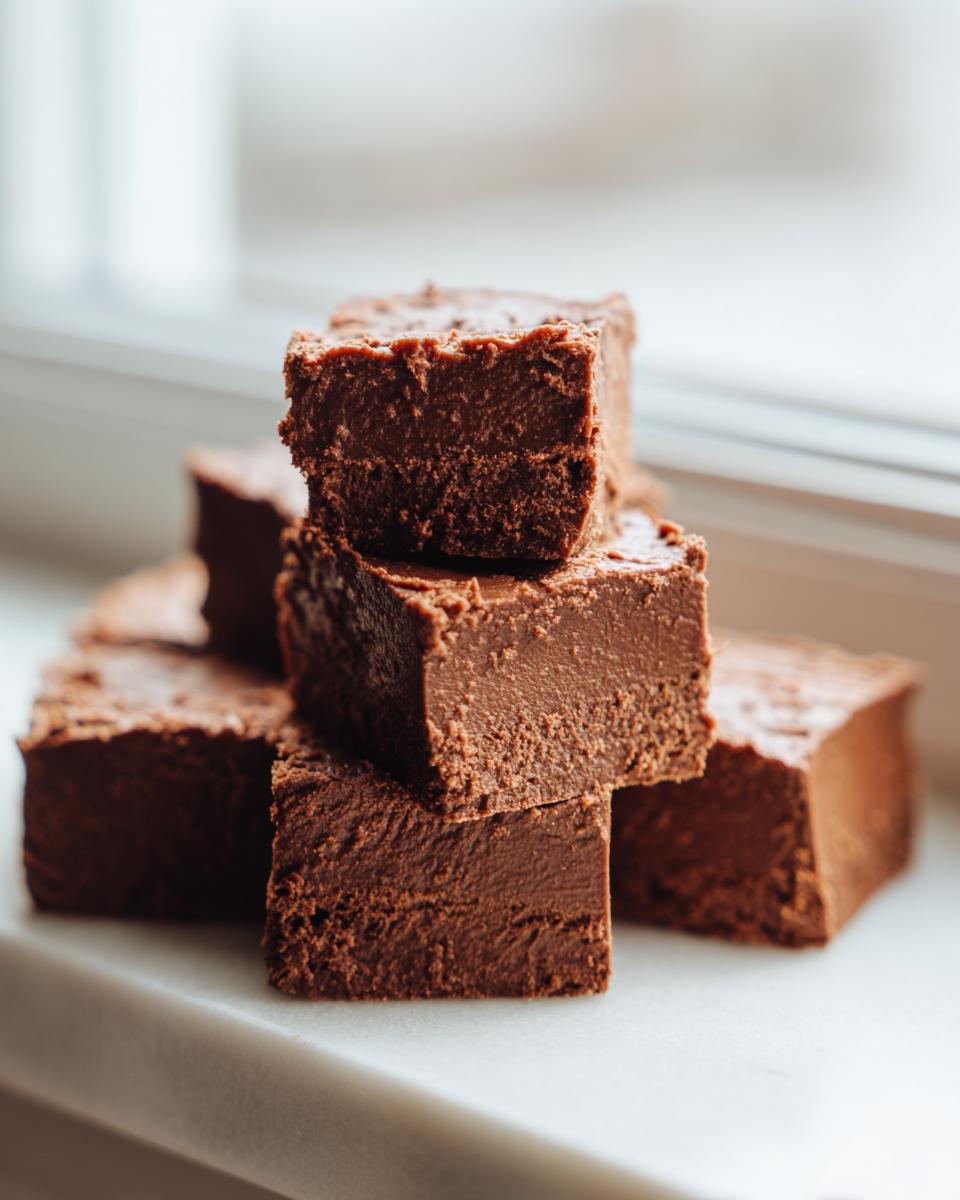
- Unbeatable Texture: We aim for that beautiful, super creamy, melt-in-your-mouth experience. Because we don’t boil this mixture aggressively, the texture stays silky smooth, not gritty.
- Perfect for Gifting: Honestly, this homemade fudge is one of my favorite holiday candy ideas because it looks amazing cut into neat squares and wrapped up nicely. You can check out how I wrap up favors like my cranberry sauce recipe right here.
Essential Ingredients for Perfect Creamy Fudge
The beautiful thing about this easy method is how short our list of ingredients is. When you’re working with only a few things, ingredient quality really steps up to the plate, doesn’t it? Don’t skimp here where you can, because these items do all the heavy lifting to create that rich texture we want in a great chocolate fudge.
Here is exactly what you’ll need to grab before you even turn on the stove:
- One (14 ounce) can of sweetened condensed milk—this is our creamy shortcut!
- One (12 ounce) package of semi-sweet chocolate chips—go for good quality if you can.
- One teaspoon of pure vanilla extract.
- 1/4 cup of butter, cut into small pieces.
- 1/2 cup of chopped nuts, totally optional, but I love how they add a little crunch!
That’s it! Five main things, and you’re set to make the best simple dessert treats.
Ingredient Notes and Substitution Ideas for Your Fudge
Because we aren’t working with traditional sugar syrups, the chocolate chips are key for the best flavor profile. If you use a higher cacao percentage in your chips, you get a much deeper, richer chocolate fudge experience. If you want to pivot away from chocolate, don’t sweat it! Remember that fun little note in the details? You can easily swap those semi-sweet chips out for peanut butter chips and add 1/2 cup of creamy peanut butter right along with the butter. Hello, decadent peanut butter fudge!
Step-by-Step Instructions for Making Homemade Fudge
Alright, let’s get cooking! This is where the magic happens, and I promise it’s so straightforward. Before we even start heating things up, do yourself a huge favor and prep your 8×8 inch pan. I always take a sheet of parchment paper and let it hang over the sides—that overhang is your handle later when you need to lift the firm fudge right out of the pan. Give that paper a quick grease, too!
- Place the saucepan over low heat. Now, toss in your sweetened condensed milk, the chocolate chips, and the pieces of butter.
- This next part requires your full attention, but it’s gentle! You need to stir this mixture constantly until everything is completely melted and looks like one smooth, beautiful chocolate river. Repeat after me: Do not let this mixture boil! Boiling is how you get grainy fudge, and we are aiming for silky smooth here.
- Once it’s perfectly smooth, pull the saucepan right off that burner. Stir in your vanilla extract right away. If you’re adding those nuts, mix them in now so they get evenly distributed.
- Pour that glorious mixture into your prepared 8×8 pan and spread it out evenly. You can check out how I use parchment with pastries like my apple strudel when you need that easy cleanup, if you want to see my technique!
- Time for patience! Slide that pan into the refrigerator. You must let it chill for at least two hours until it’s firm enough to handle cutting.
- Once it’s set, use those parchment flaps to lift the whole block out, place it on a cutting board, and slice it into nice squares.
Tips for Achieving Smooth, Melt In Your Mouth Fudge Texture
The difference between amazing fudge and that slightly gritty stuff you sometimes end up with is all in the melting stage. Remember, we never wanted a boil! Keep your heat on low and just let the warmth of the pan do the work of melting the chocolate and butter together. Constant, gentle stirring ensures every chocolate chip dissolves without overheating in spots, which is what causes sugar crystals to form (that graininess we hate!). Also, don’t rush that chill time. If you try to cut it too soon, it will just smear everywhere. That full two hours in the fridge guarantees a clean, luscious slice of melt-in-your-mouth fudge.
Expert Tips for Successful Fudge Making
Even though this is my easy fudge recipe, I’ve still made a few rookie mistakes over the years that I want to save you from! For instance, I remember one Christmas trying to rush things because I was late for a party. I cranked the heat up way too high to melt the chips faster. Big mistake! The bottom scorched instantly, and the whole batch turned weirdly stiff and grainy. It was salvageable, but just barely.
So here are the few extra tricks I’ve picked up to guarantee success for your homemade fudge:
- The Right Pan Matters: Always use a metal or glass pan. Avoid plastic containers for setting, as the temperature transfer isn’t even. Metal pans cool the fudge beautifully and consistently.
- Don’t Get Distracted: That low-and-slow melting stage is critical. If you walk away to answer the phone or help a kid, you risk scorching the bottom. Your main job during those five minutes is stirring!
- The Quick Cool Down: For the quickest set, once the fudge is spread in the pan, immediately place it on the coolest counter surface you have. Don’t let it sit on a hot stovetop or warm counter while it cools down before the fridge.
Follow these steps, and you’ll have the best, richest, smoothest batch of chocolate fudge imaginable. If you love that deep caramel note, you should definitely check out my recipe for maple brown sugar cookies too!
Creative Variations for Your Chocolate Fudge
One of the best things about this incredibly easy fudge recipe is how beautifully it takes other flavors! Since the base ingredients are so simple—sweetened condensed milk, butter, and chocolate—it’s like a blank canvas waiting for your favorite additions. You can totally customize your homemade fudge to whatever you’re craving that day.
If you’re looking to branch out from pure chocolate, I’ve got simple swaps for you. As I mentioned in the ingredient notes, making a spectacular peanut butter fudge is as easy as trading out the chocolate chips for peanut butter chips and boosting the creaminess with some pure peanut butter when you melt everything down. That version is always a huge hit at parties!
You can also swing for the fences and add things like peppermint extract for a holiday treat or even a heavy drizzle of caramel sauce swirled in after you pour it into the pan. If you love peanut butter as much as I do, make sure you check out my recipe for the easy no-bake peanut butter pie—it captures a similar comforting flavor profile!
How to Store and Keep Your Homemade Fudge Fresh
Once you finally cut into that beautiful, chilled block of homemade fudge, you’ll want to make sure it stays delicious for as long as possible. Since we used the super-simple, no-fuss method here, storage is actually really straightforward—you don’t need any complicated candy-storage rules!
For the best flavor and texture, I generally like to store my chocolate fudge in a good airtight container at cool room temperature for about a week. It stays perfectly soft and melts nicely in your mouth just like that. If you made a huge batch (and who wouldn’t?), or if your kitchen tends to run warm, don’t hesitate to pop it into the refrigerator for longer keeping. Just wrap those individual squares tightly in wax paper first so they don’t stick together!
If you’re looking for more no-bake treats that last well, you should take a peek at my recipe for the no-bake peanut butter pie; it’s another great make-ahead sweet!
Serving Suggestions for This Simple Dessert Treats
The moment your fudge is firm and you’ve cut those perfect little squares, the fun really begins! This creamy fudge is fantastic all on its own, but it shines even brighter when you use it as part of a dessert display. Since this recipe is so quick, it’s my secret weapon for last-minute party desserts.
For parties, I like to arrange the squares on a simple white platter. You can add a sprinkle of flaky sea salt on top of half the batch—it really makes that chocolate flavor pop against the sweetness. They pair wonderfully next to a hot cup of coffee or served with a tiny dollop of fresh whipped cream if you’re feeling extra fancy.
If you’re planning on using this rich chocolate dessert for holiday candy ideas or gifting, wrap the individual squares in small squares of decorative parchment paper and tie them with a little twine. They look so professional! It’s almost as impressive as my classic cheese ball recipe when it comes to crowd-pleasing appetizers—you can check out that savory side of things for your next gathering!
Frequently Asked Questions About Making Fudge
I totally get it—when you are trying out a new sweet treat, you always have questions hanging around! That’s why I pulled together the most common things folks ask me about whipping up this easy fudge recipe. We want your journey to creamy fudge to be a total success! If you’re looking for another great resource on easy fudge, check out some tips over here.
Can I make this fudge without sweetened condensed milk?
That is the number one question I hear! For this specific recipe, the answer is usually no, sweet friend. This whole technique is designed to skip the scary candy thermometer, and the sweetened condensed milk is absolutely essential for that quick, foolproof texture. Traditional old fashioned fudge relies on boiling sugar mixtures, but we are relying on that milk for richness and stability. If you want to try a version that skips it, you’ll need to switch to a much more involved classic fudge recipe, which involves stirring constantly until it reaches a very specific temperature—not what we are going for here!
How do I get the fudge to set faster?
Patience is tough when you have rich chocolate fudge waiting! If you are in a real bind, you can certainly speed up the process by chilling it longer. Two hours is usually the minimum time needed in the refrigerator for a clean cut. If you need it faster than that, you could test putting it in the freezer for about 30-40 minutes, but you have to watch it closely! If it gets too cold, it becomes brittle and hard to slice. Honestly, letting it set slowly in the fridge gives the best melt-in-your-mouth result.
I noticed my fudge seems slightly soft—does it need more time?
More often than not, yes! Soft fudge usually means it hasn’t been chilled long enough. These simple dessert treats rely heavily on cold temperatures to firm up properly. If you cut into it when it’s even slightly warm, it will smear out rather than hold its shape. I would pop it back into the fridge for another hour, maybe even two, just to be totally sure before slicing. If you’ve already cut it and it’s too soft to handle, just press it lightly back into the pan and put it back in the cold!
Can I use this base recipe to make Peanut Butter Fudge instead?
Absolutely! That’s the fun of having a solid base recipe for homemade candy. I referenced it above, but I’ll say it again here: for a brilliant peanut butter fudge, just swap out the semi-sweet chocolate chips for peanut butter chips, and add about 1/2 cup of smooth peanut butter right when you melt the butter. Keep everything else exactly the same. It is so delicious! If you want another easy swap, check out how I use simple ingredients in my cranberry sauce recipe—it’s all about finding those easy shortcuts!
Estimated Nutritional Data for This Fudge
It’s always smart to have a general idea of what’s in the treats we’re making, right? Even though this rich chocolate dessert is so simple, it’s definitely on the indulgent side! I want to give you the numbers, but please remember these are just estimates based on the recipe using standard ingredients, especially if you skip the optional nuts. This data is exactly what you’d expect from a decadent sweet like this homemade fudge.
- Serving Size: 1 square
- Calories: 145
- Sugar: 18g
- Fat: 7g
- Protein: 2g
- Carbohydrates: 20g
- Saturated Fat: 4g
- Sodium: 35mg
If you use high-quality dark chocolate or mix in extra peanut butter for a variation, those numbers will shift a bit, of course. But either way, these simple dessert treats are worth every single delightful bite!
PrintEasy, No-Fail Creamy Chocolate Fudge (No Candy Thermometer Required)
Make rich, creamy chocolate fudge using a simple method that skips the candy thermometer. This recipe delivers a decadent, melt-in-your-mouth texture perfect for gifting or parties.
- Prep Time: 10 min
- Cook Time: 5 min
- Total Time: 2 hours 15 min
- Yield: 36 squares 1x
- Category: Dessert
- Method: Stovetop
- Cuisine: American
- Diet: Vegetarian
Ingredients
- 1 (14 ounce) can sweetened condensed milk
- 1 (12 ounce) package semi-sweet chocolate chips
- 1 teaspoon vanilla extract
- 1/4 cup butter, cut into pieces
- 1/2 cup chopped nuts (optional)
Instructions
- Line an 8×8 inch baking pan with parchment paper, leaving an overhang on the sides for easy removal. Lightly grease the paper.
- In a medium saucepan over low heat, combine the sweetened condensed milk, chocolate chips, and butter.
- Stir constantly until the chocolate and butter are completely melted and the mixture is smooth. Do not let the mixture boil.
- Remove the saucepan from the heat. Stir in the vanilla extract. If using, stir in the chopped nuts.
- Pour the fudge mixture into the prepared baking pan and spread evenly.
- Chill in the refrigerator for at least 2 hours, or until firm enough to cut.
- Lift the fudge out of the pan using the parchment paper overhang. Cut into 1-inch squares.
Notes
- For a richer flavor, use high-quality chocolate chips or chopped baking chocolate.
- If you want a peanut butter fudge variation, substitute the chocolate chips with peanut butter chips and add 1/2 cup of creamy peanut butter when melting.
- Store this homemade fudge in an airtight container at room temperature for up to one week, or refrigerated for longer storage.
Nutrition
- Serving Size: 1 square
- Calories: 145
- Sugar: 18g
- Sodium: 35mg
- Fat: 7g
- Saturated Fat: 4g
- Unsaturated Fat: 3g
- Trans Fat: 0g
- Carbohydrates: 20g
- Fiber: 1g
- Protein: 2g
- Cholesterol: 10mg