
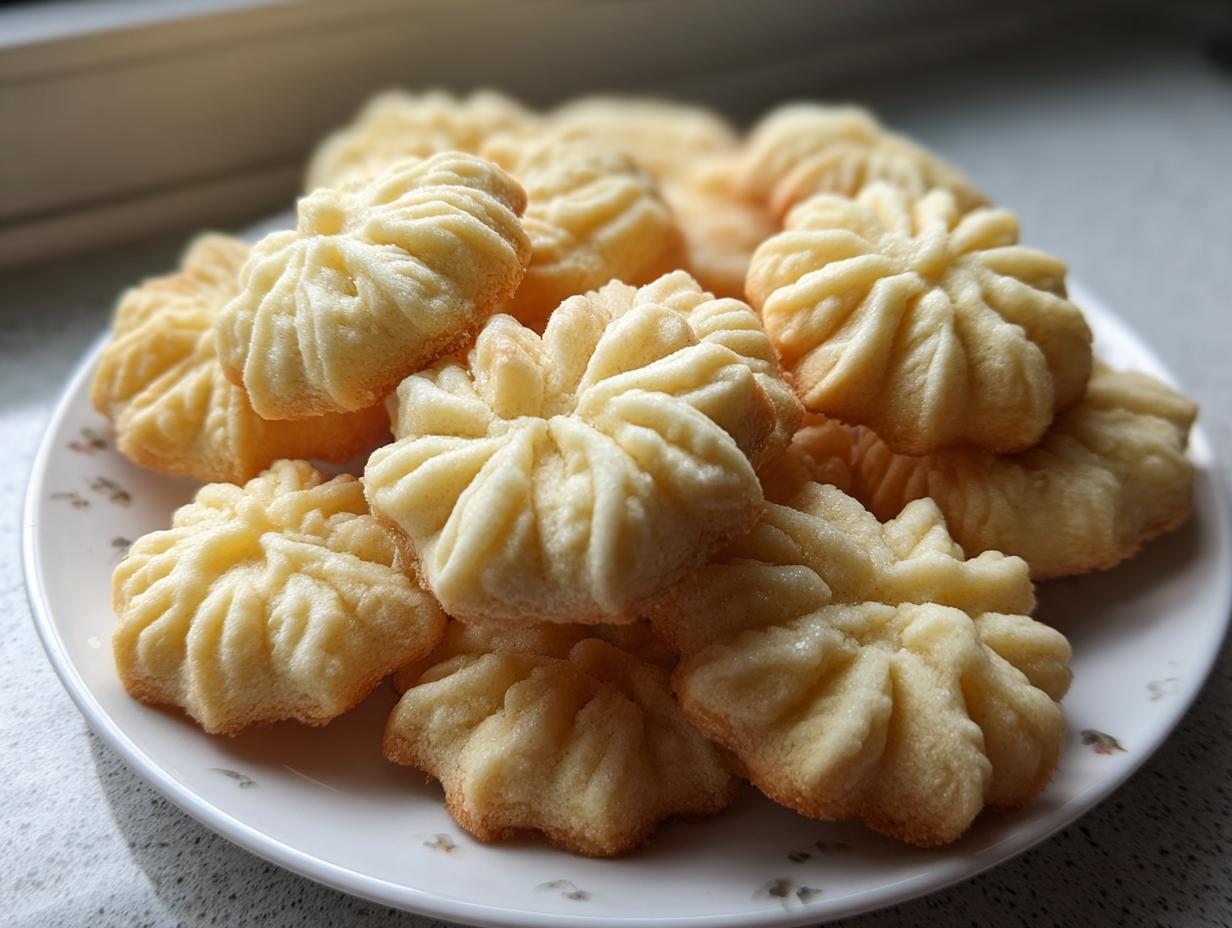
Oh, the beautiful nostalgia packed into a simple, perfect little cookie! If you’re anything like me, the scent of freshly baked **butter cookies** instantly transports you back to childhood holidays or quiet afternoon tea moments. I’ve tried countless recipes over the years, but this one—this is the definitive one. Forget dry, crumbly shortbread; this is the ultimate, easy recipe designed specifically to achieve that glorious, melt-in-your-mouth texture we all crave. My mother used to pipe these for every small celebration, and learning the precise technique from her taught me that simplicity often yields the best results in the kitchen. If you want to know more about the philosophy behind keeping things simple in my kitchen, you can always check out my story over at Mia’s Meals. Trust me, you want this recipe in your regular rotation!
- Why This Classic Butter Cookies Recipe Delivers Perfection
- Gathering Your Ingredients for Classic Butter Cookies
- Step-by-Step Instructions for Homemade Butter Cookies from Scratch
- Tips for Success When Making Danish Butter Cookie Copycat
- Holiday Baking Essentials: Variations for Your Butter Cookies
- Storage and Keeping Your Butter Cookies Fresh
- Frequently Asked Questions About Making Butter Cookies
- Estimated Nutritional Breakdown for These Butter Cookies
- Share Your Homemade Butter Cookies Creations
Why This Classic Butter Cookies Recipe Delivers Perfection
When you’re looking for true satisfaction from a treat, this recipe delivers every single time. It’s become a staple here because it cuts right through the fuss and noise of complicated baking. We focus purely on those rich, buttery flavors, which is why I love sharing these delicious dessert recipes.
- No weird chilling requirements! These are truly Easy Homemade Butter Cookies that come together fast.
- They genuinely live up to the hype—they are the definition of Melt in Your Mouth Cookies.
- They are designed to be stable enough for decorating or dipping, which makes them perfect for holiday trays.
Achieving That Signature Buttery Shortbread Style Cookies Texture
It all comes down to the ratio of butter to flour, friend! Because we use a solid amount of softened butter and just that one egg yolk, we get this wonderful richness without spreading too thin. The secret here is making sure your butter is perfectly tempered—room temperature but still slightly firm. If it’s too soft, the texture falls apart, and you lose that lovely, slightly crisp edge combined with a tender center.

Simple 5 Ingredient Cookies Base for Quick Baking
You won’t need to run out to specialty stores for this one. Seriously, if you have butter, sugar, flour, salt, and vanilla, you’re already golden. Out of the flour, salt, and vanilla, you only need four things to make the basic dough structure. That’s the beauty of these Simple 5 Ingredient Cookies; they prove you don’t need a dozen specialized items to create something unbelievably good.
Gathering Your Ingredients for Classic Butter Cookies
Okay, let’s talk about what you need to pull off these amazing **butter cookies**. When I simplified this recipe down, I wanted to make sure anyone could walk into their pantry and get started right away. We need just the essentials, but their quality really shines through when the ingredients are this few!
Here is what you need to have ready on your counter:
- 1 cup (that’s two full sticks!) of unsalted butter, very important: softened.
- 3/4 cup of regular white granulated sugar—don’t fuss with specialty sugars here.
- 1 large egg yolk—just the yolk!
- 1 teaspoon of pure vanilla extract (go for the good stuff!).
- 2 1/2 cups of all-purpose flour.
- Just a tiny pinch of salt, about 1/4 teaspoon.
- And if you want that holiday flair, about 4 ounces of semi-sweet chocolate for dipping later on.
Ingredient Notes and Substitutions for Perfect Butter Cookies
I need to stress on the butter: unsalted is key so you can control the salt level yourself. Make sure it’s truly softened, meaning you can press your finger into it easily, but it shouldn’t be melted or greasy looking. That perfect texture relies on that correct temperature!
You might wonder why we only use one egg yolk. It’s just for richness and tenderness! A whole egg adds too much liquid, which makes these **butter cookies** puff up more instead of keeping that beautiful density we are aiming for. Measure your flour carefully—scoop it lightly into your cup and level it off. Too much flour ruins the melt-in-your-mouth experience!
Step-by-Step Instructions for Homemade Butter Cookies from Scratch
It’s time to get mixing! Following these steps exactly ensures you end up with bakery-quality **butter cookies** rather than just a bowl of sad, flat discs. The rhythm of baking is important here, so take your time, especially during the creaming stage. First things first, go ahead and preheat your oven to 350°F (175°C). Also grab your baking sheets and line them with parchment paper—this keeps things tidy!
Mixing the Dough: Achieving the Right Consistency for Piped Butter Cookies Recipe
Start with your softened butter and beat it until it looks nice and creamy. Then, slowly add the sugar and beat it again until the mixture turns pale yellow and fluffy. Don’t rush this creaming step; it’s what whips air into the dough! After the butter and sugar are happy together, beat in that single egg yolk and the vanilla until they are just combined. Now, mix your flour and salt in a separate bowl. Add the dry ingredients to the wet stuff gradually, mixing on the lowest speed possible. Seriously, stop mixing the second you don’t see any more dry streaks. Overmixing is the absolute enemy of perfect **butter cookies**!
Shaping and Baking Your Butter Cookies
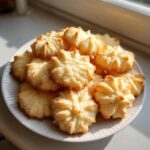
Okay, you have two choices for shaping, depending on what you like! If you want the fancy look, load that dough into a piping bag fitted with a star tip. Pipe pretty rosettes or swirls onto your prepared sheets, leaving about an inch between them. If you’re slicing, wrap the dough tightly in plastic wrap and chill it for about 30 minutes; this keeps them from spreading too much. Once shaped, bake them for 10 to 12 minutes. You’re looking for the edges to just barely start turning light gold. They should look pretty pale overall! Let them chill on the sheet for five minutes before moving them carefully to a cooling rack. If you decide to make caramel-stuffed cookies later, you’ll want to let these cool completely first!
Tips for Success When Making Danish Butter Cookie Copycat
If you’re aiming for that classic, crisp-edged, uniform appearance like the ones you find in the famous blue tins, I have a few high-level tips for you. We want these **butter cookies** to hold their shape beautifully, whether you pipe them or slice them. My mom always said that using a cookie press gives you the most identical results, since the dough is extruded under a bit more pressure, which keeps things tight.
For these copycat treats, make sure your butter isn’t just room temp, but maybe slightly cooler than standard baking temp. This little adjustment makes a huge difference in maintaining the detailed ridges when they bake. You can also chill your piping bag full of dough for about 15 minutes before starting; it firms everything up perfectly before it hits the hot oven liner. For more great tips on utilizing cold butter in baking, check out my insights on blueberry scones—the principles are similar!
Troubleshooting Common Butter Cookies Spreading Issues
It’s frustrating when your beautiful piped shapes flatten out into mere pancakes! This almost always happens for two main reasons. First, like I mentioned, if your butter gets too warm while you’re creaming it, you’ve essentially melted the structure before it even entered the oven. Second, the culprit is often over-mixing the flour in. Once that flour goes in, you only want to mix until it *just* disappears.
If you notice spreading happening on your first few cookies, pull the tray out immediately and pop the entire tray into the fridge for ten minutes before trying again. Sometimes that quick chill is all the dough needs to remember it should be a cookie, not a puddle! If you’re looking for more insight on piping techniques, this guide here is really helpful.
Holiday Baking Essentials: Variations for Your Butter Cookies
Now, this is my favorite part—making the absolute best of these treats for holiday platters! These **butter cookies** are already fantastic plain, but a little holiday flair goes such a long way in making them look like they came from a professional bakery. If you’re planning your menu, these make fantastic additions to any list of Christmas cookie ideas.
The easiest way to dress them up is with a simple chocolate dip. Once the cookies are completely cool—and I mean fully cooled—melt down some semi-sweet chocolate. I just use the microwave, stirring every 30 seconds so it doesn’t seize up on me!
For the perfect **Chocolate Dipped Butter Cookies**, dip about half the cookie straight into the melted chocolate. Let the excess drip off for just a second, then set them on parchment paper. While the chocolate is still wet, I love sprinkling them with a little bit of crushed peppermint or some festive nonpareils. They look so elegant, but remember, this step needs patience! You must let them set up fully before piling them into tins. You can find another great dipping guide over at Beyond Frosting!
Storage and Keeping Your Butter Cookies Fresh
One of the best things about these classic **butter cookies** is how long they stay delicious! Unlike those fussy, delicate shortbreads, these hold their texture beautifully, which is great news for holiday baking when you need to prepare things ahead of time. The absolute first rule is cooling—don’t even think about putting them into any container until they are stone cold. Warm cookies trapped in a sealed tin create steam, and steam equals mushy bases!
Once completely cool, you should store your **butter cookies** in an airtight container right on the counter at room temperature. And yes, you really don’t need to chill them in the fridge! Remember how some of you guys skip the chilling step for slicing because you want a quicker batch? If you made those softer, quicker cookies, they might stale just a tiny bit faster than the firm ones, but honestly, if you keep them airtight, they are lovely for a good week, sometimes longer. I rarely worry about refrigeration unless I’ve done the chocolate dip, just to keep the chocolate super firm if my house is warm.
Frequently Asked Questions About Making Butter Cookies
I totally get it; sometimes you just need a quick yes or no answer before you commit to a whole batch of baking! These little buttery rounds are so popular, and readers often have similar questions when they are trying to get that perfect texture. Here are some of the most common things folks ask when diving into this recipe. Remember, if you have more thoughts or need more guidance, pop over to my site for some easy breakfast ideas or just leave a comment below!
Can I make these Soft and Chewy Butter Cookies instead of crisp?
Oh yes, absolutely you can tweak these! Generally, these bake up to be crisp on the edges and tender in the middle, which is that perfect balance. If you want them decidedly more Soft and Chewy Butter Cookies, you have two main levers to pull. First, bake them for less time—pull them out when they look truly pale and only *just* starting to lose that wet sheen on top, maybe 9 minutes instead of 12. Second, you can try adding just half of the egg white back into the dough along with the yolk. That little bit of extra protein helps keep things soft, though it might make the dough spread just a hair more.
What is the best way to get Vanilla Butter Cookies flavor?
Since this recipe relies so heavily on butter and vanilla, using good quality ingredients here really pays off! For truly fantastic Vanilla Butter Cookies flavor, don’t skimp on your extract. If you’re using imitation vanilla, you’ll taste the difference right away. My trick for deepening that standard vanilla flavor, especially if I’m baking them for adults or a special event, is to add just 1/4 teaspoon of almond extract along with the vanilla. You don’t want it to taste like almonds, but that little nudge really enhances the vanilla essence beautifully.
Are these Cookie Recipes for Beginners friendly?
The short answer is a huge YES! I designed this recipe to be incredibly accessible. If you can master the technique of creaming butter and sugar together until it’s fluffy—which we cover in detail!—you’re over the hardest hurdle. There’s no yeast, no complicated folding, and no chilling needed if you decide to pipe them right away. So, if you’re new to the baking game, this is one of the most forgiving and rewarding Cookie Recipes for Beginners you can try. You’ll feel like a pro when they come out of the oven!
Estimated Nutritional Breakdown for These Butter Cookies
I like keeping things transparent, so here is a peek at the numbers for these rich **butter cookies**. Please know these are just estimates based on using standard ingredients, so your actual count might shift a bit depending on the exact brand of butter or sugar you use. It’s good to know what you’re serving, but honestly, the joy is in trusting the process!
- Serving Size: 1 cookie
- Calories: 120
- Sugar: 7g
- Fat: 7g
- Protein: 1g
Because these are such simple ingredients, the values are straightforward. If you dip them in chocolate (which is totally worth it!), make sure you add that to your personal tracking. Happy baking!
Share Your Homemade Butter Cookies Creations
Well, that’s it! You now have the secret to making the most incredible, classic **butter cookies** right in your own kitchen. They really are foolproof, and once you try one—especially one that’s been dipped in that gorgeous chocolate—you’ll never look back, I promise you that!
Now, the best part of my job here at Mia’s Meals is hearing from all of you. Did you pipe them beautifully with a star tip? Did you decide to leave them plain because you just couldn’t wait another second to eat them? I truly want to know! Please take a moment to click on the star rating above and let me know how this recipe worked out for you—was it a five-star melt-in-your-mouth experience?
I’d be so thrilled if you shared a picture of your finished **butter cookies** on social media and tagged me, or just left a comment below telling me what you loved most about them. Connecting over a simple, sweet treat like this is exactly why I share these recipes. If you have any troubleshooting questions that popped up during the process, don’t hesitate to reach out through my contact page. Happy baking, and enjoy every single buttery bite!
PrintThe Ultimate Classic Butter Cookies: Easy, Buttery, Melt-in-Your-Mouth Perfection
Make classic butter cookies at home using basic ingredients. This simple recipe yields rich, melt-in-your-mouth cookies perfect for holidays or everyday treats.
- Prep Time: 20 min
- Cook Time: 12 min
- Total Time: 32 min
- Yield: About 3 dozen 1x
- Category: Dessert
- Method: Baking
- Cuisine: American
- Diet: Vegetarian
Ingredients
- 1 cup (2 sticks) unsalted butter, softened
- 3/4 cup granulated sugar
- 1 large egg yolk
- 1 teaspoon vanilla extract
- 2 1/2 cups all-purpose flour
- 1/4 teaspoon salt
- Optional: 4 ounces semi-sweet chocolate for dipping
Instructions
- Beat the softened butter in a large bowl until creamy. Add the sugar and beat until the mixture is light and fluffy.
- Beat in the egg yolk and vanilla extract until just combined.
- In a separate bowl, whisk together the flour and salt. Gradually add the dry ingredients to the wet ingredients, mixing on low speed until a soft dough forms. Do not overmix.
- Transfer the dough to a piping bag fitted with a star tip (like a Wilton 1M) or shape the dough into logs for slicing. If slicing, chill the dough for 30 minutes.
- Preheat your oven to 350°F (175°C). Line baking sheets with parchment paper.
- Pipe or slice the dough into desired shapes onto the prepared baking sheets, spacing them about 1 inch apart.
- Bake for 10 to 12 minutes, or until the edges are lightly golden brown. These cookies stay quite pale.
- Let the cookies cool on the baking sheet for 5 minutes before transferring them to a wire rack to cool completely.
- If dipping in chocolate, melt the chocolate according to package directions. Dip half of each cooled cookie into the melted chocolate and place them back on parchment paper to set.
Notes
- For a Danish Butter Cookie copycat texture, ensure your butter is at room temperature but not melted.
- You can use a cookie press instead of a piping bag for uniform shapes.
- If you skip chilling the dough for slicing, the cookies will spread more, resulting in a crispier edge.
- For a soft and chewy butter cookie, slightly reduce the baking time to 9 minutes.
Nutrition
- Serving Size: 1 cookie
- Calories: 120
- Sugar: 7
- Sodium: 35
- Fat: 7
- Saturated Fat: 4
- Unsaturated Fat: 3
- Trans Fat: 0
- Carbohydrates: 13
- Fiber: 0
- Protein: 1
- Cholesterol: 25