
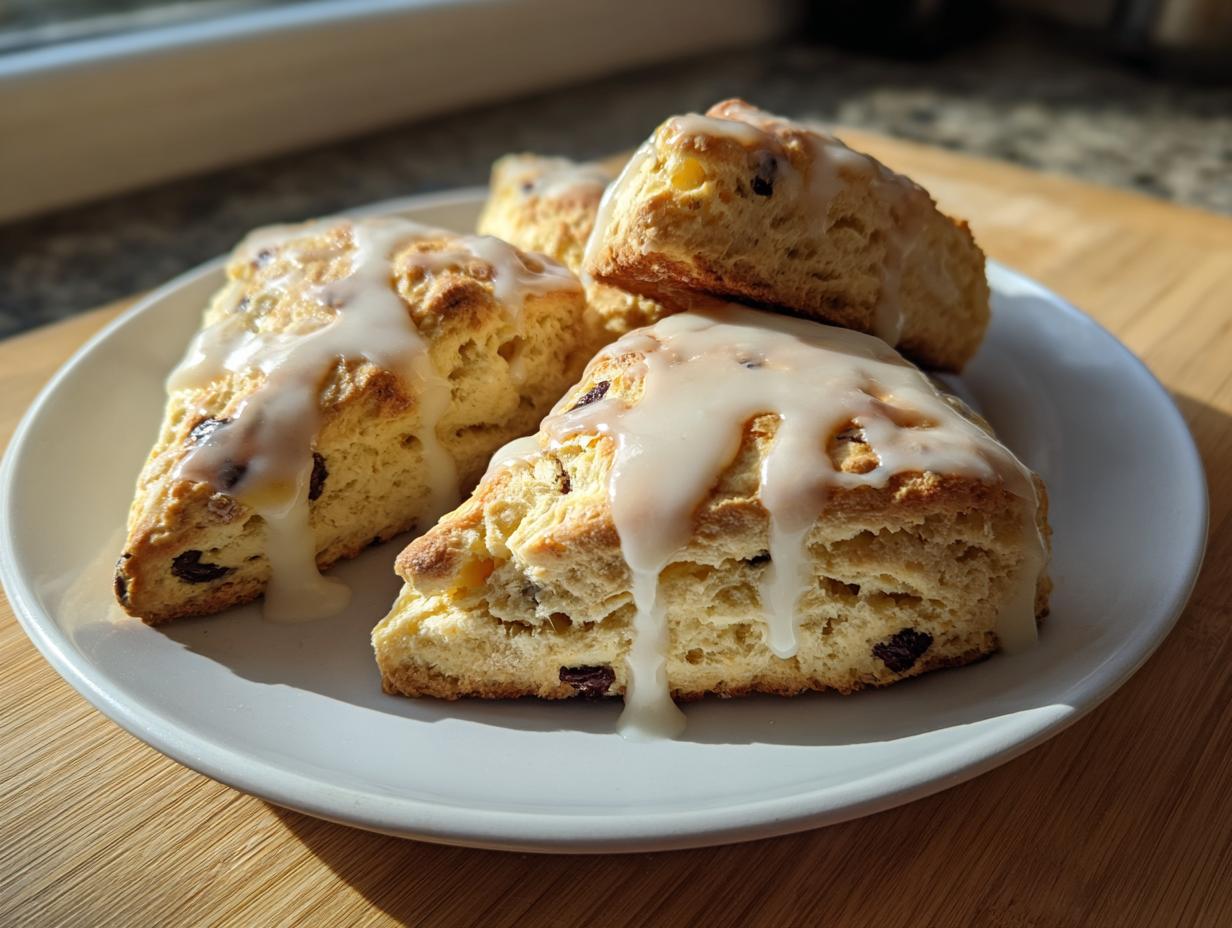
Oh, you know that feeling? Walking into your favorite little coffee shop and smelling that fresh, buttery pastry hitting the air? That’s pure comfort! I chased that perfectly flaky, tender texture for ages before realizing I didn’t need a bakery license to make amazing breakfast ideas right here. That’s why I’m so thrilled to share my recipe for chocolate chip scones. Seriously, these come together so fast—we’re talking under 40 minutes total—and ditch all the complicated tricks. For me, good food means less time fussing and more time connecting, and these easy scones deliver maximum cozy vibes with minimal effort. Trust me, once you try making these at home, you won’t go back!
- Why These Are The Best Chocolate Chip Scones You Will Make
- Ingredients Needed for Bakery-Style Chocolate Chip Scones
- How to Make Flaky Pastry Recipe Chocolate Chip Scones
- Tips for Success Making Homemade Bakery Scones
- Variations for Your Chocolate Chip Scones
- Serving Suggestions for Perfect Chocolate Chip Scones
- Storage and Reheating Instructions for Chocolate Chip Scones
- Frequently Asked Questions About Chocolate Chip Scones
- Nutrition Estimate for Chocolate Chip Scones
- Share Your Homemade Bakery Scones
Why These Are The Best Chocolate Chip Scones You Will Make
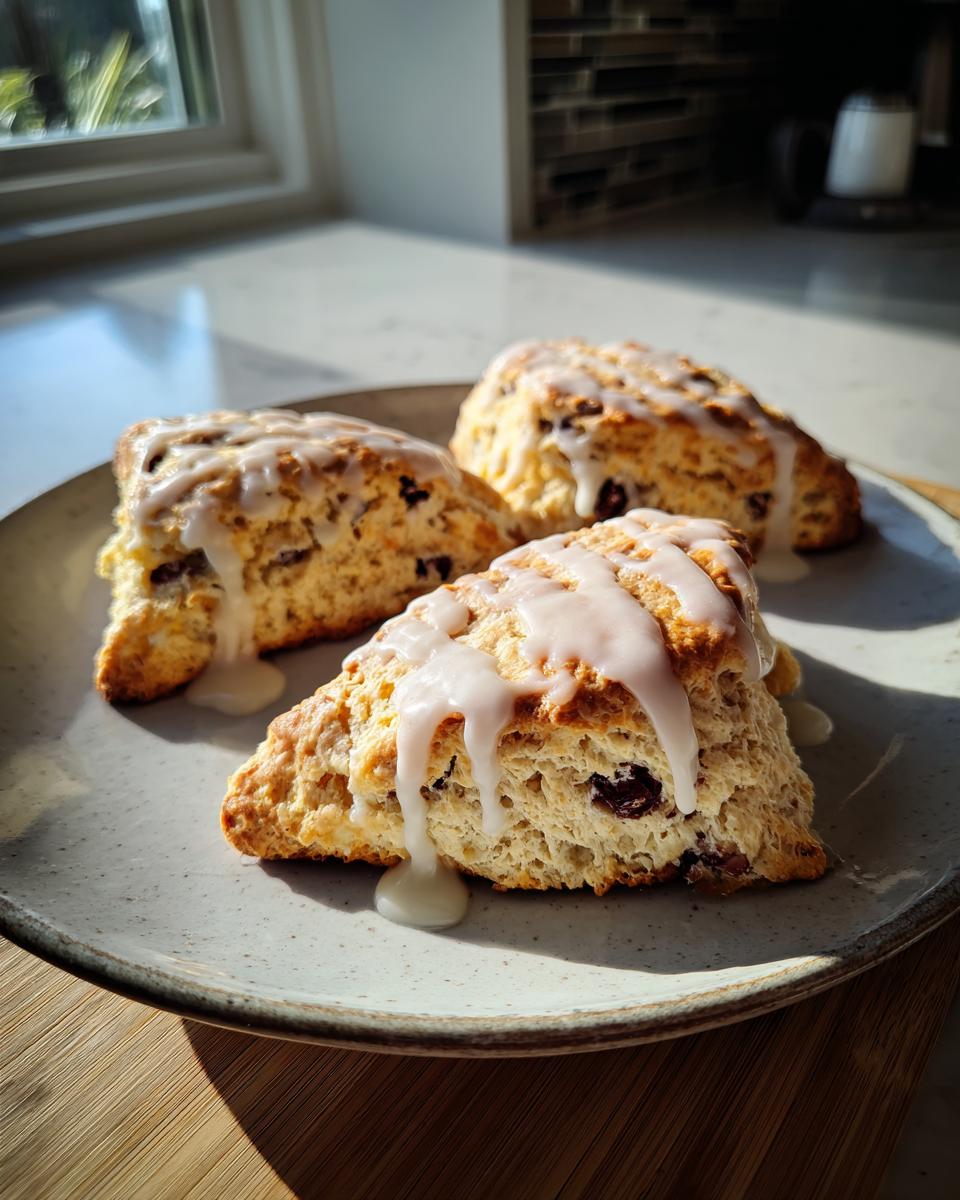
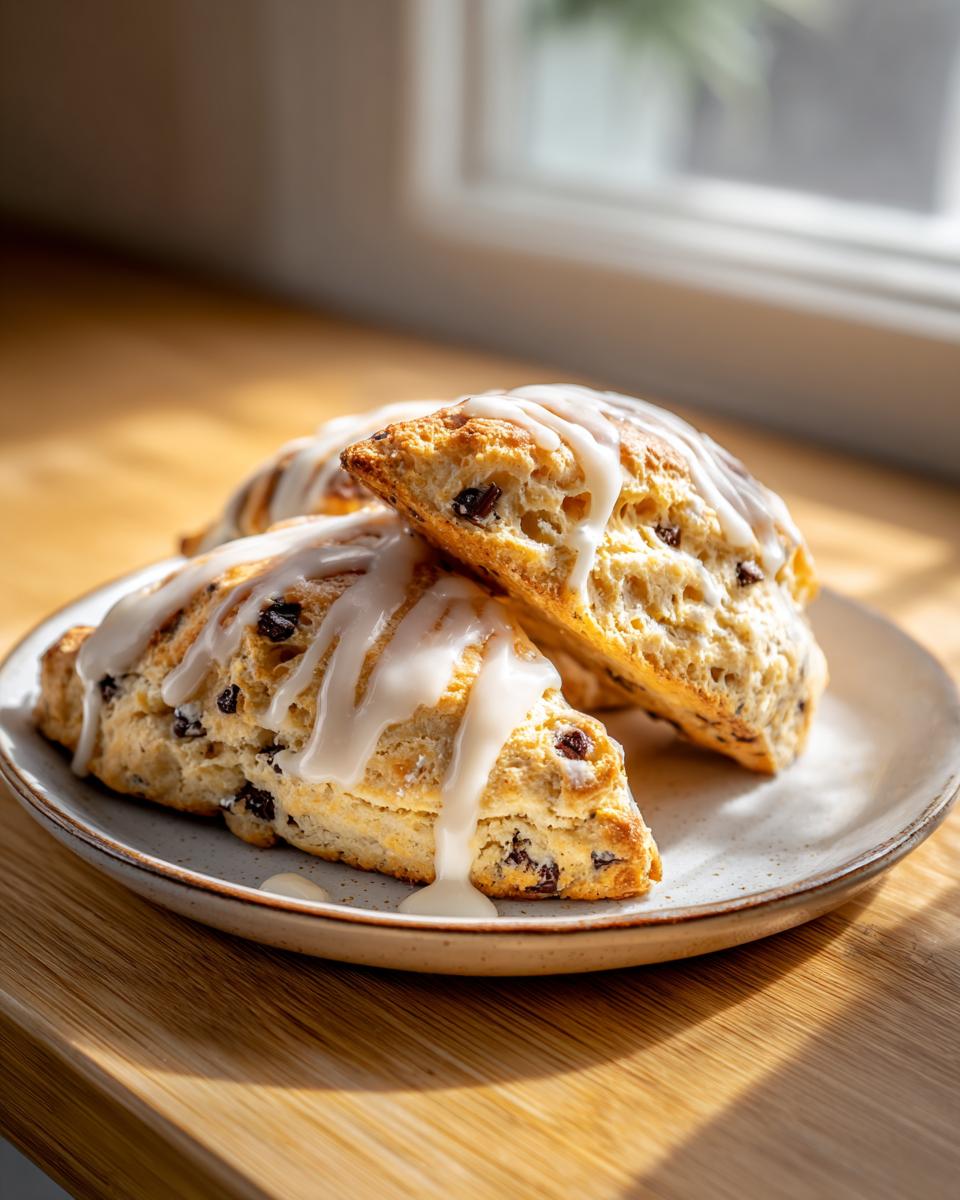
I know everyone claims their **Buttery Scones** recipe is the best, but I promise you, these are different. What sets these apart is that they nail that coveted bakery texture—think tall, flaky, and rich—without needing to laminate the dough for hours. We aren’t fooling around here; this is truly a foolproof Flaky Pastry Recipe adapted for your busy morning. I’ve tested this recipe side-by-side with store-bought versions, and honestly, the homemade ones win every single time. You get that fresh-from-the-oven taste without the wait!
- They look just like the picture: tall with beautiful, crisp edges.
- They are incredibly tender and melt right in your mouth.
- Perfect for serving warm with butter or a cup of coffee like other great bakery treats.

Quick Scone Recipe: Ready in Under 40 Minutes
This is perhaps the biggest selling point! We are talking about 15 minutes of prep and about 18 minutes of bake time. That whole process, from pulling out the mixing bowl to glazing them, clocks in around 33 minutes total. That makes these absolute champions for any kind of Easy Breakfast Baking when you need something special but don’t have a ton of time to spend.
Achieving Tender Chocolate Chip Treats Texture
The entire secret to that flaky pastry texture boils down to one thing: cold. Everything must be ice cold—the butter, the heavy cream, even your hands if your kitchen is warm! When the ice-cold butter hits that hot oven, it creates steam pockets, which is exactly what lifts the layers apart. Keep those ingredients cold, and you will always end up with those beautifully Tender Chocolate Chip Treats.
Ingredients Needed for Bakery-Style Chocolate Chip Scones
When we talk about making Homemade Bakery Scones that really hit the spot, the list of items is wonderfully simple, but the quality matters! We aren’t using a million things here; we’re focusing on making the core ingredients shine. I always measure everything out before I even turn the oven on. It’s part of my prep ritual because once we start cutting in that butter, things move fast, and you don’t want to be scrambling for the sugar shaker!
For the Chocolate Chip Scones
You need the basics for the dough, but remember: cold, cold, cold! These measurements are perfect for yielding 8 beautiful wedges.
- 2 1/4 cups all-purpose flour
- 1/2 cup granulated sugar
- 1 tablespoon baking powder
- 1/2 teaspoon salt
- 1/2 cup (1 stick) cold unsalted butter, cut into small pieces
- 1 cup semi-sweet chocolate chips
- 3/4 cup cold heavy cream or buttermilk (I keep mine in the fridge until the absolute last second!)
For the Egg Wash and Topping
This little step is what gets you those gorgeous deep tops we all look for in a classic scone. It gives such a beautiful, inviting finish!
- 1 large egg, lightly beaten
- 1 tablespoon milk or cream
- (Optional: A sprinkle of coarse turbinado sugar for crunch!)
For the Sweet Vanilla Glaze
While you can definitely skip this if you want a less sweet treat, I highly recommend it! The glaze brings in that extra level of ‘cafe’ feel, and it easily puts these into the category of lovely Scones with Glaze.
- 1/2 cup powdered sugar
- 1 tablespoon milk or cream
- 1/4 teaspoon vanilla extract
How to Make Flaky Pastry Recipe Chocolate Chip Scones
Now for the fun part—let’s mix up these gorgeous **chocolate chip scones**! Remember what I said about keeping things cold? That is your mantra for this entire section. If you follow these steps closely, you’ll have that flaky pastry recipe result we are aiming for, and honestly, it’s so simple once you see it done.
Preparation and Cutting in the Butter
First things first, crank that oven up to 400°F (200°C) and get your baking sheet lined with parchment paper. That parchment is your best friend, trust me! In a big bowl, whisk together all your dry stuff: flour, sugar, baking powder, and salt. Now, add in those cold butter cubes. This is where you earn your stripes! Use a pastry blender or just your fingertips to work that butter into the flour. You’re looking for coarse crumbs, not mush. Keep working it until you see those little pea-sized butter pieces scattered throughout. Those pieces are what create the lift!
Mixing the Dough and Shaping Your Chocolate Chip Scones
Once the butter is cut in, stir in all those lovely semi-sweet chocolate chips. Next, pour in the ice-cold heavy cream or buttermilk all at once. Grab a fork and mix until it just barely comes together. I mean it—stop mixing the second it stops looking like dusty flour! The dough should look shaggy, almost like it hasn’t decided to become a dough yet. That’s perfect! Turn it out onto a lightly floured spot. Gently pat it down—no tough kneading allowed! Pat it into a circle or rectangle about 3/4-inch thick. Then, take a knife and slice it into 8 even wedges. Place those wedges on your prepared sheet with space between them if you like them to spread a bit more.
Baking and Glazing Your Tender Chocolate Chip Treats
For that beautiful shine and rich color that screams ‘bakery,’ mix up the egg and milk wash and brush it gently over the tops of your wedge pieces. This helps them get perfectly golden brown scones! Pop them into the hot oven for about 15 to 18 minutes. They are done when they look lovely and cooked through. Let them cool just slightly. While they cool, whisk up the glaze ingredients until smooth. Then, drizzle that sweet vanilla glaze all over the tops. Seeing that glaze set on those warm **tender chocolate chip treats**? That’s the payoff!

Tips for Success Making Homemade Bakery Scones
When you’re aiming for that perfect texture in your **chocolate chip scones**, remember that baking is chemistry, but it’s easy chemistry! We already talked about keeping things cold, but let’s really nail down why that matters for creating a great Flaky Pastry Recipe at home. If you skip this part, you get dense little hockey pucks, and nobody wants that!
The Cold Rule: Why Temperature Matters
Seriously, this is non-negotiable for flaky pastry! If your butter melts before it gets into the oven, it just blends into the flour, making the whole thing heavy. We need those chunks! When the cold butter hits the heat, it instantly turns to steam, forcing the dough layers apart. That steam *is* the flakiness. If your heavy cream or buttermilk feels even slightly warm, pop it in the freezer for ten minutes before you add it!
Techniques for Taller Chocolate Chip Scones
If you want those impressive, tall bakery scones, you don’t need a fancy technique, just a little forethought. If you’re worried about them slumping, try stacking your cut wedges right next to each other on the baking sheet instead of spreading them out fully. They essentially bake into each other and support each other’s height. Or, before you pat the dough out the final time, try folding it gently in half, turning it 90 degrees, and patting it down again. That quick fold acts like a mini lamination and helps build those beautiful layers for your chocolate chip scones. Check out my tips for other flaky scone recipes for more layering ideas!
Variations for Your Chocolate Chip Scones
Okay, once you nail the basic formula for these amazing Buttery Scones, you’ve basically opened the door to endless possibilities! The base recipe is so fundamentally good—buttery, tender, and soft—that you can start fiddling with the mix-ins. This is where you can really make these your own, whether you want something zesty or just want to double down on the rich chocolate experience. Don’t be afraid to experiment a little bit here!
Swapping the Chocolate Type
We used semi-sweet chips because they give us that perfectly melty pool of chocolate without making the whole scone too sweet, you know? But if you’re feeling impulsive, go for it! Feel free to swap them out for dark chocolate chunks if you prefer a deeper, slightly bitter note. Or, if you’re making these for a real sugar celebration, try white chocolate chips—they bake up so creamy! You can even do a mix, like half semi-sweet and half milk, for a fun blend of flavors in one bite.
Adding Zest or Spice
If you want to elevate these beyond classic sweet breakfast ideas, let’s talk flavor boosters! A little brightness cuts through all that rich butter beautifully. I absolutely love adding the zest of one whole orange right into the dry ingredients when I make these. It smells incredible while they bake! Also, if you’re a spice fanatic like me, throw in just a tiny pinch—maybe 1/4 teaspoon—of ground cinnamon or nutmeg along with your baking powder. It warms up the chocolate flavor just enough to make you wonder what magic you just added!
Serving Suggestions for Perfect Chocolate Chip Scones
So, you’ve pulled off the **flaky pastry recipe**, they’re golden brown, and maybe they even have that lovely vanilla drizzle! Now what? These aren’t just quick little treats; these are main-stage brunch pastries material. They are wonderful on their own, of course, especially warmed up for about thirty seconds in the microwave. But part of the fun of baking comfort food is deciding what you’re going to serve alongside it!
If you’re setting up a big weekend spread, I always try to offer a few different textures. While these scones already have that buttery richness, a little something tangy really wakes up the palate. Think about serving them alongside a bowl of fresh yogurt or maybe some seasonal fruit salad. A little fresh raspberry or even thinly sliced oranges keep things bright!
And obviously, these are the ultimate coffee pairing treats. Seriously, grab your favorite mug. If you like a creamier topping than the standard glaze, try serving them with a tiny dish of high-quality clotted cream—which sounds fancy, but honestly, it’s just richer than whipped cream! For a cozy morning at home, a good smear of salted butter that just melts into the cuts of the scone is pure heaven. If you enjoyed these tips, maybe check out my recipe for creamy maple brown butter—it’s not a scone topping, I know, but it just hits that same rich, comforting spot!
Storage and Reheating Instructions for Chocolate Chip Scones
The hardest part about making these flaky **chocolate chip scones** is stopping yourself from eating them all the first day! But don’t worry, they store surprisingly well, even with that lovely vanilla glaze on top. I like to think of them as being great for meal prep, making future mornings much easier.
If you have any left over—and I mean *any*—you want to store them airtight. If they have the glaze on them, they are best kept at room temperature for up to two days max. Use a good container or a zip-top bag. If you are pushing three or four days, or if you live somewhere really humid during the summer, sometimes the extra moisture makes the glaze get sticky or weep a little bit. If that happens, don’t panic!
For longer keeps, say up to a month, you can actually freeze them! Just make sure they are completely cooled first. If you glazed them, I’d actually stick a little square of parchment paper between the scones before stacking them in a freezer-safe bag. It keeps that glaze from sticking totally shut.
When you are ready to enjoy one of those frozen treats, they reheat like a dream. Pop the scone (glazed or unglazed) on a microwave-safe plate and give it about 10 to 15 seconds. That little burst of heat brings back the buttery softness inside and slightly melts the chocolate chips again. Pure magic! If you’re reheating a few at once, the oven is better. Wrap them loosely in foil and warm them at 300°F (150°C) for about 5 to 8 minutes. That gets them piping hot and returns a little bit of that fresh-baked crispness to the outside. For more amazing tips on keeping your baked goods perfect, you can definitely check out this site by Handle the Heat!
Frequently Asked Questions About Chocolate Chip Scones
When you’re ready to bake something new, I totally get having a few questions pop up before you even start! Don’t worry; I’ve tried to answer the things I always wonder about when I’m tackling a new **simple scone recipe**. It’s all about building confidence so every batch turns out like those perfect **copycat cafe scones**! Don’t forget to check out my tips for making sure sugar cookie icing dries hard if you decide to glaze these, though the vanilla glaze here stays softer!
Can I substitute heavy cream with buttermilk in this chocolate chip scones recipe?
Oh, yes, absolutely! In fact, many people prefer using buttermilk in their **Buttermilk Scones Recipe**. Heavy cream gives you a really rich, tender crumb because it’s high in fat, which is great. Buttermilk, however, has that wonderful acidity. When it reacts with the baking powder in the recipe, it gives you a little extra lift, making the scones rise taller, and it adds a tiny, subtle tang that cuts through the sweetness of the chocolate chips. It’s a fantastic swap, so feel free to use whichever you have handy!
What is the secret to making these scones tall and flaky?
If you want those gorgeous, skyscraper-tall, layered results that look amazing in photos and taste even better, the secret is 100% temperature control. Seriously, this answers the biggest question people have about **how to make scones**! You must keep your butter and your cream ice cold—I mean frozen or near-frozen cold. If you cut in the butter and it starts looking soft or oily, stop, put the bowl in the freezer for five minutes, then come back and finish cutting it in. Those cold pockets of fat turn to steam when they bake, and that steam pushes the dough layers apart, giving you that signature flakiness.
Are these scones good for ‘Simple Baking for Beginners’?
Yes, I think so! They are definitely one of the best **sweet breakfast ideas** for beginners because they come together so fast once you learn the rhythm. The absolute key for beginners is Rule Number One: Do Not Overmix. As soon as you add the liquid, mix just until no dry streaks of flour remain. If you keep kneading or stirring past that point, you’re developing the gluten, and that’s what turns a beautiful, tender scone into a tough biscuit. Keep it light, keep it quick, and you’ll have those perfect **golden brown scones** on your first try!
Nutrition Estimate for Chocolate Chip Scones
I always tell folks that baking is a joy, not a science experiment where you have to count every single calorie, but I also believe in being transparent! Since we all use slightly different brands of butter or sugar, these numbers are my best estimate based on the ingredients listed above. Think of this as a helpful guide, not gospel!
These **chocolate chip scones** are definitely an indulgent treat, not an everyday low-calorie item, but that’s okay, right? We save the simple recipes for the weekdays, and this bakery-style indulgence is for the weekend!
- Serving Size: 1 scone
- Calories: About 350
- Fat: 19g (A good chunk of that is that wonderful cold butter, so you know it had to be good!)
- Saturated Fat: 11g
- Carbohydrates: 42g
- Sugar: 18g (The chocolate chips and the glaze add up!)
- Protein: 5g
It’s important to remember that these figures are based on the recipe using standard ingredients and yield of 8 scones. If you make your wedges bigger or smother them in extra glaze, those totals are going to change! But hey, if you’re making one of these amazing tender chocolate chip treats, you deserve to enjoy it fully, wrappers and all!
Share Your Homemade Bakery Scones
Now that you’ve mastered the art of making the perfect, flaky **Homemade Bakery Scones**, I really, really want to see them! Baking is so much more fun when you can share the results, even if it’s just showing off a beautiful photo online. I live vicariously through all of your creations, honestly!
If you give this recipe a try, please take a picture and tag me over on social media! Let me know how your glaze turned out, or if you tried adding that orange zest I mentioned. It helps me tremendously when you leave a little star rating right here on the page, too. Those ratings matter so much to me and help other busy folks like us feel confident trying out a new recipe. Happy baking, everyone, and enjoy those buttery, chocolatey masterpieces!
PrintBakery-Style Chocolate Chip Scones with Vanilla Glaze

Make tender, buttery chocolate chip scones that taste like they came from a favorite cafe. This easy recipe delivers flaky pastry loaded with chocolate chips and topped with a sweet vanilla glaze in under 40 minutes.
- Prep Time: 15 min
- Cook Time: 18 min
- Total Time: 33 min
- Yield: 8 servings 1x
- Category: Breakfast
- Method: Baking
- Cuisine: American
- Diet: Vegetarian
Ingredients
- 2 1/4 cups all-purpose flour
- 1/2 cup granulated sugar
- 1 tablespoon baking powder
- 1/2 teaspoon salt
- 1/2 cup (1 stick) cold unsalted butter, cut into small pieces
- 1 cup semi-sweet chocolate chips
- 3/4 cup cold heavy cream or buttermilk
- 1 large egg, lightly beaten (for egg wash)
- 1 tablespoon milk or cream (for egg wash)
- 1/2 cup powdered sugar (for glaze)
- 1 tablespoon milk or cream (for glaze)
- 1/4 teaspoon vanilla extract (for glaze)
Instructions
- Preheat your oven to 400°F (200°C). Line a baking sheet with parchment paper.
- In a large bowl, whisk together the flour, granulated sugar, baking powder, and salt.
- Add the cold butter pieces to the dry ingredients. Use a pastry blender or your fingertips to cut the butter into the flour until the mixture resembles coarse crumbs with some pea-sized pieces of butter remaining.
- Stir in the chocolate chips until they are evenly distributed.
- Pour in the cold heavy cream or buttermilk. Use a fork to mix until the dough just comes together. Do not overmix; the dough will look shaggy.
- Turn the dough out onto a lightly floured surface. Gently knead it 3 or 4 times until it holds together. Pat the dough into a 3/4-inch thick circle or rectangle.
- Cut the dough into 8 equal wedges (like a pizza). Place the wedges onto the prepared baking sheet, leaving about 1 inch between them.
- In a small bowl, whisk together the egg and 1 tablespoon of milk or cream. Brush the tops of the scones lightly with this egg wash. Sprinkle the tops with a little extra coarse sugar, if desired, for a slight crunch.
- Bake for 15 to 18 minutes, or until the scones are golden brown on top and cooked through.
- While the scones cool slightly, prepare the glaze. Whisk together the powdered sugar, 1 tablespoon of milk or cream, and vanilla extract until smooth. Add more liquid, a drop at a time, if the glaze is too thick.
- Drizzle the vanilla glaze over the warm or cooled scones before serving.
Notes
- Keep your butter and cream very cold. Cold ingredients create steam during baking, which results in flaky pastry.
- For taller scones, you can gently stack the wedges close together before baking, or fold the dough several times before cutting.
- These scones are excellent for easy breakfast baking and pair well with coffee or tea.
Nutrition
- Serving Size: 1 scone
- Calories: 350
- Sugar: 18g
- Sodium: 250mg
- Fat: 19g
- Saturated Fat: 11g
- Unsaturated Fat: 8g
- Trans Fat: 0g
- Carbohydrates: 42g
- Fiber: 1g
- Protein: 5g
- Cholesterol: 55mg