
Oh, my heart just leaps when I think about those perfect, buttery, salty snacks you can only get when you bake them yourself! Back in my little Ohio kitchen, connecting over simple meals was everything, and that spirit carries straight through to my recipes today. If you’re dreaming of cracker-like perfection this minute, you’re in the absolute right place. Forget those sad, pale store-bought versions—we are making the ultimate crispy Southern Cheddar cheese straws today, and I promise you, they come together so fast, you’ll wonder why you waited!
I’ve streamlined this recipe so you can get that amazing, savory crunch on your table in easily under an hour total. It’s all about getting the technique right for big flavor without the fuss. We’re talking about the kind of party appetizers that disappear before you even set them down! Trust me, these will become your new go-to for any gathering or just a quiet, cozy evening. I love pairing them with something simple, like quick homemade snacks.
- Why These Are the Best Crispy Southern Cheddar Cheese Straws
- Essential Ingredients for Perfect Cheese Straws
- Step-by-Step Instructions for Homemade Cheese Straws
- Tips for Success Making the Best Cheese Straws
- Variations on Classic Cheese Straws: Herbs and Spice
- Serving Suggestions for Your Savory Snacks
- Storage and Reheating Instructions for Cheese Straws
- Frequently Asked Questions About Making Cheese Straws
- Nutritional Estimates for These Easy Cheese Snacks
Why These Are the Best Crispy Southern Cheddar Cheese Straws
I know, everyone claims their recipe is the ‘best,’ right? But honestly, these homemade cheese straws truly stand out, and it all comes down to texture and flavor balance. When I was working on simplifying my family’s older recipes, I focused on nailing that shatteringly crisp exterior that Southern recipes are famous for. That crispiness doesn’t happen by accident; it’s pure butter science!
I think you’ll really love how dependable these turn out:
- They have a deep, nutty flavor from using real, sharp cheddar—none of that bland stuff here.
- They bake up incredibly light and buttery, feeling fancy but taking hardly any time.
- They are perfect for putting out before dinner or tucking into your next party spread!
Achieving That Signature Crispiness in Your Cheese Straws
The secret to that wonderful, addictive crunch is keeping things cold! When you cut the cold butter into the flour early on, you create little pockets. As they bake, those pockets turn into airy layers, giving you truly fantastic crispy baked goods that snap instead of bend. Rolling them thin, about 1/8 of an inch, is non-negotiable for achieving that snap. If they’re too thick, they turn into soft cheese biscuits, and we just can’t have that!
Perfect Party Appetizers and Game Day Food
These are my go-to holiday finger foods because they hold up well on a platter for hours. Plus, since they are small and sturdy, guests can easily grab one while balancing a drink. They look wonderfully rustic and homemade, which always gets compliments over anything store-bought. If you’re looking for fantastic entertaining recipes, get these on your list now!
Essential Ingredients for Perfect Cheese Straws
Okay, listen up, because this is where we lock in that classic, savory flavor. I keep the ingredient list short and sweet here—we want flavor, not filler! You’ll notice I stress ‘sharp’ cheddar and I mean it. Don’t skimp here; the aging process in that cheese gives us the flavor bomb we need in these buttery cheese bites.
The most crucial thing you have to do is grate your own cheese. Pre-shredded cheese has stuff coated on it to stop it from clumping in the bag, but that stuff also stops your cheese straws from getting deep golden and crispy! Trust me on this; freshly grated sharp cheddar is key to this winning cheddar cheese recipe.
Here is what you need gathered on your counter:
- 2 cups all-purpose flour
- 1 teaspoon salt
- 1/2 teaspoon cayenne pepper (if you want that nice little spicy kick!)
- 1/4 teaspoon black pepper
- 1 cup (that’s two full sticks!) unsalted butter, cut into small pieces and kept very cold
- 2 cups freshly grated sharp cheddar cheese
- 1/4 cup cold water
- 1 large egg, beaten (we use this for a little wash later)
- 1 teaspoon paprika (just for sprinkling on top, optional color!)
Step-by-Step Instructions for Homemade Cheese Straws
Alright, let’s get these crackers mixed! Honestly, the process for these cheese straws is so straightforward—it’s just about layering the ingredients correctly. We start building that beautiful, flaky structure right away. Remember, we aren’t looking for a smooth cookie dough; we are aiming for something crumbly that just holds together when squeezed. Keep your ingredients cold, and you are halfway to success!
Once everything is mixed, we absolutely have to chill it. Don’t skip that step! Make sure you have your oven set to 400 degrees Fahrenheit well before you are ready to roll, too. We want things hot and fast for that supreme crunch.
Mixing the Dough: The Key to Savory Shortbread Texture
First things first, we need to get the dry things mixed—that’s your flour, salt, black pepper, and if you’re feeling spirited, that half-teaspoon of cayenne! Whisk them up in a big bowl. Next comes the work we can do with our hands (or a pastry blender, if you prefer to keep your fingers clean!). Work that cold butter into the flour until it looks exactly like coarse sand or maybe like little frozen peas stuck in the flour. This is what gives us that tender, savory shortbread texture.
Now, stir in that beautiful mountain of freshly grated cheddar. You want it evenly speckled throughout the dough mixture. Finally, we drizzle in the cold water, one tablespoon at a time. Stop as soon as the dough clumps together when you press it. Seriously, don’t add too much water, or you’ll end up with tough cheese snacks instead of crispy ones!
Chilling and Shaping Your Cheese Straws
This is my favorite part because you can already smell how good these are going to be! Take the dough, divide it into two equal halves. Flatten each half into a disk shape—this just helps it chill evenly—wrap it up tight in plastic wrap, and tuck it into the fridge for at least 30 minutes. This rest period is vital; it hydrates the flour and firms up that butter again.
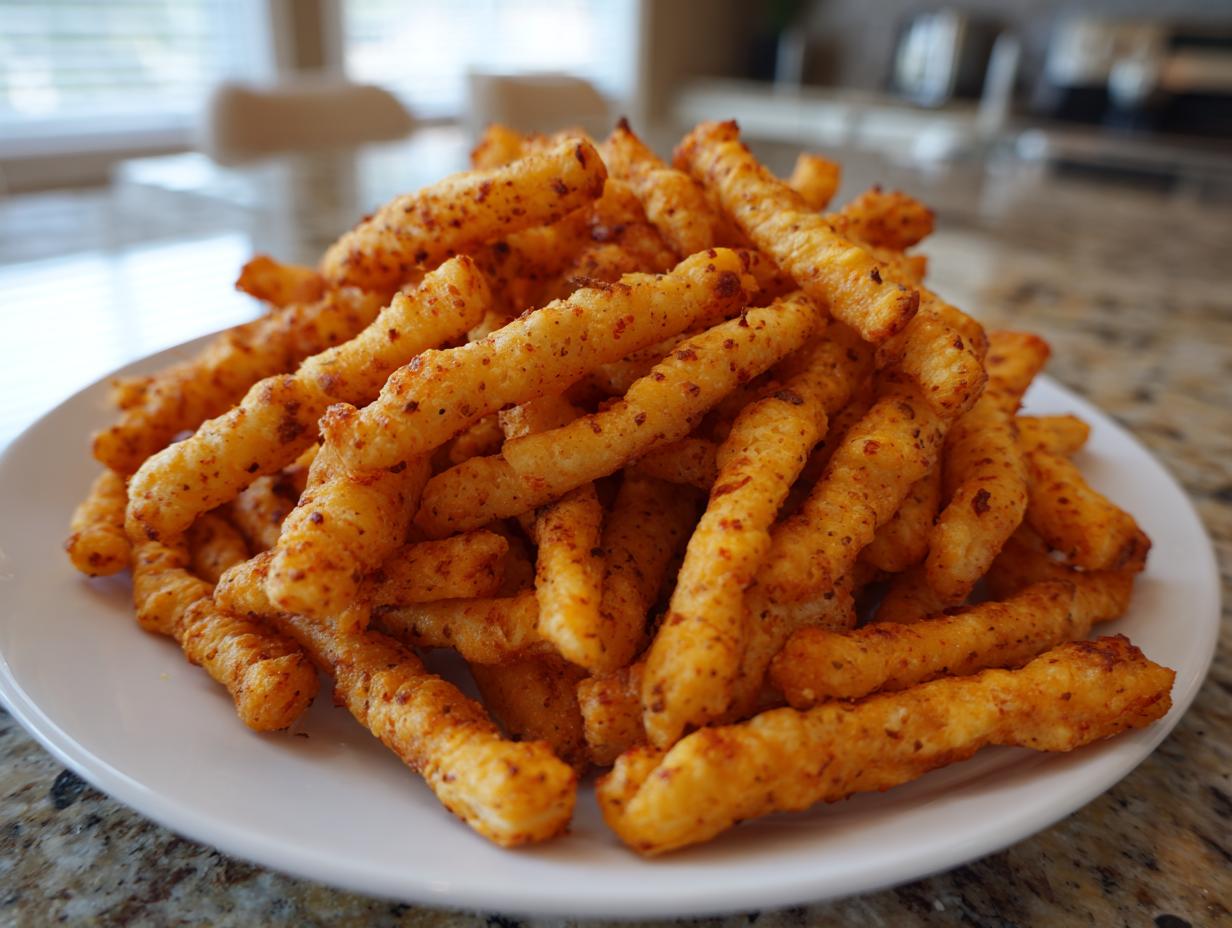
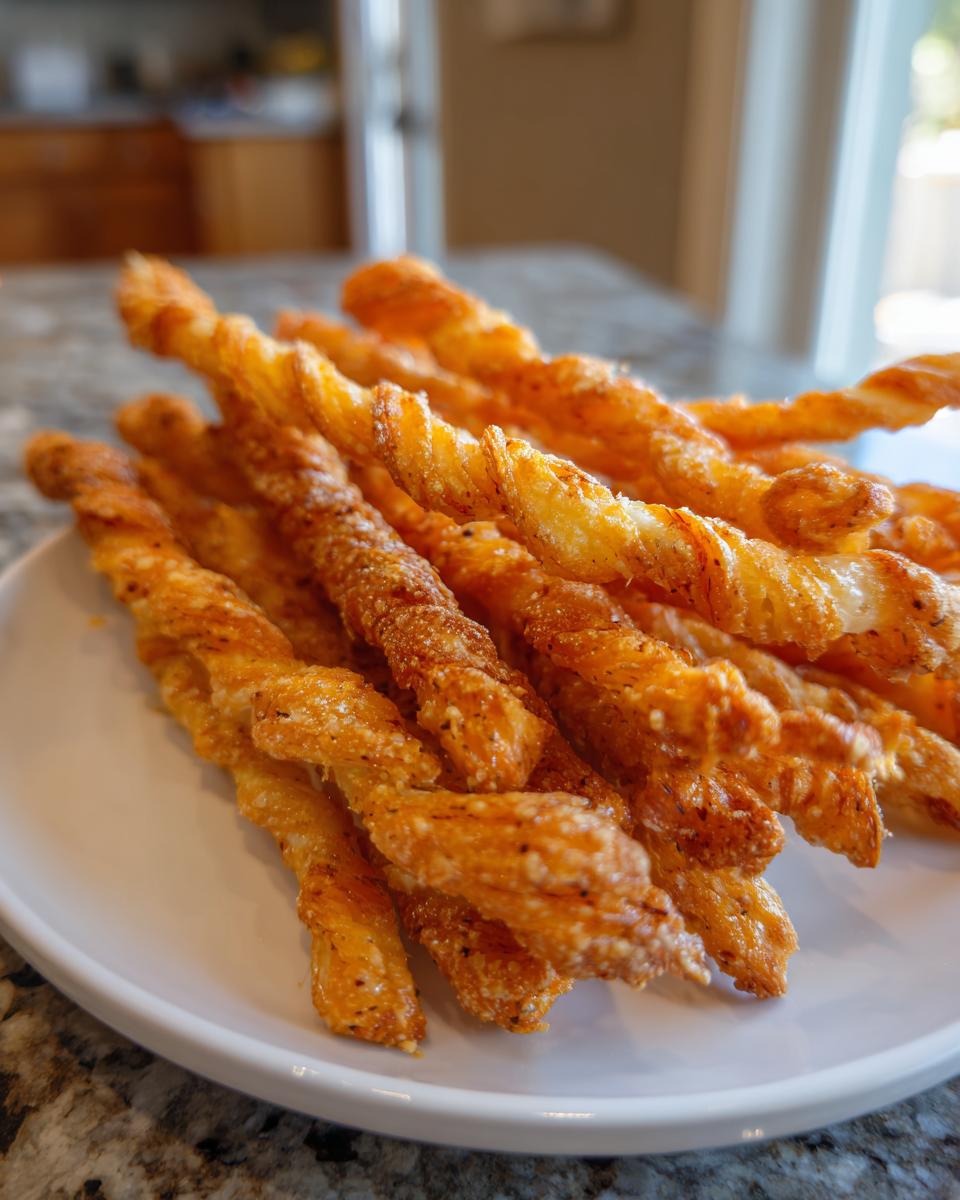
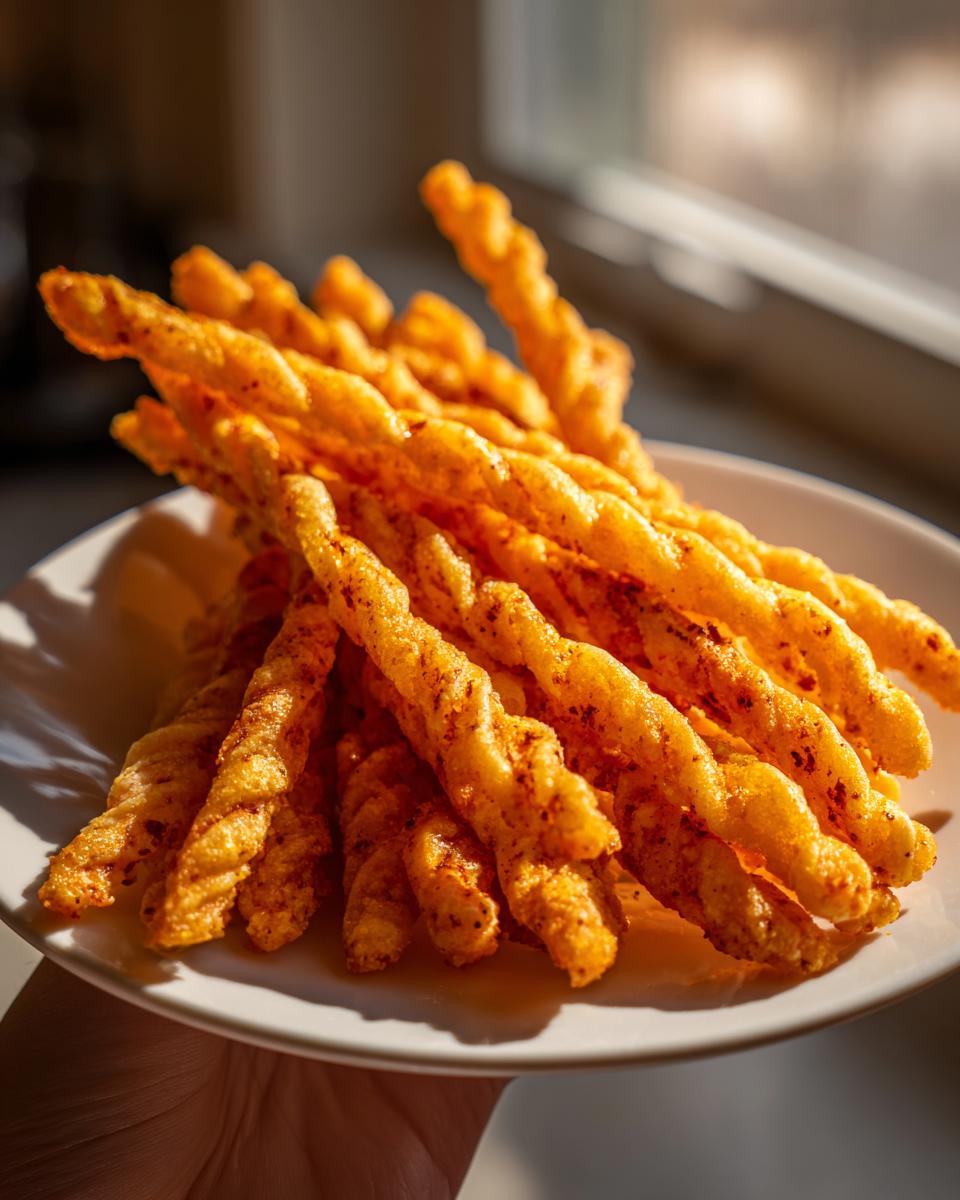
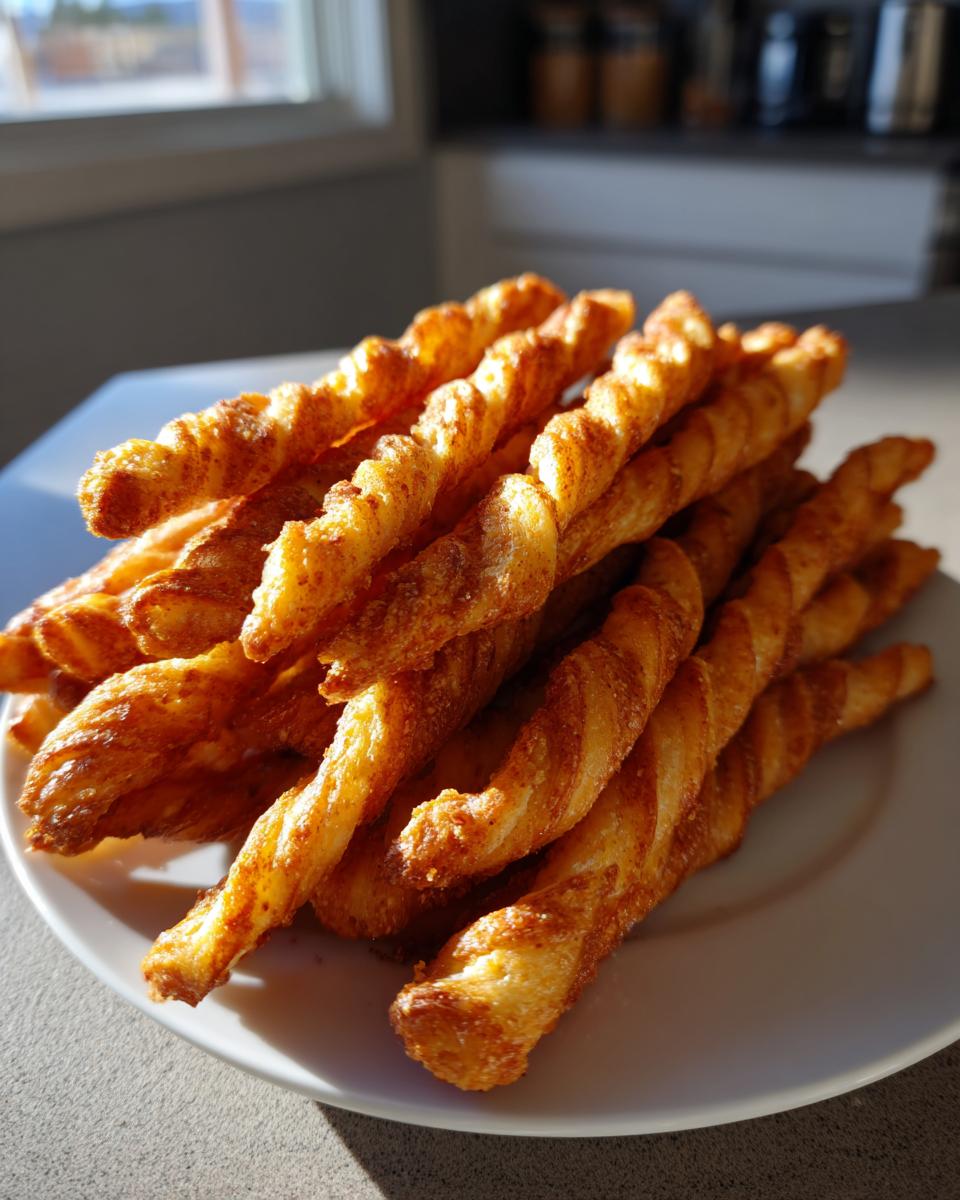
When you take the dough out, line your baking sheets with parchment paper. On a lightly floured surface, roll the dough out until it’s really thin—I aim for about 1/8-inch thickness. Then, grab a knife or a pizza cutter and slice those into strips that are roughly half an inch wide and four or five inches long. If you’re feeling fancy, give them a little twist as you lay them onto the sheet. They spread a little, so leave a bit of breathing room between them.
Baking for Maximum Crunch
Get those cheesy strips into that preheated 400°F oven! You are looking for them to bake for about 10 to 14 minutes. Now, this is important: watch them like a hawk after the 10-minute mark! Because we rolled them thin, they can go from golden brown to burnt very quickly. You want them deeply golden across the top, and when you tap one with a fork, it should sound hollow.
As soon as they look perfect, slide them out! Transfer the hot cheese straws immediately onto a wire cooling rack. They will still feel a little soft when they first come out, but trust me, they firm up and get wonderfully crisp as they cool down completely. Don’t skip the cooling rack—it lets air circulate underneath so they don’t steam and get soggy!
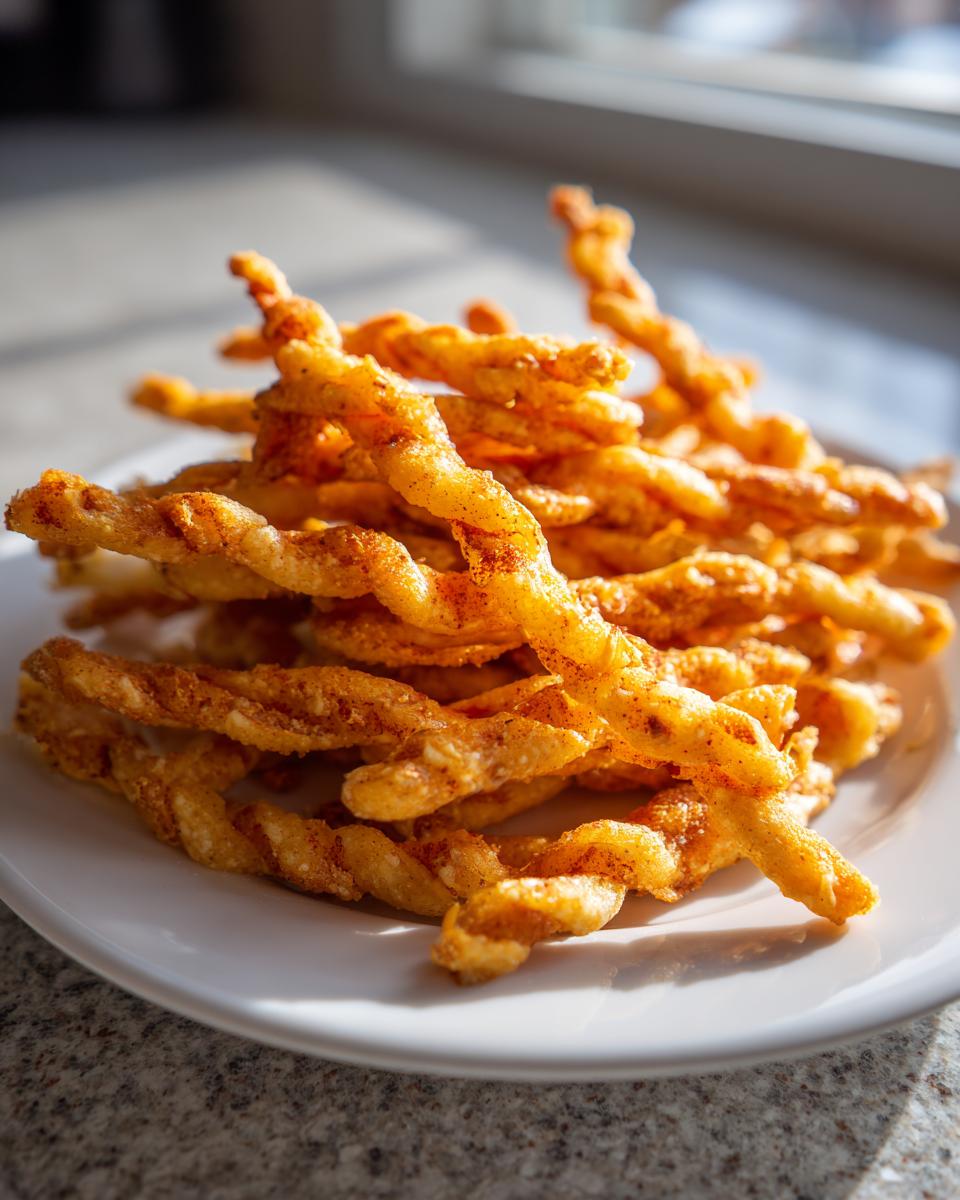
When you are done baking, don’t forget to brush the tops lightly with that beaten egg and sprinkle them with paprika if you want that pretty color! I sometimes look at my finished batch and think, wow, look at these amazing homemade crackers!
Tips for Success Making the Best Cheese Straws
After making hundreds of batches of these—seriously, people snatch these up at every gathering—I’ve learned a few little tricks that elevate them from good to unbelievably addictive. Remember, baking is chemistry, even when it comes to savory snacks! If you follow the core rules, you’ll have perfect, shatteringly crisp cheese straws every single time.
My biggest teaching moments always circle back to the cheese. If you want that deep, authentic flavor that makes people ask for the recipe, you must use good, sharp cheddar and grate it yourself. Pre-shredded cheese is a nemesis to crispiness! Also, treat this like a savory shortbread recipe; you want to handle the dough as little as possible once the ingredients are just combined. Overworking it develops gluten, and suddenly your perfect little snack turns into a tough little chew—and we are aiming for a buttery snap!
Follow these quick pointers for consistently great results:
- Keep It Cold: Your butter needs to be fridge-cold, not room-temp soft, when you cut it in. This is the secret weapon for light, flaky layers that crisp up beautifully.
- Don’t Under-Spice: Don’t skip the salt or pepper! This is what keeps them from tasting like plain crackers. If you’re making a batch just for yourself (a true pleasure!), try adding a few shakes of hot sauce or smoked paprika for an extra layer of flavor in your cheddar cheese recipe.
- Test Roll: If you have doubts about your thickness, roll out one scrap piece first. Bake it for five minutes and see how it snaps when cool. If it’s still soft, roll the rest thinner. It’s better to be thin than thick when aiming for these amazing buttery cheese bites.
For even more classic Southern wisdom, I always find myself glancing at recipes like the fantastic one found over at House of Nash Eats. But honestly, sticking to the cold butter rule is the biggest game-changer for crispy results! If you need a simple, rich flavor boost for other spreads, check out my recipe for easy homemade garlic butter.
Variations on Classic Cheese Straws: Herbs and Spice
Now, while the sharp cheddar version is my foundation—the perfect classic—sometimes you need to mix things up for holiday spreads or just to keep the family guessing! You absolutely can play around with these cheese straws; they are honestly so forgiving. The dough sets up beautifully whether you keep it purely cheesy or introduce some earthy herbs or a touch more heat. This recipe is just begging to be customized!
If you’re making a batch for a dinner party, maybe you want something a little more refined. Or perhaps you’re feeding a crowd that loves a good kick! Don’t be afraid to experiment once you’ve mastered the basic technique. For me, the Parmesan swap is an absolute winner when I’m serving richer dips or need a slightly saltier, nuttier bite.
Parmesan Straws: A Salty Swap
If you want to move away from pure cheddar, swapping in some Parmesan is the easiest thing you can do. You don’t need to change any other measurements! Just take out about half of your sharp cheddar—so if you’re using the full recipe, pull out one cup of cheddar—and replace it with an equal amount of freshly grated Parmesan cheese. That nutty flavor of good Parmesan, when baked crispy, is just divine!
These Parmesan straws are fantastic if you’re looking for something that pairs really well with wine, too. They feel a little more elegant! If you love that Parmesan flavor, you might really enjoy this garlic parmesan roasted broccoli recipe as a side sometime, they share a similar savory richness.
Adding Herbs for an Earthy Twist
My mom always used to toss a little dried rosemary into anything savory, and it works like a charm here. If you want to introduce some fresh herbs, remember that they are potent! I suggest adding about one teaspoon of dried rosemary or dried thyme right into the dry ingredients when you mix the flour.
If you want to see how beautiful the herb variation can look, you should check out the inspiration I found for rosemary Parmesan cheese straws—it gives you a great visual idea! Remember, fresh herbs release moisture, so dried is usually safer if you’re sticking close to my original instructions, unless you want them slightly softer. A little kick of cayenne, which we put in the primary recipe, always helps balance out fresh herbs really nicely!
Serving Suggestions for Your Savory Snacks
Now that you have a batch of the most irresistible, crispy cheese straws, the real fun begins: what do we eat them with? These aren’t just good; they are the perfect accompaniment to elevate almost any casual spread! Think of them as your upgraded, homemade crackers.
For a simple evening treat, I absolutely love them alongside a glass of chilled white wine—they are tailor-made for wine pairing snacks! If you’re serving them as an appetizer before dinner, try dunking them into a creamy soup. They hold up beautifully to dipping. They are seriously amazing with my creamy potato leek soup. Every bite is pure salty, cheesy joy!
Storage and Reheating Instructions for Cheese Straws
The biggest challenge with homemade savory snacks like these is keeping them crispy once they cool down. Honestly, they are *so* good fresh from the oven that you might be tempted to eat them all right away. But if you somehow manage to save any of your amazing cheese straws, storage is super important for maintaining that perfect crunch we worked so hard for!
You absolutely must let them cool down completely—and I mean *completely*—before you even think about putting them into a container. If there’s any residual heat trapped inside, that moisture will turn your crispy straws soft in no time. It breaks my heart just thinking about it!
For the best results, plan on storing them in a container that keeps air out. An airtight container is your best friend here, and I prefer glass containers with tight-sealing lids any day. If you don’t have one, a heavy-duty zip-top plastic bag will do the trick, just try to squeeze as much air out as possible before sealing.
If you’ve stored them properly in an airtight spot at room temperature, they should stay wonderfully crisp for about five to seven days. I’ve heard some people have success freezing them, but I personally stick to room temp since they are such a simple bake. If you find they’ve lost their snap after a few days, don’t worry! You can revive them easily.
Just give them a quick reheat! Pop them back onto a baking sheet—no need to add any extra fat or anything—and place them in a 300°F oven for just 4 to 6 minutes. When you pull them out, let them cool for just a minute or two on the tray. That little blast of lower heat dries out any absorbed moisture, bringing back that fantastic crispiness. It’s like magic for resurrecting old homemade crackers. You can read more about keeping Southern classics fresh over on Serious Eats if you want a deeper dive into preservation techniques!
Frequently Asked Questions About Making Cheese Straws
I notice folks always have a few pressing questions when they first try making their own cheese straws—and rightly so! It’s about getting that perfect, savory snap every single time. Having the answers makes troubleshooting easy so you can get back to enjoying these fantastic party appetizers before everyone else does!
Can I really not use pre-shredded cheese in this recipe?
Oh, friend, please don’t! This is probably the most important piece of advice I can give you when aiming for truly crispy results. Pre-shredded cheese is coated in starches—things like potato starch or cellulose—to stop it from clumping in the bag. While that’s fine for a quick sprinkle on a salad, those starches interfere with the dough binding and moisture release needed for that amazing crunch in your homemade crackers. Always grab a block of sharp cheddar and grate it yourself; it makes a world of difference!
What is the absolute best cheese to use for homemade cheese straws?
For that authentic, bold flavor that kicks off the Southern classic, you need sharp cheddar. The sharper it is, the more flavor you pack into every bite of these buttery cheese bites! If you want to try a variation, using a high-quality two-year-aged white cheddar gives a slightly different, less orange color, but still packs the necessary flavor punch. If you’re after a different flavor profile altogether, try mixing half cheddar with half Gruyère—it melts beautifully but keeps the savory edge!
How long do these easy cheese snacks stay fresh and crispy?
If stored correctly—and I mean truly airtight at room temperature—they should stay wonderfully crisp for about five to seven days. That’s why I suggested the cooling rack and the tight seal earlier! They are certainly best within the first 48 hours, but if you’ve made a huge batch for the holidays, they hold up quite well. If you find your easy cheese snacks have softened a bit by day six, just follow my reheat trick in a low oven (about 300°F for 5 minutes) to bring that crispness right back!
Can I make these spicy cheese straws ahead of time for a party?
Yes, you absolutely can prepare them ahead of time! Instead of baking them, you can mix the dough, shape the strips, lay them out on the baking sheets separated by parchment paper, and then cover the whole setup tightly with plastic wrap. Keep them in the refrigerator for up to two days before baking. When guests arrive, just pop the chilled trays straight into the 400°F oven. They might need an extra minute or two to bake since they are starting cold, but they are the perfect quick appetizers because the prep work is already done!
If you run into any trouble or just want to share how much your family loved them, please feel free to reach out to me via my contact page!
Nutritional Estimates for These Easy Cheese Snacks
Now, I want to be super clear about this part: Since these are truly homemade and you might be using a slightly sharper cheddar or maybe adding a little extra spice than my base recipe calls for, these numbers are just an estimate. Think of these as a guideline for your easy cheese snacks! These numbers are calculated based on a standard serving size of three straws, using the exact measurements listed in the recipe upfront.
I always encourage folks to focus more on the joy of making these classic savory snacks than stressing over every micro-nutrient, but it’s nice to have a general idea, especially when serving them during the holidays!
Here’s the breakdown based on our ingredient list:
- Serving Size: 3 straws (about 18 grams)
- Calories: Approximately 110 (That’s not bad for such a flavorful bite!)
- Fat: About 8g total fat
- Saturated Fat: Around 5g (That’s the butter and cheese talking!)
- Carbohydrates: Approximately 6g
- Protein: Around 4g
- Sodium: Right around 180mg
- Sugar: Very low, about 0.2g (They are savory, remember?)
See? Not too bad for a delicious treat! These cheese straws are essentially a highly satisfying savory shortbread. If you are watching your sodium, remember that using unsalted butter and being mindful of how much extra salt you add when topping them can make a difference. Enjoy every buttery, cheesy bite!
PrintThe Ultimate Crispy Southern Cheddar Cheese Straws (Easy Recipe)

Make the best homemade cheese straws with this simple recipe. These buttery, savory snacks use sharp cheddar and bake up perfectly crispy, making them ideal party appetizers or game day food.
- Prep Time: 20 min
- Cook Time: 14 min
- Total Time: 34 min
- Yield: About 4 dozen 1x
- Category: Appetizer
- Method: Baking
- Cuisine: American
- Diet: Vegetarian
Ingredients
- 2 cups all-purpose flour
- 1 teaspoon salt
- 1/2 teaspoon cayenne pepper (optional, for a spicy kick)
- 1/4 teaspoon black pepper
- 1 cup (2 sticks) cold unsalted butter, cut into small pieces
- 2 cups freshly grated sharp cheddar cheese
- 1/4 cup cold water
- 1 large egg, beaten (for egg wash)
- 1 teaspoon paprika (optional, for topping)
Instructions
- In a large bowl, whisk together the flour, salt, cayenne pepper, and black pepper.
- Cut the cold butter into the flour mixture using a pastry blender or your fingertips until the mixture resembles coarse crumbs.
- Stir in the grated sharp cheddar cheese until evenly distributed.
- Add the cold water one tablespoon at a time, mixing until the dough just comes together. Do not overmix.
- Divide the dough in half, shape each half into a flat disk, wrap in plastic wrap, and chill in the refrigerator for at least 30 minutes.
- Preheat your oven to 400 degrees Fahrenheit (200 degrees Celsius). Line two baking sheets with parchment paper.
- On a lightly floured surface, roll out one disk of dough to about 1/8-inch thickness.
- Cut the dough into strips about 1/2-inch wide and 4 to 5 inches long. You can twist the strips slightly for a classic look.
- Place the strips on the prepared baking sheets, leaving a small space between them.
- Brush the tops lightly with the beaten egg and sprinkle with paprika, if using.
- Bake for 10 to 14 minutes, or until the cheese straws are golden brown and crisp. Baking time varies, so watch them closely to prevent burning.
- Transfer the crispy cheese straws to a wire rack to cool completely. They will crisp up more as they cool.
- Serve these savory snacks immediately or store them in an airtight container.
Notes
- Use freshly grated sharp cheddar cheese for the best flavor and texture; pre-shredded cheese contains anti-caking agents that affect crispiness.
- For Parmesan straws, substitute half of the cheddar with grated Parmesan cheese.
- If you prefer a more herb flavor, add 1 teaspoon of dried rosemary or thyme to the dry ingredients.
- These homemade crackers are excellent served with wine or alongside soup.
Nutrition
- Serving Size: 3 straws
- Calories: 110
- Sugar: 0.2
- Sodium: 180
- Fat: 8
- Saturated Fat: 5
- Unsaturated Fat: 3
- Trans Fat: 0.2
- Carbohydrates: 6
- Fiber: 0.3
- Protein: 4
- Cholesterol: 25