
Oh, there is nothing quite like slicing into a warm, homemade piece of bread fresh off the griddle, right? Forget those store-bought rounds; we are going straight for the gold standard here. I’m talking about those magnificent, hole-filled textures that seem impossible to replicate at home. When I started Mia’s Meals, my mission was to bring back those reliable, classic American comfort foods that don’t demand you spend your entire day in the kitchen. That’s exactly what we’re doing today with this foolproof english muffin recipe. Trust me, achieving those signature ‘nooks and crannies’ is simpler than you think when you stick to my tried-and-true stovetop method.
- Why This is the Best Homemade English Muffins Recipe
- Gathering Ingredients for Your English Muffin Recipe
- Step-by-Step Yeast English Muffin Instructions
- Mastering English Muffin Cooking Techniques on a Griddle
- Tips for Success with Your English Muffin Recipe
- Ingredient Notes and Substitutions for this English Muffin Recipe
- Storage and Reheating Instructions for Homemade English Muffins
- Frequently Asked Questions About Making English Muffins
- Serving Suggestions for Your Classic Breakfast Bake
Why This is the Best Homemade English Muffins Recipe
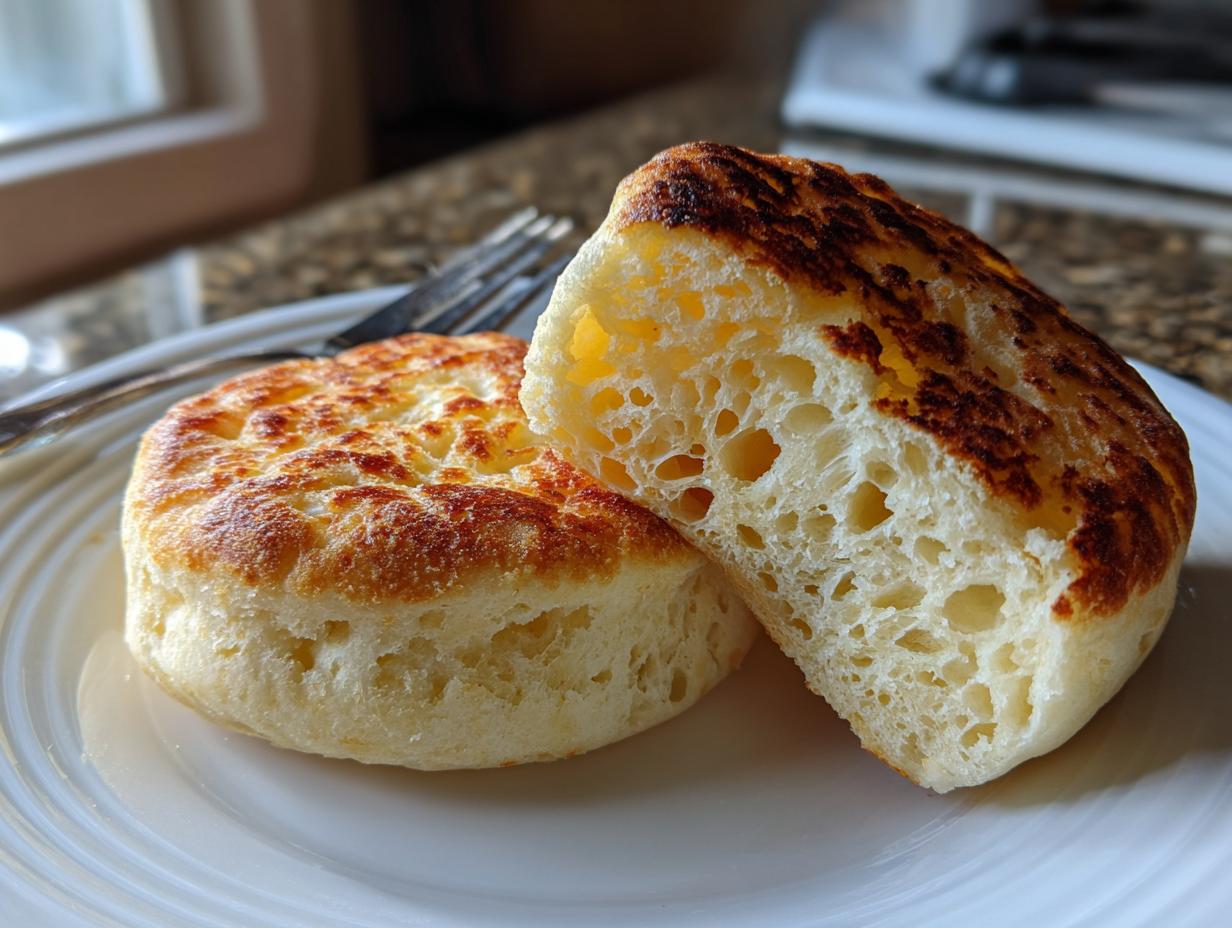
When you pull these out of the oven—well, off the griddle—you’ll understand why I call this the best homemade English muffins recipe. We’re focusing on texture here. Too often, homemade versions turn out dense, but not these! They are unbelievably light, and that’s because we keep the mixing minimal. I guarantee these from scratch English muffins will become your reliable weekend staple.
- The texture is guaranteed to be soft, never tough or chewy.
- The results are consistent, which is everything when you’re relying on them for a busy morning breakfast.
- They freeze beautifully, so you can make a huge batch!
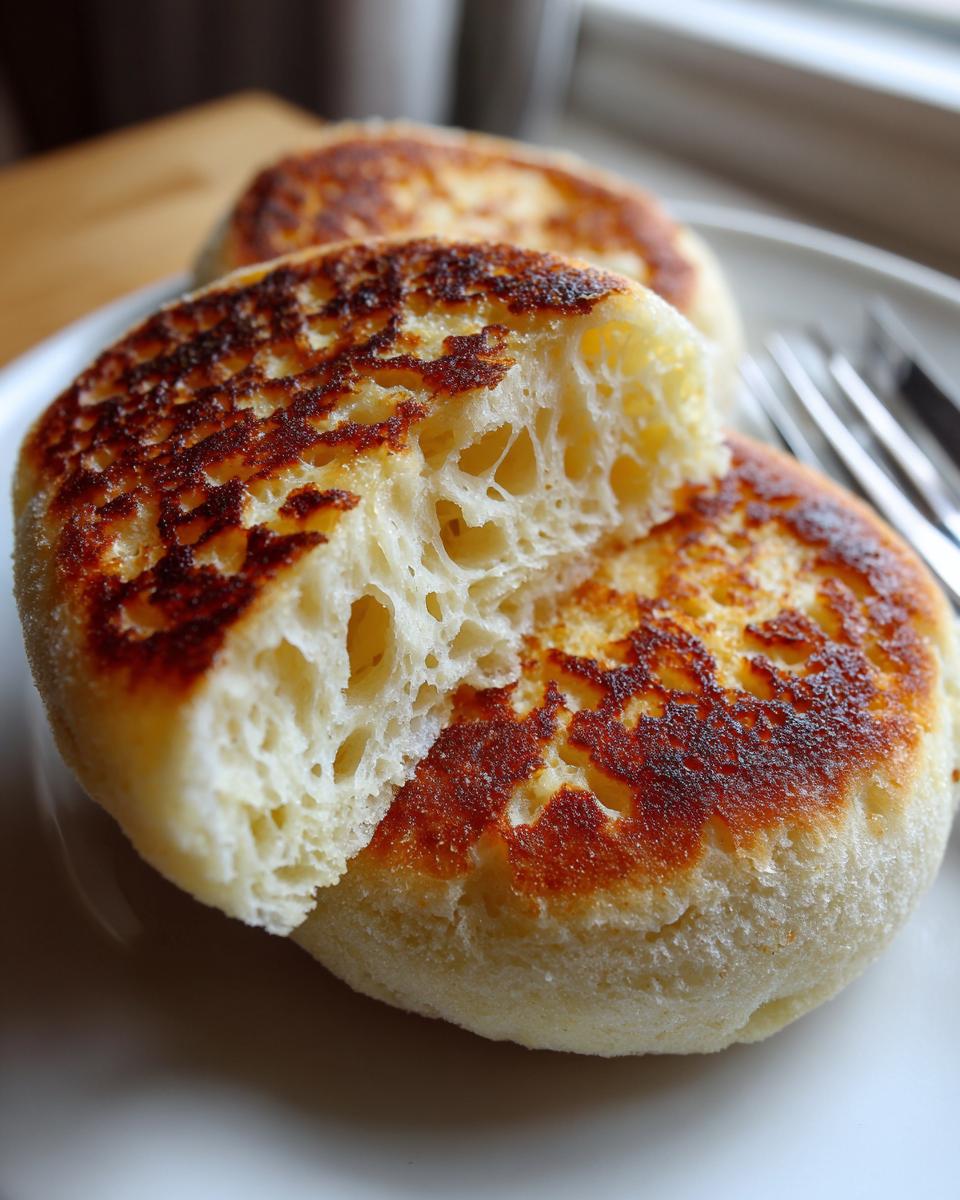
Achieving Perfect Nooks and Crannies
Those famous holes aren’t magic; they’re science! They happen because we barely handle the dough—no aggressive kneading needed. Plus, cooking them low and slow on the stovetop makes sure they steam up perfectly inside while developing that signature golden crust outside. It’s all about patience with the heat!
Simple Yeast English Muffin Instructions
You don’t need fancy equipment or hours of complicated folding. My goal is always to simplify flavor, and that includes the process. These yeast English muffin instructions are straightforward, relying on proper proofing time over complex handling. It’s exactly the dependable, straightforward method I started with in my Midwest kitchen.
Gathering Ingredients for Your English Muffin Recipe
Okay, let’s get our ingredients lined up. For this traditional English muffin recipe, you don’t need anything too exotic, which I love! The quality of your yeast matters, though. You’ll need one standard packet of active dry yeast, and make absolutely sure your milk is warm—we are aiming for 105 to 115°F so the yeast wakes up happily. Don’t skip the cornmeal, either!
That cornmeal is what keeps the sticky dough from grabbing the griddle later on. Here’s exactly what you need for about 10 lovely muffins:
- 2 cups all-purpose flour
- 1 tablespoon granulated sugar
- 1 teaspoon salt
- 1 packet active dry yeast (that’s 2 1/4 teaspoons!)
- 3/4 cup warm milk (must check that temperature for the yeast!)
- 1/4 cup water, warm
- 2 tablespoons unsalted butter, melted
- Cornmeal, for dusting everything!
Step-by-Step Yeast English Muffin Instructions
Now for the fun part! Getting these from scratch English muffins right is all about respecting the dough. Remember what I always say about letting food tell you what it needs? This dough is sticky and wet, and that’s a good thing. We actually want to avoid developing gluten structure here, which means we put the heavy kneading away!
Mixing the Dough and First Rise
First things first, get your dry ingredients whisked together in a big bowl—flour, sugar, and salt. Don’t worry about sifting; we’re keeping this simple! In a smaller bowl, I need you to ‘talk’ to your yeast. Dissolve it in that warm water—about 105 to 115°F is the sweet spot. If the water is too hot, you’ll kill the yeast, and we’ll end up with sad, flat pancakes. Mine usually gets foamy in about five minutes, which is my personal signal that it’s ready to go.
Once the yeast is bubbly, add your warm milk and that melted butter to the yeast mixture. Pour all those lovely wet things right into your dry ingredients. Use a big wooden spoon and just mix until everything is incorporated. I mean it—a shaggy, sticky mass is what you’re aiming for. Cover it up tight, stick it somewhere warm, and let it chill out for about an hour to an hour and a half until it’s doubled. It really needs that time for the flavor to develop!
Shaping and Second Proofing for the English Muffin Recipe
When you come back, gently scrape that risen dough onto a surface dusted lightly with flour. Now, resist the urge to knead! We’re gently patting this out. You want to flatten it into a nice rectangle, making sure it’s about 3/4 of an inch thick. Too thin and they’ll burn; too thick and they won’t cook through. Grab a 3-inch cutter—or a clean jam jar top works in a pinch—and start punching out your circles.
This next step is crucial if you want that authentic texture: generously dust a baking sheet or tray with cornmeal. Place your rounds on the cornmeal, giving them some breathing room. Cover this tray loosely, and let them sit for just 30 minutes before cooking. They’ll puff up just a touch more. See? This is so much easier than a heavy homemade rolls recipe where kneading is key!
Mastering English Muffin Cooking Techniques on a Griddle
Listen, this next part is where most good recipes fall apart. You can have the perfect sticky dough, but if you mess up the heat, you end up with pale insides and burnt bottoms. Mastering how to make English muffins on a griddle is honestly the key to getting those beautiful, deeply golden exteriors. This is one of the most important English muffin cooking techniques you’ll ever learn for this kind of stovetop breakfast bread.
Make sure your griddle or your heaviest skillet is clean, and critically, do not add any oil or butter! We are cooking these dry. Think of it more like baking on a metal surface than frying. The low and slow approach is definitely the way to go here.
Setting the Right Heat for Stovetop Breakfast Bread
I cannot stress this enough: medium-low heat is your friend. If you crank it up to medium or medium-high, the outside will scorch in about three minutes, and the middle will still be raw dough. We need enough heat to create that crust, but slow enough that the steam inside can cook the dough right through. Once the griddle feels warm—not smoking hot—carefully place your rounds down, leaving space between them!
Be patient, friends. You’re looking at about 8 to 12 minutes on the first side. When you flip them, they should be a rich, mahogany brown. If they are getting dark too fast, turn that heat down immediately! The second side usually cooks just as fast, maybe a minute or two less. When they are done, they should sound hollow when you tap the top, meaning they’re cooked all the way through. You can definitely check out more of my griddle baked recipes for more tips on using this method!
Tips for Success with Your English Muffin Recipe
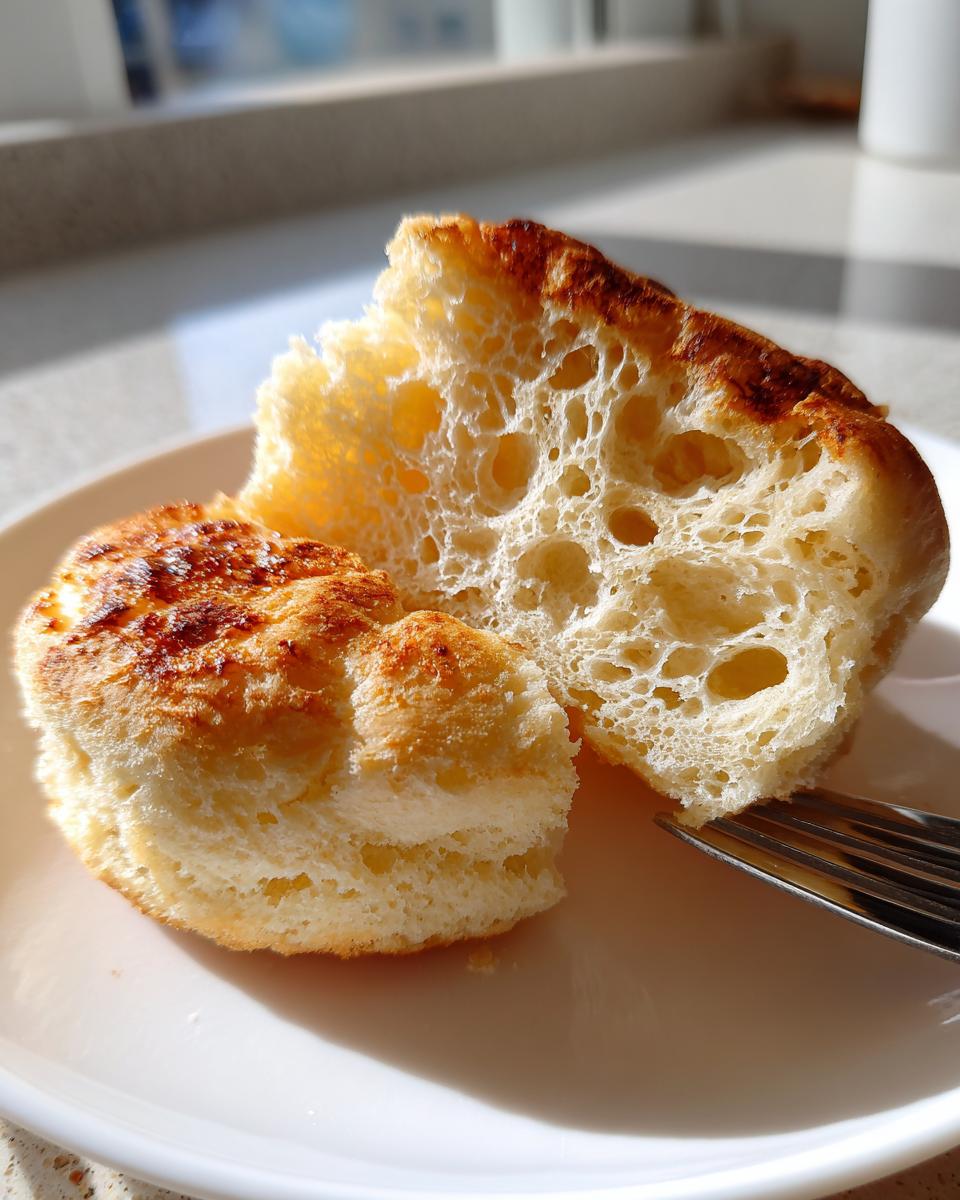
You’ve cooked them perfectly, and now comes the final, crucial secret to unlocking those amazing textures. Don’t ruin the payoff by cutting them wrong! We are aiming for maximum butter-holding capability here, and that means utilizing a very old trick that helps our nooks and crannies muffins shine.
It takes discipline, but trust me, once you try this technique, you won’t ever go back to using a knife on these beauties. It keeps the interior airy!
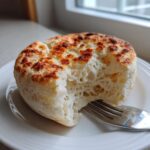
The Fork Trick for Nooks and Crannies Muffins
When you pull your cooked muffins off the rack, let them cool just slightly so they aren’t steaming hot. Then, instead of slicing them neatly down the middle like you would a regular slice of toast, take a fork and pierce the side.
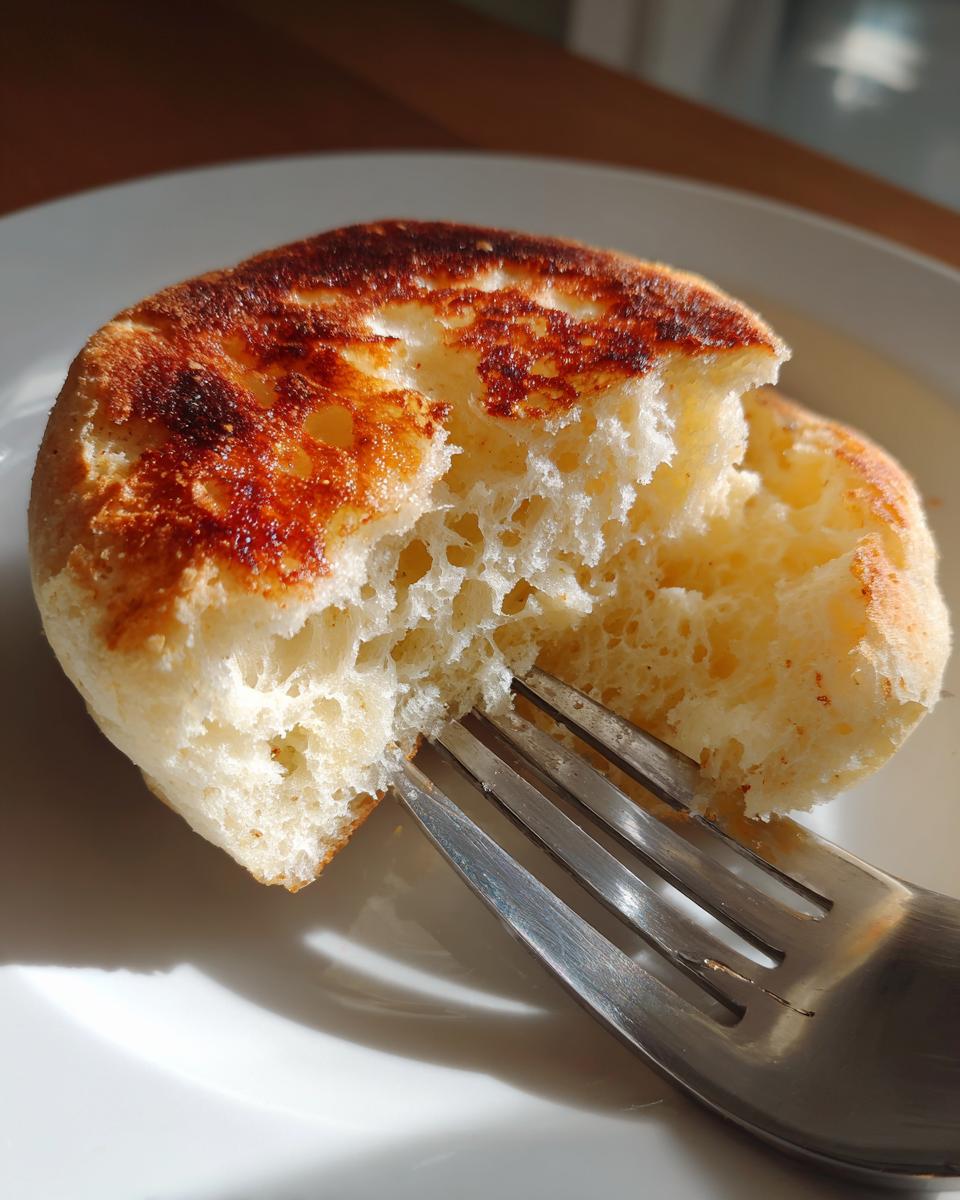
Run that fork all the way around to gently pry them apart. This rough tearing action actually preserves all those little air pockets we worked so hard to create in the batter. A knife presses everything down and seals those holes shut! The resulting craggy, uneven surface is perfect for soaking up butter, jam, or whatever you decide to top it with.
Ingredient Notes and Substitutions for this English Muffin Recipe
The beauty of this traditional English muffin recipe is that it’s pretty rigid because we are chasing that classic texture, but I know life happens, and sometimes you run out of something! For the most part, though, I’d say stick close to what I listed. The ratio of yeast to flour is calibrated exactly for that soft rise without spreading too much.
However, if you’re looking for a slightly richer bite—and I mean, who isn’t?—you can absolutely substitute that 1/4 cup of water in the wet mix with an extra 1/4 cup of milk. I mentioned this in the notes section because it makes the final product feel a little closer to a soft homemade roll. It adds a tiny bit of fat and complexity without changing the core structure.
Can you use bread flour instead of all-purpose? Yes, you can, but be mindful! Bread flour has higher protein, so you might need a tiny splash more liquid because it absorbs more. I prefer the tenderness of AP flour for these breakfast bakes, but bread flour will work in a pinch if that’s what you have on hand.
Now, what about skipping the sugar? I wouldn’t recommend it, honestly. The sugar doesn’t just make them taste good; it’s essential food for the yeast to get that beautiful rise we talked about earlier. It plays a part in the final color, too!
Storage and Reheating Instructions for Homemade English Muffins
Once you’ve browned these beauties on the griddle, you’re probably drowning in muffins—it happens every time! The good news is these keep really well, which is fantastic for meal prepping. I usually bake enough on Sunday so we have them all week long.
Since these aren’t baked in a conventional oven, they don’t develop the same tight crust as a loaf, so we need to treat them gently to keep that nice, soft homemade rolls texture we worked so hard for. It’s pretty simple, really, depending on how fast you plan to eat them all!
If you think you’ll devour them within three days, leaving them on the counter is just fine. Just make sure they are completely cooled after coming off the rack before you store them. An airtight container works perfectly at room temperature. Putting them away warm traps moisture and can make them gummy, which we certainly don’t want!
For keeping them longer, freezing is the answer. If you plan to store them longer than three days, wrap them tightly—I use plastic wrap first, then slip them into a heavy-duty freezer bag—and they’ll be great for up to three months. When you’re ready to eat one later, pulling it straight from the freezer and putting it right onto the toaster is usually the easiest way to reheat them!
Frequently Asked Questions About Making English Muffins
I know when you first try making from scratch English muffins, you end up with a million questions popping up! That’s totally normal, especially when you’re trying to master the art of the griddle. I’ve pulled together some of the most common things folks ask me when they are trying to bake bread for breakfast using this method. Hopefully, this helps you troubleshoot before you even start!
Why are my muffins flat and dense instead of holey?
Oh, this one breaks my heart every time! Usually, flat muffins mean one of two things, maybe both. First, if you kneaded the dough for even a minute too long, you developed too much gluten, and it won’t puff up right. Second, check your heat! If the griddle was too hot when you placed the dough down, it sealed the outside before the yeast could do its final rising work inside. Remember, we want medium-low heat for these stovetop breakfast bread wonders!
Can I skip the milk and just use water?
You technically *can* use all water, but I really wouldn’t recommend it if you want the absolute best result for your baking bread for breakfast efforts. The milk provides that little bit of extra fat and sugar that makes the final product richer and helps achieve a nicer internal tenderness. If you’re in a pinch, it’s okay, but the texture won’t be quite as soft or pillowy as the recipe intends.
Do I have to use cornmeal, or can I use flour to dust the pan?
You absolutely must use cornmeal on the tray where the muffins proof, otherwise, they will stick like glue when you try to move them to the griddle! A light dusting of flour is fine on your counter when you pat the dough out, but the grit of the cornmeal is key for keeping them separated and easy to lift without tearing before cooking. It also gives a nice, traditional texture to the bottom!
Can I use bread flour instead of all-purpose flour?
That’s a great question many bakers ask! Yes, you can swap in bread flour if you want a slightly chewier final product, but you have to be careful. Bread flour has more protein and will absorb more liquid. If you notice your dough seems unusually stiff after the first mix, add liquid just a teaspoon at a time until you get that required shaggy, sticky mess. I stick to AP flour for the softest results, but bread flour works if you watch the hydration closely.
Serving Suggestions for Your Classic Breakfast Bake
Now that you have finally mastered the art of the griddle and have a stack of perfectly cooked, hole-filled rounds, it’s time to eat! This classic breakfast bake is a canvas waiting for your favorite toppings. Seriously, the possibilities are endless, but some combinations just feel like coming home.
My absolute first choice, especially on a busy weekday morning, is just good quality butter. Split the muffin open using that fork trick, toast both cut sides until they are warm and slightly crisp, and then slather it on. Watch that butter melt right down into every single one of those nooks and crannies. It’s simple perfection right there.

If you’re having them for a weekend brunch, you have to go for the ultimate classic: Eggs Benedict. The nooks are perfect for catching all that hollandaise sauce; honestly, it’s better than any bagel or regular toast you could use! If you’re feeling sweet, a good quality raspberry jam or strawberry preserves is the only way to go. You just can’t beat that contrast between the slightly savory, tangy muffin and sweet fruit preserves.
If you want to see some other amazing ways to start your day, I have a fantastic recipe for best French toast recipe that pairs really well with a side of these fresh muffins! Enjoy every single bite!
PrintBest Homemade English Muffins Recipe for Nooks and Crannies
Make classic, soft English muffins from scratch on your stovetop. This recipe delivers the characteristic holes and light texture you want for your breakfast.
- Prep Time: 20 min
- Cook Time: 25 min
- Total Time: 1 hour 55 min
- Yield: 10 muffins 1x
- Category: Breakfast
- Method: Griddling
- Cuisine: American
- Diet: Vegetarian
Ingredients
- 2 cups all-purpose flour
- 1 tablespoon granulated sugar
- 1 teaspoon salt
- 1 packet active dry yeast (2 1/4 teaspoons)
- 3/4 cup warm milk (about 105-115°F)
- 1/4 cup water, warm
- 2 tablespoons unsalted butter, melted
- Cornmeal, for dusting
Instructions
- In a large bowl, whisk together the flour, sugar, and salt.
- In a separate small bowl, dissolve the yeast in the warm water and let it sit for 5 minutes until foamy.
- Add the warm milk and melted butter to the yeast mixture. Stir to combine.
- Pour the wet ingredients into the dry ingredients. Mix with a wooden spoon until a shaggy, sticky dough forms. Do not overmix or knead.
- Cover the bowl with plastic wrap and let the dough rise in a warm place for 1 to 1.5 hours, or until doubled in size.
- Lightly dust a clean surface with flour. Gently scrape the dough out. Pat the dough into a rectangle about 3/4 inch thick.
- Use a 3-inch round cutter to cut out the muffins. Reroll scraps once if needed.
- Generously dust a baking sheet or large tray with cornmeal. Place the cut dough rounds on the cornmeal, leaving space between them.
- Cover the tray loosely with plastic wrap and let the muffins proof for 30 minutes. They will puff slightly.
- Heat a large, dry griddle or heavy skillet over medium-low heat. The temperature is important; too high and the outside burns before the inside cooks.
- Carefully place the muffins onto the hot griddle, leaving space between them. Do not press them down.
- Cook for 8 to 12 minutes per side until deeply golden brown. If they brown too quickly, reduce the heat.
- The muffins should sound hollow when tapped. Remove from the griddle and cool on a wire rack.
- Split the cooked English muffins with a fork to preserve the nooks and crannies, then toast before serving.
Notes
- For the best texture, use a fork to split the muffins open instead of a knife. This creates more surface area for butter.
- If you want a slightly richer flavor, substitute the water with an extra 1/4 cup of milk.
- Store leftover cooked muffins in an airtight container at room temperature for up to 3 days, or freeze them for longer storage.
Nutrition
- Serving Size: 1 muffin
- Calories: 160
- Sugar: 2
- Sodium: 280
- Fat: 3
- Saturated Fat: 2
- Unsaturated Fat: 1
- Trans Fat: 0
- Carbohydrates: 29
- Fiber: 1
- Protein: 5
- Cholesterol: 10