
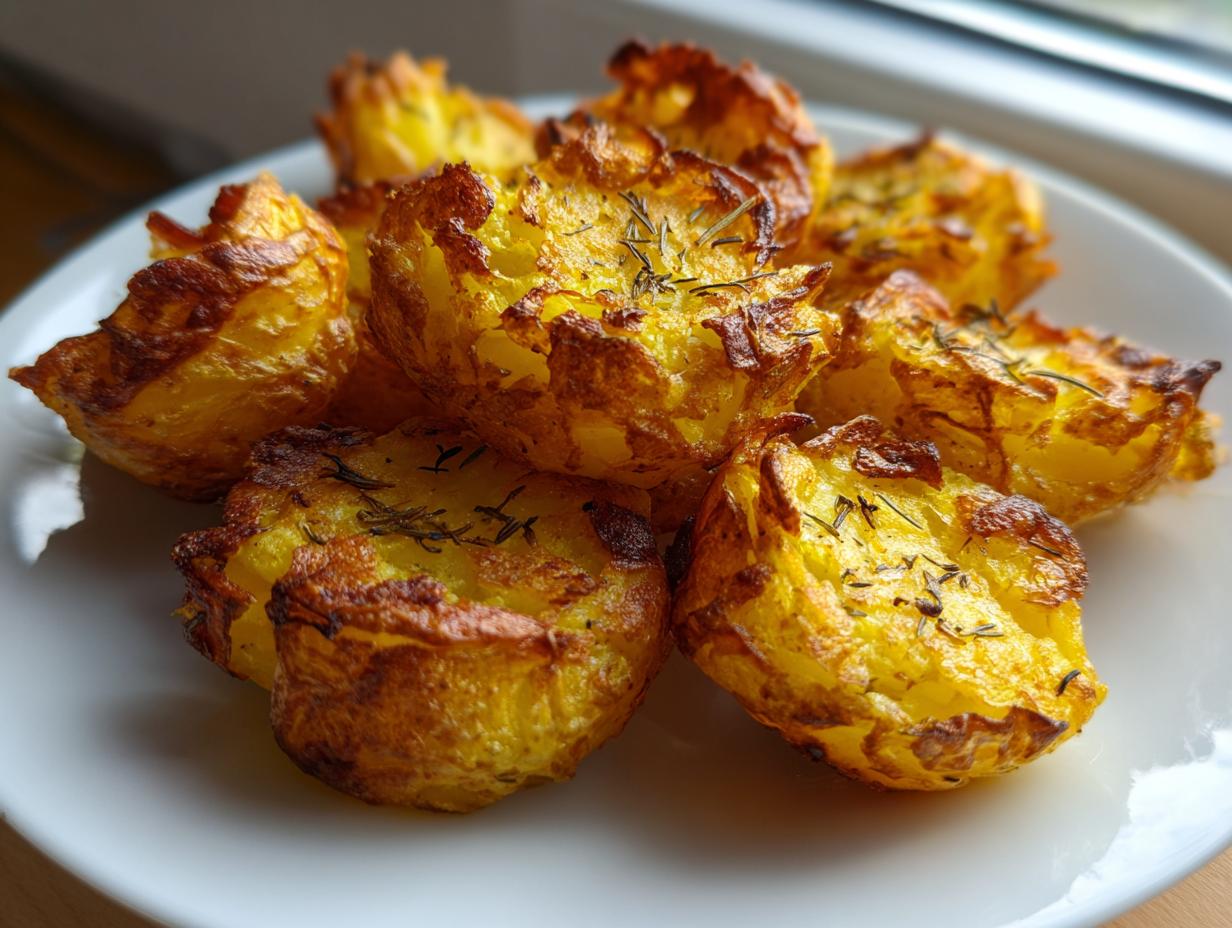
If you’ve ever sighed looking at roast potatoes swimming in oil, sad and limp, then you are my new best friend. Getting that perfect contrast—a shatteringly crisp golden outside hiding a cloud of fluffy interior—is the dream, right? Forget complicated timing; this recipe for garlic roasted potatoes is about taking two simple steps and guaranteeing results, even when dinner hour is rushing up on you. That’s my whole philosophy here at Mia’s Meals. If you want to know more about how I landed on simple flavor, you can always read about our story right here.
When I pair these with a leg of lamb, the aroma of fresh rosemary and thyme fills the kitchen, making the whole house feel cozy again. You don’t need hours to make something truly memorable; you just need the right technique for these incredible garlic roasted potatoes.
- Why This is the Best Potato Recipe for Your Roast
- Ingredients for Perfect Garlic Roasted Potatoes
- The Foolproof Method for Crispy Garlic Roasted Potatoes
- Tips for Success with Rosemary Potatoes
- Making Garlic Roasted Potatoes for a Crowd
- Storage and Reheating Crispy Roasted Potatoes
- Variations for Your Garlic Potatoes
- Frequently Asked Questions About Garlic Roasted Potatoes
- Nutritional Snapshot of This Easy Side Dish
Why This is the Best Potato Recipe for Your Roast
You might think just tossing potatoes in olive oil and roasting them works, but trust me, it doesn’t! The secret to achieving the best potato recipe that truly stands out as crispy roasted potatoes lies in the pre-treatment. We aren’t just roasting here; we are setting the stage for texture!
That quick boil, followed by shaking the colander, creates the roughed-up starchy edges. These little fluffy bits are what transform into delicious, golden-brown armor when they hit the high oven heat. It’s simple science, but it makes all the difference for your dinner party sides!
Ingredients for Perfect Garlic Roasted Potatoes
Good food starts with knowing exactly what you need before you even turn the stove on. Whenever I’m running late, I have these ingredients lined up—it cuts down on so much frantic searching mid-prep! We are using 2 pounds of Yukon Golds, which I cut into nice, chunky 1.5-inch pieces. You want pieces big enough to get that fluffy center, see?
Then, load up on the flavor: four cloves of garlic, minced fine, two beautiful sprigs of fresh rosemary (just the leaves, chopped), and one teaspoon of fresh thyme leaves. Don’t skimp on the herbs; that’s what gives them that amazing spring flavor!
- 2 lbs Yukon Gold potatoes, cut into 1.5-inch pieces
- 4 tablespoons olive oil
- 4 cloves garlic, minced
- 2 sprigs fresh rosemary, leaves chopped
- 1 teaspoon fresh thyme leaves
- 1 teaspoon salt
- 1/2 teaspoon black pepper
Selecting the Right Potatoes and Herbs
I always choose Yukon Gold potatoes for this recipe. They hold their shape better than Russets after boiling, giving you that slightly waxy, creamy interior that contrasts perfectly with the crisp exterior. They’re just more reliable! As for the herbs, if you’re using dried, cut the amounts way back, but honestly, nothing beats the punch of fresh rosemary and thyme when they start roasting.
The Foolproof Method for Crispy Garlic Roasted Potatoes
I’m going to walk you through this process step-by-step, because honestly, following these few rules is the only way to get those perfect garlic roasted potatoes. Once you see how easy it is to get that beautiful texture, you’ll never go back to just throwing raw chunks in the oven. Don’t forget that one of my favorite ways to use these is alongside roasted carrots, so check out that recipe for a full sheet pan feast!

Preheating and Par-Boiling for Texture
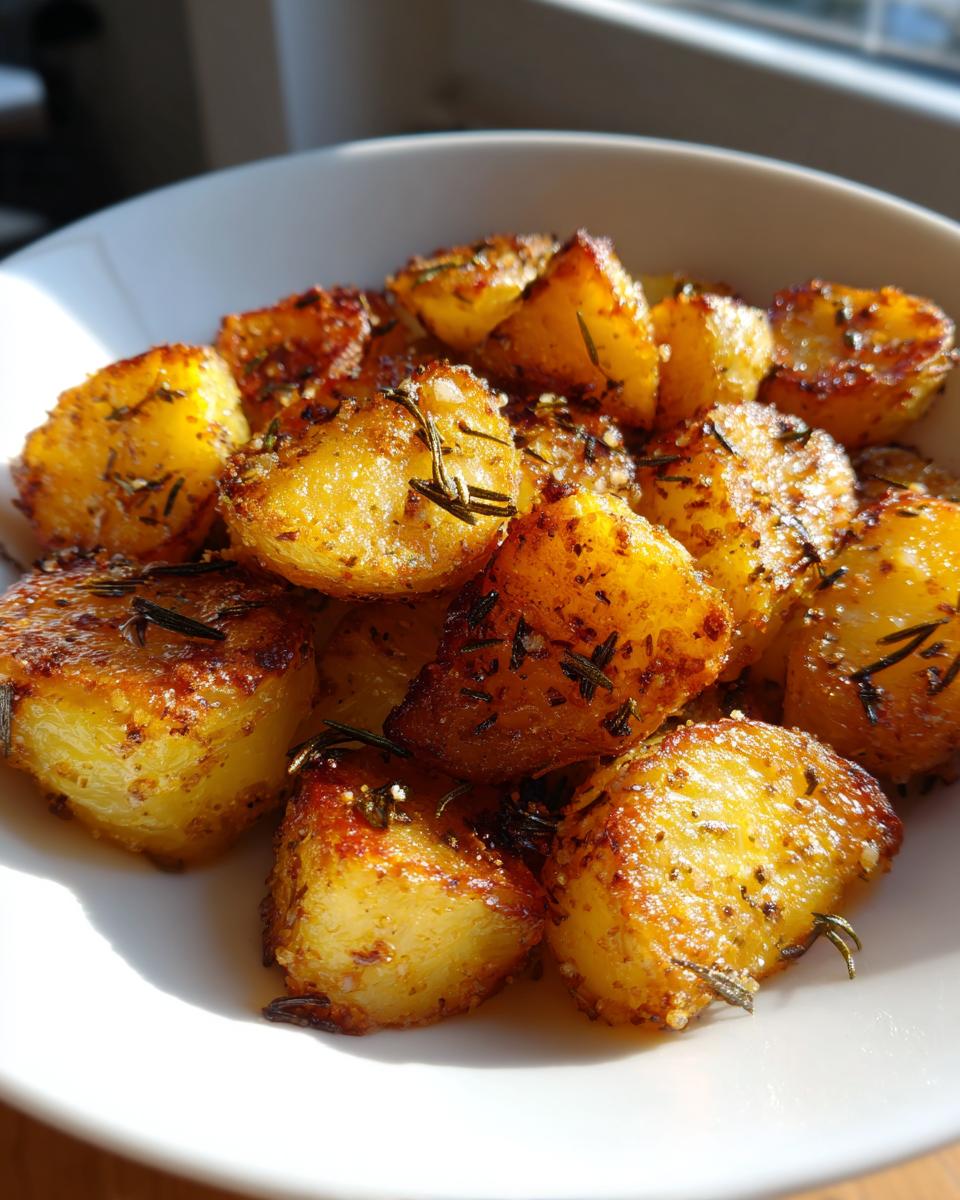
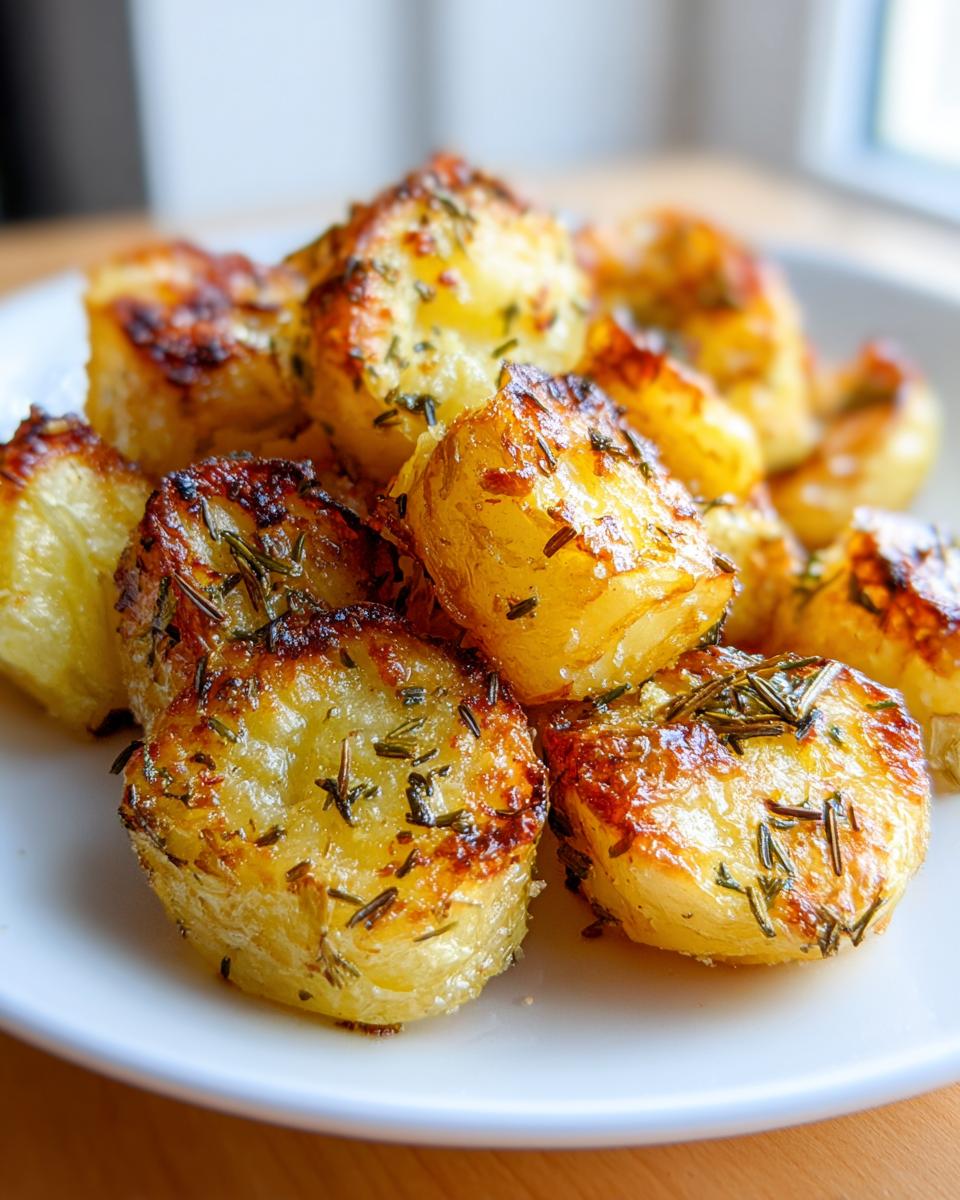
First things first: blast that oven up to 425 degrees Fahrenheit! While it’s heating, get your potatoes into a pot of cold water with a teaspoon of salt. We boil these until they are just tender—we’re aiming for exactly 7 minutes once it hits a rolling boil. You want them cooked through but not mushy! Drain them really well in your colander.
Creating the Flavor Coat for Your Garlic Potatoes
This next part is pure magic. Once the potatoes are drained, put the colander back on the sink and just **shake it gently**. Don’t dump them out yet! Shaking slightly roughens up those boiled edges, creating the starches we need to get crispy. Now, put those roughed-up spuds in a big bowl and toss them generously with your olive oil, the minced garlic, rosemary, thyme, salt, and pepper until every piece is slick and coated with flavor.
Roasting Sheet Pan Sides to Golden Perfection
Spread everything out onto your baking sheet. And I mean spread it out! We need one single layer for these sheet pan sides to crisp up properly; overcrowding traps steam and steams your potatoes instead of roasting them. Pop them in the hot oven for about 30 to 40 minutes total. Halfway through roasting, give them a good flip so they get golden brown on all sides. When they’re tender inside and golden outside, they are done!

Tips for Success with Rosemary Potatoes
If you want perfectly reliable rosemary potatoes every single time, you have to pay attention to two sneaky details, even if you’re in a rush to get dinner on the table. The first tip, which I stressed slightly before, is the absolute necessity of **dry potatoes**. Water is the enemy of crispiness! Make sure those beauties are dry after boiling, maybe even patting them gently with a paper towel if they look wet.
Second, think about your pan space. Even though these are excellent on their own, if you are pairing them with something else—maybe my roasted broccoli with garlic and parmesan, which you can see here—do not overcrowd!
Give them room to breathe so the heat can circulate. This prevents steaming and guarantees that gorgeous, crackly exterior you’re looking for!
Making Garlic Roasted Potatoes for a Crowd
When I’m hosting, I rely on these potatoes as my go-to dinner party sides because they are incredibly easy to scale up. You can definitely double the recipe easily—just make sure you use two baking sheets. Remember, overcrowding is the enemy, so don’t try to cram everything onto one pan or you’ll lose that crispy magic!
If you’re doing major batch cooking, you can actually complete the par-boiling and roughing-up step ahead of time. Store those coated, raw potatoes in an airtight container in the fridge for up to 12 hours. Then, when it’s time to roast, spread them out and give them that full 30-40 minutes in the hot oven. They come out perfect every time, making your hosting duties so much lighter. If you need more inspiration for simple spreads, check out my collection of easy side dishes!
Storage and Reheating Crispy Roasted Potatoes
Now, let’s be real. Sometimes you make too much, or maybe you’re planning ahead for leftovers (which, by the way, are still pretty good the next day!). The secret to keeping these crispy roasted potatoes ready for round two is twofold: storage and reheating.
When storing, make sure they are completely cool first. Then, put them in an airtight container. Don’t leave them sitting on the counter, or they turn soft fast. Cold moisture is the enemy of crispiness once they are cooked!
When you reheat, promise me you won’t touch that microwave button. A microwave just reheats the moisture inside, making them steam themselves into mush. Instead, spread them back out on a baking sheet—single layer, please! Stick them into a moderately hot oven (around 375°F) for about 8 to 10 minutes, or use your air fryer on high for about 5 minutes. That burst of dry heat immediately brings back that wonderful, crunchy exterior we worked so hard for!
Variations for Your Garlic Potatoes
Don’t feel like you have to stick to just rosemary and thyme! Because these garlic potatoes are such a fantastic base, they welcome almost any spring vegetable addition you want to throw their way. This is a great way to use up whatever lovely things you have coming out of the garden or farmer’s market.
Try adding some thinly sliced shallots right in with the oil and herbs—they caramelize beautifully alongside the potatoes. For a bit of color and extra spring flair, toss in some peeled, halved baby carrots or asparagus tips during the last 20 minutes of roasting. If you’ve ever made my cranberry sauce recipe here, you know I love balancing out rich flavors, and these variations do just that!
Frequently Asked Questions About Garlic Roasted Potatoes
I get so many questions about this recipe, and honestly, it’s because everyone wants that perfect result! Whether you’re planning quick weeknight dinners or a big weekend meal, these little tips should help iron out any texture worries you might have. If you’re looking for even faster meal ideas, don’t forget to check out my guide to quick weeknight dinners!
Can I use Russet potatoes instead of Yukon Gold for these garlic roasted potatoes?
You absolutely can, but I like to tell people upfront that Yukon Golds are a little more reliable here. Russets will give you that super fluffy interior you might be dreaming of, but because they have more starch, they can sometimes fall apart a bit when you’re shaking them up after boiling. If you love fluffy, go for Russet, but be extra gentle when you rough up those edges!
Are these gluten free sides suitable for vegans?
The great news is that this recipe—the way I’ve written it using olive oil—is totally naturally gluten free sides! Since we only use olive oil and no butter in the coating process, you don’t have to worry about any animal products at all. They are perfect for nearly everyone at the table.
How do I ensure my potatoes get truly crispy roasted potatoes?
If you’ve made it this far, you’re halfway to crispy heaven, but here are the two main takeaways for guaranteed crunch! First: shake that colander after draining to rough up those starchy edges—that creates the surface area for crispiness. Second: never, ever overcrowd your baking sheet. If the potatoes are touching too much, they’ll steam instead of roast. Give them space to breathe and get brown!
Nutritional Snapshot of This Easy Side Dish
I always try to keep things straightforward, and that includes knowing what’s in our meal! These easy side dishes are hearty but keep things relatively balanced. Based on the recipe for four servings, you’re looking at about 280 calories per plate. You get roughly 14 grams of fat, which is mostly healthy fats from the olive oil, 35 grams of carbs, and 4 grams of protein.
Now, remember these numbers are just estimates, especially since the size of your potatoes can change things up! For a full breakdown, you can see my recipe notes on other healthy recipes too.
PrintPerfect Crispy Garlic Roasted Potatoes with Rosemary

Follow this simple method to achieve crispy outside and fluffy inside garlic roasted potatoes, perfect as a side dish for any roast.
- Prep Time: 15 min
- Cook Time: 40 min
- Total Time: 55 min
- Yield: 4 servings 1x
- Category: Side Dish
- Method: Roasting
- Cuisine: American
- Diet: Gluten Free
Ingredients
- 2 lbs Yukon Gold potatoes, cut into 1.5-inch pieces
- 4 tablespoons olive oil
- 4 cloves garlic, minced
- 2 sprigs fresh rosemary, leaves chopped
- 1 teaspoon fresh thyme leaves
- 1 teaspoon salt
- 1/2 teaspoon black pepper
Instructions
- Preheat your oven to 425 degrees Fahrenheit.
- Place the cut potatoes in a large pot and cover them with cold water. Add 1 teaspoon of salt to the water. Bring the water to a boil and cook the potatoes for 7 minutes.
- Drain the potatoes well in a colander. Shake the colander gently to rough up the edges of the potatoes; this helps them crisp up.
- In a large bowl, toss the slightly boiled potatoes with olive oil, minced garlic, chopped rosemary, thyme, salt, and pepper until they are evenly coated.
- Spread the potatoes in a single layer on a large baking sheet. Do not overcrowd the pan.
- Roast for 30 to 40 minutes, flipping them halfway through, until they are golden brown and crispy on the outside and tender inside.
- Serve immediately as an easy side dish.
Notes
- For extra crispiness, ensure the potatoes are completely dry after boiling before tossing them with oil.
- If you are making this as a sheet pan side with other items, roast the potatoes alone for the first 20 minutes before adding other ingredients.
- This recipe works well with Russet potatoes if you prefer a fluffier interior, but Yukon Golds give a better overall texture.
Nutrition
- Serving Size: 1 serving
- Calories: 280
- Sugar: 1
- Sodium: 450
- Fat: 14
- Saturated Fat: 2
- Unsaturated Fat: 12
- Trans Fat: 0
- Carbohydrates: 35
- Fiber: 4
- Protein: 4
- Cholesterol: 0