
Oh, you know how much I love anything that’s tiny, perfectly formed, and packs a huge flavor punch! When it comes to party desserts, nothing beats the charm of a good cake pop. But let’s be honest, traditional cake pops can sometimes be finicky, right? They either dry out, or the chocolate cracks the second they leave the coating. Ugh! My mission here at Mia’s Meals is always simplifying those classics for our busy lives, and that’s exactly what we’re doing today. Trust me, this Red Velvet Cake Pops recipe is the holy grail. We use just two simple components to guarantee the moistest, most decadent bite-sized red velvet treats you’ve ever made!
- Why This Red Velvet Cake Pops Recipe is Your New Go-To (E-E-A-T)
- Gathering Your Ingredients for Red Velvet Cake Pops
- Step-by-Step Easy Cake Pops Tutorial
- Mastering the White Chocolate Dipping Technique for Red Velvet Cake Pops
- Making Your Red Velvet Cake Pops Party Ready
- Storage and Making Ahead for Festive Red Velvet Bites
- Troubleshooting Common Red Velvet Cake Pops Issues
- Serving Suggestions for Your Bite Sized Red Velvet Treats
- Nutritional Estimates for Red Velvet Cake Pops
- Share Your Red Velvet Cake Pops Success
Why This Red Velvet Cake Pops Recipe is Your New Go-To (E-E-A-T)
When I share a recipe, I need you to be able to trust it 100%, especially when it comes to tricky things like dipping! We are aiming for bakery style cake pops, not crumbly failures. This method cuts out the guesswork so you can focus on the fun part—the dipping and decorating. If you love this cream cheese magic, you absolutely have to check out my pumpkin bars with cream cheese frosting when the fall rolls around!
- No More Drying Out: We use a secret binder that guarantees unbelievably moist red velvet balls every single time. You won’t have stale-tasting treats here!
- Superior Texture: The firmness you get means they roll perfectly and hold the stick without wobbling or falling off later.
- Foolproof Coating: I’m sharing my exact chilling technique so your white chocolate shells dry smooth, shiny, and crack-free.
Achieving That Perfect Cream Cheese Cake Pop Filling
Don’t even think about just dumping buttercream in there! The cream cheese is non-negotiable. It cuts through the sweetness just enough and gives the filling a slightly tangy, rich flavor that pairs perfectly with the cake. Plus, that small bit of moisture helps the crumbs stick together like magic, giving you that perfect fudgy texture.
Gathering Your Ingredients for Red Velvet Cake Pops
Okay, let’s get down to business! Since we are simplifying things for busy weeknights, we are relying on that trusted box mix for the base. The beauty of this recipe is that the magic happens during the assembly, not the baking. Lay everything out so you can see it all—it makes the mixing process so much smoother. Remember, everything needs to be ready to go before we start rolling!
For the Cake Base and Filling
- 1 box Red Velvet Cake Mix (plus the water, oil, and eggs the box calls for)
- 1 cup Cream Cheese Frosting (Don’t skip this! Store-bought is totally fine here.)
For the Coating and Dipping
- 12 ounces White Candy Melts or White Chocolate (I prefer candy melts for stability!)
- 1 tablespoon Coconut Oil or Shortening (This is optional, but it really helps thin the coating out for easier dipping.)
- 10-12 Cake Pop Sticks
- A little dash of red or white sprinkles, if you’re feeling festive!
Step-by-Step Easy Cake Pops Tutorial
Alright, this is where the transformation happens! We’re taking simple ingredients and turning them into those firm, perfect little spheres. Remember what I always say: baking is chemistry, but these are no-bake assembly, so precision matters, especially with the mixing ratio. If you’re looking for another easy box mix transformation, you can check out how I whip up my red velvet cake mix cookies!
Baking and Creating the Moist Red Velvet Balls Base
First, bake that cake according to the box instructions, but please, please bake it in a 9×13 pan. It cools faster and crumbles so much easier! Once it’s totally cool—I mean room temperature cool, not slightly warm—you need to crumble it into the finest dust possible. Toss out any dark, crusty edges you don’t love. Next, add in your cream cheese frosting. Get your hands in there! You’ve got to mix it until it looks like a thick, dense dough that holds its shape when you squeeze it. No loose crumbs allowed!
Shaping and the Critical Chilling Phase
Now for the rolling. Try to make your balls uniform, aiming for about one inch each. This helps them all dip evenly later on. Line a sheet pan with parchment paper because things get sticky! Pop these rolled balls into the fridge for a good two hours, minimum. Seriously, don’t rush this! If they aren’t rock solid when they go into the melted coating, they will crack or fall apart fast. If you’re worried about the stick holding, take a tiny bit of your melted candy melts, dip just the tip of the stick in it, stick it in the ball, and pop it back in the fridge for 15 minutes to set that ‘glue.’ You can find more dipping pro secrets over at Forkful Heaven!
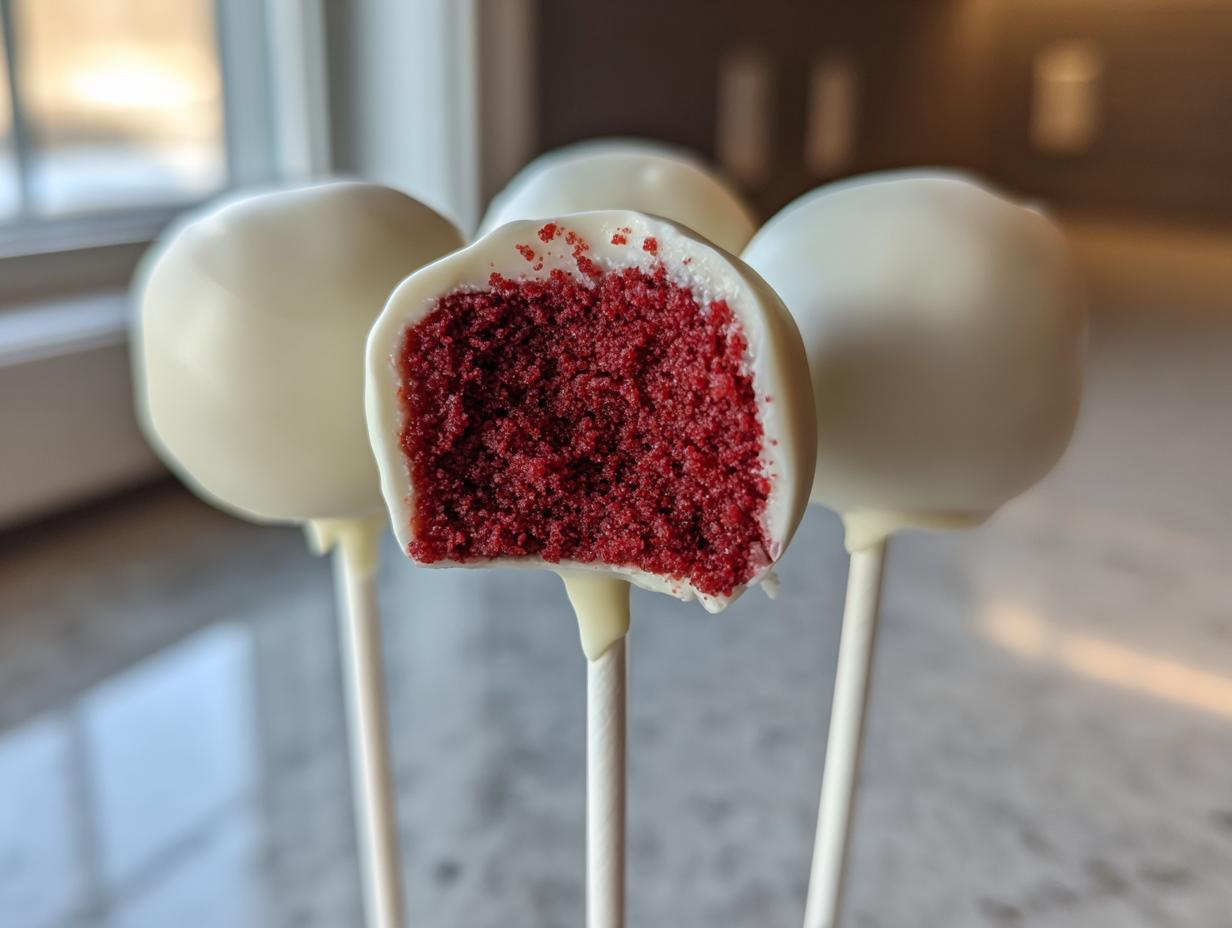
Mastering the White Chocolate Dipping Technique for Red Velvet Cake Pops
Okay, this is the part that makes or breaks the entire project! We want that gorgeous, smooth, high-shine shell—the kind you see in the bakeries. The secret here isn’t just the coating itself, but the temperature relationship between your candy and your cake balls. Remember how dark I told you to chill those balls? You need them icy cold! If they are even slightly room temp, the hot coating makes them sweat, and boom, you get those dreadful cracks when it cools down.
When melting your candy melts (or chocolate), go slow! Microwave them in 30-second bursts, stirring thoroughly after every single interval, even if it looks fine. If it seems super thick, stir in that tiny bit of coconut oil or shortening I mentioned earlier—it’s my favorite little trick for making the coating flow like silk. Once dipped, hold the stick straight up, let the excess drip off for a second, and then gently tap the stick against the side of the bowl. Don’t bang it! Just a gentle tap or two helps the thick coating shed without sending streaks everywhere. If you want to see some other great dipping tricks, you can read up on achieving the perfect coat over at Pure Cooking Joy. And if you’re ever working with icing that’s too thin, check out my tips for making sugar cookie icing dry hard; the principles are similar!
Tips for a Glossy Chocolate Shell for Cake Pops
Temperature control is everything here. Keep those cake balls in the freezer or the coldest part of your fridge until the absolute second they are going into the melted candy. If you notice the chocolate hardening up while you’re dipping the last half of your batch, don’t just blast it in the microwave. Reheat it in short, 10-second bursts, stirring well after each session, until it flows easily again. This keeps the texture perfect and guarantees that beautiful, glossy chocolate shell for cake pops!
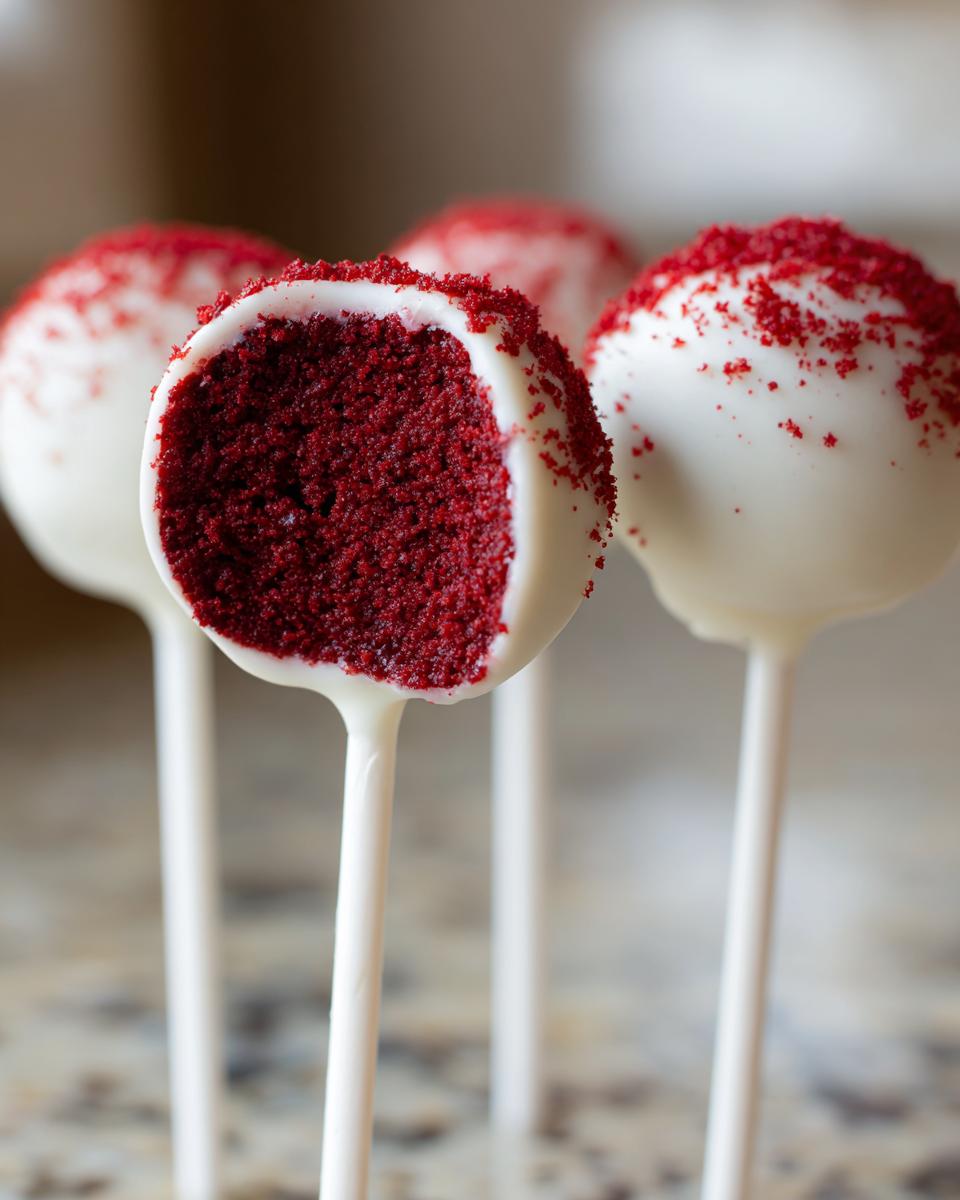
Making Your Red Velvet Cake Pops Party Ready
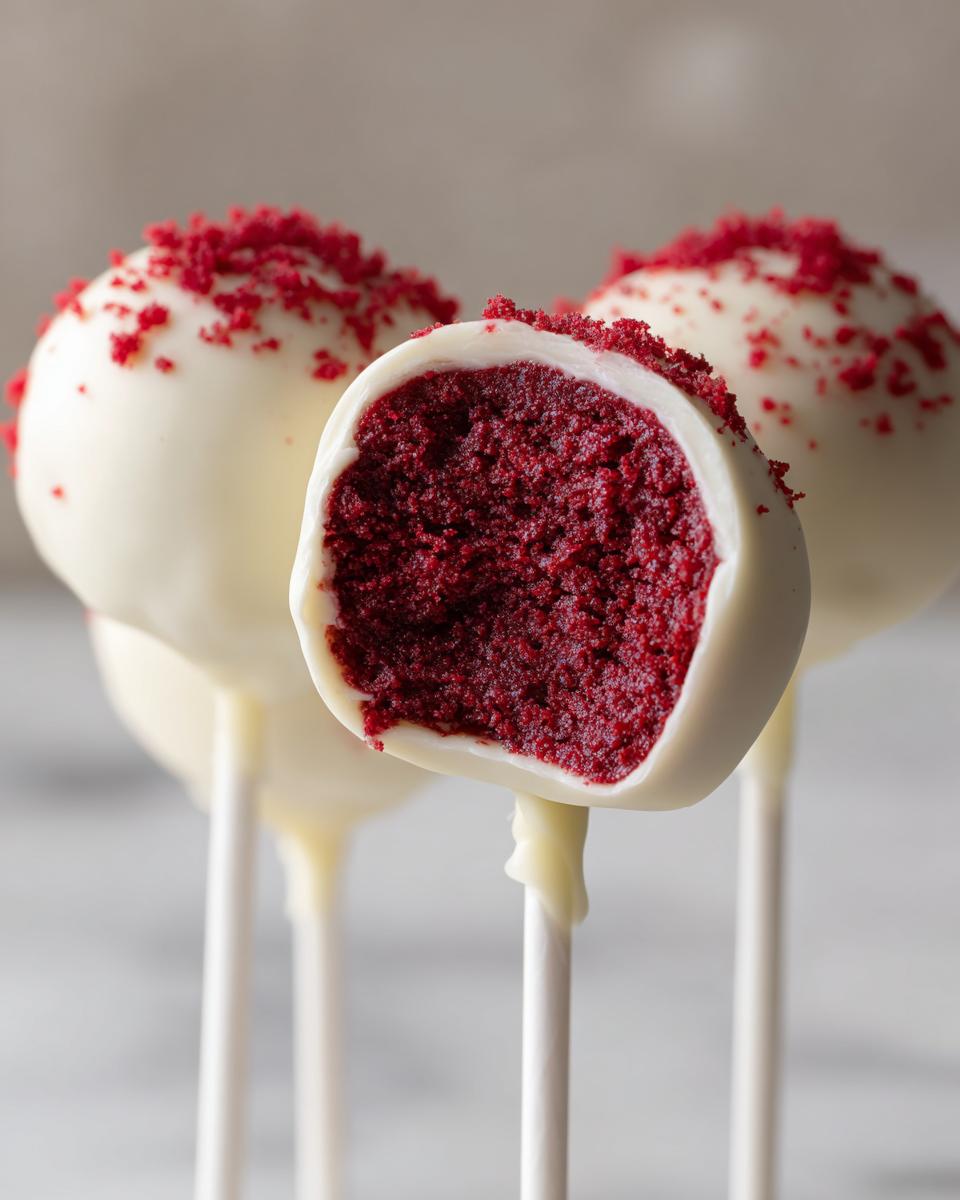
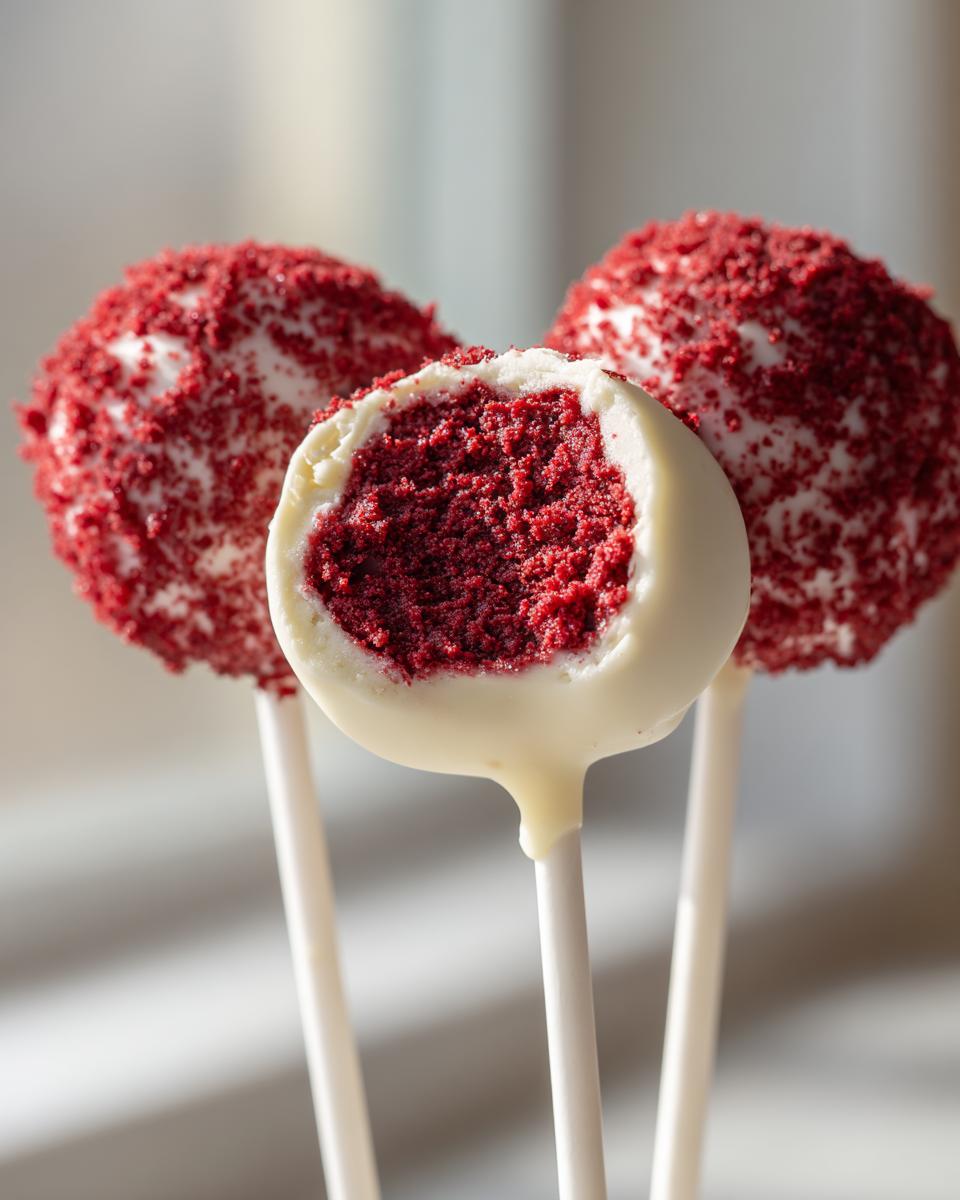
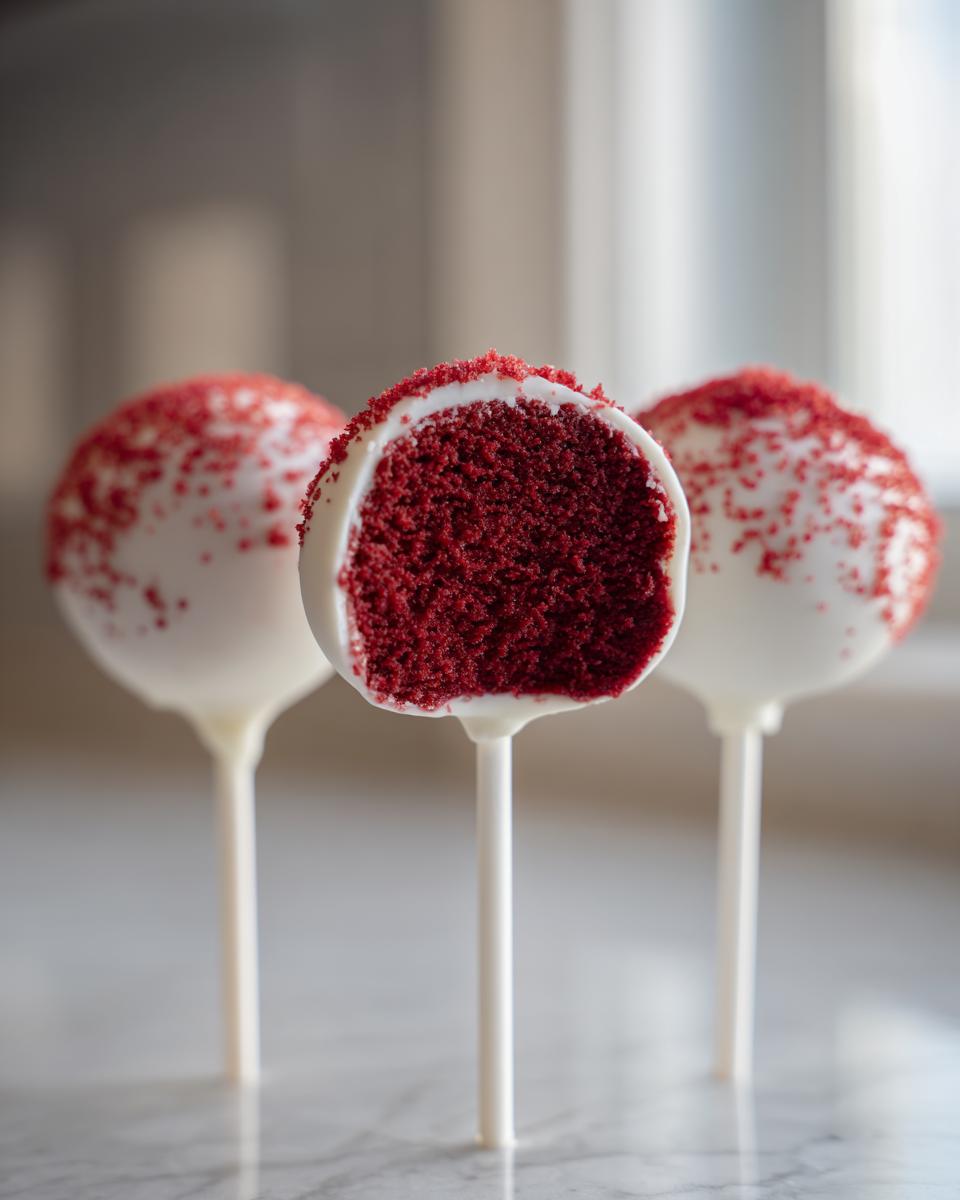
Okay, success! You pulled that pop out of the white chocolate, and it looks flawless! Don’t wait a single second now, because that coating is your window of opportunity. If you are using sprinkles—the red ones, the white ones, or anything fun—they need to go on *immediately*. Think of it like icing a cookie fresh out of the oven; if you wait even 30 seconds, they won’t stick.
Gently roll or sprinkle your decorations over the top while the coating is still wet. Then, you need to stand them up immediately to dry! Grab a block of styrofoam or even an old flower frog and stick them straight up. Setting them upside down means you get a little puddle of chocolate at the bottom, which isn’t cute. We want perfect presentation for these festive treats. For more festive ideas, check out how I handle my Christmas cookie bars!
Storage and Making Ahead for Festive Red Velvet Bites
One of the best parts about our Red Velvet Cake Pops recipe is how well they hold up! They absolutely shine as a make-ahead dessert, which is a lifesaver before any big party. If you’ve got leftovers, or if you want to prep them for a celebration, just store them in an airtight container. At cool room temperature, they are great for a few days. For longer storage, stick them in the fridge—though let them warm up just a tiny bit before serving so the coating isn’t rock hard.
My biggest secret for busy times is freezing them before they even get coated! You can absolutely freeze your chilled, uncoated balls. If you want to see my full guide on freezing sweets, check out my tips on make ahead dessert balls for the best technique. They freeze beautifully!
Troubleshooting Common Red Velvet Cake Pops Issues
You followed the steps, you chilled them—but sometimes, even the best recipes hit a snag! Don’t panic if things go a little sideways. Cake pops can be temperamental, but knowing *why* something went wrong is the quickest way to fix it next time. This is how we build up knowledge and get that bakery-style look down pat!
If you’ve ever had a batch of these gorgeous red velvet truffles refuse to cooperate, you’re in good company. Here are the three most common meltdowns I see, and how you conquer them immediately.
My Cake Balls Keep Crumbling!
This is almost always a binder issue, meaning you need more “glue.” If your red velvet cake pops balls are falling apart when you try to roll them or when you push the stick in, it means the cake crumbs were too dry or you didn’t use enough cream cheese frosting. You need to add another tablespoon or two of frosting and knead it in until it feels tacky and cohesive, almost like playdough.
Next time, let the frosting sit out for 15 minutes so it’s softer before you start mixing; cold frosting won’t incorporate as well into those dry crumbs. Don’t worry about adding too much, as the cream cheese keeps them moist anyway!
Why Did My White Chocolate Coating Crack?
This is the MOST common problem, and I’ll tell you right now: your cake balls were too warm! You can’t rush the chill time—they need to be firm, almost frozen, when they hit that warm candy coating. The rapid temperature change causes the coating to seize up immediately, which leads to cracks as the cake ball slightly warms up inside the shell.
If you notice cracking, pull the next batch of balls directly from the freezer rather than the fridge. Also, ensure your dipping bowl isn’t sitting over a high heat source, even residual heat can mess up the coating consistency.
My White Chocolate Coating Seems Too Thick to Dip
If the coating looks cloudy or gloopy and you can barely get the cake ball submerged, it’s time to thin it out gently. Remember that optional tablespoon of coconut oil or shortening? Now is the time to use it! Stir in a tiny amount—maybe half a teaspoon at a time—stirring until it flows more easily.
If you’ve microwaved it already and it’s still thick, give it another 10 seconds in the microwave, stirring vigorously. That melting action combined with the added oil should thin out that coating just enough so you get a smooth finish and can easily pull your red velvet cake pops out looking professionally dipped!
Serving Suggestions for Your Bite Sized Red Velvet Treats
Once those gorgeous pops are dry, the real fun begins—displaying these showstoppers! These aren’t just for standing upright in a block of foam, though that always works. For big party dessert ideas, I love sticking them directly into a large, frosted sheet cake as toppers. It looks so impressive and adds vertical interest!
They also look spectacular clustered on a tiered tray, maybe mixed with some powdered sugar donut holes to break up the red. If you’re serving them alongside drinks, try setting them up next to a big bowl of my favorite non-alcoholic Christmas punch for a stunning color contrast.
Honestly, these bite sized red velvet treats are so rich, one or two is always enough, so they are perfect for setting out on a fancy platter and letting guests graze!
Nutritional Estimates for Red Velvet Cake Pops
Now, look, I’m Mia, and my focus is always on making things taste fantastic first, and worrying about the numbers second! But I know some of you are tracking things, so I wanted to give you a ballpark idea of what’s in these decadent bites. Remember, because we are using a box mix and store-bought frosting, the exact nutrition can swing a bit depending on the brands you grab—so view this as a handy guide rather than a hard fact.
This estimate is based on making about 24 pops, which is what this recipe yields. If you manage to roll yours bigger, the numbers will naturally change!
- Serving Size: 1 pop
- Calories: Around 220 (Yep, they’re rich, but totally worth it!)
- Sugar: Approximately 20g (That good white coating adds up quickly!)
- Fat: About 13g
- Carbohydrates: Roughly 25g
- Protein: Near 2g
Since we are using melted candy melts instead of pure chocolate, the fat content is slightly different than old-school baking. Just enjoy them for what they are: a perfect, shareable little burst of red velvet happiness for your next gathering!
Share Your Red Velvet Cake Pops Success
Well, there you have it! We took a boxed cake mix and turned it into the most gorgeous, crack-free, perfectly chilled red velvet cake pops you could dream of. My heart is happy just thinking about how many parties these beautiful bites are going to grace!
I really, truly hope you try this recipe out for your next gathering. When you do, I’d absolutely love to hear about it! Did you manage to get that coating perfectly smooth? Did the sticks stay put? Please drop a comment down below and let me know how your dipping adventure went. Or better yet, take a picture of your stunning, bite-sized red velvet treats and tag me on social media!
Seeing your creations come to life in your own kitchens—that’s what makes all this worth it for me. Happy baking, friend!
PrintEasy Red Velvet Cake Pops Recipe with Cream Cheese Filling

Create moist, bakery-style red velvet cake pops using a simple box mix and cream cheese binder. This tutorial focuses on the technique for a smooth, crack-free white chocolate coating, resulting in decadent, bite-sized treats perfect for parties or gifting.
- Prep Time: 30 min
- Cook Time: 30 min
- Total Time: 3 hours 40 min
- Yield: 24 pops 1x
- Category: Dessert
- Method: No Bake Assembly
- Cuisine: American
- Diet: Vegetarian
Ingredients
- 1 box Red Velvet Cake Mix (plus ingredients listed on box, usually eggs, oil, water)
- 1 cup Cream Cheese Frosting (store-bought or homemade)
- 12 ounces White Candy Melts or White Chocolate
- 1 tablespoon Coconut Oil or Shortening (optional, for smoother dipping)
- 10–12 Cake Pop Sticks
- Red or white sprinkles (optional, for decoration)
Instructions
- Prepare the red velvet cake according to the box directions. Bake the cake in a 9×13 inch pan for easier crumbling. Let the cake cool completely.
- Crumble the cooled cake into fine crumbs in a large bowl. Discard any overly browned edges.
- Add the cream cheese frosting to the cake crumbs. Mix thoroughly with a sturdy spoon or clean hands until the mixture holds together like thick dough.
- Roll the mixture into uniform 1-inch balls. Place the balls on a parchment-lined baking sheet.
- Insert the cake pop sticks halfway into the balls. If the sticks do not hold well, dip the tip of the stick in melted chocolate or candy melts first, then reinsert and chill.
- Chill the cake balls for at least 2 hours, or until very firm. This step prevents cracking during dipping.
- Melt the white candy melts (or white chocolate) according to package directions, often in a microwave-safe bowl in 30-second intervals, stirring well between each interval. Stir in the coconut oil or shortening if using, to thin the coating.
- Dip each chilled cake ball completely into the melted coating. Gently tap the stick against the side of the bowl to remove excess coating.
- Immediately apply sprinkles, if desired, before the coating sets.
- Place the dipped cake pops upright in a styrofoam block or cake pop stand to allow the coating to dry completely and harden.
- Store finished cake pops in an airtight container at room temperature or in the refrigerator.
Notes
- For the smoothest white chocolate dipping technique, keep your cake balls frozen or very cold. Warm cake balls cause the coating to crack as it cools.
- If the candy coating becomes too thick while dipping, reheat it briefly in 10-second bursts.
- You can substitute the cake mix with your favorite scratch-made red velvet cake recipe for a richer flavor.
- These treats freeze well. Place them in an airtight container between layers of wax paper before freezing.
Nutrition
- Serving Size: 1 pop
- Calories: 220
- Sugar: 20g
- Sodium: 150mg
- Fat: 13g
- Saturated Fat: 7g
- Unsaturated Fat: 6g
- Trans Fat: 0.5g
- Carbohydrates: 25g
- Fiber: 0.5g
- Protein: 2g
- Cholesterol: 15mg