
There’s nothing quite like that first spoonful of something warm, spiced, and utterly comforting, is there? When the day is long or the evening is chilly, we all deserve a dessert that feels like a hug. That’s exactly why I’ve perfected the Ultimate Easy Buttery Apple Cobbler with a Biscuit Topping. You don’t need to spend hours slaving away for that classic flavor; this recipe delivers that truly memorable apple cobbler experience in a flash. It’s all part of my promise here at Mia’s Meals: taking those incredible, rich flavors from my Midwest upbringing and stripping away the complexity so you can spend more time enjoying your family. If you’re looking for other quick fruit fixes, you might want to check out tips on how to make the best stovetop apple pie filling while you’re here!
- Why This Easy Apple Cobbler Recipe Works for Everyone
- Gathering Ingredients for Your Classic Apple Cobbler
- Step-by-Step Instructions for This Apple Cobbler with Biscuit Top
- Tips for a Perfect Homemade Apple Cobbler
- Serving Suggestions for Your Warm Apple Dessert
- Storing and Reheating Your Leftover Apple Cobbler
- Frequently Asked Questions About Apple Cobbler
- Nutritional Estimates for This Simple Apple Dessert
- Share Your Experience with This Apple Cobbler
Why This Easy Apple Cobbler Recipe Works for Everyone
I hear you! We all want that homemade taste, but life moves fast. This isn’t some finicky, show-off recipe. This is the Best Apple Cobbler Dessert because it is truly dependable. It’s built for real life, delivering maximum cozy factor with minimal fuss. If you’ve ever felt nervous about baking a crust, don’t worry; this is the perfect recipe to boost your confidence.
Forget complicated assembly; this is pure comfort delivered quickly. We’re checking all the boxes for satisfying Comfort Food Desserts:
- It comes together faster than ordering takeout.
- The topping is forgiving—even if you don’t roll it perfectly!
- It bakes up bubbly and fragrant every single time.
If you’re already feeling inspired to try another quick fruit fantastic treat, you might enjoy my guide to making an easy puff pastry apple strudel.
Quick Prep Time for Your Apple Cobbler
Seriously, fifteen minutes. That’s what the clock says in my kitchen when I’m getting this assembled. In the early days of running Mia’s Meals when the kids were toddlers, I needed desserts that could jump from pantry to oven fast. This Quick Apple Cobbler is my answer to those evenings. You just toss the apples, mix the topping, and boom—it’s ready for the oven. That’s the efficiency I strive for!
The Secret to the Buttery Apple Cobbler Topping
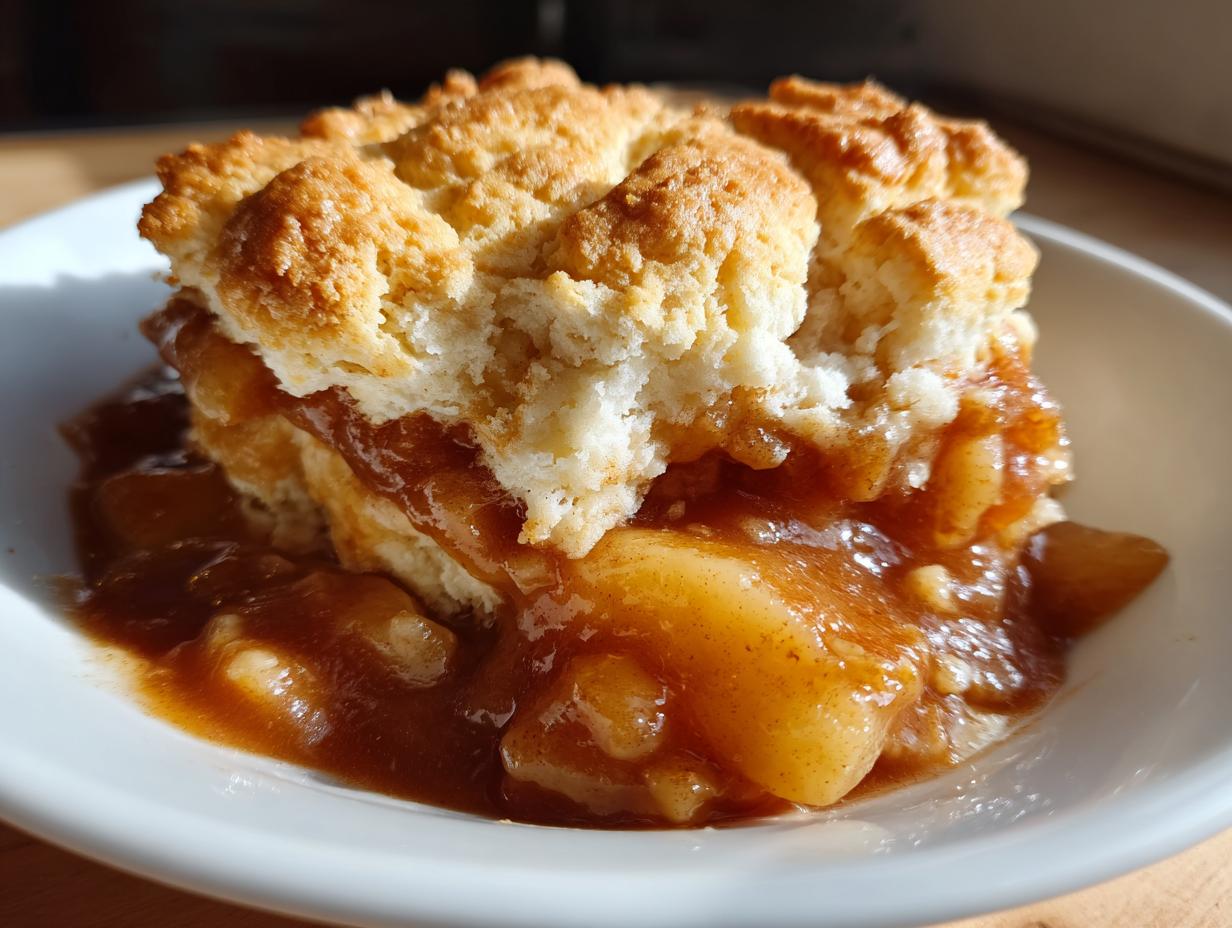
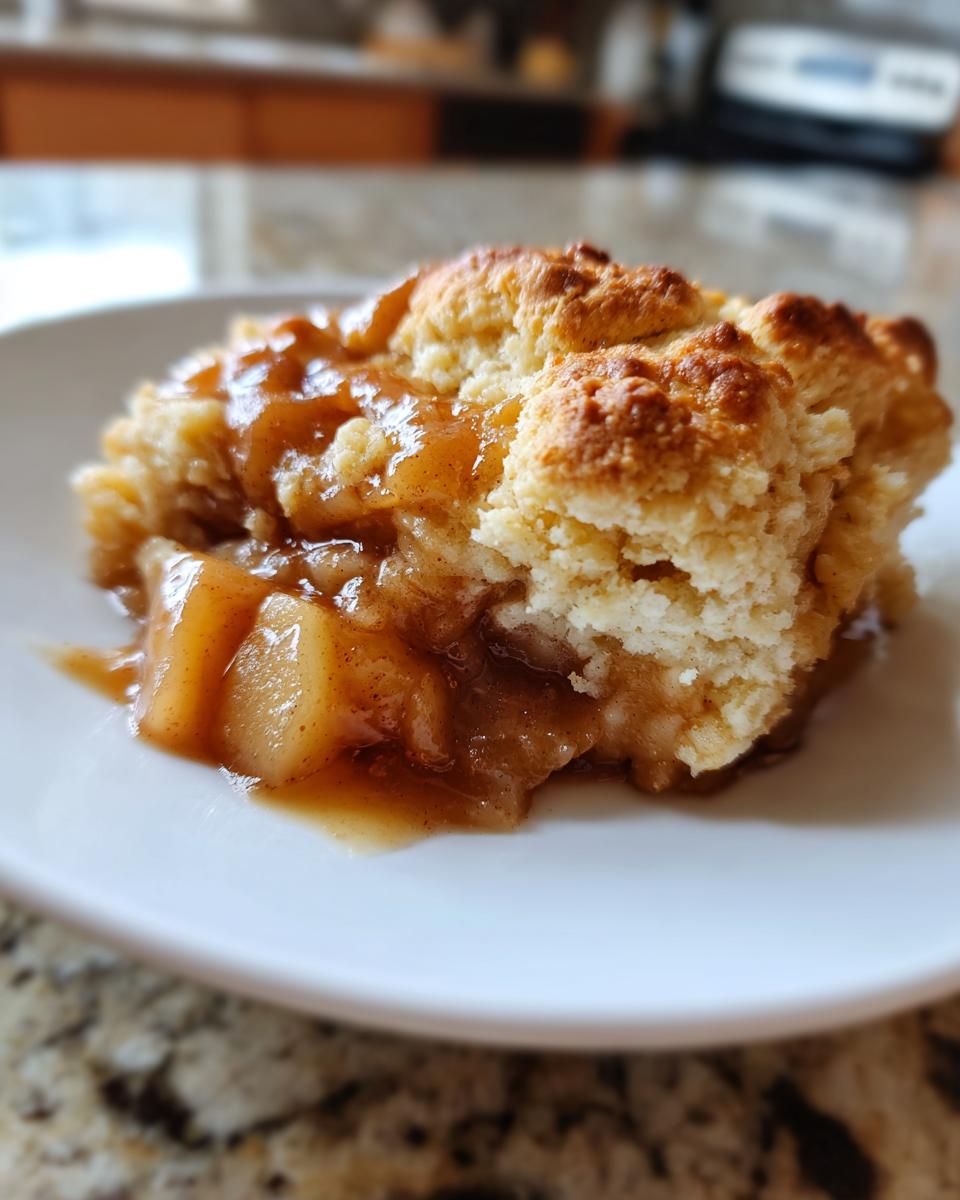
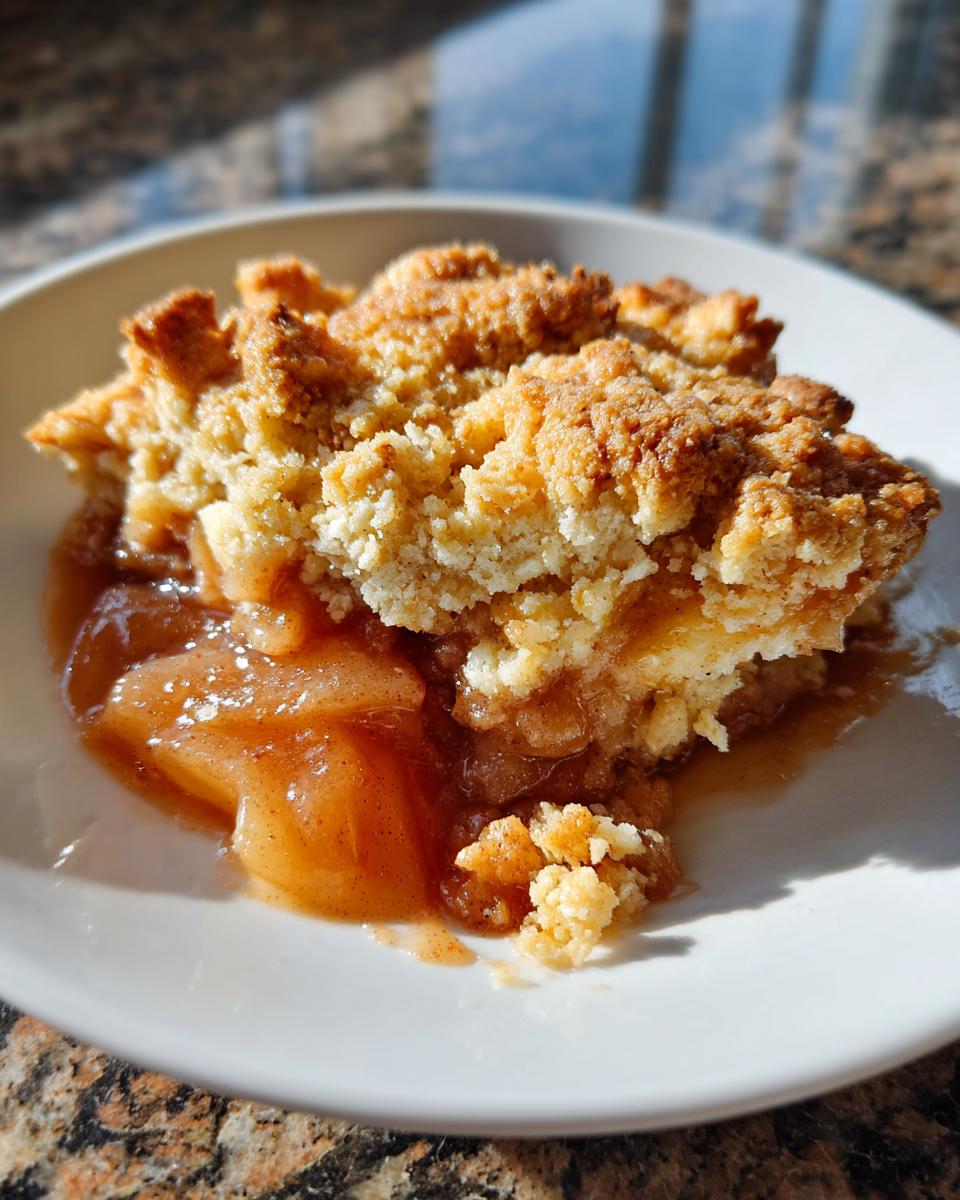
Okay, this is where the magic really happens. Forget pie dough! We’re going for a thick, biscuit-like topping. The absolute, non-negotiable secret to that melt-in-your-mouth texture is using very cold butter, cut into small cubes. When you work that cold butter into the dry ingredients, you are creating little pockets of fat. As it bakes, that fat melts and steams, giving you those beautiful flaky layers in the Buttery Apple Cobbler Topping.
Gathering Ingredients for Your Classic Apple Cobbler
To get that ‘comfort in a bowl’ feeling, you can’t cut corners on your starting materials. Since this Classic Apple Cobbler is so simple, the quality of what you put in really shines through. For the filling, you’ll want six large Granny Smith apples; they must be peeled, cored, and sliced neatly about a quarter-inch thick. Make sure your butter for the topping is unsalted and kept incredibly cold, cut into little pieces before you start.
The topping just needs standard pantry staples, but the magic is in the technique, which we cover next. Getting your mise en place ready now means the actual assembly later is incredibly smooth.
Apple Selection for the Best Apple Cobbler Dessert
I get asked all the time, “Mia, what apples should I use?” For a truly balanced dessert, you need acidity to cut through all that glorious sugar we add. That’s why I lean heavily on tart Granny Smith apples. They hold their shape perfectly during baking, avoiding that mushy texture, and their tartness sings against the cinnamon and brown sugar. Trust me, Granny Smiths make this the Best Apple Cobbler Dessert!
Step-by-Step Instructions for This Apple Cobbler with Biscuit Top
Now that we have our perfect apples and our cold butter ready, it’s time to put this beauty together! Remember, for this apple cobbler, timing is everything, but rush the chilling steps and you lose the texture. We’re moving logically here to ensure that topping stays flaky and the apples get perfectly tender. While we’re focused on cobbler today, don’t forget you can apply some of these principles to making easy apple pie cookies too!
Preparing the Spiced Apple Filling for Your Apple Cobbler
First things first, make sure your oven is warming up to 375 degrees F. Lightly grease your pie dish or 8×8 pan. Now for the apples! In a large bowl—and this is where you use that gentle touch—toss all your sliced apples with the sugars, the small amount of flour, cinnamon, nutmeg, lemon juice, and water. You want them evenly coated, but don’t mash them! Bruised apples turn to applesauce when they bake, and we want slices!
Once they look beautifully coated and fragrant, spread that mixture into your prepared dish in a nice, even layer. That’s the base done in maybe five minutes!
Making the Buttery Apple Cobbler Topping Dough
Time for the biscuit topping, which is absolutely key. In a separate spot, whisk together the flour, sugar, baking powder, and salt for the topping. Now, take your COLD butter pieces and work them in. You can use your fingers, but I swear by a pastry blender. You must mix it until it looks like coarse crumbs, keeping some pea-sized chunks of butter visible—those bits are flavor bombs! Because this is a biscuit dough, you only add the milk right at the end and stir *just* until it comes together. Stop stirring the second you don’t see dry flour anymore. It should look shaggy, not smooth!
Baking and Resting the Homemade Apple Cobbler
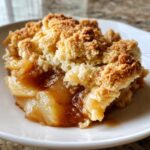
Take haphazard spoonfuls of that dough and drop them over your apples. Don’t worry about making it perfect; gaps are great because we want to see that filling bubbling! Brush those biscuits lightly with melted butter and maybe sprinkle on some coarse sugar for crunch. Pop it in the oven for about 40 to 45 minutes. You are looking for two signs: the topping must be richly golden brown, and the filling underneath must be bubbling thickly around the edges. This means it’s cooked through. Crucially, let this Homemade Apple Cobbler rest on a rack for a full 15 minutes before you even think about digging in. This rest lets the filling set up so it doesn’t run all over your plate!
Tips for a Perfect Homemade Apple Cobbler
Making a great apple cobbler isn’t just about following steps; it’s about knowing the little tricks that turn good into truly great. I want your results to be foolproof, especially when you’re diving into Fall Baking Recipes. If you’ve ever worried about a soggy bottom, stick with these tips—they are born from years of trying to get that perfect contrast between the gooey fruit and the slightly crisp topping.
If you want to explore another great layered fruit dessert, you must give my pecan pie cobbler a look! It steals the show every single time.
Variations on the Classic Apple Cobbler
While the recipe I gave you is my staple, sometimes you just need to tweak things based on what’s in the pantry or what sounds exciting that day! The beauty of this structure is how easily it adapts.
- To add some texture up top, try mixing about a quarter cup of chopped pecans or walnuts right into the topping dough along with your milk. They toast up beautifully during baking.
- If your apples aren’t super tart, you can boost the acidity in the filling by swapping out a teaspoon of that cinnamon for a tiny pinch of ground cardamom. It adds a lovely floral note that pairs wonderfully with baked apples.
- Because we use flour in the filling (to help it thicken), if you still find your filling is running a little loose—maybe your apples had extra water—you can drizzle a tablespoon of caramel sauce over the apples *before* you put the topping on. That caramel starts to thicken as it heats up, helping bind the whole bubbling base together. For more fun pairings, check out this tip for making your easy apple cobbler even better!
Serving Suggestions for Your Warm Apple Dessert
You’ve done the hard work, and now it’s time for the reward! Serving this cobbler piping hot is essential for the best experience. Remember how important those gooey apples are? You want to enhance that! The number one way to turn this into the ultimate evening treat is with a big scoop of vanilla bean ice cream melting slowly over the hot biscuit top. Seriously, I rarely serve it without. For an extra layer of indulgent flavor, grab your favorite caramel sauce and drizzle it right over the top. You can find my recipe for foolproof chewy caramel sauce to serve alongside this! This creates the perfect marriage of tart fruit and sweet, salty warmth, making every bite of this Warm Apple Dessert unforgettable.

Storing and Reheating Your Leftover Apple Cobbler
Now, let’s be real: sometimes we actually have leftovers, which is rare when this cobbler is around! How you store this matters a lot because that beautiful buttery topping can get soft or dry out if you aren’t careful. If you have just a tiny bit left, covering it loosely with foil and leaving it on the counter for a few hours is fine. But for anything longer than that, you should pop it strictly in the fridge. Pop a bit of plastic wrap snugly over the exposed topping area or foil and it should keep well for about three days.
The reheat is key to bringing back that fresh-baked goodness. If you are only warming up one or two servings, the microwave is your friend for speed, but I won’t lie—it softens the biscuit topping too much. If you want that crisp texture back, you absolutely have to use the oven. Just place a single serving on a small oven-safe plate, cover it lightly with foil (so the apples don’t dry out), and warm it at 350 degrees F for about ten minutes. This little bit of extra time brings the topping right back to life. Don’t skip this step if you want that perfect Homemade Apple Cobbler texture the next day!
Frequently Asked Questions About Apple Cobbler
I always gather questions when I make a new dish, and I know you probably have a few too about this delicious dessert! I want to make sure your experience making this apple cobbler is perfect from start to finish. Here are some of the things I hear most often when folks try to bake a Simple Apple Dessert like this one. If you’re wondering about sweet glazes that dry nicely, you might want to look at my tips on how to get the best sugar cookie icing—it’s surprisingly relevant when thinking about toppings!
Can I make this apple cobbler ahead of time?
This is tricky, and here’s my honest take: You can prep both components separately! You can toss the apples with their spices a day ahead and keep them covered in the fridge. You can also make the biscuit topping dough, wrap it tight, and chill it. However, I strongly advise against assembling the whole thing—apples AND topping—until about 30 minutes before you want to put it in the oven. If the dough sits too long on the raw fruit, the moisture will start soaking up into the biscuit, and you won’t get that beautiful, fluffy rise we talked about. For the best results, assemble it right before baking!
What is the best apple to use for an Easy Apple Cobbler Recipe?
Hands down, for an Easy Apple Cobbler Recipe that tastes like it came from a champion baker, you need Granny Smith apples. Why? Because they hold their shape beautifully. When baking, you want the apples to soften but not completely turn to mush. Granny Smiths are tart enough, so when you mix them with our brown sugar, you get that perfect sweet-tart balance without everything becoming one uniform, gooey mess. They give you the best texture!
How do I prevent my biscuit top from getting soggy?
The number one reason the topping gets soggy is usually one of two things: either the filling isn’t hot enough, or the topping is applied too densely. For this recipe, the biscuit topping is designed to be dropped on in clumps, not spread smoothly. Those gaps are important because they allow steam to escape! Make sure you are baking it at the full 375 degrees F, as a lower temperature means the apples release moisture for longer without the topping having a chance to crisp up. Also, the mandatory 15-minute rest time after it comes out lets that bubbling filling thicken up, which seals the bottom layer slightly so it doesn’t stay too wet.
Nutritional Estimates for This Simple Apple Dessert
I want to be upfront: baking is all about joy, not strict calorie counting! But I know some of you like to keep track. Based on standard ingredient measurements, this Simple Apple Dessert clocks in around 410 calories per serving. You’ll see about 19 grams of fat and 35 grams of sugar, mainly from the butter and the fruit sugars we added. These numbers are just an estimate, of course, because how much butter *you* brush on top changes things! Remember, these estimates are based on one of six generous servings.
Share Your Experience with This Apple Cobbler
That’s it! You’ve created the Ultimate Easy Buttery Apple Cobbler, and now I’m so excited for you to dig in. Please don’t keep this warmth and comfort all to yourself! I build Mia’s Meals around the idea of sharing good food and good times, and hearing from you is the best part of my day.
When you try this recipe, I’d be so grateful if you could come back here and leave a rating. Did you get that golden, flaky biscuit top? How did you serve it up? Did the kids devour it? Five stars lets other busy home cooks know they can trust this recipe, and your comments give me ideas for future delicious, simple creations!
If you captured any beautiful photos of your Simple Apple Dessert bubbling away, I’d love to see them! Tag us on social media or share them right here in the comments. It truly means the world to me when I see my recipes making their way onto your tables. If you want to learn more about why I focus on these approachable, heartfelt meals, you can always read more about our philosophy here! For more simple baking inspiration based on this classic flavor profile, check out this highly-saved idea for a cozier apple cobbler recipe.
PrintUltimate Easy Buttery Apple Cobbler with a Biscuit Topping
Make this easy apple cobbler for comforting gatherings. It features tender, spiced apples under a rich, buttery biscuit topping. This recipe is simple for beginners and delivers classic comfort food flavor.
- Prep Time: 15 min
- Cook Time: 45 min
- Total Time: 60 min
- Yield: 6 servings 1x
- Category: Dessert
- Method: Baking
- Cuisine: American
- Diet: Vegetarian
Ingredients
- 6 large Granny Smith apples, peeled, cored, and sliced 1/4 inch thick
- 1/2 cup granulated sugar
- 1/4 cup packed light brown sugar
- 1 tablespoon all-purpose flour
- 1 teaspoon ground cinnamon
- 1/4 teaspoon ground nutmeg
- 1 tablespoon lemon juice
- 1/4 cup water
- 1 cup all-purpose flour (for topping)
- 1 tablespoon granulated sugar (for topping)
- 1 teaspoon baking powder
- 1/2 teaspoon salt
- 1/2 cup (1 stick) cold unsalted butter, cut into small pieces
- 1/3 cup milk
- 1 tablespoon melted butter (for brushing top)
- 1 teaspoon coarse sugar (optional, for sprinkling)
Instructions
- Preheat your oven to 375 degrees F. Lightly grease a 9-inch pie dish or an 8×8 inch baking dish.
- In a large bowl, combine the sliced apples, granulated sugar, brown sugar, 1 tablespoon flour, cinnamon, nutmeg, lemon juice, and water. Toss gently until the apples are evenly coated.
- Pour the apple mixture into your prepared baking dish, spreading them into an even layer.
- Prepare the biscuit topping: In a separate medium bowl, whisk together the 1 cup flour, 1 tablespoon sugar, baking powder, and salt.
- Cut in the cold butter pieces using a pastry blender or your fingertips until the mixture resembles coarse crumbs with some pea-sized pieces of butter remaining.
- Pour in the milk and stir just until a shaggy dough forms. Do not overmix.
- Drop spoonfuls of the biscuit dough evenly over the apple filling. You do not need to cover the entire surface; gaps are fine.
- Brush the tops of the biscuit dough lightly with the 1 tablespoon of melted butter and sprinkle with coarse sugar, if using.
- Bake for 40 to 45 minutes, or until the topping is golden brown and the apple filling is bubbling thickly around the edges.
- Let the apple cobbler cool on a wire rack for at least 15 minutes before serving warm.
Notes
- Serve this warm apple dessert with vanilla ice cream or a drizzle of caramel sauce for the best comfort food experience.
- For a deeper flavor, substitute half of the granulated sugar in the apple filling with packed light brown sugar.
- If you prefer a skillet apple cobbler, use an oven-safe cast iron skillet instead of a baking dish.
Nutrition
- Serving Size: 1 serving
- Calories: 410
- Sugar: 35
- Sodium: 250
- Fat: 19
- Saturated Fat: 11
- Unsaturated Fat: 8
- Trans Fat: 0.5
- Carbohydrates: 60
- Fiber: 4
- Protein: 5
- Cholesterol: 45