

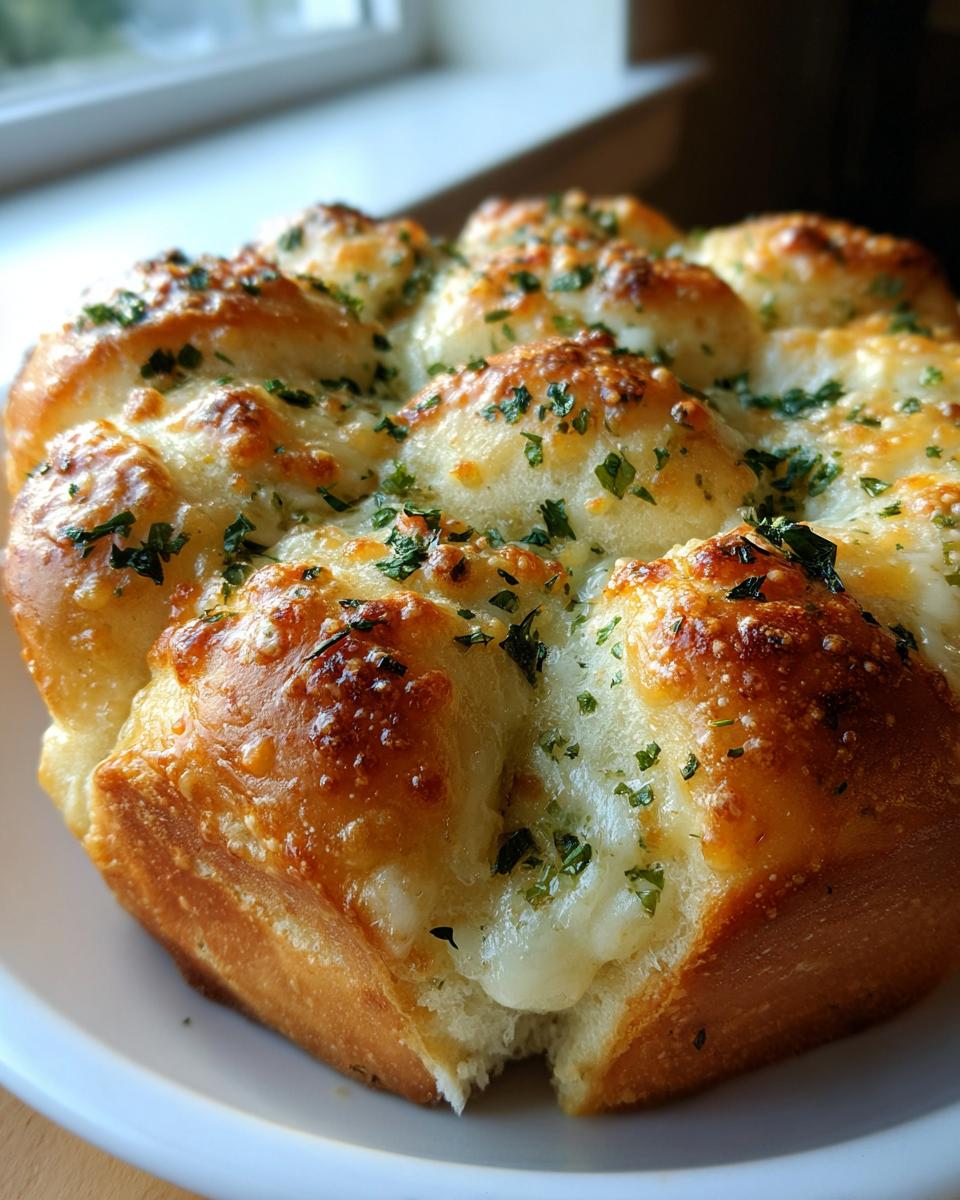
Oh, you want comfort food that actually hugs you back? I totally get it. Life is messy, and sometimes you just need something warm, cheesy, and ridiculously garlicky to set things right. That’s exactly why I worked so hard to nail these garlic cheese rolls. Forget those dry, sad little bread sides you get at restaurants; we are making the Ultimate Soft Homemade Garlic Cheese Rolls here!
When I started Mia’s Meals, it was all about taking those classic tastes from my childhood—the ones Mom and Grandma made that tied the whole family to the table—and cutting out the fussy nonsense. These rolls are the purest expression of that mission: they are spectacularly soft, perfectly pull-apart, and swimming in garlic butter before they even hit the oven. If you want to know more about why I focus on simple comfort food, you can always check out my story on the about page.
Seriously, these are the best cheesy bread rolls you’ll ever pull apart. They remind me that even on the busiest Tuesday night, we can make something truly special without spending hours slaving over the stove. Trust me, these will become your go-to *party appetizer bread*.
- Why You Will Love These Garlic Cheese Rolls
- Essential Ingredients for Perfect Garlic Cheese Rolls
- Step-by-Step Guide: How to Make Garlic Cheese Rolls
- Tips for Success When Making Garlic Cheese Rolls
- Variations for Savory Yeast Rolls
- Serving Suggestions for Warm Cheesy Bread Side Dish
- Storage and Reheating Instructions for Garlic Cheese Rolls
- Frequently Asked Questions About Making Garlic Cheese Buns
- Estimated Nutritional Data for Garlic Cheese Rolls
- Share Your Homemade Soft Bread Recipes with Cheese
Why You Will Love These Garlic Cheese Rolls
I know there are a million recipes out there promising the world, but these rolls? They truly deliver the magic. I wouldn’t put them up here if they didn’t pass my ultra-high standards for softness and flavor. Here’s the quick rundown on why you need to drop everything and make this easy garlic cheese bread recipe right now:
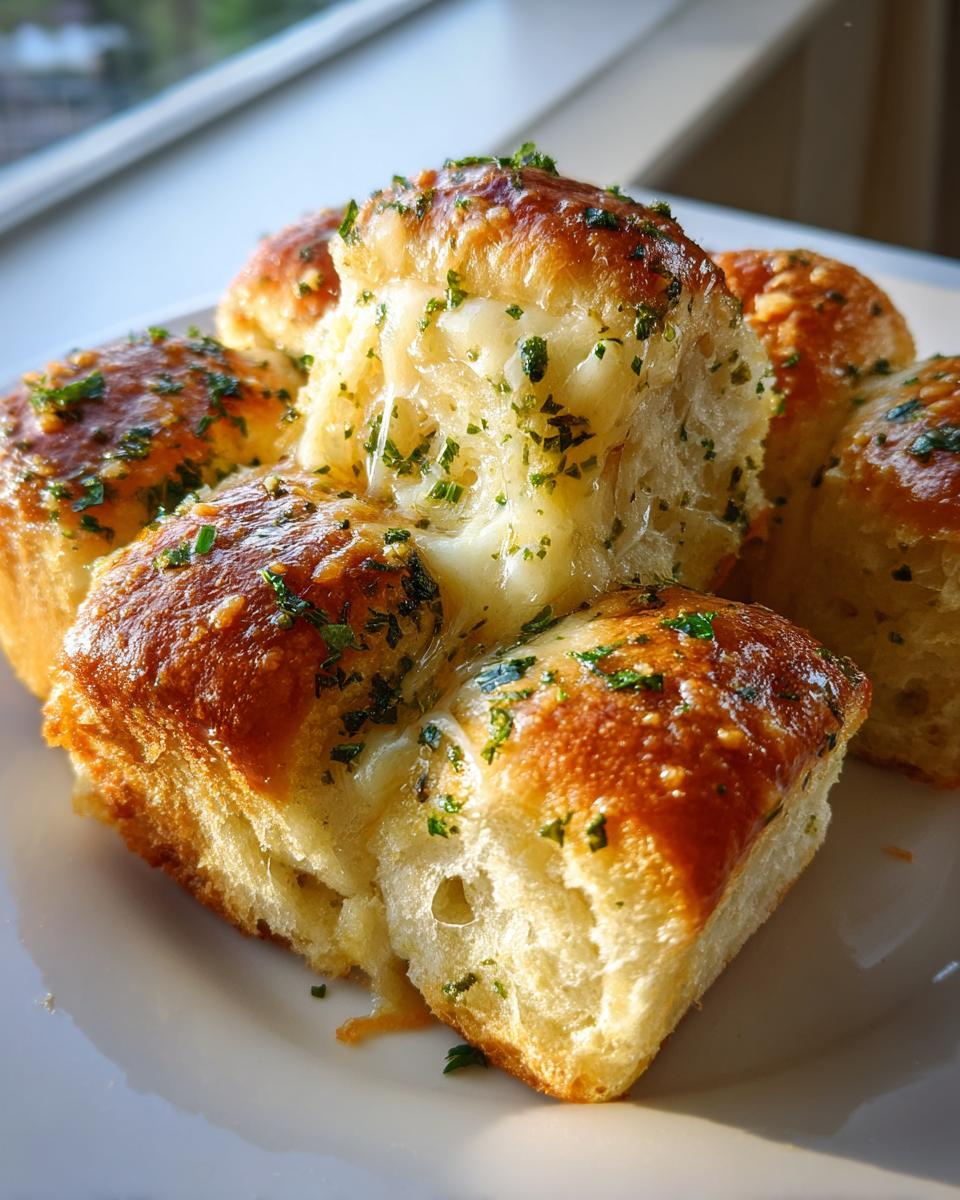
- They are genuinely pull-apart goodness! Seriously, the best part is tearing one off while it’s still piping hot, and the cheese stretches forever.
- The texture is incredible. We use a tested homemade soft dough rolls method that keeps them cloud-like soft, even hours later.
- Intense garlic flavor without any harshness. That melted butter infusion gets right into every nook and cranny of the dough.
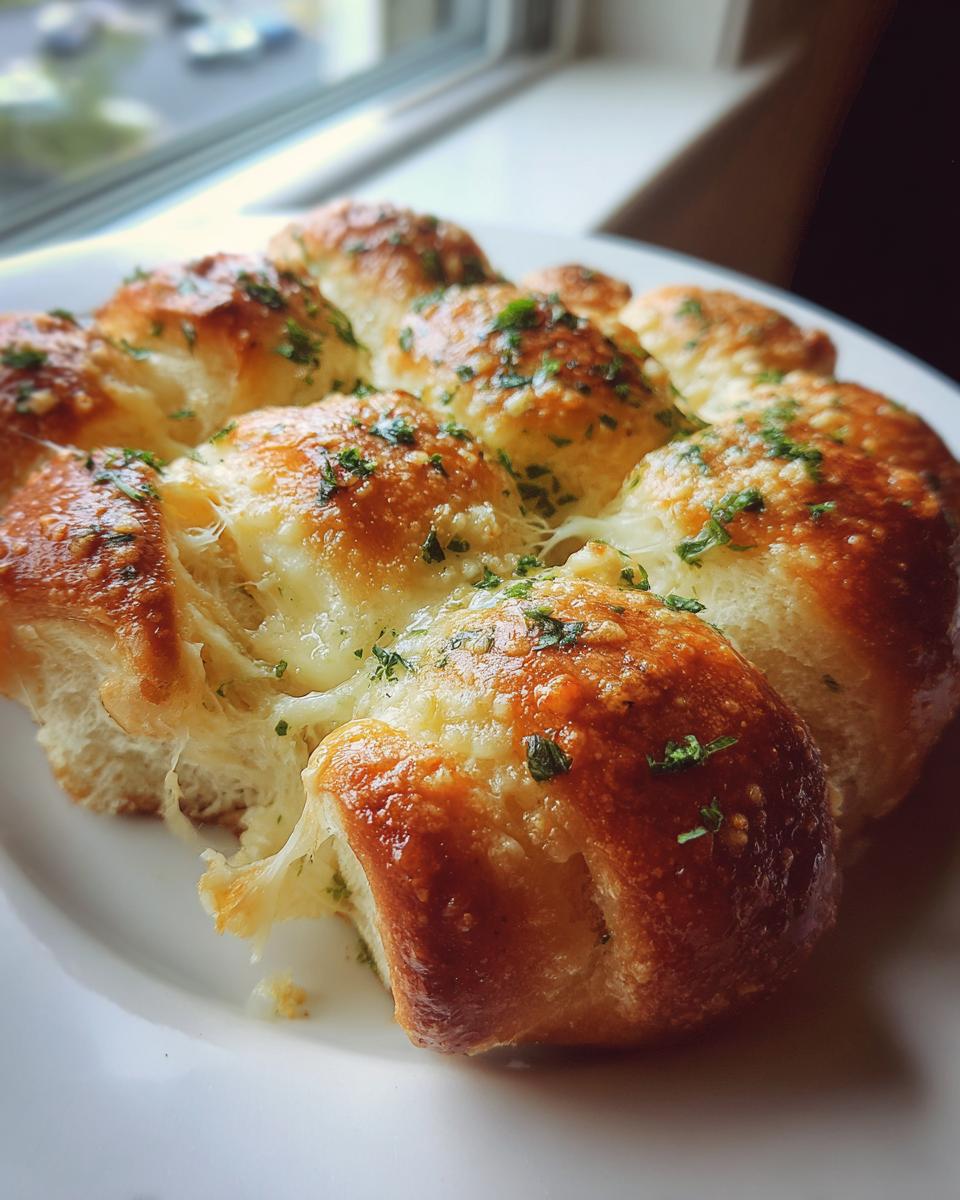
- They bake up fast! Once your dough rises, you are minutes away from having the most amazing cheesy garlic dinner rolls at your service.
- Perfect for everything from weeknight pasta nights to holiday tables—they are the ultimate crowd-pleaser. If you love this pull-apart vibe, you should absolutely check out my recipe for gooey pull-apart garlic cheese bread, too!
Essential Ingredients for Perfect Garlic Cheese Rolls
If you want bakery-quality results, we can’t cut corners on the ingredients, but thankfully, this list is super straightforward. You probably have most of this stuff already! The key here is making sure your yeast is happy and that you have enough butter—because honestly, there’s never *enough* butter when it comes to these rolls.
Baking bread from scratch requires precision, especially with yeast, so pay attention to those temperatures. If you’re looking for other simple ingredients made easy, I use a lot of the same rules when I make my easy homemade soft chewy caramels!
Here is exactly what you need to gather before we mix up this amazing dough:
- 1 cup warm milk (And I mean warm! Get it right around 105-115°F—tepid, not hot, or we’ll kill that yeast!).
- 2 1/4 teaspoons active dry yeast (That’s one standard packet, thankfully).
- 1 tablespoon granulated sugar (Just a little food for the yeast to wake up nice and bubbly).
- 3 cups all-purpose flour, plus more for dusting (We add this gradually, so don’t dump it all in at once!).
- 1 teaspoon salt (Flavor foundation!).
- 1 large egg, room temperature (Make sure it’s relaxed, not cold from the fridge, for better mixing).
- 4 tablespoons unsalted butter, melted, plus another 4 tablespoons reserved strictly for the garlic topping (Yes, that’s 8 tablespoons total!).
- 4 cloves garlic, minced (Don’t even think about using the jarred stuff here; fresh is mandatory for this flavor!).
- 1/2 cup shredded mozzarella cheese (The main pull factor!).
- 1/4 cup grated Parmesan cheese (For that salty, sharp kick).
- 2 tablespoons fresh parsley, chopped (Adds a beautiful pop of color and freshness).
Step-by-Step Guide: How to Make Garlic Cheese Rolls
Okay, deep breaths! Making bread from scratch always feels a little intimidating, but that’s why I’ve broken these instructions down into tiny, manageable pieces. We’re going to treat this dough gently, and by the end, you’ll have the fluffiest, most flavorful savory yeast rolls you’ve ever made. Remember, patience during the rise times is your secret weapon!
Activating the Yeast and Mixing the Dough for Garlic Cheese Rolls
First things first: we need to wake up the yeast. Grab your biggest bowl! You’ll mix that warm milk—remember, 105 to 115 degrees; that’s crucial—with your yeast and sugar. Give it a little stir and then just let it chill out for about five to ten minutes. If it gets nice and foamy on top, congrats! Your yeast is alive and breathing. If it stays flat, toss it and start over with warmer milk.
Once you have that beautiful foam, it’s time to add the bulk of the flavor and structure. Toss in 2 cups of your flour, the salt, the egg, and the *first* measure of melted butter (that’s four tablespoons). Get your dough hook in there if you’re using a mixer, or brace yourself for some good arm work if you’re mixing by hand. Mix until it just comes together. Then, you’re going to slowly add the rest of that flour until you have a dough that’s *soft*. It should still feel a little tacky, but it shouldn’t be sticking aggressively to the sides of the bowl. That tells us we have the right consistency for genuinely soft bread recipes with cheese.
Kneading and Proofing Your Homemade Soft Dough Rolls
Now, turn that shaggy dough out onto a lightly floured surface. We need to knead this for about 5 to 7 minutes until it’s smooth and elastic. You’ll know it’s ready when you poke it gently, and the dough slowly springs back at you—that’s what tells us we’ve built up the gluten structure needed for these homemade soft dough rolls.
Slap that beautiful dough into a lightly oiled bowl, give it a caper in the oil to keep any stray bits from drying out, cover it tightly, and find it a warm spot. It needs 1 to 1.5 hours to double in size. Don’t rush this! A long, slow first rise means lighter, better rolls.
Assembling and Baking Your Cheesy Garlic Dinner Rolls
After the first rise, go ahead and gently punch the air out. Now, this is fun: divide everything into 12 equal pieces and roll each into a tight little ball. Set up your **garlic butter rolls recipe** topping: mix that remaining 4 tablespoons of melted butter with your minced garlic and fresh parsley.
Take those dough balls one by one and dip them completely into that garlicky goodness. Don’t be shy! Then, arrange them snugly together in your greased 9×9 baking pan. When they’re all tucked in, cover them up again and let them rest for a final, quick 30-minute rise. While they’re puffing up that last bit, go ahead and set your oven to 375°F (190°C).
Bake for about 18 to 22 minutes. You’re looking for that lovely golden-brown color on top. I love peering through the glass just to watch them grow into magnificent little mounds!
The Final Melt: Adding Cheese to Your Garlic Cheese Rolls
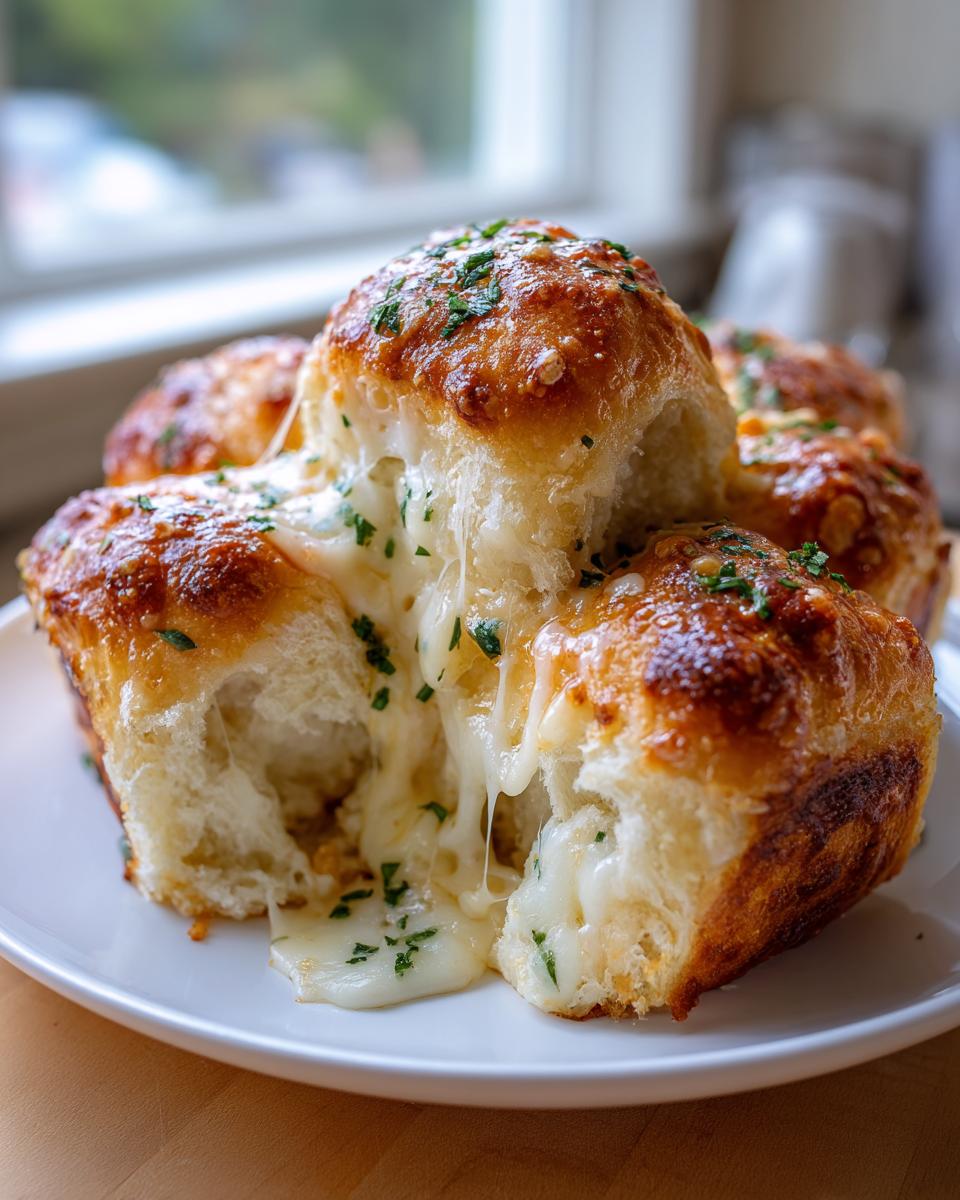
This next step is why these are the best cheesy bread recipe around! As soon as those rolls come out of the oven—and I mean *immediately*—you need to hit them with all that shredded mozzarella and grated Parmesan. The heat trapped in the bread is what melts the cheese perfectly, giving you that amazing stretch.
Pop the pan right back into the oven for just 2 or 3 more minutes. You aren’t cooking them; you’re just coaxing that cheese to get gooey and bubbly. Let them sit for five minutes before you dive in, because hot cheese burns are no joke, trust me. Once they’ve cooled just slightly, they are ready to be pulled apart and devoured warm!
To help you remember all those timings and tricks, I put together a quick guide on baking soft dinner rolls at home that might be handy for your reference later!
Tips for Success When Making Garlic Cheese Rolls
Listen, I love giving you the recipe, but I really love making sure you avoid any little pitfalls! Even though these are pretty straightforward—definitely falling into the ‘quick garlic rolls’ category once the dough is made—a few small checks will guarantee you the softest, most flavorful results every single time. These are the little tricks I learned watching Mom and Grandma fuss over their yeast doughs.
First off, let’s talk temperature, because this is the make-or-break for yeast. That warm milk has to be in that sweet spot (105-115°F). If it’s too cold, the yeast just kind of sighs and stays dormant. Too hot? You’ve killed your starter! I keep a cheap little candy thermometer handy just for this step; it’s worth it. And remember that egg? It really does need to be room temperature so it incorporates smoothly and doesn’t shock the dough when you mix it in.
Next, you asked about garlic intensity. We called for 4 cloves of fresh minced garlic in the butter wash, but hey, if you’re making these for a serious garlic lover—or maybe you’re adding them to your famous roasted broccoli—I highly recommend bumping that up to 6 cloves, just like I noted. If you don’t have fresh, you *can* use garlic powder, but only about half a teaspoon mixed right into the flour during the kneading stage. Fresh is king here for that vibrant punch!
Finally, when you are mixing that dough, don’t be tempted to add all the flour at once, even if the recipe seems dry. You need the dough to be soft when kneading. If it looks like it’s *just* barely coming together but still has a bit of silky shine, you’re perfect. Too much flour means tough, dry rolls, and we absolutely forbid tough rolls in this kitchen! If you want to see another way I infuse flavor into butter washes without dough, check out my recipe for easy garlic butter recipe homemade.
Variations for Savory Yeast Rolls
The beauty of starting with a great savory yeast rolls base like this is that you can dress them up for any occasion! Once you’ve mastered the basic technique, these rolls are totally ready for customization. I love keeping a few of these easy swaps in my back pocket, especially when I’m rushing to turn this into a quick *party appetizer bread* for unexpected guests.
Here are three super simple ways to pivot this recipe without messing up the softness we worked so hard to achieve:
- Herb Power-Up: For a slightly more Mediterranean vibe, skip the parsley entirely and throw in 2 teaspoons of dried Italian seasoning *or* 1 tablespoon of fresh, finely chopped rosemary right into the garlic butter wash. Rosemary and garlic are just heaven together, especially if you’re serving them with something hearty.
- Cheese Swap: Mozzarella is king for the pull, but we can certainly mix things up! Try mixing in 1/4 cup of cubed Provolone cheese balls or even sharp white Cheddar along with the mozzarella right before the final melt. This completely changes the flavor profile of your garlic cheese rolls!
- A Little Heat: If you like things exciting, add a tiny pinch of red pepper flakes (like 1/4 teaspoon) to that melted garlic butter mixture. It gives these rolls a lovely, gentle warmth on the finish that pairs wonderfully with rich main courses. It’s a small addition that makes them feel incredibly gourmet, but they stay just as comforting. Speaking of great pairings, have you tried roasting vegetables with garlic and Parmesan? My roasted broccoli recipe would be perfect alongside these!
Serving Suggestions for Warm Cheesy Bread Side Dish
Okay, confession time: sometimes I bake these rolls just so I have an excuse to eat them straight out of the pan while things are simmering on the stove. But really, they are designed to be the star supporting actor to almost any meal. If you are looking for that perfect accompaniment, this warm cheesy bread side dish is truly versatile, especially for those cozy, comforting dinners.
Here are my top three ways I always serve these garlic cheese rolls:
- Dipping into Hearty Soups: Forget crackers! Nothing beats dunking this soft bread into a big bowl of soup. They are absolutely heavenly with my chunky beef stew or even a simple tomato basil soup. The garlic butter soaks up all the broth beautifully. If you need a great soup recipe to pair them with, try my recipe for old-fashioned hamburger soup—it’s the ultimate pairing.
- Alongside Pasta Night: If you’re making spaghetti, lasagna, or any saucy casserole, these rolls are your ticket to cleaning up every last bit of sauce from your plate. They handle marinara sauce better than any garlic toast I’ve ever tried. They soak it up without getting soggy immediately.
- The BBQ/Roast Companion: When you have a big roast chicken, pulled pork, or even just grilled steaks, you need something soft and savory on the side that isn’t just a boring baked potato. These rolls offer that savory yeast roll element but with major flavor payoff. They balance out rich meats perfectly.
Storage and Reheating Instructions for Garlic Cheese Rolls
No matter how many times I tell everyone to save some for later, these garlic cheese rolls tend to disappear the moment they come out of the oven. But hey, if you manage to have any leftovers—maybe you have amazing self-control, which I clearly don’t!—you’ll want to store them correctly so they stay soft. Hard, stale garlic cheese bread is just tragic, and we won’t stand for that here!
For short-term storage, if you know you’ll be eating them within a day, just tuck them right back into their original 9×9 pan, cover them tightly with plastic wrap or foil, and leave them right on the counter. Room temperature works great for up to 24 hours to keep those homemade soft dough rolls tender.
If you need them to last longer than that, they need the fridge. After cooling *completely* (this is important so they don’t sweat), transfer them to an airtight container. They will last safely for about 3 to 4 days in the refrigerator. I usually keep mine in an airtight container, though I have to admit, they get a *tiny* bit firmer when chilled.
Now for the most important part: reheating! The microwave is your enemy here because it heats the water molecules unevenly, and you end up with rubbery rolls. We want that gooey, freshly baked texture back!
- Best Method (Oven): Wrap the rolls loosely in foil—this keeps moisture in. Pop them into a 350°F oven for about 8 to 10 minutes. This gently steams them back to softness and gets the cheese nice and melty again.
- Quickest Method (Air Fryer): If you have an air fryer, that works wonders too! Set it to 325°F for around 4 minutes. They come out piping hot and satisfyingly fluffy.
If you’re using the fridge rolls, just add 3 or 4 extra minutes to the oven time to take the chill off first. Seriously, reheating this way makes them taste like they just came out of the oven this morning. For more tips on making my recipes last, check out my guide to easy breakfast ideas, which sometimes involves using leftover bread in fun ways!
Frequently Asked Questions About Making Garlic Cheese Buns
I know when you venture into baking soft dinner rolls at home, you usually have a few burning questions pop up. Don’t worry at all; that’s just part of the fun of learning a new recipe! I’ve gathered up the most common things people ask me when trying to perfect these garlic cheese rolls. If I can simplify things enough so you can get these on the table during a *quick weeknight dinner*, then my mission is accomplished! For more ideas on getting dinner done faster, check out my section on quick weeknight dinners.
Can I use canned or pre-made dough instead of making the dough from scratch?
Oh, I totally get the temptation, especially when time is tight! You can absolutely use store-bought biscuit dough or pizza dough if you really need a shortcut for these *quick garlic rolls*. However, I have to be honest: you won’t get that same pillowy, melt-in-your-mouth sensation that comes from using the yeast method here. The secret to my incredibly soft texture is that slow yeast rise. If you do use store dough, skip the first rise entirely, just separate the pieces, dip them in the garlic butter, and give them that short second rise before baking.
How do I guarantee the softest possible texture in these rolls?
If softness is your absolute goal when making these *savory yeast rolls*, focus on three things: temperature, kneading, and liquid. First, make sure your milk is the perfect temperature for the yeast. Second, don’t over-flour while kneading; the dough should remain slightly pliable and tender, not stiff. Third, and this is a big one for any *soft bread recipes with cheese*, ensure your egg is at room temperature. Cold ingredients chill the yeast mixture and make the final dough less elastic and ultimately, less soft once baked.
I don’t have fresh garlic cloves. Can I use garlic powder for the garlic butter rolls recipe?
I really push for fresh garlic because it caramelizes beautifully when melted with butter, giving you that rich, authentic flavor that makes these the *best cheesy bread recipe*! If you absolutely must substitute, you’ll need about 1/2 teaspoon of garlic powder mixed into the 4 tablespoons of melted butter for the topping. But please, for the sake of flavor supremacy, try to grab one bulb of garlic next time you’re out. The difference is huge when you’re making something simple like a *garlic cheese bread recipe*!
My cheese came out greasy, not melted and stretchy. What went wrong?
That usually happens if the cheese cooks too long or if the internal temperature of the rolls is too low when you add it. Remember, we are not *baking* the cheese; we are just *melting* it! The rolls should be piping hot when they come out of the oven the first time. Add your mozzarella and Parmesan immediately, and then only return them to the oven for 2 or 3 minutes max, just until the cheese begins to glisten and pull. Pulling them out too late is the secret to greasy cheese instead of perfectly melted cheese.
Can I turn these into baked cheesy bread sticks instead of round rolls?
Yes, you totally can! If you want to make *baked cheesy bread sticks* instead of the pull-apart rounds, simply roll the entire dough out into a large rectangle after the first rise. Spread your 4 tablespoons of garlic butter evenly over the surface. Sprinkle the cheeses lightly over the butter, then roll it up tightly like a jelly roll. Slice the log into sections about 1 inch thick, and lay those cut-side up in your baking dish instead of rolling tight balls. They bake up just as delicious, but look a little different!
Estimated Nutritional Data for Garlic Cheese Rolls
I want to be super clear about the numbers here because, let’s face it, these are decadent, cheesy rolls—not a diet food! But understanding what you’re eating is part of being comfortable and confident in your cooking, right? This information helps me plan my meals the next day, maybe by opting for something lighter for lunch. If you are interested in healthier ideas, you can check out my healthy lunch recipes section.
The numbers below are estimates based on the specific ingredients and measurements listed above, assuming you get exactly 12 rolls out of the batch. Since we’re dealing with yeast, butter, and cheese, these are delightfully rich!
- Serving Size: 1 roll
- Calories: 220
- Fat: 11g
- Saturated Fat: 6g
- Trans Fat: 0g
- Carbohydrates: 25g
- Sugar: 2g
- Fiber: 1g
- Protein: 7g
- Sodium: 350mg
- Cholesterol: 30mg
Just a little standard disclaimer: these figures are based on standard product estimations for flour and cheese used. If you swap out butter for oil, or use low-fat cheese, or maybe skip some of that amazing garlic topping (which I highly advise against!), these numbers will change. But for the authentic, buttery, cheesy experience, trust these figures!
Share Your Homemade Soft Bread Recipes with Cheese
Well, friend, you’ve done it! You’ve conquered the yeast, tamed the garlic butter, and created a beautiful pan of garlic cheese rolls. That warm, savory aroma filling your house right now? That’s the smell of connection, right there.
Now, here’s where you come in! My whole philosophy here at Mia’s Meals is about building those simple traditions around food, and that only happens when we share our kitchen successes. I absolutely want to hear how these turned out for you. Did they achieve that perfect pull-apart stretch? Which main dish did you serve them with?
Don’t be shy—head down to the comments section below. Seriously, let me know! Rate these rolls for me; that feedback helps other home cooks trust that this is the *best cheesy bread recipe* out there. If you managed to snap a picture of your golden, cheesy bounty, I’d love to see it. You can always tag me on social media, or if you have extensive questions about scaling up the recipe, feel free to send a note through the contact page.
Thank you for bringing these delicious, simple savory yeast rolls to your table. Keep baking with love, and I’ll see you in the next recipe!
PrintUltimate Soft Homemade Garlic Cheese Rolls

Make soft, pull-apart garlic cheese rolls from scratch using a simple yeast dough, loaded with garlic butter and melted mozzarella cheese. These are perfect as a warm cheesy bread side dish.
- Prep Time: 30 min
- Cook Time: 25 min
- Total Time: 2 hours 25 min
- Yield: 12 rolls 1x
- Category: Side Dish
- Method: Baking
- Cuisine: American
- Diet: Vegetarian
Ingredients
- 1 cup warm milk (105-115°F)
- 2 1/4 teaspoons active dry yeast
- 1 tablespoon granulated sugar
- 3 cups all-purpose flour, plus more for dusting
- 1 teaspoon salt
- 1 large egg, room temperature
- 4 tablespoons unsalted butter, melted, plus 4 tablespoons for topping
- 4 cloves garlic, minced
- 1/2 cup shredded mozzarella cheese
- 1/4 cup grated Parmesan cheese
- 2 tablespoons fresh parsley, chopped
Instructions
- Activate the yeast: In a large bowl, combine the warm milk, yeast, and sugar. Let stand for 5 to 10 minutes until foamy.
- Mix the dough: Add 2 cups of the flour, salt, egg, and 4 tablespoons of melted butter to the yeast mixture. Mix on low speed with a dough hook, or by hand, until combined. Gradually add the remaining flour until a soft dough forms.
- Knead: Knead the dough on a lightly floured surface for 5 to 7 minutes until smooth and elastic.
- First rise: Place the dough in a lightly oiled bowl, turning to coat. Cover with plastic wrap and let rise in a warm place for 1 to 1.5 hours, or until doubled in size.
- Shape the rolls: Punch down the dough gently. Divide the dough into 12 equal pieces. Roll each piece into a ball.
- Prepare the filling: In a small bowl, combine the remaining 4 tablespoons of melted butter, minced garlic, and parsley.
- Assemble: Dip each dough ball into the garlic butter mixture, coating it well. Place the coated balls close together in a greased 9×9 inch baking pan.
- Second rise: Cover the pan and let the rolls rise again for 30 minutes. Preheat your oven to 375°F (190°C).
- Bake: Bake for 18 to 22 minutes, or until golden brown.
- Add cheese: Remove the rolls from the oven. Immediately sprinkle the mozzarella and Parmesan cheese evenly over the hot rolls. Return to the oven for 2 to 3 minutes, just until the cheese melts.
- Serve: Let cool slightly before serving warm as a party appetizer bread.
Notes
- For extra flavor, use garlic powder mixed with the flour when kneading.
- If you prefer a stronger garlic flavor, increase the minced garlic to 6 cloves.
- This recipe uses a soft bread recipe with cheese, resulting in very tender rolls.
Nutrition
- Serving Size: 1 roll
- Calories: 220
- Sugar: 2
- Sodium: 350
- Fat: 11
- Saturated Fat: 6
- Unsaturated Fat: 5
- Trans Fat: 0
- Carbohydrates: 25
- Fiber: 1
- Protein: 7
- Cholesterol: 30