
Oh, my goodness, if you can smell my kitchen right now! There’s nothing that screams “cozy home” louder than the scent of warm apples, cinnamon, and browning butter filling the air. When the leaves start turning here in Ohio, I automatically reach for my favorite baking dish. Forget fussy, complicated desserts; my mission here at Mia’s Meals is to give you recipes that actually work when life gets busy, and that’s exactly what this is.
I bring you what I truly call The Best Classic & Easy Old Fashioned Apple Crisp Recipe. This is pure, unadulterated homemade comfort food. It ditches the tricky lattice tops or extra complicated steps required in something like pie building, though I do have a fantastic apple pie recipe if you have extra time! This crisp gives you tender, spiced apples hiding beneath that glorious, crunchy oat topping. This simple apple dessert proves that feeling connected doesn’t require hours of labor—it just takes a few good ingredients and a warm oven.
- Why This is the Best apple crisp recipe for Your Kitchen
- Ingredients for Your Classic apple crisp recipe
- How to Make This Old Fashioned apple crisp recipe Step-by-Step
- Tips for the Perfect apple crisp recipe Success
- Variations on the Classic apple crisp recipe
- Serving Suggestions for Your apple crisp recipe
- Storage and Reheating the apple crisp recipe
- Frequently Asked Questions About This apple crisp recipe
- Share Your apple crisp recipe Experience
Why This is the Best apple crisp recipe for Your Kitchen
So, why should you trust me on this? Because this apple crisp recipe cuts right to the chase! If you’re looking for that unmistakable taste of fall dessert recipes without spending all afternoon over the stove, this is it. It’s my go-to when I need some quick apple dessert magic, fitting perfectly into my mission of simple recipes for a happy home. I’ve perfected the balance here: enough tart apples on the bottom to give you that lovely tender baked apples texture, swimming in cinnamon goodness, topped with just the right amount of buttery apple crisp crumble.
This delivers that authentic homemade comfort food feeling, yet it’s genuinely foolproof. We get everything set up in just 15 minutes, which means less time chopping and more time enjoying that cozy dessert aroma!
Quick Prep for an Easy apple crisp recipe
Honestly, the prep time is the best part. We’re talking 15 minutes tops to get this baby into the oven. That hands-on time fits anyone’s weeknight schedule, whether you’re juggling homework or rushing home after a long day. This recipe skips messy layering and complicated doughs, meaning cleanup is a breeze too. If you’re new to baking or just need something simple, this is your new favorite easy fall baking staple. You can check out other quick weeknight dinners while this is baking!
Ingredients for Your Classic apple crisp recipe
When I say this recipe is straightforward, I mean it! Having all your components ready to go is key to keeping that prep time under fifteen minutes. I always lay out my ingredients like this; it helps me see exactly what I have for the apples versus what I need for the topping. Being super clear about the prep for each item—like making sure that butter is truly cold—is what separates a good bowl of crisp from a truly mind-blowing, buttery apple crisp experience. Trust me on this layout; it makes assembly foolproof.
For the Tender Baked Apples Filling
This combination makes the apples soft and slightly tart, which is perfect since the topping is rich and sweet. Since we aren’t making pie, these don’t need to be paper-thin! I prefer using a mix of apples, like half tart Granny Smith and half sweeter Honeycrisp, to get that complex flavor in your apple pie filling baseline.
- 6 medium apples (like Granny Smith or Honeycrisp), peeled, cored, and sliced about 1/4 inch thick
- 1/4 cup granulated sugar
- 1 tablespoon all-purpose flour
- 1 teaspoon ground cinnamon
- 1/4 teaspoon ground nutmeg
- 1 tablespoon lemon juice
Crafting the Crispy Oat Topping
This is where the magic happens! The oats are what give us that beautiful, slightly chewy, crispy oat topping we all dream about. The most important note here: the butter MUST be ice cold. If it’s soft, you won’t get the right coarse crumb texture. It needs to stay separate from the dry ingredients!
- 1/2 cup all-purpose flour (for topping)
- 1/2 cup packed light brown sugar (for topping)
- 1/2 cup old-fashioned rolled oats (for topping)
- 1/4 teaspoon ground cinnamon (for topping)
- 1/4 cup (1/2 stick) cold unsalted butter, cut into small pieces
How to Make This Old Fashioned apple crisp recipe Step-by-Step
Alright, let’s make some magic happen without breaking a sweat! This entire process flows so smoothly when you follow the steps exactly. It’s how we get that perfect rustic look that screams autumn baking. Getting the timing right on the baking schedule is crucial for achieving the best apple crisp recipe result—tender fruit and crunchy topping.
Preparing the Apples and Oven
First thing’s first: turn that oven on to 375 degrees Fahrenheit right away. We’re also going to lightly grease whatever 8×8 dish you’re using. Don’t skip the greasing; even though this isn’t a sticky pie, we want zero fighting when it comes time to serve this gorgeous dessert! Next, grab that big bowl. Toss your apples with the granulated sugar, tiny bit of flour, that main teaspoon of cinnamon, the nutmeg, and the lemon juice. Mix it all around until every single slice is coated. It should look damp and wonderfully fragrant. Transfer these coated apples right into your prepared baking dish and spread them out evenly. They should form one nice, cozy layer.
Assembling the Oat Crumble Topping
Now for the best part—the topping! In a separate bowl, mix your topping flour, brown sugar, oats, and the smaller amount of cinnamon with a fork. Just dry things together thoroughly. This is where you need to be gentle. Take your cold butter pieces and start working them into that dry mix. I usually use my fingertips because I can feel when it’s right, but a pastry blender works too! You want this to look like coarse crumbs, not sand. Make sure you still see some pea-sized chunks of butter in there—that’s what guarantees that crispy oat topping we are after!
Baking and Resting the apple crisp recipe
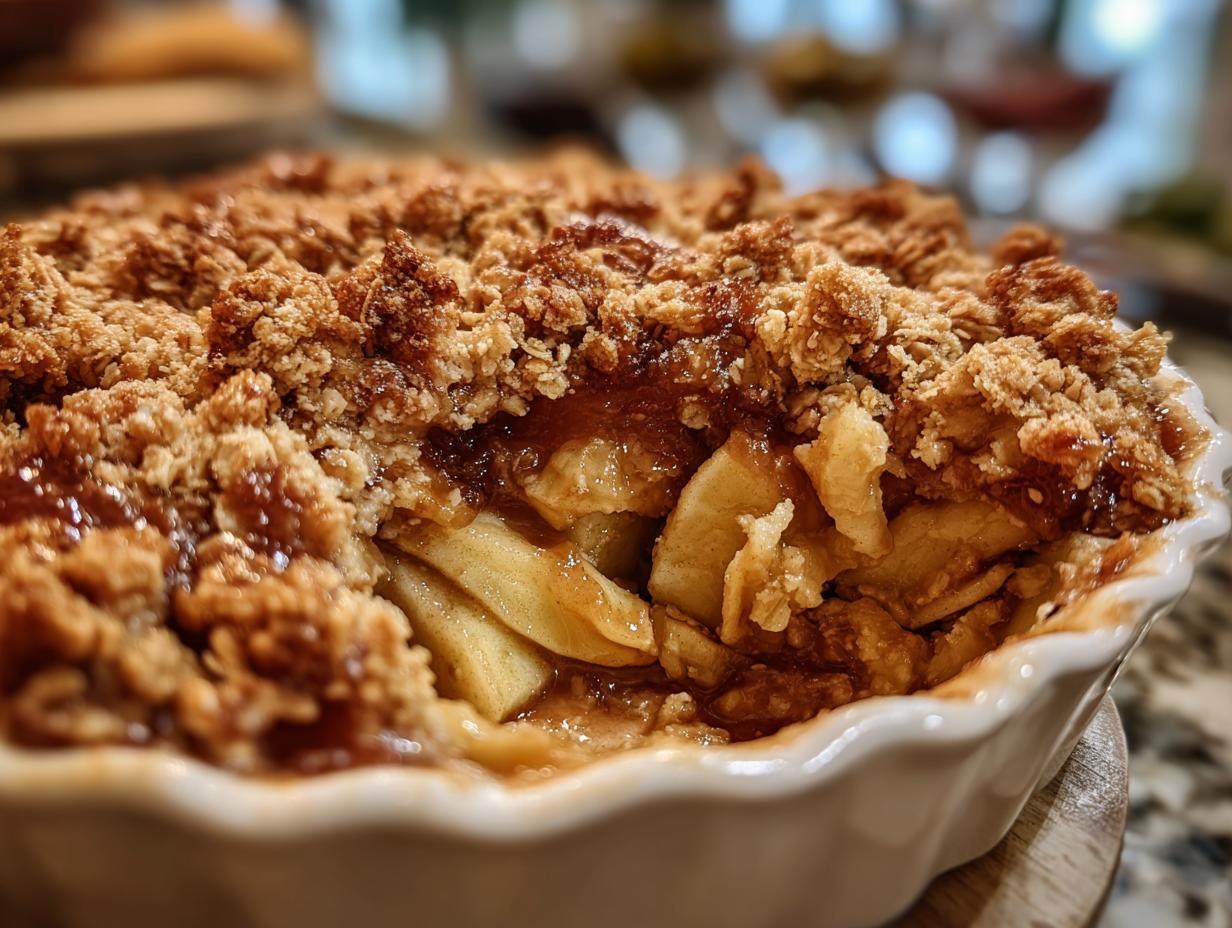
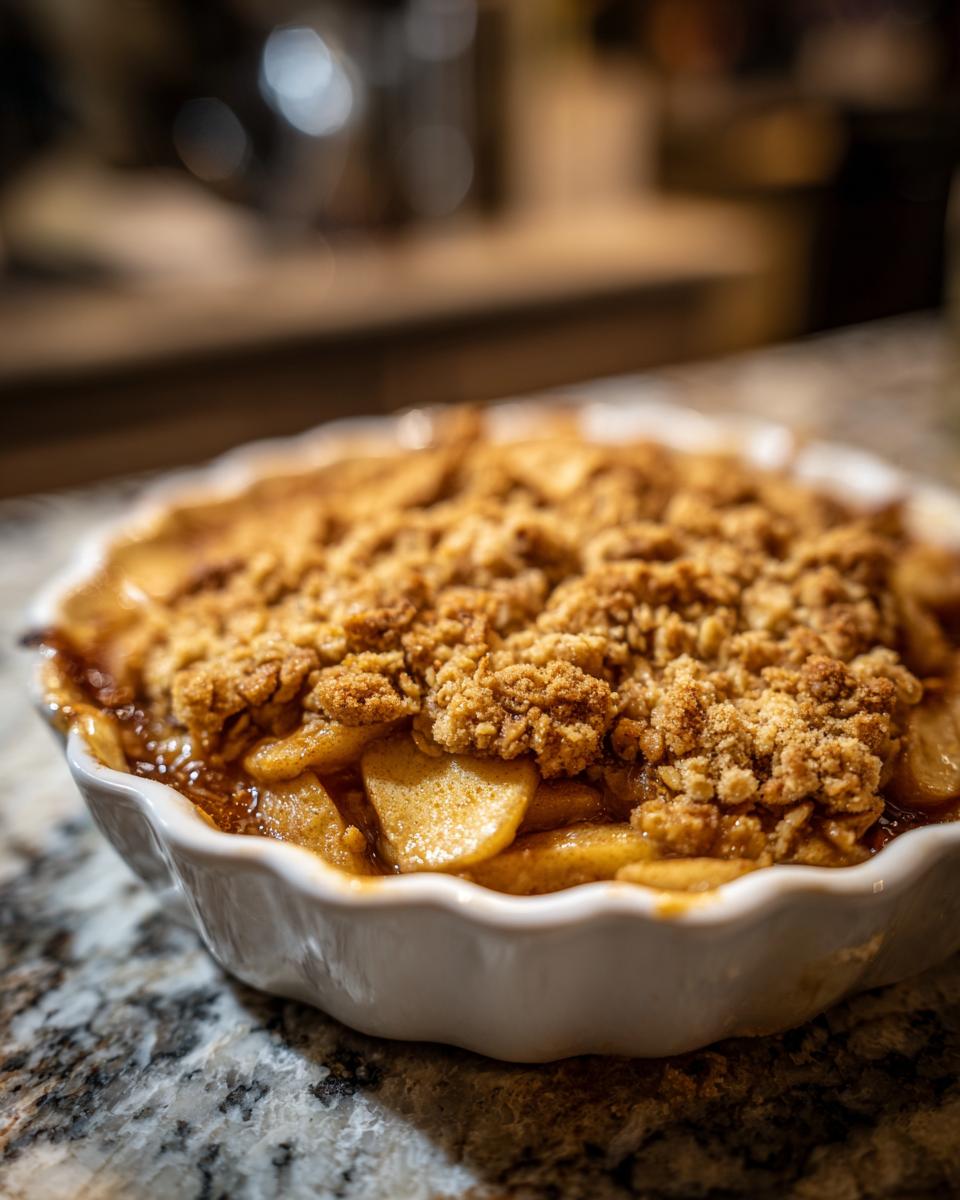
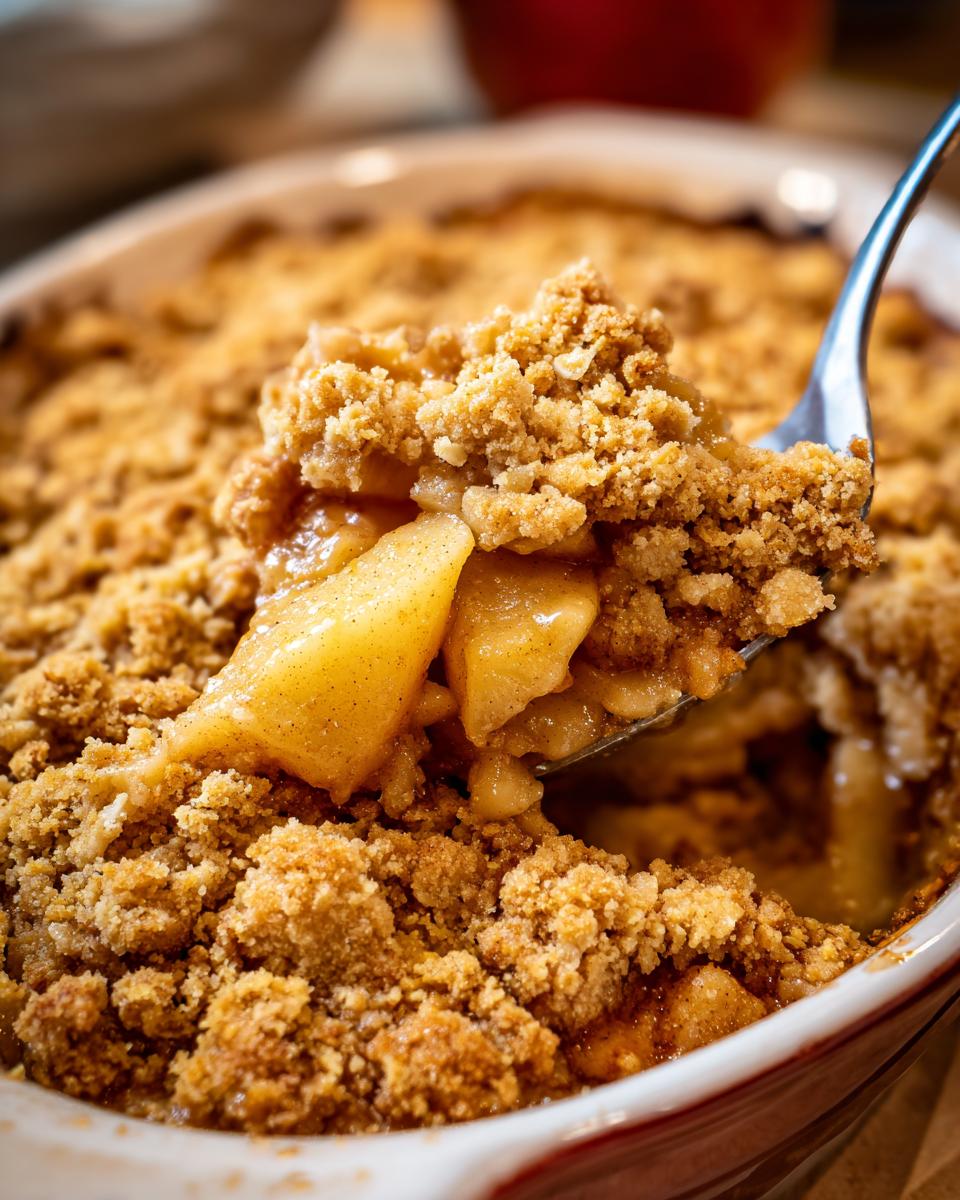
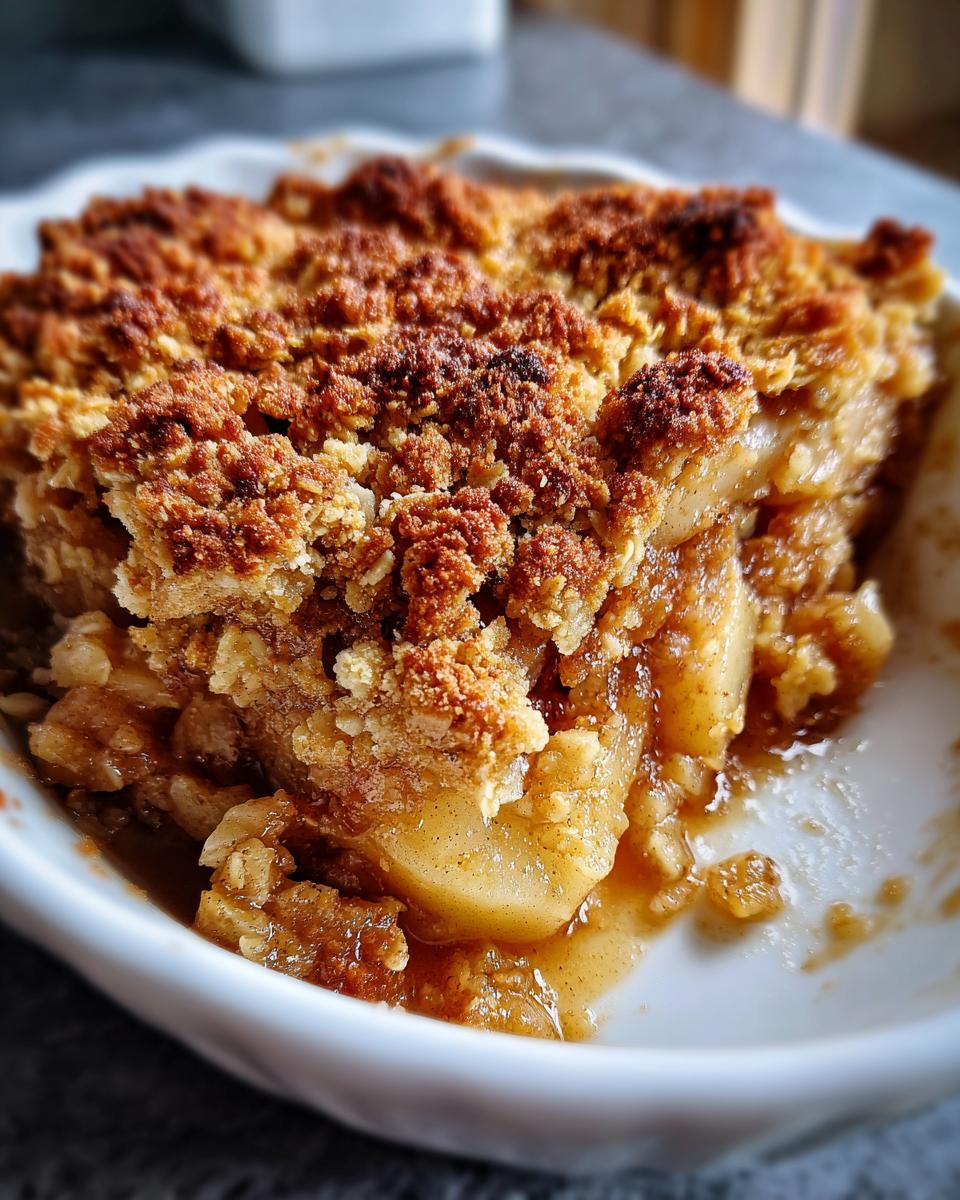
Carefully sprinkle that beautiful oat crumble topping evenly over your apples. Don’t press it down! You want it light so it bakes up golden and airy. Pop this into the preheated oven for about 35 to 45 minutes. You’ll know it’s done when the apples are bubbling up around the edges and you can see that topping going deep golden brown. This is super important: Pull it out and let this apple crisp rest for a solid 15 minutes on the counter. If you dive in too soon, the apple filling will just run everywhere. That rest lets everything set just enough for perfect serving!
Tips for the Perfect apple crisp recipe Success
Okay, now that you have the basic steps down, let’s talk about leveling up. Since I’ve made this foolproof apple crisp dozens of times, I’ve picked up a few tricks that guarantee you get that wonderful contrast between the soft fruit and the crunchy exterior every single time. This is where experience really pays off, folks! When you treat your ingredients right, you don’t have to worry about sogginess—just pure deliciousness. You can even use these principles when making my apple cinnamon overnight oats!
Choosing Apples for Tender Baked Apples
The apple choice is HUGE. If you pick something too soft, like a McIntosh, you’ll end up with sweet apple sauce instead of tender baked apples. You need something sturdy that holds its shape while it softens during that 40-minute bake. I swear by Granny Smith—they provide a lovely tart bite that cuts through the sweetness of the brown sugar and butter in the topping. But honestly? The best version uses a blend! Try mixing your tart apples with something sweeter like Honeycrisp or Fuji. This gives you layers of flavor instead of just one note. Remember, slice them consistently, about a quarter-inch thick—that ensures they all cook at the same rate.
Achieving a Golden, Buttery Apple Crisp
This tip is all about that topping! Seriously, if your topping isn’t golden and buttery, you’ve missed the mark. The secret is keeping that butter COLD. I always stick my cubed butter in the freezer for ten minutes before I start mixing the topping. When you cut that cold butter into the flour and oats, those little pockets of fat slowly melt in the oven, creating steam pockets that keep the topping light yet crisp. If you overmix it and it starts looking like paste, stop! That means the butter warmed up too much. You want it coarse, almost clumpy when you sprinkle it on. That texture is the foundation of a truly golden, buttery apple crisp.
Variations on the Classic apple crisp recipe
Half the fun of a great base recipe—like this one—is knowing you can tweak it just slightly for a totally new experience next week! Once you master the basic ten minutes of prep for the topping and get the apples tender just right, you can start playing around with the flavors. This doesn’t take any extra time, really, but it sure keeps things interesting when you’re baking something regularly. We’re keeping things cozy and comforting, just shaking up the spice cabinet a little bit.
Spice and Flavor Twists
Cinnamon and nutmeg are the bedrock of autumn baking, no question. But if you feel like getting a little adventurous, try tossing in just a tiny pinch of ground cardamom with your spices when you coat the apples. Cardamom has this beautiful, almost floral note that really elevates the apple flavor without overwhelming it. It pairs beautifully with the lemon juice we added!
Another simple swap I love involves the sweetener in the apple layer. If you have some lovely maple syrup on hand instead of all that granulated sugar, try substituting two tablespoons of the granulated sugar for the maple syrup. It just adds this deep, woodsy sweetness that feels extra special compared to regular sugar. It’s a subtle change, but I promise you’ll taste the difference!
Adding Texture to the Topping
The oat crumble topping gets fantastic on its own, but if you’re serving this to folks who really appreciate a crunch, you have to add nuts. Pecans or walnuts are absolutely perfect here. Before you start cutting in that cold butter, just throw in about a quarter cup of chopped nuts right in with the flour and oats.
Make sure they are chopped relatively small—nothing bigger than a pea—so they bake right into the crumble and don’t just burn on top. When those nuts toast up in the oven alongside the butter, they add this wonderful richness. It takes an already great dessert and makes it feel like something you’d serve at a holiday dinner, even if you whipped it up on a Tuesday night. If you love rhubarb, you might want to try this adaptation technique on my rhubarb crisp next!
Serving Suggestions for Your apple crisp recipe
A warm apple crisp recipe is honestly wonderful all by itself, right out of the baking dish. But, let’s be real, we don’t eat dessert plain around here, do we? The way this comforting fall dessert recipe is built—warm, spiced apples meeting that slightly salty, buttery topping—begs for something cold and creamy alongside it. This is non-negotiable for me!
The absolute classic, the one you simply can’t skip, is a big scoop of good quality vanilla ice cream. When setting the ice cream on that hot apple crisp, it melts down into a sweet, cold cream that mixes with the juices at the bottom. It’s pure heaven. If you’re feeling extra fancy, drizzle just a tiny bit of caramel sauce over the whole affair. It’s decadent, yes, but you deserve it!

If you aren’t into ice cream, don’t panic! Heavy cream that’s been whipped until it just holds soft peaks is a fantastic substitute. It’s lighter than ice cream but still gives you that necessary coolness and creaminess against the hot fruit. Or, if you are having this after a big savory meal, sometimes a little zing is nice. While it sounds different, a small dollop of crème fraîche works surprisingly well to cut through the sweetness.
Since we’re embracing that cozy fall dessert vibe, sometimes I serve leftovers the next morning! Yes, I do! It’s great next to the turkey hash or maybe even alongside a spoonful of my easy homemade cranberry sauce if I happen to have some leftover from the holidays. Don’t knock it ’til you try it; sometimes savory meets sweet in the best way for breakfast!
Storage and Reheating the apple crisp recipe
If you manage to have any leftovers—which is rare in my house, trust me—storing this easy apple crisp is simple. First off, this is best eaten the day it’s made, obviously! But if you are storing it, let it cool down completely first. Trying to put hot food in a plastic container is a nightmare.
Once it’s cool, cover the dish tightly with plastic wrap or foil. If you baked it in a dish that doesn’t have a lid, just transfer the cooled crisp to an airtight container. I usually keep leftovers on the counter for one day if it’s sealed up well, especially if I used a sturdy baking dish. If you think it’s going to last longer than 24 hours, tuck it into the fridge. It usually stays great for about three or four days.
The big question, of course, is reheating! Microwaving is the enemy of any good oat crumble topping, you know? It turns that beautiful crisp into soggy mush faster than you can say “vanilla ice cream.” So, please, skip the microwave unless you absolutely have to use it.
Restoring the Crispiness
For the best texture—so you get that golden, buttery apple crisp crunch back—you need dry heat. The oven is my preferred method. Just set your oven (or toaster oven if you’re just warming up a single serving) to about 325 degrees Fahrenheit. Pop the dish in, uncovered, for about 10 to 15 minutes. You just want it warm through, not boiling hot again.
If you have an air fryer, even better! That’s my secret weapon for reviving any baked item. Set the air fryer to 320 degrees and heat a small portion for about five or six minutes. Shake it gently halfway through. It’s so fast, and it makes the topping unbelievably crisp again, almost like it just came out of the oven!
If you’ve been roasting veggies like my easy roasted carrots lately, you know using the oven is always worth the extra minute of preheating when it comes to getting that perfect texture. Save the microwave for coffee!
Frequently Asked Questions About This apple crisp recipe
We all have those little baking quirks, right? Even when following what I think is a foolproof apple crisp recipe, sometimes questions pop up when you get in the kitchen. These are the things my readers ask me most often! Mostly, they revolve around making sure that topping ends up perfectly crispy and how to deal with apples since they can be tricky.
Don’t stress about these little hiccups; they are totally fixable, and they don’t stop this simple apple dessert from tasting incredible. If you have another cooking question, feel free to hop over to my easy breakfast ideas section and browse around—my email is always open!
Can I prepare the apple crisp recipe ahead of time?
Oh, yes, you totally can! This is a fantastic recipe for getting ahead, especially if you are hosting people or just want a warm treat ready to go after a busy day. You have two ways to do this. The best way for maximum crunch is to prepare the apple filling and the oat crumble topping separately. Store the apples in the baking dish, covered, in the fridge. Keep the topping in a Ziploc bag—also in the fridge. When you are ready to bake, mix the cold topping over the cold apples and add about 10 extra minutes to your bake time, since everything is starting out cold.
If you want to assemble the whole thing—apples in the dish, topping sprinkled over—you can do that too. Just cover it tightly with plastic wrap and put it in the fridge for up to 24 hours. When you bake it, you’ll need that extra baking time I mentioned. Either way works for this classic apple dessert!
What is the secret to a crispy oat topping?
If you take away only one thing from this whole recipe, let it be this secret for the crispy oat topping! The absolute secret is using cold, cold butter. I mean, almost frozen! When you cut that cold butter into the dry ingredients—flour, brown sugar, and oats—those little bits of butter stay separate. As the crisp bakes, that cold butter melts slowly, creating steam pockets that keep the topping light yet crisp.
The other part of the secret to maintaining that texture in your buttery apple crisp is **not overmixing**. Stop crumbling when the mixture still looks like coarse crumbs, maybe with some larger, pea-sized pockets of butter still visible. If you mix it until it looks uniformly sandy, you’re developing too much gluten, and you’ll end up with a dense, hard layer instead of a light, wonderful crumble. Give it that cold butter treatment, and you’ll never have a soggy top again!
Share Your apple crisp recipe Experience
Now that you know the secrets to making this simple apple dessert, I really want to hear all about it! Did you manage to save any leftovers? Go ahead and drop a star rating below to let me know how you liked this classic apple dessert. And please, let me know in the comments: are you a vanilla ice cream purist or did you try a wilder topping? I love seeing how you make this recipe your own cozy tradition. You can learn more about my philosophy over on the about page!
PrintThe Best Classic & Easy Old Fashioned Apple Crisp Recipe

Make this classic apple crisp recipe for a comforting dessert. You get tender, cinnamon-spiced apples under a golden, buttery oat crumble topping. It is simple to prepare and perfect for fall gatherings or a weeknight treat.
- Prep Time: 15 min
- Cook Time: 40 min
- Total Time: 55 min
- Yield: 6 servings 1x
- Category: Dessert
- Method: Baking
- Cuisine: American
- Diet: Vegetarian
Ingredients
- 6 medium apples (like Granny Smith or Honeycrisp), peeled, cored, and sliced about 1/4 inch thick
- 1/4 cup granulated sugar
- 1 tablespoon all-purpose flour
- 1 teaspoon ground cinnamon
- 1/4 teaspoon ground nutmeg
- 1 tablespoon lemon juice
- 1/2 cup all-purpose flour (for topping)
- 1/2 cup packed light brown sugar (for topping)
- 1/2 cup old-fashioned rolled oats (for topping)
- 1/4 teaspoon ground cinnamon (for topping)
- 1/4 cup (1/2 stick) cold unsalted butter, cut into small pieces
Instructions
- Preheat your oven to 375 degrees Fahrenheit. Lightly grease an 8×8 inch baking dish or a similar-sized pie plate.
- In a large bowl, combine the sliced apples, granulated sugar, 1 tablespoon flour, 1 teaspoon cinnamon, nutmeg, and lemon juice. Toss gently until the apples are evenly coated.
- Pour the apple mixture into your prepared baking dish and spread it into an even layer.
- In a separate medium bowl, prepare the topping. Combine the 1/2 cup flour, brown sugar, rolled oats, and 1/4 teaspoon cinnamon. Mix these dry ingredients with a fork.
- Cut in the cold butter pieces using a pastry blender or your fingertips until the mixture resembles coarse crumbs. Do not overmix; you want some pea-sized pieces of butter remaining.
- Sprinkle the oat crumble topping evenly over the apples in the baking dish.
- Bake for 35 to 45 minutes, or until the topping is golden brown and the apple filling is bubbly and tender when pierced with a fork.
- Remove from the oven and let it cool for at least 15 minutes before serving. This allows the filling to set slightly.
Notes
- Serve this warm apple crisp with a scoop of vanilla ice cream or a drizzle of caramel sauce for the best experience.
- For a crispier topping, chill the topping mixture for 10 minutes before sprinkling it over the apples.
- You can substitute half of the all-purpose flour in the topping with whole wheat flour for a slightly nuttier flavor.
Nutrition
- Serving Size: 1 serving
- Calories: 350
- Sugar: 30g
- Sodium: 120mg
- Fat: 15g
- Saturated Fat: 9g
- Unsaturated Fat: 6g
- Trans Fat: 0g
- Carbohydrates: 55g
- Fiber: 5g
- Protein: 4g
- Cholesterol: 35mg