
Trust me, I totally get it. Life is flying by, and sometimes you crave that warm, comforting sweetness without any of the fuss. When homework, work deadlines, or just plain exhaustion hits, the last thing I want to do is lug out the stand mixer and dirty three different bowls. That’s why this cherry dump cake holds such a special place in my recipe rotation. It reminds me of those simple, connected moments in my childhood kitchen, only now I can make it in about five minutes of active time!
My mom always said food shared at the table is love made visible, and that’s true even when the recipe is this ridiculously easy. Honestly, the entire magic of this Best Cherry Dump Cake is that you don’t mix anything. You literally grab your ingredients, and you dump them. Seriously, this is the ultimate Minimal Prep Dessert when you need something incredible on the fly.
If you’re looking for a sweet, bubbly treat that tastes like an incredible homemade cobbler but requires zero effort, this is it. You can see more of my favorite delicious dessert recipes right here, but this one always gets the most enthusiastic cheers.
- Why This Easy Dessert Recipe is a Family Favorite Dessert
- Gathering Ingredients for the Classic Cherry Dump Cake
- How to Make Cherry Dump Cake: The Quick Baking Recipe Steps
- Tips for Success Making Your Cherry Dump Cake
- Dump Cake Variations: Customizing Your Sweet Baked Treat
- Serving Suggestions for This Last Minute Dessert
- Storage and Reheating Instructions for Your Cherry Dump Cake
- Frequently Asked Questions About the Easy Cherry Dump Cake Recipe
- Nutritional Information for This Quick Cake Recipe
- Share Your Experience with This Dump and Bake Recipe
Why This Easy Dessert Recipe is a Family Favorite Dessert
If I need a dessert that earns big compliments with almost zero input from me, this is the one I turn to. It checks every box for a busy cook trying to keep things cozy and comforting.
- It’s the definition of an Easy Dessert Recipe—prep time is under five minutes!
- It travels like a dream, making it perfect for Potluck Dessert Ideas.
- The flavor profile is pure nostalgia; it always comes out tasting like a rich, sweet cherry cobbler. It’s a true Family Favorite Dessert for a reason.
The Magic of the Dump and Bake Recipe
When I talk about this being a Minimal Prep Dessert, I really mean it. The ‘dump’ part is everything! You aren’t creaming butter, you aren’t folding in flour, and you definitely aren’t dirtying a single mixing bowl. You just pour! This Dump and Bake Recipe lets the oven do all the heavy lifting, turning simple layers into something truly special.
Gathering Ingredients for the Classic Cherry Dump Cake
The sheer simplicity of this list is why I love having this dessert in my back pocket! You probably already have these exact three things sitting in your pantry right now. Grab a 9×13 dish, and let’s get ready to layer!
Here is the core lineup for this perfect, simple recipe:
- 1 (21 ounce) can cherry pie filling
- 1 (15.25 ounce) box yellow cake mix
- 1 cup (2 sticks) unsalted butter, melted
Ingredient Notes and the 3 Ingredient Dump Cake Base
See? Only three things! This foundational mix is what makes it the famous 3 Ingredient Dump Cake we all adore. We are using the standard yellow cake mix here because its flavor profile is perfect for balancing that bright cherry. Don’t worry, we’ll talk about mixing in chocolate later, but for now, stick to the yellow—it makes that incredible crisp topping.
How to Make Cherry Dump Cake: The Quick Baking Recipe Steps
Now that you’ve got your simple ingredients lined up, let’s put this thing together. It’s honestly faster than making a pot of coffee, I promise! We need to get the oven warming up right away so we can jump into the layering process. Remember, everything we do from here on out is designed to stay *unmixed*. That’s the secret sauce for this How to Make Dump Cake technique!
I love that this lets me focus on my quick weeknight dinners while knowing dessert is already handled. You’re looking at only about five minutes of hands-on time here!
Preparing the Pan and Layering for the Best Cherry Dump Cake
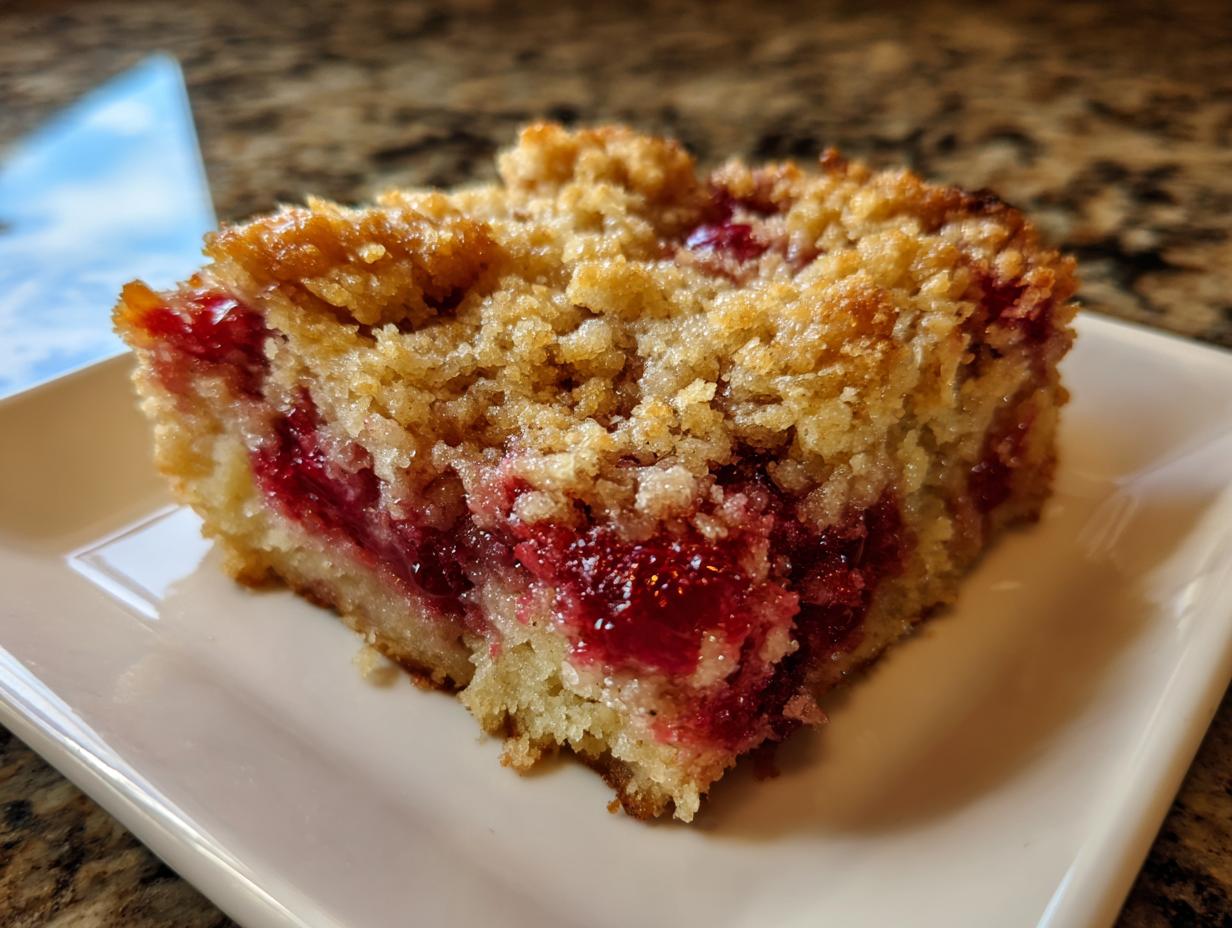
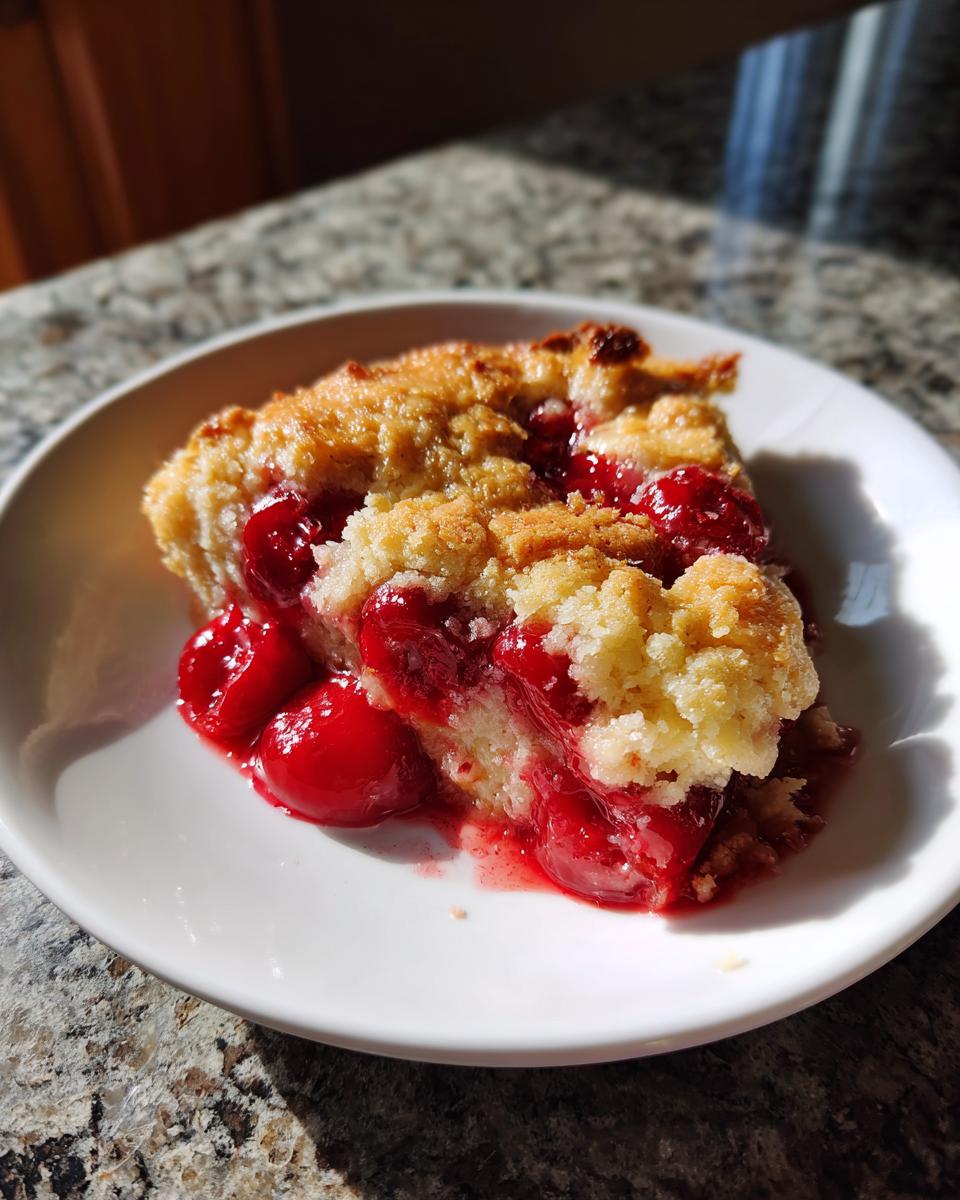
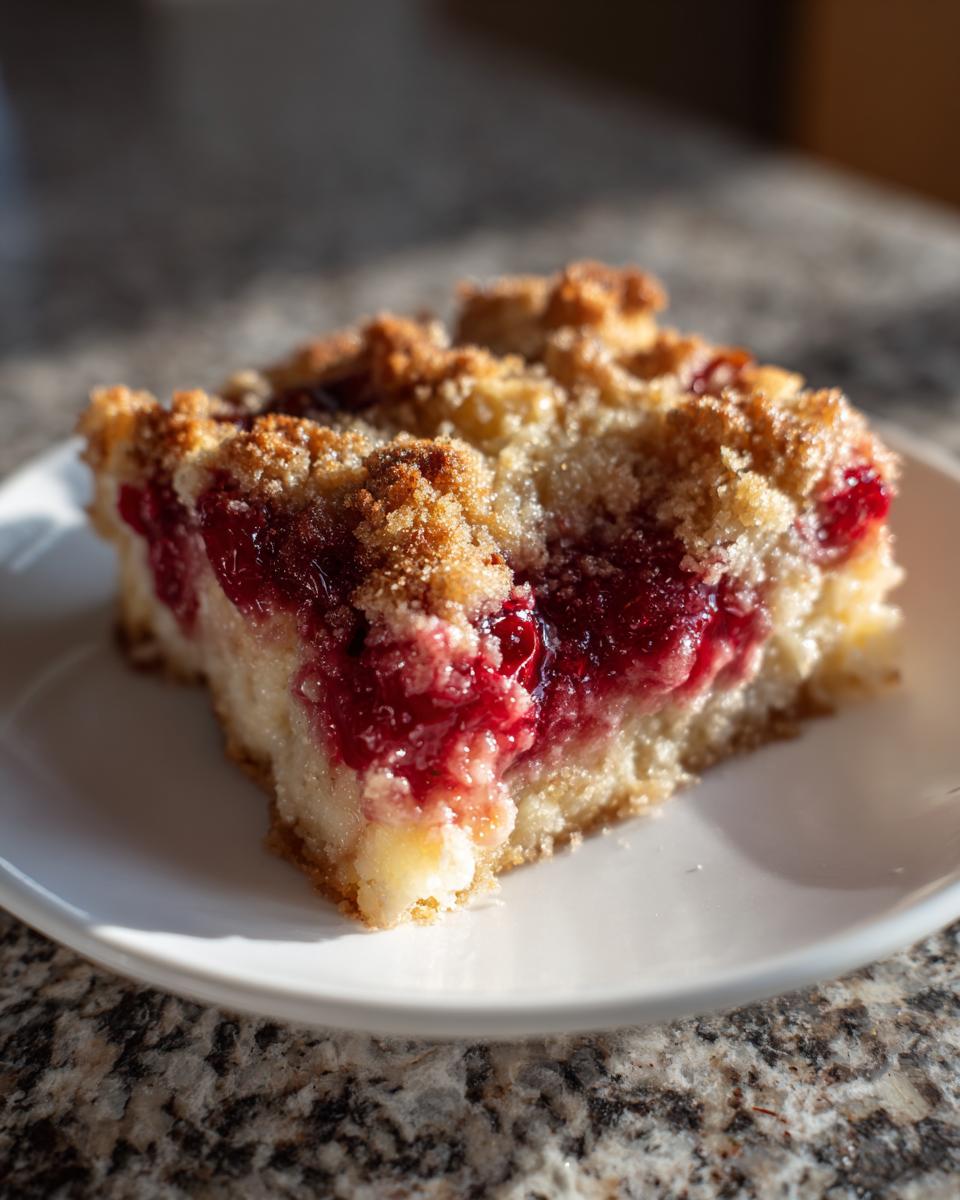
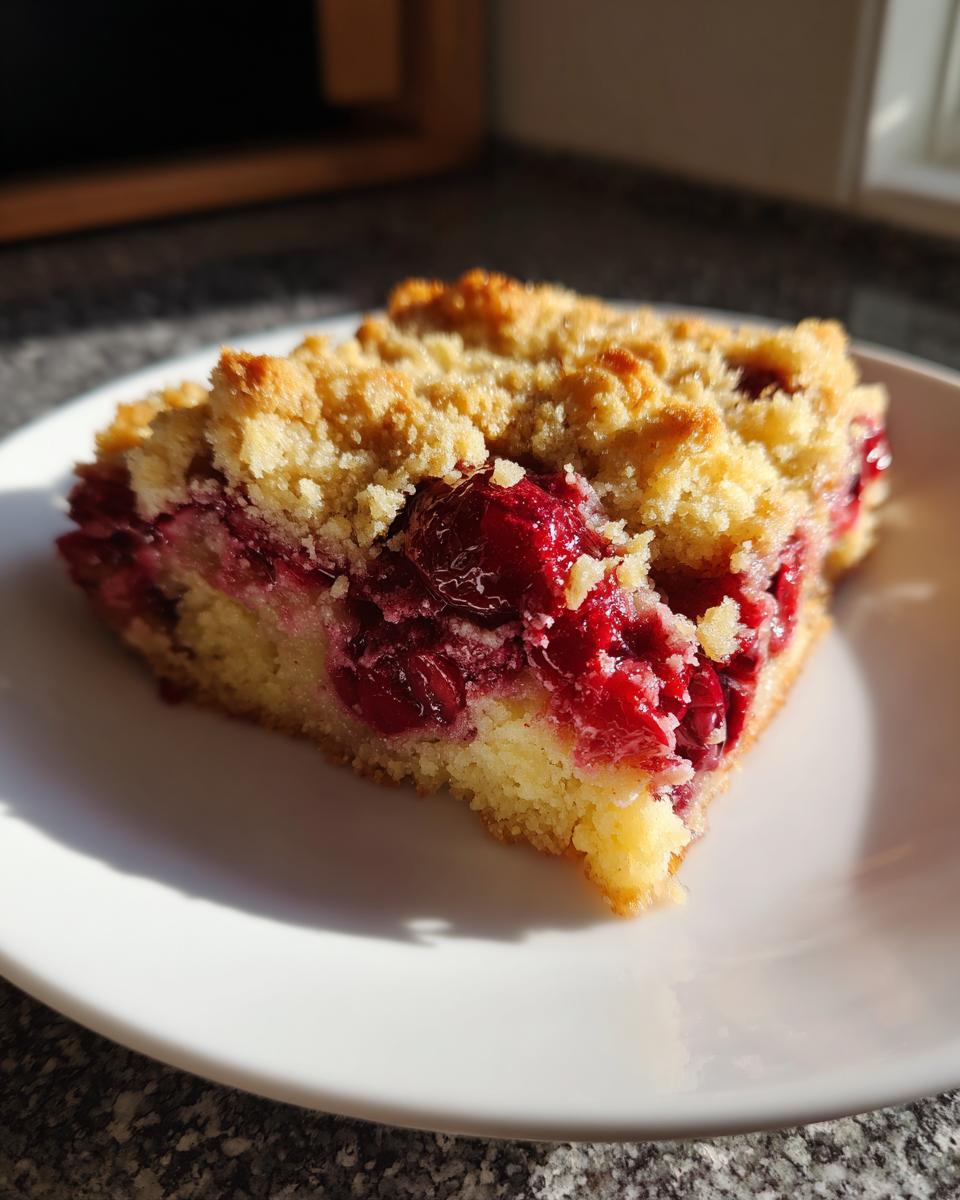
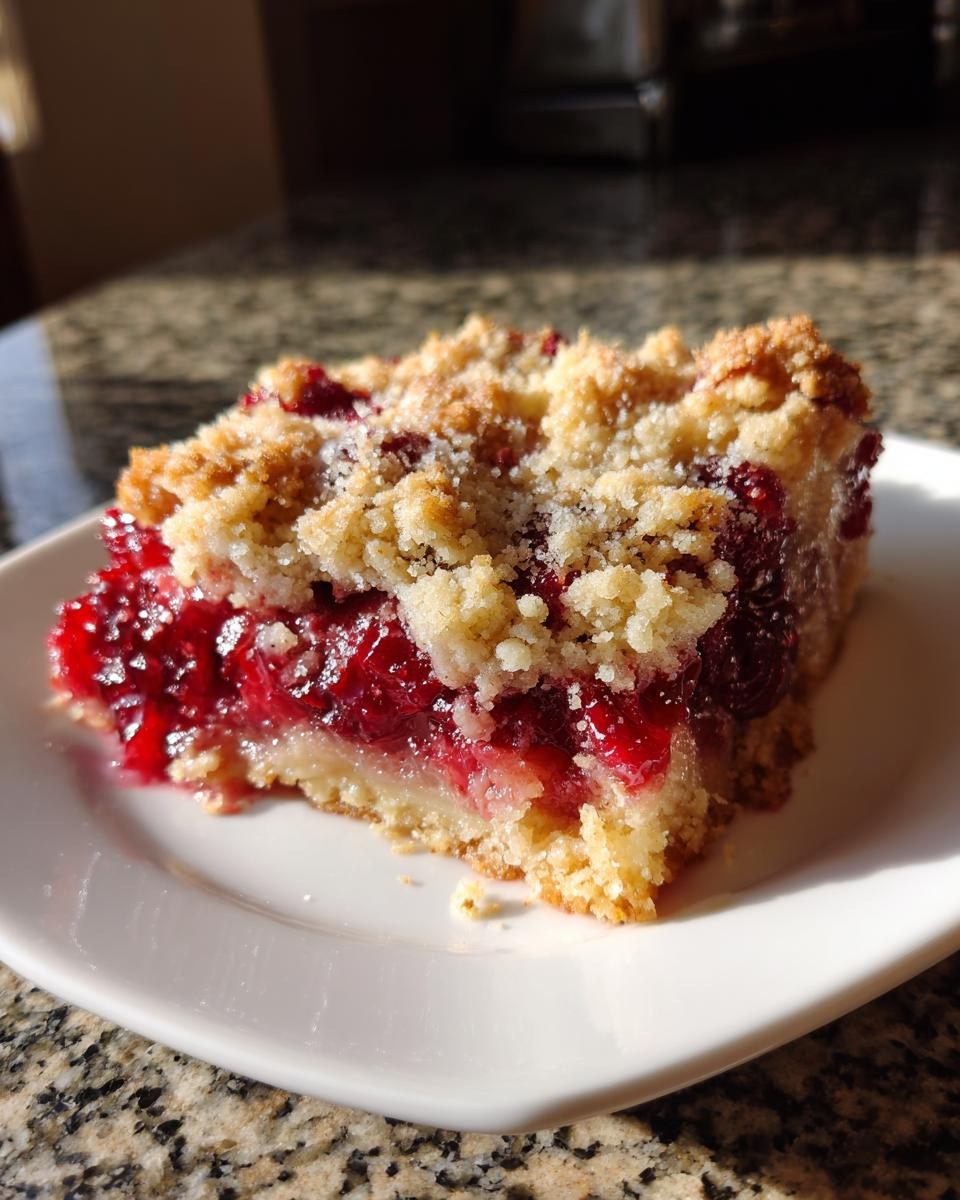
First things first: grab a 9×13 inch baking dish and give it a quick grease. This helps everything lift out nicely later, which is important when dealing with all that gooey filling. Next, grab your can of cherry pie filling. Open it up and spread that vibrant red filling evenly across the bottom of your prepared dish. You want one nice, smooth layer of cherry goodness. Don’t worry if there are a few bubbles; it’ll sort itself out.
Achieving the Perfect Buttery Topping Dessert Finish
This is where the magic happens, and also where you have to resist temptation! Take your dry yellow cake mix straight from the box—no sifting, no mixing needed—and sprinkle it gently over the cherries. Make sure you get it as evenly distributed as possible. Once the dry mix is settled, pour that glorious cup of melted butter slowly and evenly right over the top of the dry cake mix. You should see little rivers of melting butter soaking in. That butter is what transforms the dry mix into that amazing, crisp Buttery Topping Dessert!
Pop that dish into the preheated 350-degree oven for about 45 to 55 minutes. You’re looking for a rich, golden-brown topping and the filling bubbling enthusiastically around the sides. It smells heavenly while it bakes!
Tips for Success Making Your Cherry Dump Cake
Even with a recipe this simple, a couple of little tricks can take your result from good to absolutely legendary. When you’re aiming for that perfect crisp exterior that contrasts with the gooey middle—you know, that texture we love in an Easy Fruit Cobbler—the butter application is everything. Don’t just pour it quickly over the center!
You must pour that melted butter slowly and deliberately over the entire surface of the dry cake mix. I like to use a gentle hand and move in slow, sweeping circles. If you leave any dry spots, you’ll end up with crunchy pockets instead of that soft, buttery crust. If you happen to notice a section that looks a little pale after 30 minutes in the oven, you can very carefully drizzle just a teaspoon of extra melted butter right onto that spot.
Also, make sure your oven is fully preheated to 350°F! A cooler oven will let that butter soak down too much, resulting in a denser, less crisp topping later on. Trust me, proper temperature control makes all the difference when you’re looking for that ideal contrast. See more tips on handling delicious dessert recipes over on my main index!
Dump Cake Variations: Customizing Your Sweet Baked Treat
While the classic vanilla base is perfection, this recipe lends itself beautifully to fun Dump Cake Variations! Once you’ve mastered the basic dump-and-bake method, you can start playing around with the flavors, which is always my favorite part. It’s so easy to swap things up and create something totally new for dessert tonight without adding any extra work.
For instance, if you love deep, rich indulgence, you absolutely must try transforming this into a chocolate version. I know, it sounds crazy, but it works so well!
Creating a Chocolate Cherry Dump Cake Flavor Profile
If you or your family aren’t huge fans of the straight yellow cake flavor, here’s the simple magic: instead of using a full box of yellow cake mix, use just half a box. Then, swap that out for half a box of chocolate cake mix. Yes, that’s it! Mixing the two still gives you that wonderful, crispy buttery topping, but the chocolate chips in the mix melt right into that cherry filling for a decadent flavor.
It’s like a shortcut to the best cherry-chocolate dessert you can imagine. You can find more of my favorite customized baking adventures, like this caramel crunch cake recipe, if you’re feeling extra ambitious next weekend!
Serving Suggestions for This Last Minute Dessert
Even though this is the ultimate reliable recipe for needing a Last Minute Dessert, you’d never know it by how fancy it looks on the table! Since this bakes up so warm and bubbly, you absolutely have to serve it warm. That’s when the contrast between the crisp topping and the gooey cherry filling really shines through.
For me, there is no better accompaniment than a giant scoop of good quality vanilla ice cream that melts all over the edges. Whipped cream is just as wonderful, especially if you make your own fresh batch! This dessert is always the first thing gone at any gathering, making it a superb choice for Potluck Dessert Ideas. Want to try another simple winner? You should check out my recipe for a best easy creamy lemon pie recipe, which also travels well!
Storage and Reheating Instructions for Your Cherry Dump Cake
Once you manage to pull yourself away from the warm bowl (which is the hardest part!), you’ll want to know how to keep leftovers fresh. Since this is such a moist, fruit-based cake, it holds up really well! Once it cools completely, just scoop any leftovers into an airtight container. You can definitely keep it on the counter for a day or so, but I usually pop mine in the fridge if we won’t finish it quickly.
Reheating is super simple, too. Don’t even think about a microwave if you want to keep that lovely crisp edge! Just slide a slice onto a small baking sheet and warm it in a 300-degree oven for about 8 to 10 minutes. That short time lets the butter re-crisp the topping perfectly. Trust me, warm leftovers are just as good as the first serving!
Frequently Asked Questions About the Easy Cherry Dump Cake Recipe
I get so many great questions about this recipe all the time! Since it’s so simple, people often wonder about ways to customize it or what to do if the texture isn’t exactly what they expected. Don’t worry, we can troubleshoot anything you need to make sure you end up with the Best Cherry Dump Cake possible!
Can I use different fruit fillings in my cherry dump cake?
Oh yes, absolutely! That’s the beauty of the dump-and-bake concept. While the cherry flavor is a classic, you can swap that can of pie filling for almost any other fruit you love. Peach pie filling is phenomenal—especially in the summer! Apple pie filling works wonderfully too, especially if you want to add a tiny dash of extra cinnamon on top of the dry mix layer. It quickly becomes a completely new, delicious dessert that is just as easy as the original.
What is the best way to serve this No Mixer Dessert?
You have to serve it warm! I know it’s tempting to cut into it right out of the oven, but letting it sit for about 15 minutes lets those juices settle just a bit. The absolute best way to enjoy this No Mixer Dessert is warm with something cold melting right on top. A big scoop of high-quality vanilla bean ice cream is my favorite. If you’re feeling fancy, making some fresh whipped cream elevates it instantly! For other quick ideas, make sure you check out my easy breakfast ideas for mornings when you need speed!
Why is my topping soggy instead of crunchy?
This almost always comes down to the butter, that lovely liquid gold that creates the crisp topping! If your top layer is soggy or dense, it usually means the melted butter didn’t get spread evenly across all the dry cake mix. Remember what I stressed in the tips section? You need to pour that butter slowly and deliberately across the entire surface. If you pour it too fast over one spot, the butter sinks, and the cake mix just absorbs the liquid instead of crisping up. Also, double-check your oven temperature; if it’s too cool, the butter soaks instead of bakes!
Nutritional Information for This Quick Cake Recipe
Just like with any good family recipe, I want you to know exactly what’s going into the treats we share around Mia’s table. Because this Quick Cake Recipe relies on simple ingredients like cake mix and butter, it’s definitely a sweet indulgence, perfect for those celebrations or a cozy weekend treat!
Please keep in mind that baking is chemistry, and swapping out cake mixes or using margarine instead of butter will change these numbers. These estimates are based on using the exact ingredients listed above, served as one portion:
- Serving Size: 1 serving
- Calories: 420
- Sugar: 45g
- Sodium: 350mg
- Fat: 24g
- Saturated Fat: 14g
- Trans Fat: 0.5g
- Carbohydrates: 52g
- Fiber: 1g
- Protein: 4g
- Cholesterol: 55mg
We always serve this warm with a scoop of ice cream, so remember that adds to the totals, but honestly, that’s half the fun! Enjoy this Sweet Baked Treat responsibly!
Share Your Experience with This Dump and Bake Recipe
Now that your kitchen smells incredible and you’ve gotten that first warm, gooey bite (which I know you couldn’t wait for!), I really want to hear from you. That’s the whole point of our Mia’s Meals community—sharing what works and what flavors we discover together!
Did you stick strictly to the three ingredients, or did you try one of the Dump Cake Variations we talked about? I’m always so curious to see how you adapt these simple frameworks. If you tried the chocolate cherry version, let me know how it turned out!
If you’ve made this recipe, please take a moment to leave a star rating right below this section. It helps other busy folks find this super simple dessert when they need it most. And if you shared this at a family gathering, I’d love to hear who requested seconds! You can always learn more about our philosophy here at Mia’s Meals if you’re curious about why I focus on quick, comforting food.
If you want to check out another recipe that people are raving about that started with great simplicity, you can see this specific easy cherry dump cake floating around online as another popular take on this classic! Happy baking, friends!
PrintEasy Cherry Dump Cake Recipe

Make this easy cherry dump cake, a simple dessert requiring no mixing bowl. It features sweet cherry filling and a buttery, crisp topping.
- Prep Time: 5 min
- Cook Time: 50 min
- Total Time: 55 min
- Yield: 8 servings 1x
- Category: Dessert
- Method: Baking
- Cuisine: American
- Diet: Vegetarian
Ingredients
- 1 (21 ounce) can cherry pie filling
- 1 (15.25 ounce) box yellow cake mix
- 1 cup (2 sticks) unsalted butter, melted
Instructions
- Preheat your oven to 350 degrees F. Lightly grease a 9×13 inch baking dish.
- Spread the entire can of cherry pie filling evenly into the bottom of the prepared baking dish.
- Sprinkle the dry yellow cake mix evenly over the cherry filling layer. Do not mix.
- Pour the melted butter evenly over the dry cake mix layer.
- Bake for 45 to 55 minutes, or until the topping is golden brown and the filling is bubbly around the edges.
- Let the dump cake cool slightly before serving.
Notes
- For a richer flavor, substitute half of the yellow cake mix with chocolate cake mix for a chocolate cherry dump cake.
- Serve warm with vanilla ice cream or whipped cream for a family favorite dessert.
- This recipe works well for potlucks because it travels easily and serves many people.
Nutrition
- Serving Size: 1 serving
- Calories: 420
- Sugar: 45
- Sodium: 350
- Fat: 24
- Saturated Fat: 14
- Unsaturated Fat: 10
- Trans Fat: 0.5
- Carbohydrates: 52
- Fiber: 1
- Protein: 4
- Cholesterol: 55