
You know those smells that just wrap around you like a warm blanket? That’s what I’m aiming for with every recipe here at Mia’s Meals, and nothing hits that spot quite like a truly great bowl of pudding. Forget those flimsy, overly sweet store-bought cups; we’re going back to basics today to make something truly memorable. I’m sharing my version of The Ultimate Creamy Old Fashioned Stovetop Rice Pudding. My mom and grandma always made this on chilly evenings, and the secret to mine is proving you don’t need hours of fuss to get that luxurious, velvety texture. We’re keeping it simple, classic, and absolutely delicious right on the stove. Trust me, this is the definition of sweet comfort desserts.
- Why This Creamy Rice Pudding Recipe Becomes a Staple
- Gathering Ingredients for Old Fashioned Rice Pudding
- Step-by-Step Guide to Stovetop Rice Pudding
- Tips for the Ultimate Creamy Rice Pudding
- Serving and Storing Your Homemade Pudding Recipes
- Variations on Classic Baked Rice Pudding
- Frequently Asked Questions About Rice Pudding
- Estimated Nutritional Data for This Rice Pudding
- Share Your Comfort Food Creations
Why This Creamy Rice Pudding Recipe Becomes a Staple
When I streamlined my grandmother’s original recipe, I focused on hitting those three essentials that make this dish legendary: texture, simplicity, and warmth. This isn’t just dessert; it’s a hug in a bowl, and it proves that **homemade pudding recipes** can fit into a busy life!
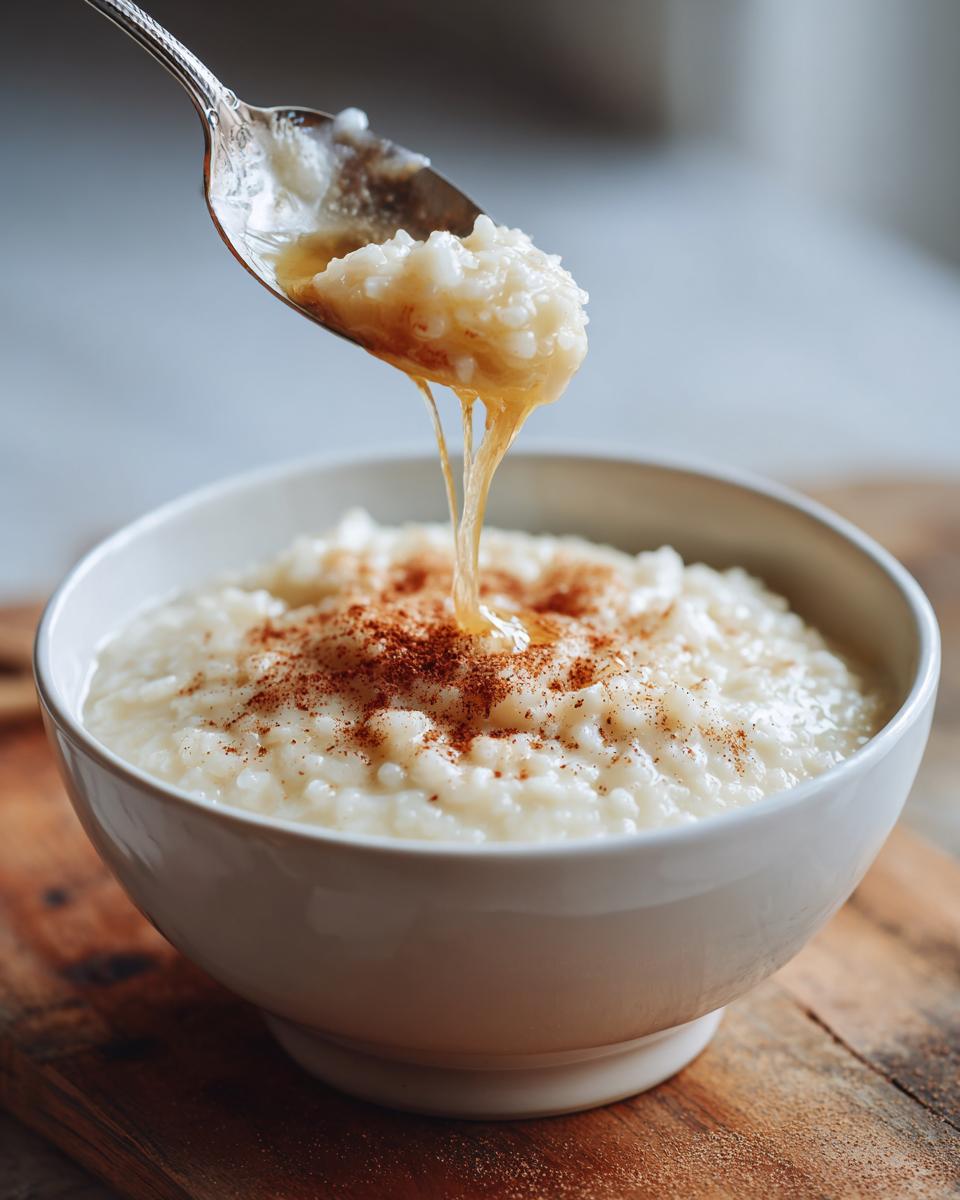
- It’s a true **creamy rice pudding recipe**. We aren’t messing around with watery results here. Every spoonful is thick, rich, and spoon-coating.
- This delivers those genuine **old fashioned rice pudding** vibes. It tastes exactly like the comforting treats you remember from childhood, without any weird stabilizers.
- It’s an incredibly budget-friendly way to make a big batch of **sweet comfort desserts**. Milk, rice, and sugar—that’s the magic trifecta!
- It works perfectly as a **make ahead dessert**. Seriously, the flavor actually gets better overnight, making those busy weeknights so much easier.
Achieving the Best Rice Pudding Texture
The absolute key to that dreamy texture—the one everyone compliments—is twofold. First, you have to use short-grain rice like Arborio. It releases far more starch than long-grain rice, which is what naturally creates that thick, velvety sauce around each grain. Second, patience during the simmer is non-negotiable. You need that low, slow bubble to let the rice swell perfectly without turning mushy.
Simple Pudding Ingredients for Nostalgic Desserts
You won’t find a long list of exotic spices or specialty items here, which is exactly what makes this recipe one of my favorites for quick weeknight sweet treats. We rely on those classic, **simple pudding ingredients**. It’s just rice, milk, sugar, salt, and vanilla. A little dash of cinnamon at the end ties it all together, hitting that deep, sweet craving associated with **nostalgic desserts**.
If you want to see how I handled something similar, check out my tips for thickening homemade cranberry sauce—it’s all about slow reduction and letting the ingredients do the heavy lifting!
Gathering Ingredients for Old Fashioned Rice Pudding
Okay, let’s look at what you need to pull this off. Because we are dedicated to making the absolute **best rice pudding texture**, our ingredient list is short but mighty. I’m a big believer in using ingredients you probably already have on hand for these **warm sweet treats**.
If you really want that unbeatable creaminess, use Arborio rice—it’s technically a risotto rice, but trust me, its starch content makes this **rice pudding** sing! If you happen to have some on hand, it makes a world of difference. You can see how I bring out the best in root vegetables by using simple ingredients over on my maple brown butter sweet potatoes recipe too.
Here’s what you need:
- 1 cup short-grain white rice (Arborio works well for creaminess)
- 4 cups whole milk
- 1 cup water
- 1/2 cup granulated sugar
- 1/4 teaspoon salt
- 1 teaspoon vanilla extract
- 1/2 teaspoon ground cinnamon, plus extra for topping
If you’re curious about other classic takes on this dish, my friend over at Smart Cook Recipes has a great rundown on traditional versions!
Step-by-Step Guide to Stovetop Rice Pudding
Now for the fun part! Making this **rice pudding** on the stovetop can feel intimidating because we’re dealing with milk, and nobody wants scorched sugar stuck to the bottom of their favorite pot. But if you follow these steps for temperature and stirring, you’ll have the easiest, creamiest pudding imaginable. Seriously, this method makes it almost foolproof!
Initial Simmering for Tender Rice
First things first: grab your heaviest pot. I mean it—use the one with the thickest bottom to fight off scorching. You’re going to combine the rice, the whole milk, and the water right there. Set it over medium heat. Now, watch it closely! You need to bring that mixture up to a boil, but keep stirring so nothing sticks underneath. The minute it hits that boil, you need to drop that heat way down. We want a whisper of a simmer, not a rolling boil. This stage establishes that fantastic **easy stovetop pudding** base; it takes about 10 to 15 minutes for the rice to start getting happy and soft.
Thickening the Creamy Rice Pudding Recipe
This takes patience, so put on some music! You’re going to let this cook uncovered for 45 to 60 minutes. The key here is the stirring frequency: every five or so minutes, give it a good scrape along the bottom. As it gets thicker toward the end, you need to stir more often—maybe every couple of minutes. When you are about 10 minutes from done, stir in your sugar, salt, and that lovely vanilla extract. Keep going until that pudding coats the back of your spoon beautifully. Remember this secret: it thickens a lot more as it cools down! If you want to see how I handle reductions when making cranberry sauce, it’s the same slow-and-steady principle.
Tips for the Ultimate Creamy Rice Pudding
Getting this **rice pudding** just right relies on knowing a few little tricks I picked up over the years. It’s about achieving that ultra-rich texture that makes people ask for your recipe. Don’t worry if you want to tweak things; this recipe is very flexible, but always remember that milk equals creaminess!
Ingredient Swaps for Richer Rice Pudding
If you’re chasing that super thick, velvety texture you find in the best copycat recipes, try this swap! Replace half a cup of your regular whole milk with evaporated milk or—even better—sweetened condensed milk. It adds a beautiful richness and depth of flavor that regular milk just can’t match. This is my secret for taking things up a notch!
Incorporating Add-ins Like Raisins
I know some people skip raisins in their pudding, but if you’re a fan, you have to soak them first. This is vital! Soak about a half-cup of raisins in some hot water (or maybe some sherry for a grown-up treat!) for about ten minutes before they go into the pot. Drain them well, and stir them in about 15 minutes before the pudding is done. This keeps them plump and stops them from stealing moisture from your beautiful **creamy rice pudding recipe**.
For more ideas on taking simple flavors to the next level, you should check out my tips on making those amazing maple brown sugar cookies. And if you want to see a very simple take, I found a short ingredient list that works wonders over at 100k Recipes.
Serving and Storing Your Homemade Pudding Recipes
The waiting is the hardest part, right? Once your beautiful, **creamy rice pudding recipe** has finished cooking, you have a little decision to make about how you want to enjoy those **warm sweet treats**. Do you dive in immediately, or do you plan ahead?
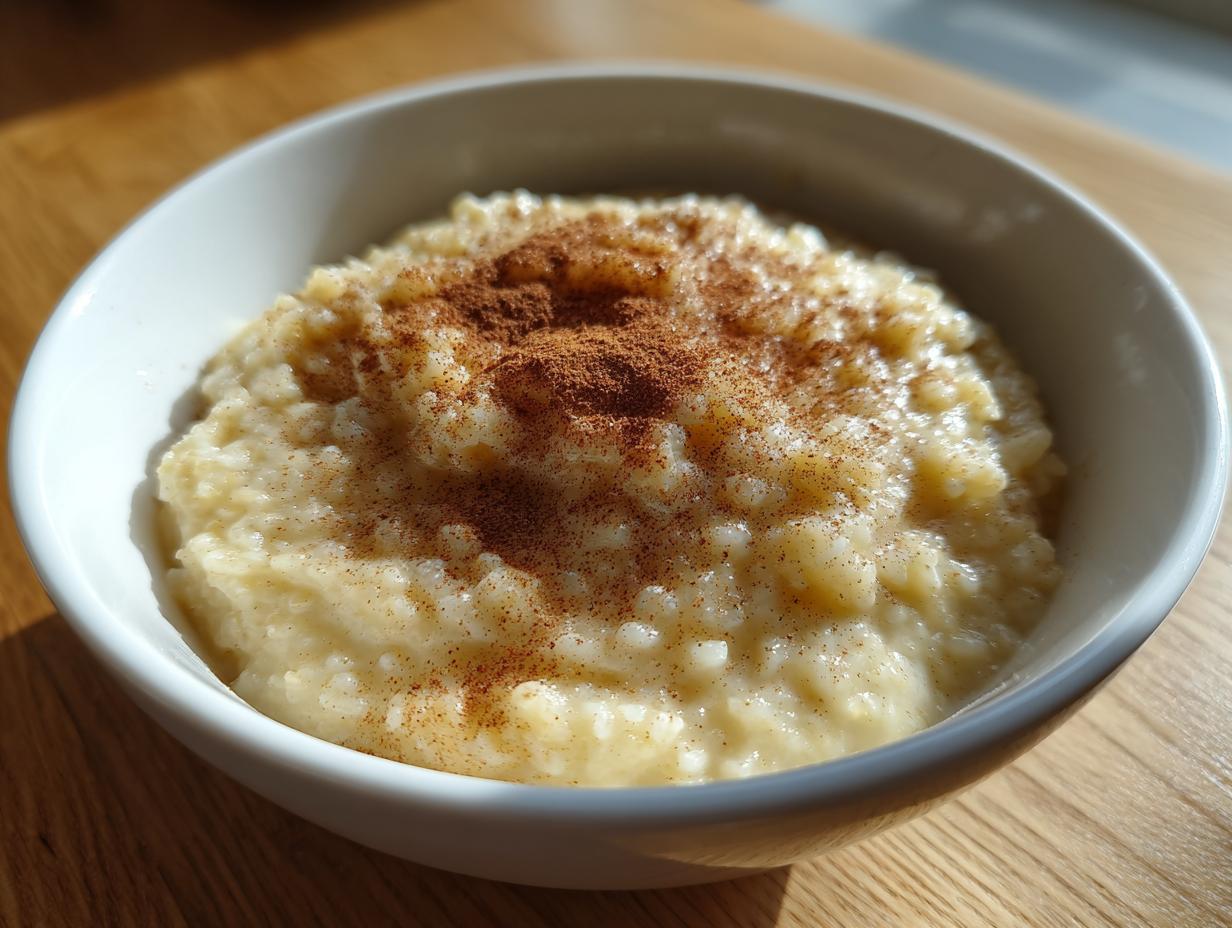
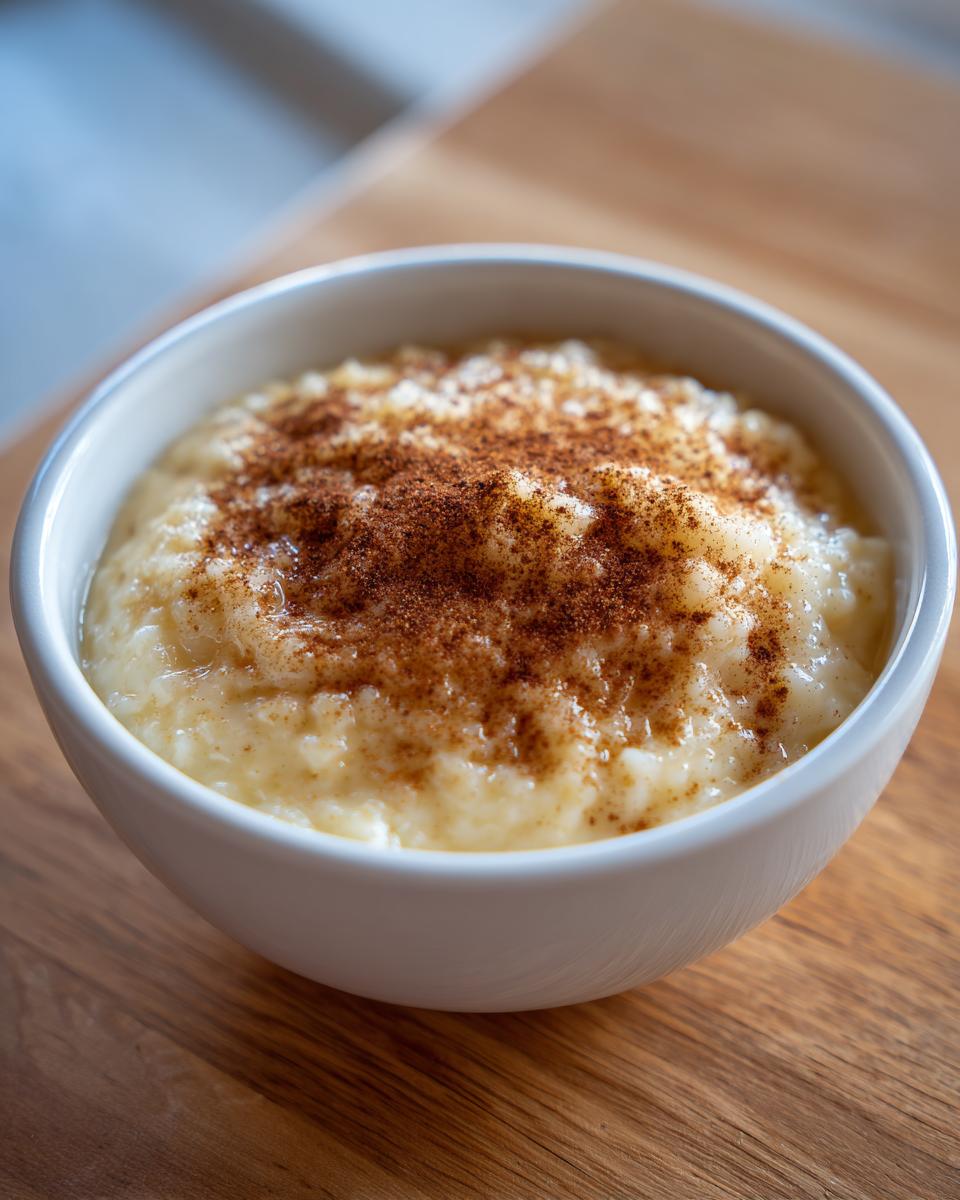
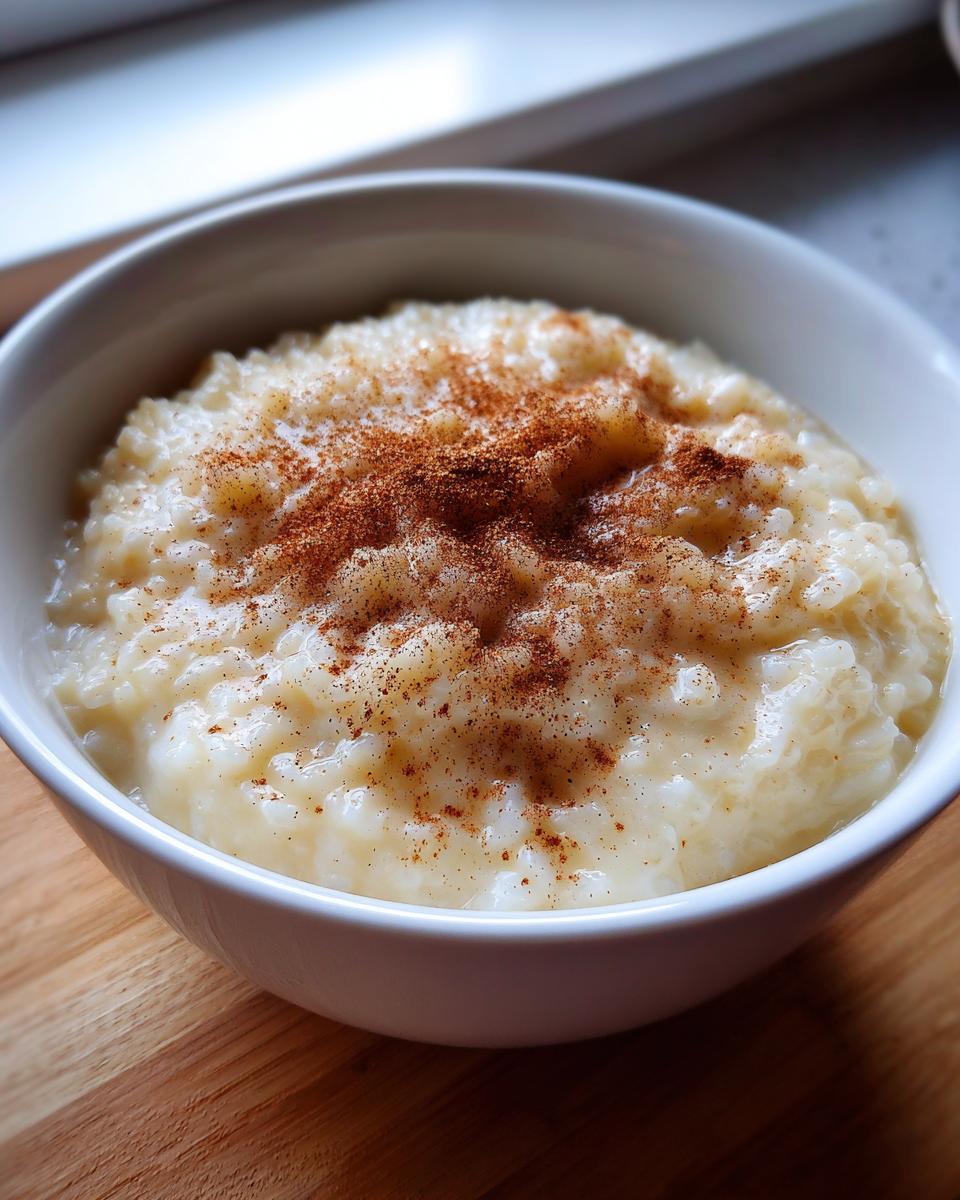
This recipe is famously excellent served warm, right after it cools for about ten minutes on the counter. Scoop it into little bowls and don’t forget that final, beautiful dusting of extra cinnamon right on top. That little bit of aroma right before eating gets everyone excited!
However, this is also one of my favorite **make ahead desserts**. If you cover it tightly—and I mean really tightly—it keeps beautifully in the fridge for three or four days. Just remember the texture will change!
How to Reheat Rice Pudding
If you let your delicious **rice pudding** chill out in the fridge, it will definitely firm up. It transforms into something almost scoopable, which is fantastic in its own right, but if you want that classic, flowing texture back, you just need a splash of liquid.
When you scoop out what you want to eat, put it in a microwave-safe bowl. Add just a tiny splash—maybe a teaspoon or two—of whole milk or half-and-half. Microwave it for about 20 seconds and stir really well. Repeat that process until it’s warm and flowing again. It works like magic and brings back that luscious mouthfeel instantly. For more tips on making smooth sauces and mixes, you can check out my notes on handling cranberry sauce—the principle of rehydrating slightly when reheating is very similar!
Variations on Classic Baked Rice Pudding
While I absolutely adore this stovetop version for its speed and guaranteed creaminess, sometimes you just need that slow, oven-baked result. That deep, comforting bake creates a slightly different texture, maybe a little more custard-like on the edges, which is exactly what some people look for in their **old fashioned rice pudding**.
Switching to the oven method completely changes your game plan, but it also lets you walk away without constant stirring! If you’re dreaming of a perfect **classic baked rice pudding**, here’s how you can adapt this recipe. It’s a fantastic way to use up any extra milk you might have!
If you’re looking for other comforting baked goods, you should definitely check out my recipe for pecan pie cobbler—it shares that same slow-bake, deeply satisfying quality!
For the baked route, you’ll want to use slightly more liquid to account for evaporation in the oven. Spread your rice mixture—including the sugar and salt—into a greased 8×8 inch baking dish. Bake it at 350°F (175°C) for about 1 hour and 15 minutes. Crucially, give it a stir halfway through the baking time so you don’t end up with a baked skin only on the bottom! I’ve seen a really thorough guide on making a similar baked **rice pudding** over at Good For Recipes if you want more detailed oven times.
Remember, the oven method often yields a slightly firmer result when cooled, which is perfect if you like your pudding scoopable!
Frequently Asked Questions About Rice Pudding
I get so many wonderful questions sent my way after people try making this dessert. It’s fantastic that you all are diving into making **homemade pudding recipes**! Here are a few of the most common things I hear, especially concerning texture and flavor adaptations for this classic **rice pudding**.
What is the best rice to use for creamy rice pudding recipe?
Hands down, you want short-grain rice. Think Arborio, which I mentioned in the ingredient list, or even plain old plain white rice if that’s what you have. Why? It’s all about the starch! Short-grain varieties release a lot more starch into the milk as they cook slowly. That starch is what thickens the liquid naturally and creates that luxurious coating around every single grain. That’s the secret to the **best rice pudding texture**—it’s science meeting comfort!
Can I make this rice pudding with low-fat milk?
You *can*, but I really wouldn’t recommend it if you’re aiming for that specific, rich, **old fashioned rice pudding** standard. Low-fat or skim milk just doesn’t have the necessary fat content. The fat is what carries the flavor and helps create that deep, velvety mouthfeel we are going after. If you use skim milk, you’ll end up with something much thinner and less satisfying. If you need to cut fat, stick to whole milk and maybe use less sugar, but don’t skip the whole milk!
How do I prevent a skin from forming on my rice pudding?
Oh, the dreaded pudding skin! It happens when the top layer cools and dries out faster than the rest of the pudding underneath. It’s a universal problem with anything creamy and milk-based. If you’re not planning on eating it all right away, here’s what I do: as soon as I take the pot off the heat, I take a piece of plastic wrap and gently press it right onto the surface of the pudding. It seals in the moisture and stops that top layer from drying out. It’s a trick I use for all custards, even sometimes for my apple strudel filling if I have leftovers!
Estimated Nutritional Data for This Rice Pudding
I always want to give you guys a heads-up on what you’re getting into, especially with comforting recipes like this, because we are using whole milk and sugar to hit that perfect texture. Please keep in mind that this data is just an estimate, based on the ingredients listed, and actual numbers can change depending on exactly what brand of milk or how much sugar dissolves! This is for planning purposes, not a medical breakdown.
If you’re ever curious about how flavor transforms simple ingredients, take a look at my rich creamy roasted butternut squash soup; the base ingredients are simple but the flavor payoff is huge!
Here is the estimated breakdown for serving one cup of this classic **rice pudding**:
- Serving Size: 1 cup
- Calories: 350
- Sugar: 25g
- Sodium: 150mg
- Fat: 8g
- Saturated Fat: 4g
- Unsaturated Fat: 4g
- Trans Fat: 0g
- Carbohydrates: 60g
- Fiber: 1g
- Protein: 10g
- Cholesterol: 25mg
Share Your Comfort Food Creations
Now it’s your turn! Making this **rice pudding** has brought me so much joy over the years, and sharing it with all of you completely warms my heart. I really, truly want to hear about your experience!
Did you try the evaporated milk trick? Did you sneak in some raisins? Did you serve it warm with a heavy dusting of cinnamon, or did you chill it down for a firmer texture?
Please drop a comment below! Let me know how it turned out for you and give the recipe a rating so other people know what a wonderful, creamy hug this dessert really is. I love seeing photos of your results, so tag me on social media if you share a snap of your finished bowls. It means the world to me to see my family favorites becoming part of yours.
If you loved how easy this was, you might also want to try whipping up my simple easy chocolate mousse next time you need a quick but impressive sweet finish for dinner!
PrintThe Ultimate Creamy Old Fashioned Stovetop Rice Pudding

You can make this classic, comforting rice pudding right on your stovetop. This recipe delivers the rich, velvety texture you remember from childhood using simple ingredients.
- Prep Time: 5 min
- Cook Time: 60 min
- Total Time: 65 min
- Yield: 4 servings 1x
- Category: Dessert
- Method: Stovetop
- Cuisine: American
- Diet: Vegetarian
Ingredients
- 1 cup short-grain white rice (Arborio works well for creaminess)
- 4 cups whole milk
- 1 cup water
- 1/2 cup granulated sugar
- 1/4 teaspoon salt
- 1 teaspoon vanilla extract
- 1/2 teaspoon ground cinnamon, plus extra for topping
Instructions
- Combine the rice, whole milk, and water in a heavy-bottomed saucepan.
- Bring the mixture to a boil over medium heat, stirring frequently to prevent scorching on the bottom.
- Once boiling, immediately reduce the heat to low. You want a very gentle simmer.
- Cook uncovered for 45 to 60 minutes, stirring every 5 to 7 minutes. The goal is for the rice to absorb most of the liquid and become tender, and for the mixture to thicken significantly. Stir more often toward the end of the cooking time.
- Stir in the sugar, salt, and vanilla extract during the last 10 minutes of cooking. Continue to stir until the sugar dissolves and the pudding reaches your desired creamy consistency. Remember, it will thicken more as it cools.
- Remove the saucepan from the heat. If you prefer a thicker pudding, let it stand, covered, for 10 minutes.
- Serve warm with a sprinkle of cinnamon, or chill completely for a firmer texture.
Notes
- For an even richer, copycat texture, substitute 1/2 cup of the whole milk with 1/2 cup of evaporated milk or sweetened condensed milk.
- If you want to add raisins, soak 1/2 cup of raisins in hot water for 10 minutes, drain them well, and stir them in during the last 15 minutes of cooking.
- This is a great make ahead dessert; it thickens considerably in the refrigerator. Add a splash of milk when reheating if needed.
Nutrition
- Serving Size: 1 cup
- Calories: 350
- Sugar: 25g
- Sodium: 150mg
- Fat: 8g
- Saturated Fat: 4g
- Unsaturated Fat: 4g
- Trans Fat: 0g
- Carbohydrates: 60g
- Fiber: 1g
- Protein: 10g
- Cholesterol: 25mg