
When the holidays roll around, or when that unexpected party invitation shows up, I always feel that familiar pull between wanting to make something truly special and needing something ready *now*. That’s where this incredible cool whip candy swoops in to save the day! Forget complicated nougat or hours over the stove; this is the ultimate secret weapon for busy home cooks. It tastes exactly like that light, fluffy chocolate bar we all loved growing up—yes, it’s a 3 Musketeers copycat candy! Back in my Ohio kitchen, we always believed good food didn’t need to be complicated, and this recipe proves that simplifying flavor is the key to making memories without the stress. If you’re short on time but still want that show-stopping holiday tray filler, check out how I make my easy homemade cranberry sauce when things get hectic too!
- Why This Easy Cool Whip Candy Is Your New Favorite 3 Ingredient Candy Recipe
- Gathering Ingredients for Your Cool Whip Candy
- Step-by-Step Guide to Making Fluffy No Bake Treats
- Tips for Success with Your 3 Musketeers Copycat Candy
- Make Ahead Candy Ideas and Storage for Cool Whip Candy
- Serving Suggestions for This Simple Holiday Candy
- Frequently Asked Questions About Cool Whip Candy
- Estimated Nutrition for This Whipped Topping Candy
- Share Your Experience Making This Cool Whip Candy
Why This Easy Cool Whip Candy Is Your New Favorite 3 Ingredient Candy Recipe
Honestly, running a home and a freelance gig means my time is stretched thin, but I refuse to let that stop me from having delicious things on the table! This recipe is pure genius because it delivers huge flavor with almost no effort. If you’ve been searching for a genuinely simple no bake Cool Whip dessert, this is it—seriously, just three core ingredients, friends!
- It’s the ultimate 3 Ingredient Candy Recipe.
- No oven required, keeping things cool during the holidays!
- The texture is exactly like a store-bought classic—hello, 3 Musketeers Copycat Candy!
This is my go-to when I need to fill up a platter fast.
Quick Party Desserts for Any Occasion
You simply cannot beat the speed of this cool whip candy. Since it’s totally no-bake, you aren’t battling oven space when you’re making pies and roasts. Just mix, freeze, dip, and done! It’s the perfect companion to a big meal or whatever easy Christmas candy you have planned.
Gathering Ingredients for Your Cool Whip Candy
Okay, let’s talk about what you need to make this miraculous treat. The beauty of this no bake cool whip dessert is how minimal the list is. Seriously, it’s three things! When I started streamlining my holiday baking, I learned that sometimes the very best sweets come from the pantry staples we already have on hand. You’ll need these exact items to capture that light, airy texture we are aiming for.
- 1 cup powdered sugar
- 1 cup frozen whipped topping (Cool Whip), thawed—this is key, friends! It needs to be soft enough to mix easily.
- 8 ounces semi-sweet chocolate, melted (for that perfect outer shell)
Step-by-Step Guide to Making Fluffy No Bake Treats
Laying the foundation for this amazing cool whip candy is all about gentle handling. First things first, you have to prep your pan! Line an 8×8 inch pan with parchment paper, making sure you leave plenty of overhang on the sides. This overhang is your handle later, trust me, you’ll thank me when it’s time to lift this frozen slab out! If you’ve ever tried to peel parchment from a tricky frozen good, you know why this step is non-negotiable.
The whole structure relies on that initial mix, so pay attention here. We freeze this base for a minimum of two hours. Don’t skim that time! That’s what turns this into a solid piece perfect for cutting into those uniform little bites we love. This freezing step is even more crucial than when I make my easy puff pastry apple strudel recipe, because we need this nougat firm enough to handle dipping!
Mixing the Base for Your Creamy Frozen Dessert
Grab your bowl with the thawed whipped topping—remember, thawed but not soupy! Gently mix in your powdered sugar until it’s just combined. This is where so many people mess up their no bake treats! If you beat the heck out of it, you’ll deflate all those precious air bubbles that make this candy so wonderfully light and airy. We want smooth, yes, but *gentle* smooth. Press that creamy mixture into your prepared pan evenly, then off to the freezer it goes for a couple of hours!
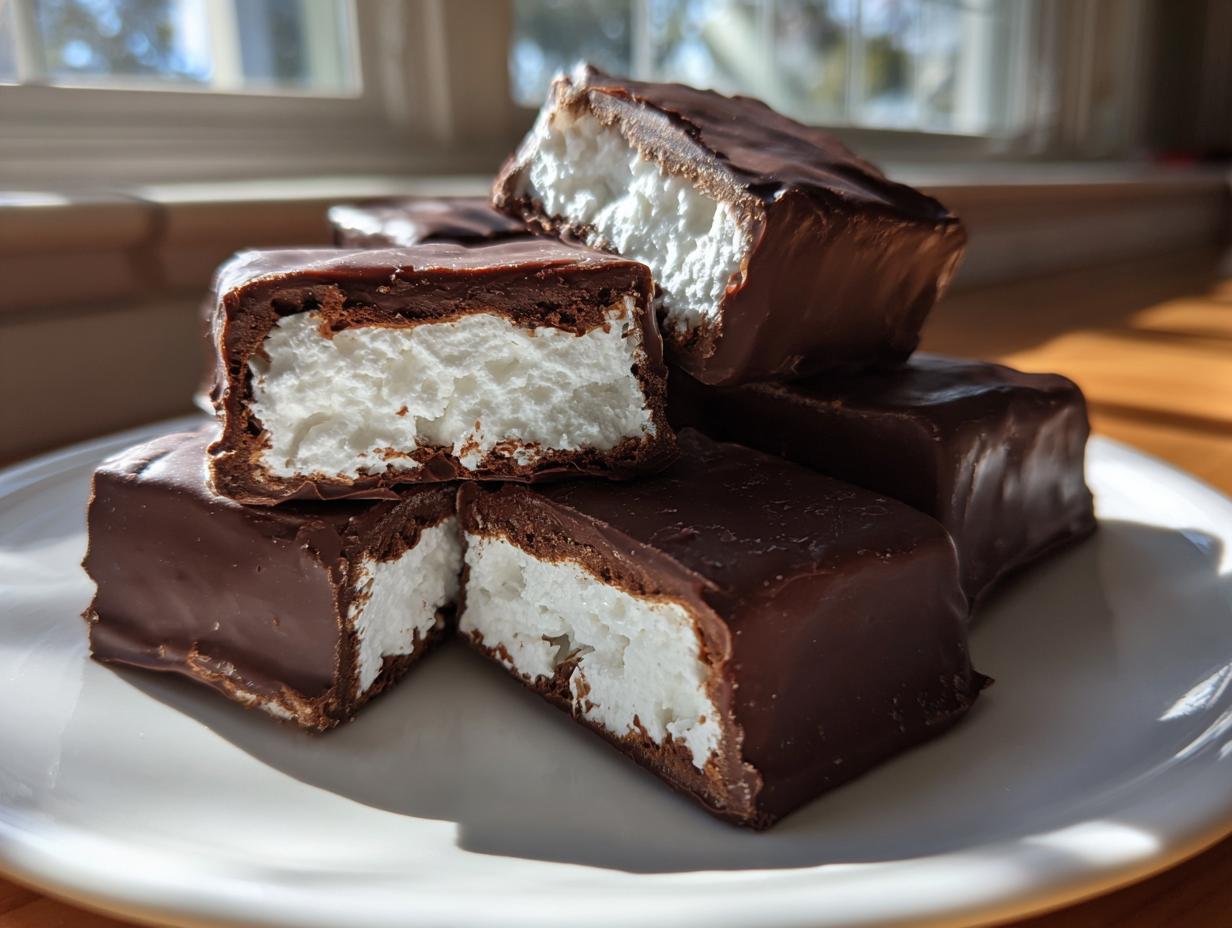
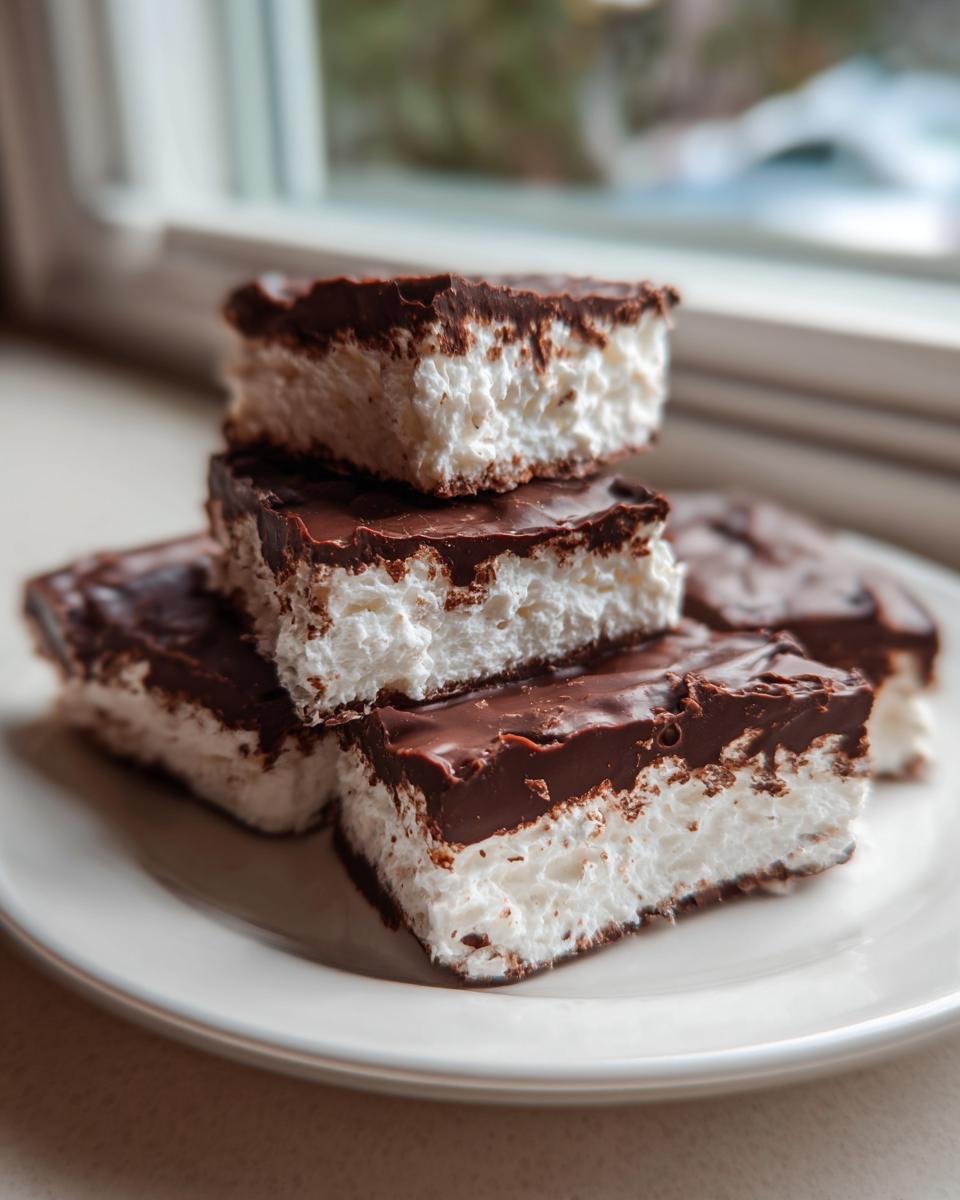
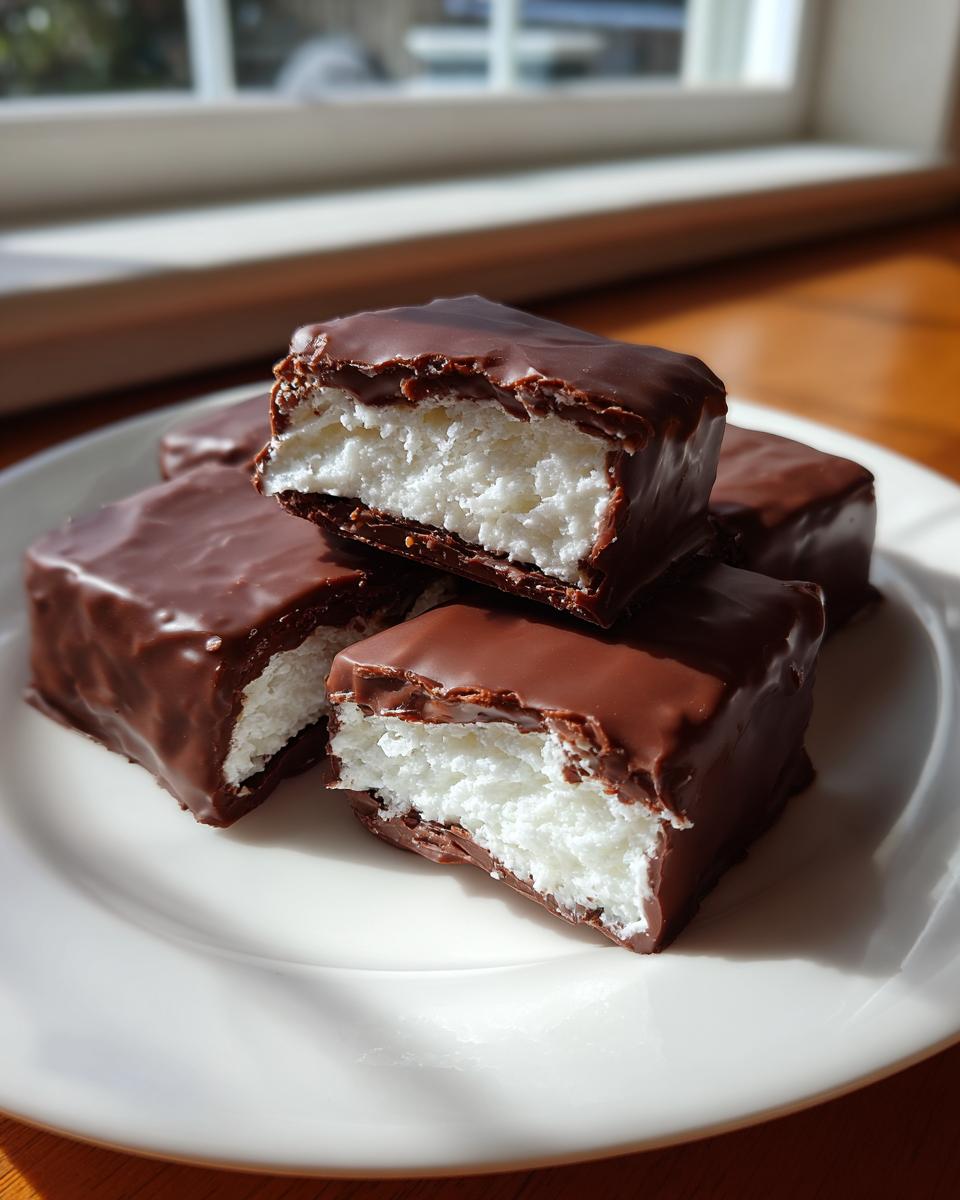
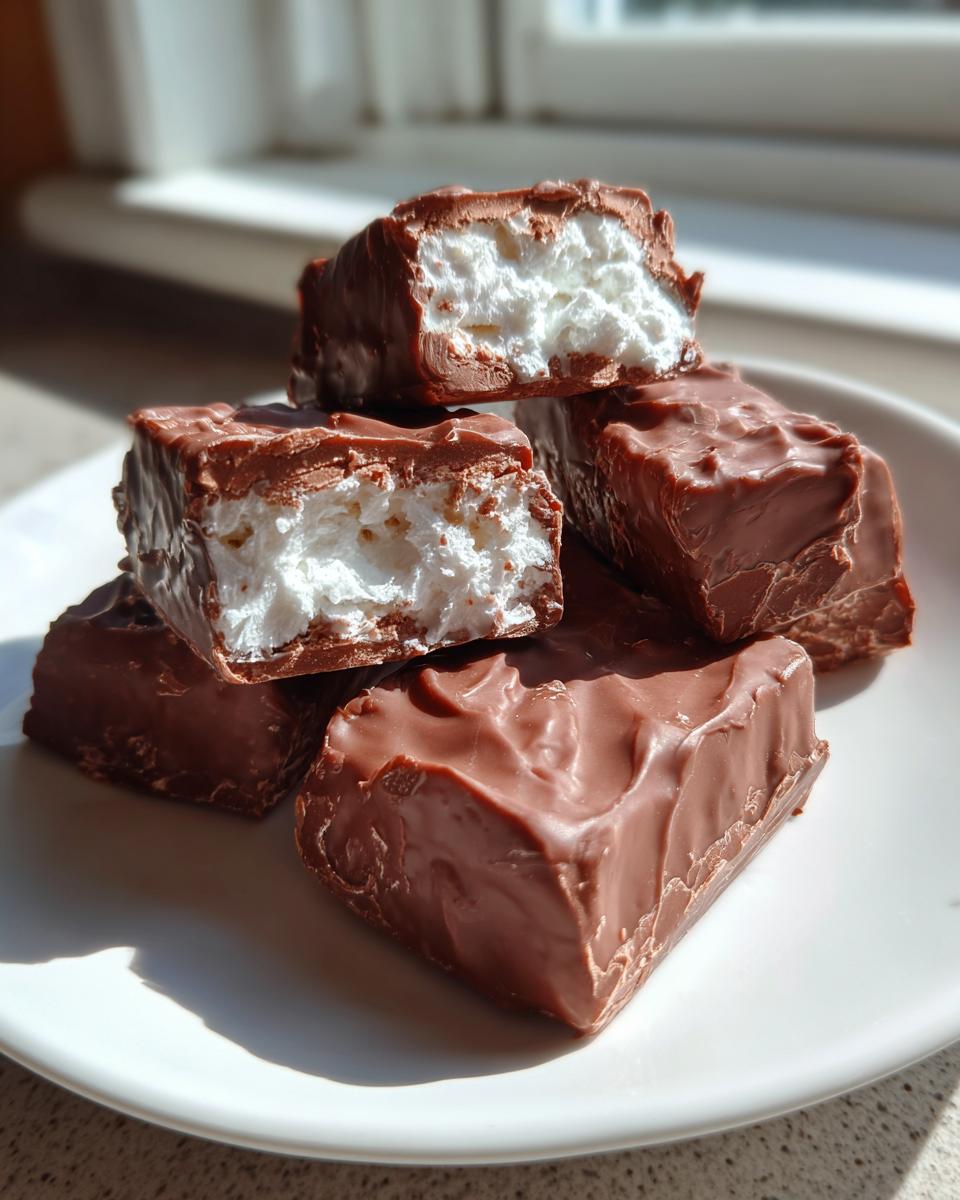
Achieving the Perfect Chocolate Coated Candy Finish
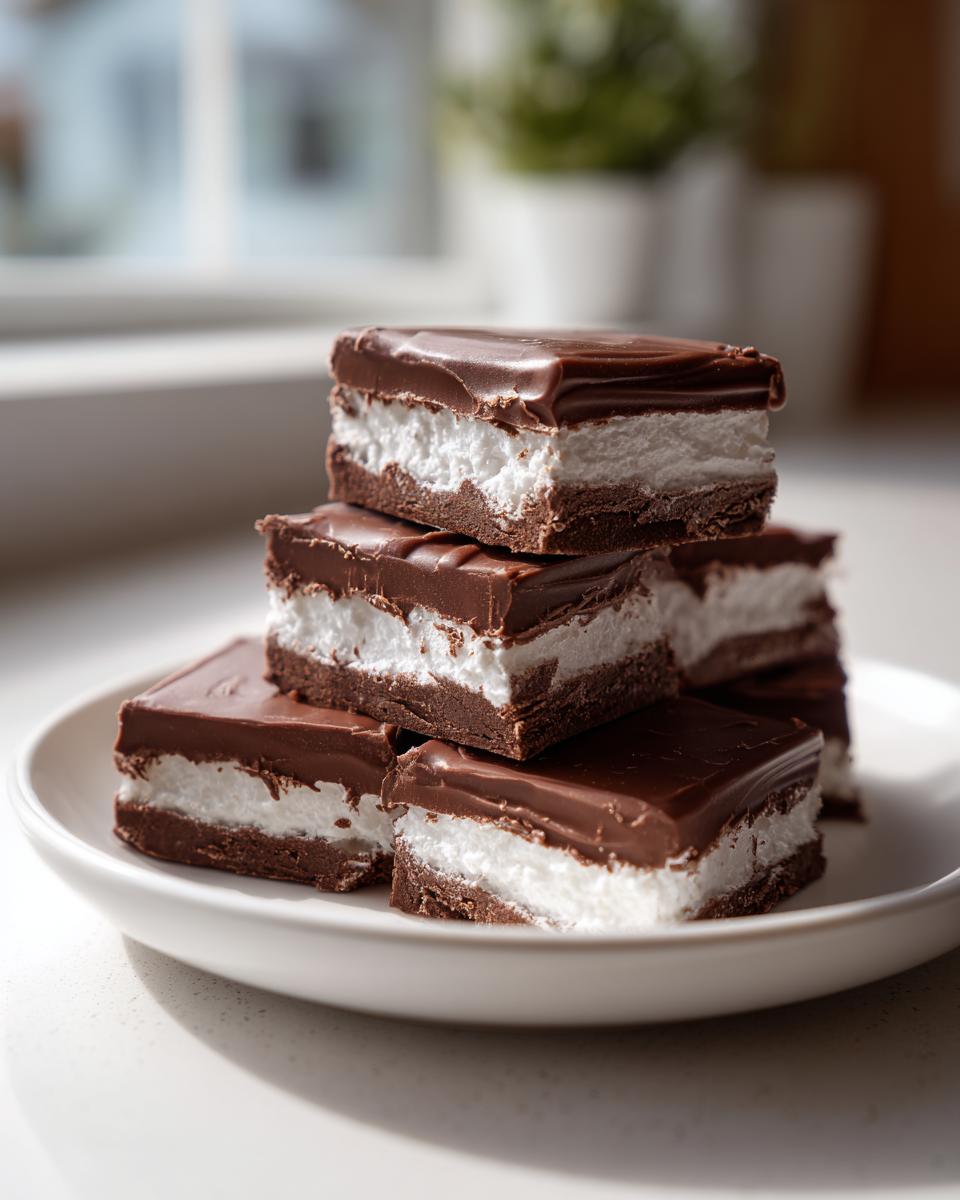
Once your creamy centers are rock solid—after that two-hour chill—take them out and slice them into small squares. Now for the best part: the chocolate coating! I melt mine slowly in the microwave, stirring every 30 seconds so it doesn’t scorch. When it’s velvety smooth, dip each square completely. Here’s my favorite secret for clean dipping: use a fork to lower the candy in, let the excess drip off for a second, and then use another fork or a toothpick to gently push it off onto the parchment-lined sheet. This keeps your fingers clean and your coating neat, giving you that professional look for your chocolate coated candy.
Tips for Success with Your 3 Musketeers Copycat Candy
Even though this is a super simple recipe, I always want to make sure you get that perfect, melt-in-your-mouth result every time you make this cool whip candy. A huge part of my philosophy here at Mia’s Meals is making sure these light and airy dessert ideas are totally foolproof, especially when you need them for a quick party or holiday tray.
We definitely want that amazing texture, which reminds everyone of a decadent store-bought bar, and a few clever tweaks can ensure you succeed!
Ingredient Notes and Substitutions for Cool Whip Candy
You saw the recipe calls for semi-sweet chocolate, and that gives a lovely balance against the powdered sugar center. But hey, I encourage playing around! If you prefer something sweeter, go right ahead and use milk chocolate for the coating. If you like a bit more contrast—which I prefer for a truly budget friendly sweet treat—try dipping these in dark chocolate instead. They hold up beautifully.
Also, if you find your center isn’t quite as firm as you’d like after cutting (sometimes the freezer time varies!), just pop those cut pieces back in the freezer for about 30 minutes right before you start dipping. That makes dipping so much cleaner because the candy won’t get mushy on the tines of your fork. It’s a simple trick that guarantees success with this chocolate coated candy.
Make Ahead Candy Ideas and Storage for Cool Whip Candy
Listen, when it comes to the high-stakes world of holiday baking, anything that can be done early is a treasure! That’s why this recipe is one of my favorite make ahead candy ideas. You can complete the entire candy right up until the chocolate setting stage several days ahead of time! It’s perfect for those weeks leading up to Christmas when the schedule gets totally packed.
After you dip them in chocolate and the coating is set—either at room temp or in the fridge—you need to store them correctly so the center stays fluffy instead of getting icy. The final instruction in the recipe tells you exactly how to handle it: keep them in an airtight container in the refrigerator. They hold up really well for about a week this way, making them reliable quick party desserts!
Serving Suggestions for This Simple Holiday Candy
Because this cool whip candy is so light and fluffy, it almost melts in your mouth before you even chew! That makes it a wonderful contrast to the richer, denser treats on your dessert table. I always bake a couple of batches of cookies, but these candies are the perfect ones to fill in those little gaps on the platter.
They look fantastic when placed right next to peanut butter fudge or a dense chocolate truffle. For big gatherings, line a tiered serving tray with small squares of parchment paper, and pile these shiny, chocolate-coated bites high. Everyone always asks for the recipe for these particular holiday baking tray fillers because they disappear first!
Frequently Asked Questions About Cool Whip Candy
I know sometimes you have questions when you try a new, super simple recipe like this one. It’s my job to make sure you feel totally confident whipping these up, whether you’re scrambling for a quick homemade candy or planning ahead. Here are some of the things people ask me most often about this fantastic cool whip candy!
Can I use real whipped cream instead of the frozen topping?
That’s a great question about substitutions! I strongly advise against using fresh, liquid heavy cream whipped up yourself. The stability comes from the stabilizers in the frozen whipped topping. Real whipped cream won’t hold that fluffy shape once frozen and dipped in chocolate; it tends to weep or separate when it thaws slightly. Stick to the store-bought kind for these budget friendly sweet treats!
Why is the center of my candy sticky or soupy?
This almost always comes down to one of two things: either you didn’t freeze the base block long enough, or you overmixed the powdered sugar and the topping initially. If you mix it too much, you deflate the air, and it loses structure. If it’s soupy after cutting, pop it back into the freezer for another hour before attempting to dip it! It needs to be rock hard before it hits that warm chocolate coating.
How long will this candy last?
Because this is a refrigerated, no-bake treat, it’s best stored in the fridge in an airtight container. They keep wonderfully for about 7 to 10 days. If you make them way ahead of time, you can try freezing them, but make sure they are well-wrapped so they don’t absorb any freezer smells. You might notice a tiny bit of texture change after thawing, but they are still delicious!
Estimated Nutrition for This Whipped Topping Candy
For those of you who like to track things, here’s a quick look at what’s packed into one piece of this wonderful whipped topping candy. Based on the recipe using semi-sweet chocolate, we’re looking at roughly 120 calories per piece, with about 7 grams of fat and 2 grams of protein.
Just remember, these numbers are estimates! Since chocolate brands vary wildly in fat and sugar content, these figures will shift slightly. But hey, for something this delicious and simple, I think we can agree that it’s a fantastic budget friendly sweet treat!
Share Your Experience Making This Cool Whip Candy
Now that you have the secret to making the easiest cool whip candy known to humankind, I truly want to hear how it turned out for you! As a busy mom myself, I rely on feedback from cooks like you to know which tricks really stick in a modern kitchen. Did you try milk chocolate instead? Did you add any fun holiday sprinkles on top before the chocolate set? Let me know!
Please leave your rating below—five stars if this became your new go-to holiday staple! Nothing makes me happier than knowing one of my simplified recipes brought a little bit of that old-fashioned joy to your busy week. If you snap a picture of your magnificent 3 Musketeers copycat candy tray, tag me on social media! I love seeing how you decorate these treats. If you’re looking for something to pair with this candy, check out the tips on getting the perfect crunch with my best sugar cookie icing that dries hard. Happy baking—or, rather, happy *not* baking!
PrintEasy 3-Ingredient Cool Whip Candy (3 Musketeers Copycat)

Make this simple, no-bake Cool Whip candy that tastes like a fluffy 3 Musketeers bar. It requires only three ingredients and is perfect for quick holiday treats or parties.
- Prep Time: 15 min
- Cook Time: 5 min
- Total Time: 2 hours 20 min
- Yield: About 24 pieces 1x
- Category: Candy
- Method: No-Bake/Freezing
- Cuisine: American
- Diet: Vegetarian
Ingredients
- 1 cup powdered sugar
- 1 cup frozen whipped topping (Cool Whip), thawed
- 8 ounces semi-sweet chocolate, melted
Instructions
- Line an 8×8 inch pan with parchment paper, leaving an overhang for easy removal.
- In a medium bowl, combine the powdered sugar and the thawed whipped topping. Mix them gently until they are just combined and the mixture is smooth. Do not overmix.
- Press the mixture evenly into the prepared pan.
- Place the pan in the freezer for at least 2 hours, or until the mixture is firm enough to cut.
- Remove the mixture from the pan using the parchment paper overhang and place it on a cutting board. Cut the slab into small, bite-sized squares.
- Melt the semi-sweet chocolate in a microwave-safe bowl in 30-second intervals, stirring between each interval until smooth.
- Dip each candy square into the melted chocolate, ensuring it is fully coated. You can use a fork to lift the candy out of the chocolate.
- Place the chocolate-coated candies back onto a parchment-lined baking sheet.
- Allow the chocolate to set completely at room temperature, or place the baking sheet in the refrigerator for 15 minutes for faster setting.
- Store the finished cool whip candy in an airtight container in the refrigerator.
Notes
- For a richer flavor, you can substitute the semi-sweet chocolate with milk chocolate or dark chocolate for the coating.
- If you want a slightly firmer texture, freeze the cut squares for 30 minutes before dipping them in chocolate.
- This recipe is a great budget friendly sweet treat for holiday baking trays.
Nutrition
- Serving Size: 1 piece
- Calories: 120
- Sugar: 14g
- Sodium: 15mg
- Fat: 7g
- Saturated Fat: 4g
- Unsaturated Fat: 3g
- Trans Fat: 0g
- Carbohydrates: 15g
- Fiber: 1g
- Protein: 2g
- Cholesterol: 5mg