
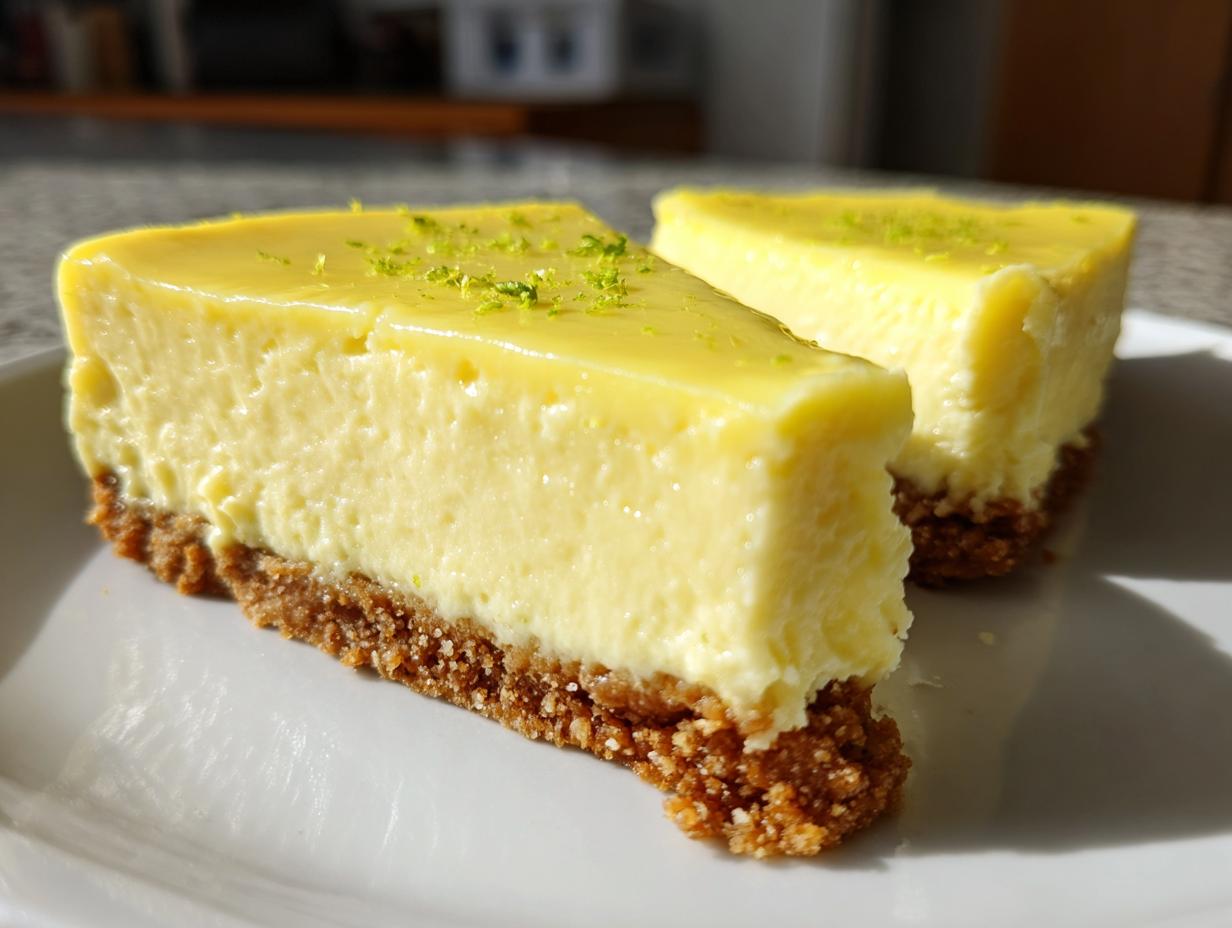
When the heat of summer hits, you know my kitchen starts craving citrus. Forget basic pies—what I really want is something truly decadent, something cold, rich, and bright all at once. Trust me, nothing hits that spot better than a perfect slice of key lime cheesecake. This recipe isn’t just another dessert; it’s my adaptation of those grand, classic American treats, streamlined so you get that amazing texture without spending all day in the oven. We are going for thick, creamy, and perfectly balanced between super sweet and wonderfully tangy.
I love taking those old, time-consuming desserts my mom and grandma used to make and figuring out the simplest path to flavor. This baked version gives you that dense, velvety texture that just melts in your mouth. We pair it with a crisp, buttery graham cracker crust, and honestly, it’s the reason our summer potlucks suddenly get very quiet when this comes out.
If you’re ready to make the ultimate citrus showstopper, check out all the secrets below, and don’t forget to peek at my other favorite dessert recipes once you’re done!
- Why This Is the Ultimate Key Lime Cheesecake Recipe
- Ingredients for the Best Key Lime Cheesecake Recipe
- How to Make Key Lime Cheesecake Using a Water Bath
- Tips for Success with Your Key Lime Cheesecake
- Make Ahead Key Lime Cheesecake and Storage Instructions
- Variations: Beyond the Classic Key Lime Cheesecake
- Frequently Asked Questions About Key Lime Cheesecake
- Estimated Nutritional Data for This Key Lime Cheesecake
- Share Your Perfect Key Lime Cheesecake Experience
Why This Is the Ultimate Key Lime Cheesecake Recipe
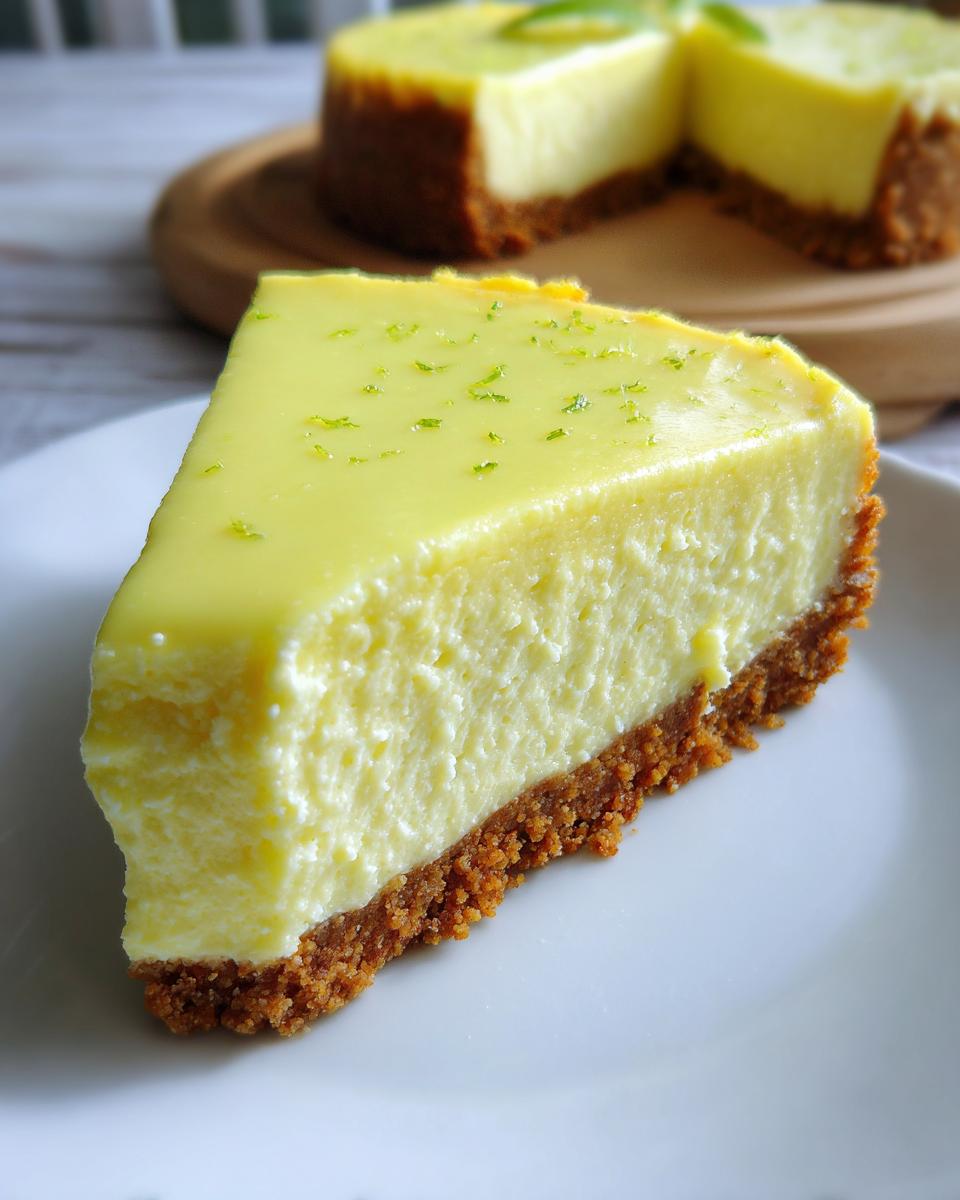
When I tell you this is the ultimate key lime cheesecake recipe, I mean it. We’re aiming for that thick, decadent result that doesn’t crack or sink on you later. This isn’t one of those flimsy, store-bought textures, folks. This is a true, rich slice of heaven. We get that incredible texture thanks to a few non-negotiables, chief among them being the water bath method you’ll see later. That gentle steam works magic, preventing the edges from setting too fast while the center cooks perfectly evenly.
The flavor profile here is exactly what you want in a tangy lime dessert—bright, zesty, and refreshing, but grounded by the sweetness of the cheese filling. It’s sunshine in a slice, honestly.
Achieving the Perfect Creamy Key Lime Cheesecake Texture
The texture is everything when we talk about that amazing creamy key lime cheesecake, right? If you want velvety smooth, you have to bring your cream cheese and sour cream out about an hour before you even think about mixing. Cold ingredients fight each other, leading to lumps, and lumps lead to rough mixing later! Also, be gentle with those eggs! Beat them in one at a time, and stop mixing the second they disappear. Overmixing eggs pumps too much air in, and while that sounds good, it results in a puffy cake that crashes the second it cools. We want density, not deflation!
The Secret to a Zesty Lime Flavor Profile
You simply must use fresh key lime juice and zest for this if you want that real punch. If you use bottled stuff, you end up with a dull, sweet flavor instead of that signature bright zing. When I zest the limes, I try to stay away from the white pith underneath because that part is bitter. We want pure, vibrant citrus oils in every spoonful of this zesty lime cream cheese dessert. The combination of that fresh juice and the zest mixed into the creamy base is what cuts through the richness of the full-fat ingredients perfectly.
Ingredients for the Best Key Lime Cheesecake Recipe
Okay, let’s talk about what goes into this magic! Getting the right ingredients ready before you start mixing is my biggest tip for sticking to the timeline and getting that perfect bake. You want everything measured out and ready to go. I’ve broken it down so you can see exactly what goes into the crust versus the filling. This simplicity is part of what makes this an easy key lime cheesecake recipe to follow.
For the Graham Cracker Crust Cheesecake Base
This crust comes together so fast, and it holds up beautifully against that rich filling. Make sure your butter is fully melted before you start this part!
- 1 1/2 cups graham cracker crumbs
- 1/4 cup granulated sugar
- 6 tablespoons unsalted butter, melted
For the Tangy Key Lime Cheesecake Filling
This is where the real flavor comes from, so don’t skimp on the fresh zest! Remember, the three 8-ounce packages of cream cheese need to be truly softened—like, really squishy—so they beat up smooth without any lumps.
- 3 (8 ounce) packages cream cheese, softened
- 1 1/2 cups granulated sugar
- 1/4 cup all-purpose flour
- 1 teaspoon vanilla extract
- 1/4 teaspoon salt
- 1/2 cup sour cream
- 4 large eggs (make sure these are room temperature too!)
- 1/2 cup fresh key lime juice
- 2 tablespoons key lime zest
How to Make Key Lime Cheesecake Using a Water Bath
This is where the baking part happens, and I promise you, it looks much more complicated than it actually is! The water bath might seem like extra work, but it’s the absolute key to nailing that smooth, crack-free surface we are aiming for. It keeps things gently steamy, which is how you get that perfect, thick cheesecake. If you’re looking for guidance on how to make key lime cheesecake that tastes this good, follow these steps closely!
Preparing the Graham Cracker Crust Cheesecake
First thing, get that oven preheated to 325 degrees Fahrenheit. Now, listen closely, because this is important for water baths: grab some heavy-duty aluminum foil and wrap the outside bottom and sides of your 9-inch springform pan really well. You want it sealed tight so no water seeps in while it’s bathing! Once wrapped, mix up your crumbs, the first bit of sugar, and that melted butter until it looks like wet sand. Press that mixture firmly into the bottom of the pan, and pop it into the oven to bake for just 10 minutes. Let it cool down before you do anything else.
Mixing the Creamy Filling and Assembling the Key Lime Cheesecake
Time for the filling! Beat that room-temperature cream cheese until it’s completely smooth—no lumps allowed. Then, slowly add the 1 1/2 cups of sugar and the flour. Once those are blended, mix in your vanilla and salt. Now comes the sour cream, beat that in until everything looks silky. Here’s the critical part for that creamy texture: add your four eggs one by one. I mean it—mix just until you see the yolk disappear, then add the next one. If you overmix here, you’ll introduce air and get cracking! Finally, switch to a spatula and gently fold in the fresh key lime juice and all that bright zest.
Baking the Key Lime Cheesecake with a Water Bath
This step ensures success. Place your foil-wrapped springform pan inside a larger roasting pan. Now, carefully pour hot water into the *roasting pan* until that water comes halfway up the sides of your cheesecake pan. Bake it like this for about 60 to 70 minutes. You’ll know it’s ready when the edges look set, but the very center still has a bit of a gentle jiggle to it—don’t wait until it’s totally firm! Once that time is up, turn the oven off, crack the door open a bit, and let the cheesecake stay inside the warm oven for a full hour. This slow cooling prevents that sudden temperature shock that causes cracks. After that hour, take it out, let it cool on the rack, and then it’s chilling time—at least 6 hours!
Tips for Success with Your Key Lime Cheesecake
I know we just put this amazing key lime cheesecake into the fridge, but I wanted to give you a couple of quick tips now. Baking is fun, but sometimes those little finishing touches—or knowing what to do if your lime juice isn’t quite right—makes the difference between a good dessert and the best key lime cheesecake recipe you’ve ever made. These are the tricks I rely on to make sure every slice is perfect, tangy, and creamy.
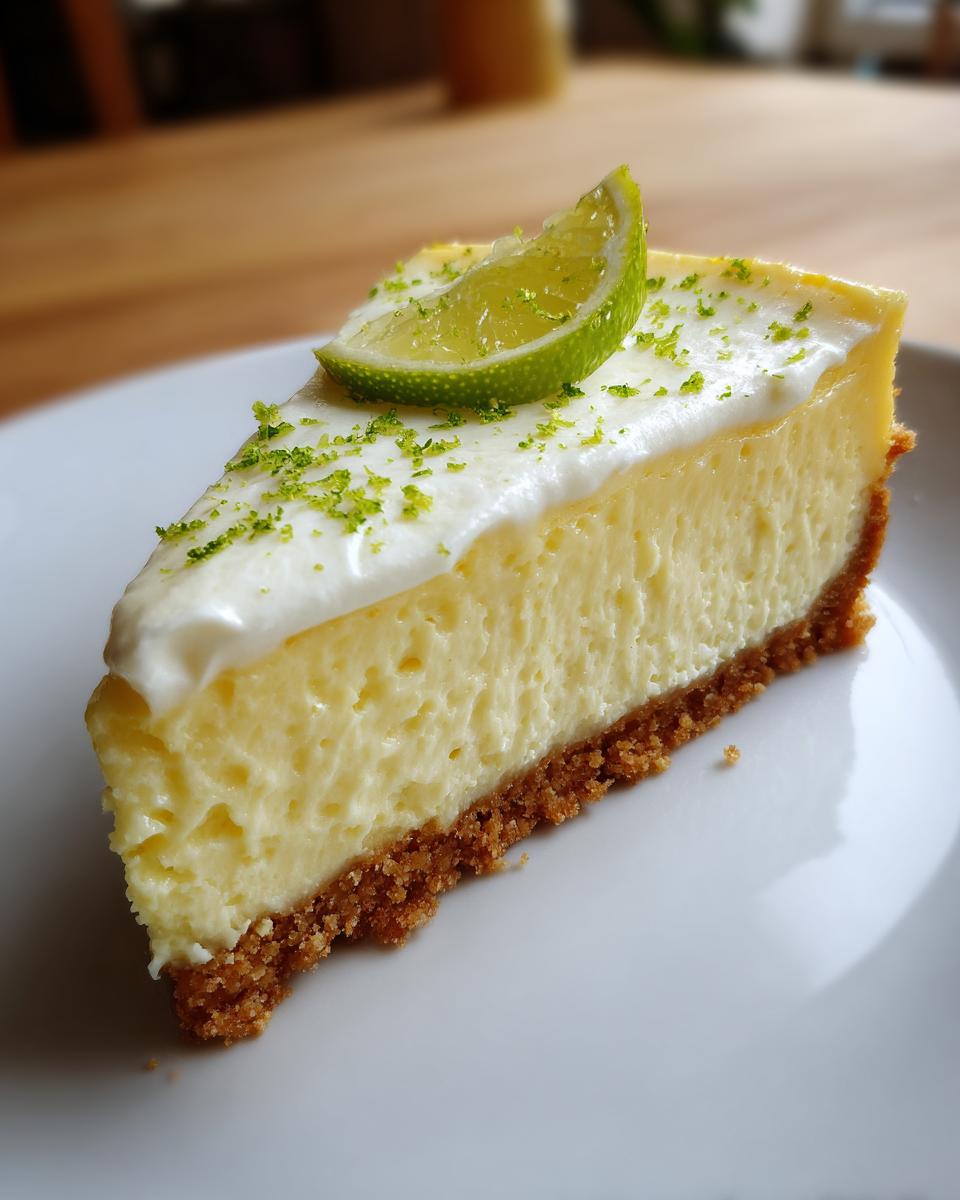
Making a Tangy Topping for Your Key Lime Cheesecake
While I love the classic look of a plain, chilled cheesecake, sometimes you just want that extra layer of tanginess right before serving, especially if you’re bringing this refreshing lime dessert for summer to a crowd. It’s super easy to whip up! Just take about half a cup of sour cream—make sure it’s cold—and mix it vigorously with about two tablespoons of powdered sugar. You want it just slightly sweet to balance the tartness. Spread this thin layer gently over the top only after the cheesecake has chilled completely. It firms up beautifully and gives you that extra pop!
Ingredient Substitutions for this Refreshing Lime Dessert
Okay, what if you’re making this on impulse and realize you only have regular lime juice, not the precious key lime juice? Don’t panic! You absolutely can use regular (Persian) lime juice, but here’s the thing: regular limes are much stronger and less sweet overall. The recipe calls for half a cup of key lime juice, but if you switch, start with maybe 1/3 cup and taste the batter before adding the eggs. You might need to add a little extra sugar if the flavor is too sharp, or just stick with less juice so you don’t throw off the structure of the filling. It won’t be exactly the same, but it will still be a delightful citrus cheesecake recipe!
Make Ahead Key Lime Cheesecake and Storage Instructions
One of the absolute best parts about making this key lime cheesecake is that it truly forces you to slow down—in a good way! This is not a dessert you rush, and honestly, that’s part of what helps it become so decadent. The long chill time isn’t just suggested; it’s mandatory if you want that thick, perfect slice.
You need that minimum chill time of six hours, but if you can manage it, definitely aim for overnight. While the cheesecake is technically baked and cooled by the time it hits the fridge, the chilling process allows the mixture to firm up completely. It sets the structure so that when you cut into it, you get those beautiful, clean slices, instead of a gooey mess.
The great news is that this recipe is fantastic for planning ahead! It’s truly a perfect make ahead key lime cheesecake. The recipe notes mentioned that it stores wonderfully. You can cover the cooled cheesecake tightly in plastic wrap and keep it in the refrigerator for up to four days. It honestly tastes just as good on day three as it does on day one, maybe even better as the nice, sharp lime flavor settles into the creamy base!
Variations: Beyond the Classic Key Lime Cheesecake
I get it—sometimes you need something fast, or maybe you’re making desserts for a huge crowd and can’t haul out the big springform pan. While I firmly believe this baked version is the absolute king of textures, we can shake things up a bit while keeping that zesty flavor everyone loves! Sometimes I see people looking for a quick no-bake key lime cheesecake recipe when they’re short on time, and that’s totally possible.
For a no-bake option, you usually skip the eggs and the oven entirely. Instead, you’ll often use gelatin or stabilized whipped cream to help the filling firm up in the fridge after it has sat for a while. It’s a little lighter in texture than this decadent baked one, but still super refreshing for summer!
The great news is that this recipe’s primary flavor profile—cream cheese, graham crust, and lime—translates easily to smaller formats. If you’re after individual treats, we can shrink this beauty down!
Creating Mini Key Lime Cheesecakes Recipe Portions
If you want to make pretty, individual portions, you are looking for the mini key lime cheesecakes recipe approach. This is fantastic for parties because everyone gets a perfect, neat slice!
Instead of a 9-inch springform pan, grab a standard muffin tin. You’ll still press the crust mixture into the bottom of each cup—you can use the bottom of a small glass or your thumb to tamp it down firmly. Then, just pour the filling mixture over the top.
Since they are tiny, they bake much, much faster because the heat penetrates right to the center quickly. Instead of 60 to 70 minutes in that water bath, start checking them around the 20-minute mark. You’re looking for edges just beginning to set. Pull them when they look mostly done but still have a tiny wobble. You still use the slow cool-down trick, but for a much shorter time—maybe 30 minutes in the turned-off oven works great for the mini ones. Then, chill them overnight, and you’re serving up pure, individual delight!
Frequently Asked Questions About Key Lime Cheesecake
It’s natural to have questions when you tackle a showstopper dessert like this! We’ve covered the main steps for making this the best key lime cheesecake recipe you’ve ever tried, but sometimes little doubts creep in. I’m here to help clear those up so you can bake with total confidence. Seriously, don’t worry if this is your first time; we’ve all been there!
Can I make this an easy key lime cheesecake recipe without a water bath?
Oh, I know the water bath sounds intimidating, and it adds a little step to what we’re calling an easy key lime cheesecake recipe. But listen, for this particular recipe—where that density and the ultra-smooth top are the goals—the water bath is your security blanket. If you absolutely cannot do it, bake it on the lowest rack possible, but accept that you risk an uneven bake or cracking because the edges cook much faster than the middle. You can *try* placing a shallow pan of water on the rack below the cheesecake to create some steam, but honestly, the full water bath works much better to guarantee that perfect texture.
How can I achieve a texture similar to the Cheesecake Factory key lime cheesecake copycat?
That signature richness you find in a homemade cheesecake Factory copycat comes from two main things we focus on here: high-quality, full-fat cream cheese (no light versions!) and the cooling process. You must use full-fat blocks of cream cheese, and they have to be truly room temperature so they cream perfectly smooth. Then, the other huge factor is that slow, gentle cooling inside the turned-off oven for a full hour! That gradual temperature adjustment prevents the dreaded sinkhole and keeps the structure dense and velvety, just like the restaurant version.
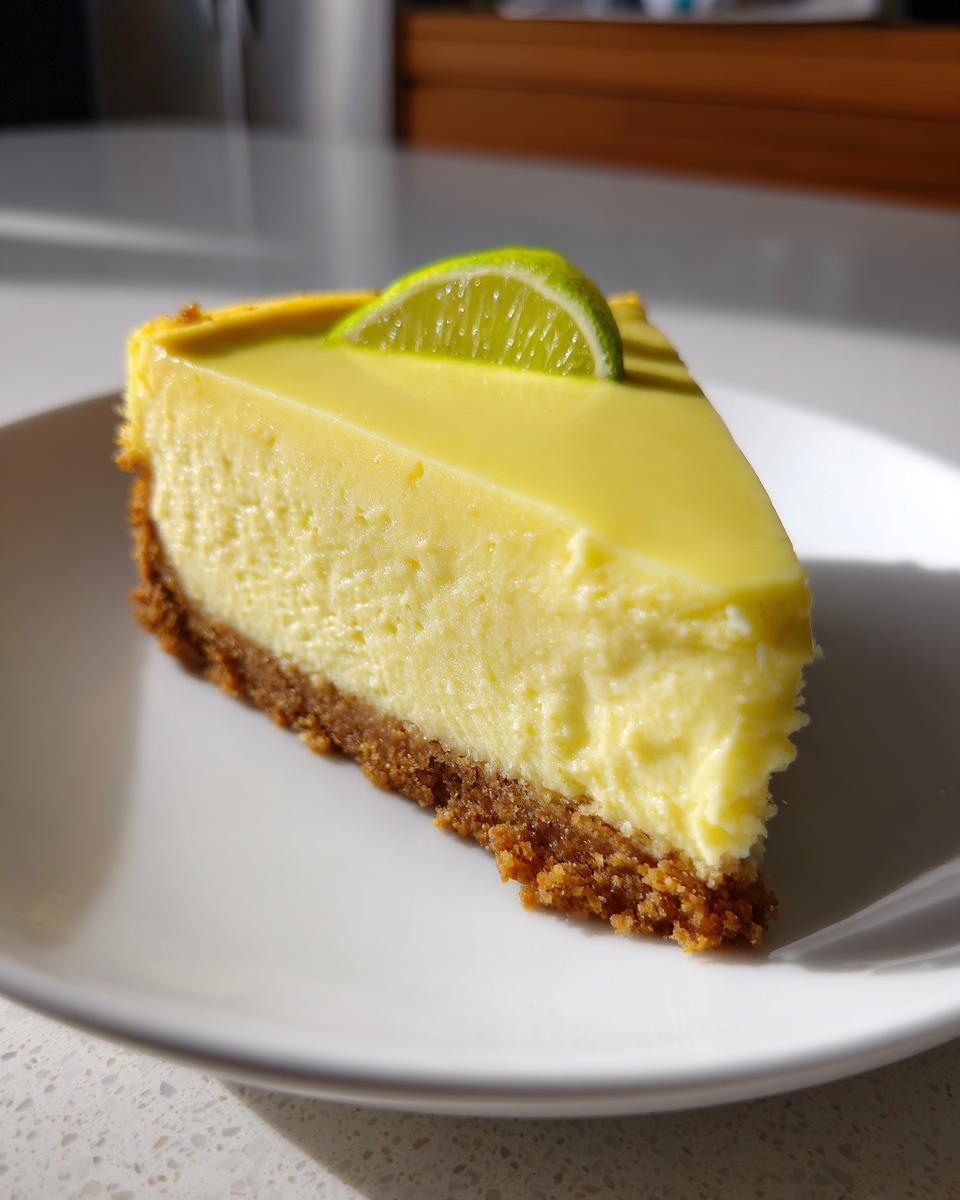
What is the best way to serve this refreshing lime dessert for summer?
This refreshing lime dessert for summer truly shines when served properly chilled! Don’t even think about taking it out of the fridge until about 20 minutes before you want to slice it. If you try to cut it when it’s ice-cold from the fridge, the slices might stick or crumble a bit. After that short rest on the counter to warm up just slightly, run a thin knife under hot water and wipe it clean between every single slice—that keeps your edges looking sharp and professional! A little extra lime zest sprinkled right on top just before serving gives it the prettiest presentation, too.
Estimated Nutritional Data for This Key Lime Cheesecake
I always like to keep track of what we’re eating, even when we are tucking into something as glorious as this ultimate key lime cheesecake. Knowing the numbers helps me plan the rest of the day’s meals. Down below, you’ll find the estimated nutritional breakdown for one slice of this dessert.
Now, please remember these figures are just guidelines based on the standard ingredients list I use here at Mia’s Meals. Cooking is an art, and everyone’s measurements might vary slightly—plus, the brand of cream cheese or the exact amount of butter used in the crust can change things!
Here is the breakdown for one serving:
- Serving Size: 1 slice
- Calories: 450
- Sugar: 35g
- Sodium: 300mg
- Fat: 28g
- Saturated Fat: 17g
- Unsaturated Fat: 11g
- Trans Fat: 0.5g
- Carbohydrates: 42g
- Fiber: 1g
- Protein: 8g
- Cholesterol: 120mg
It’s definitely a rich treat meant for special occasions, full of good fats and satisfying sweetness! Just keep in mind that because this recipe uses full-fat products to achieve that signature creamy texture, the fat and sugar content reflect a truly decadent dessert.
Share Your Perfect Key Lime Cheesecake Experience
Alright, friends, that’s it! You’ve conquered the water bath, you’ve kept your mixing gentle, and now you have this incredible, thick, and oh-so-tangy key lime cheesecake chilling in your fridge! I truly hope you love this recipe as much as my family does. It’s one of those desserts that makes everyone ask for the secret.
Now, I absolutely live for hearing how your baking adventures turned out! Did it set up perfectly? Did your family devour it in five minutes flat? Please take a moment to leave a rating right here on the recipe card—five stars if this recipe brought you pure citrus joy! If you ran into a little trouble or have a question about a substitution, drop that in the comments below, too. I always try to pop in and help folks troubleshoot!
When you do share a picture of your masterpiece on social media—because you *know* you’ll want a picture of that gorgeous slice—please tag me! I love seeing your creations and hearing how you spiced things up. You can find all my contact info and socials here if you need to send me a note directly: Get in touch with Mia here. Happy baking, and enjoy that sweet, zesty reward!
PrintThick and Creamy Key Lime Cheesecake

Make this thick and creamy key lime cheesecake for a refreshing dessert with a perfect balance of sweet and tangy flavors. It uses a buttery graham cracker crust.
- Prep Time: 25 min
- Cook Time: 70 min
- Total Time: 1 hour 35 min
- Yield: 12 servings 1x
- Category: Dessert
- Method: Baking
- Cuisine: American
- Diet: Vegetarian
Ingredients
- 1 1/2 cups graham cracker crumbs
- 1/4 cup granulated sugar
- 6 tablespoons unsalted butter, melted
- 3 (8 ounce) packages cream cheese, softened
- 1 1/2 cups granulated sugar
- 1/4 cup all-purpose flour
- 1 teaspoon vanilla extract
- 1/4 teaspoon salt
- 1/2 cup sour cream
- 4 large eggs
- 1/2 cup fresh key lime juice
- 2 tablespoons key lime zest
Instructions
- Preheat your oven to 325 degrees Fahrenheit. Wrap the outside of a 9-inch springform pan with heavy-duty aluminum foil.
- Combine graham cracker crumbs, 1/4 cup sugar, and melted butter in a bowl. Press the mixture firmly into the bottom of the prepared springform pan. Bake for 10 minutes. Let the crust cool.
- In a large bowl, beat the softened cream cheese with an electric mixer until smooth. Add 1 1/2 cups sugar and flour; beat until combined. Mix in vanilla extract and salt.
- Beat in the sour cream until smooth. Add the eggs one at a time, mixing just until each egg is incorporated. Do not overmix.
- Stir in the key lime juice and zest by hand. Pour the filling over the cooled crust.
- Place the foil-wrapped springform pan into a larger roasting pan. Carefully pour hot water into the roasting pan until the water reaches halfway up the sides of the springform pan (this creates a water bath).
- Bake for 60 to 70 minutes, or until the edges are set but the center still jiggles slightly.
- Turn off the oven, crack the door open, and let the cheesecake cool inside the oven for 1 hour.
- Remove the cheesecake from the water bath and let it cool completely on a wire rack.
- Chill the cheesecake in the refrigerator for at least 6 hours, or preferably overnight, before serving.
Notes
- For a tangy topping, mix 1/2 cup sour cream with 2 tablespoons powdered sugar and spread over the chilled cheesecake before serving.
- You can make this recipe ahead of time; it stores well covered in the refrigerator for up to 4 days.
- If you cannot find key lime juice, use regular lime juice, but reduce the amount slightly for a less intense flavor.
Nutrition
- Serving Size: 1 slice
- Calories: 450
- Sugar: 35g
- Sodium: 300mg
- Fat: 28g
- Saturated Fat: 17g
- Unsaturated Fat: 11g
- Trans Fat: 0.5g
- Carbohydrates: 42g
- Fiber: 1g
- Protein: 8g
- Cholesterol: 120mg