
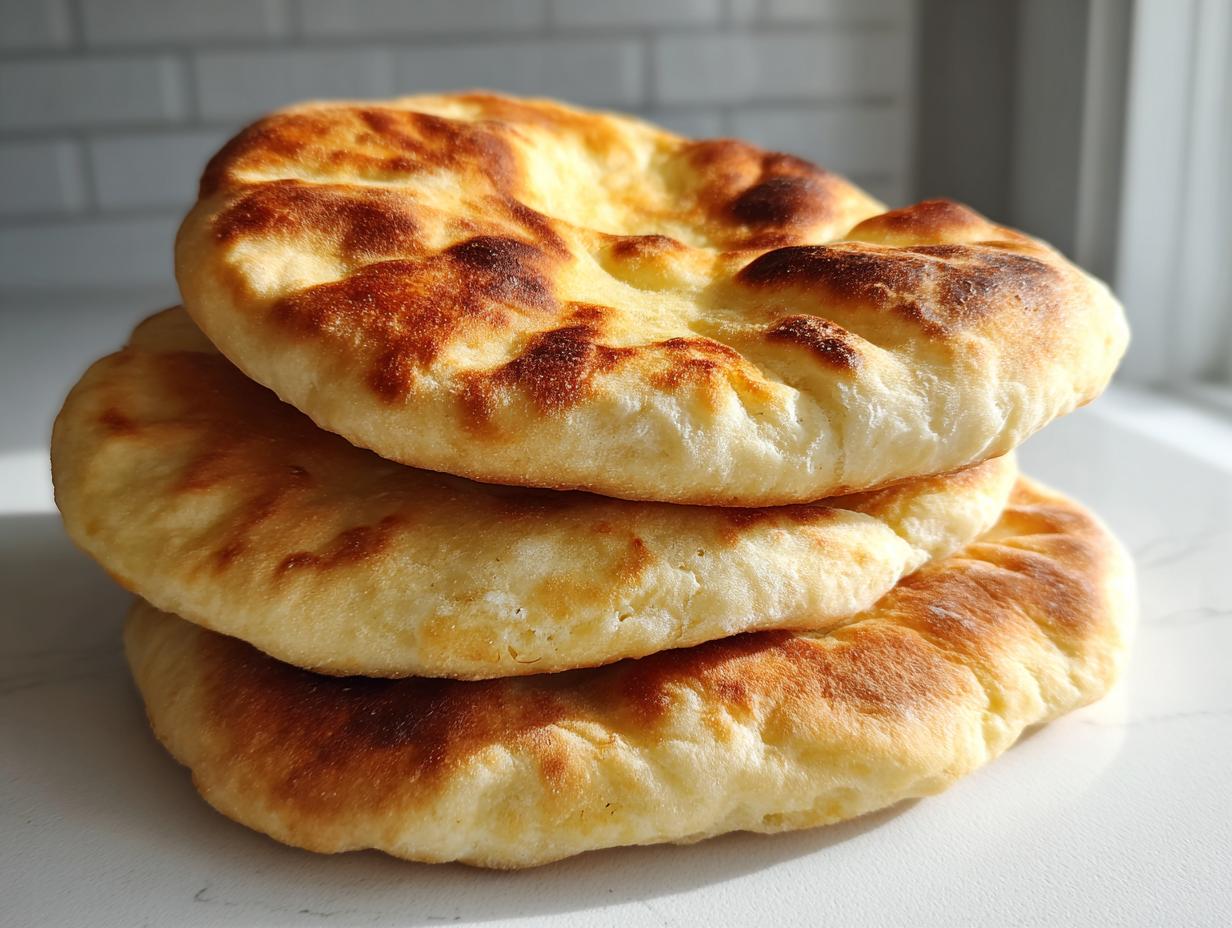
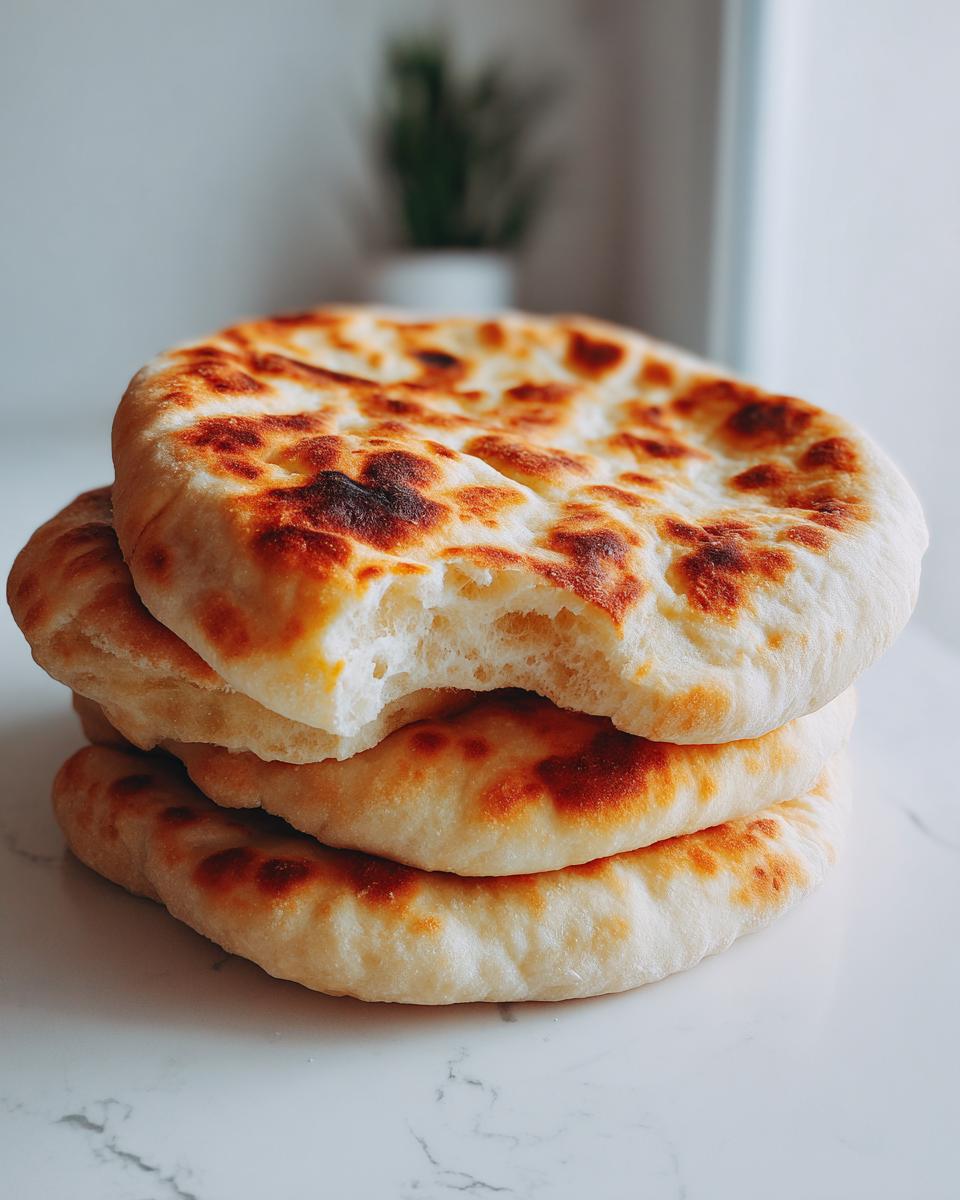
Honestly, once you’ve pulled a piece of warm, impossibly soft pita bread right off the skillet, you’ll never go back to those sad, dry things you find in plastic bags at the store. I remember feeling like making bread from scratch was just for people with endless weekends, but that’s exactly why I perfected this recipe. At Mia’s Meals, my whole mission is taking those classic comfort foods and stripping them down to their essentials, so you get maximum flavor without the fuss. Trust me when I say this is the foolproof, soft, fluffy homemade pita bread recipe that creates those magical, perfect pockets every single time using a super fast stovetop method. It’s simple, it’s fast, and it brings that warmth right to your table.
- Why This is the Best Pita Bread Recipe You Will Ever Make
- Gathering Ingredients for Your Soft Pita Bread
- Step-by-Step Instructions: How to Make Pita Bread
- Expert Tips for Perfect Pita Pockets Every Time
- Variations on Homemade Pita Bread
- Serving Suggestions for Your Warm Fresh Bread
- Storage and Reheating Instructions for Pita Bread
- Frequently Asked Questions About Pita Bread
- Bringing Connection to Your Table with Homemade Pita Bread
Why This is the Best Pita Bread Recipe You Will Ever Make
I know, I know, everyone claims their recipe is the ‘best,’ but hear me out on why this pita bread stands head and shoulders above the rest. We’re aiming for that pillowy, soft experience that mimics the best Greek bakeries, not the cardboard texture you sometimes find. If you love the satisfying crust of a good baguette, you’ll still appreciate how much attention we pay to structure here, just like in my classic French bread.
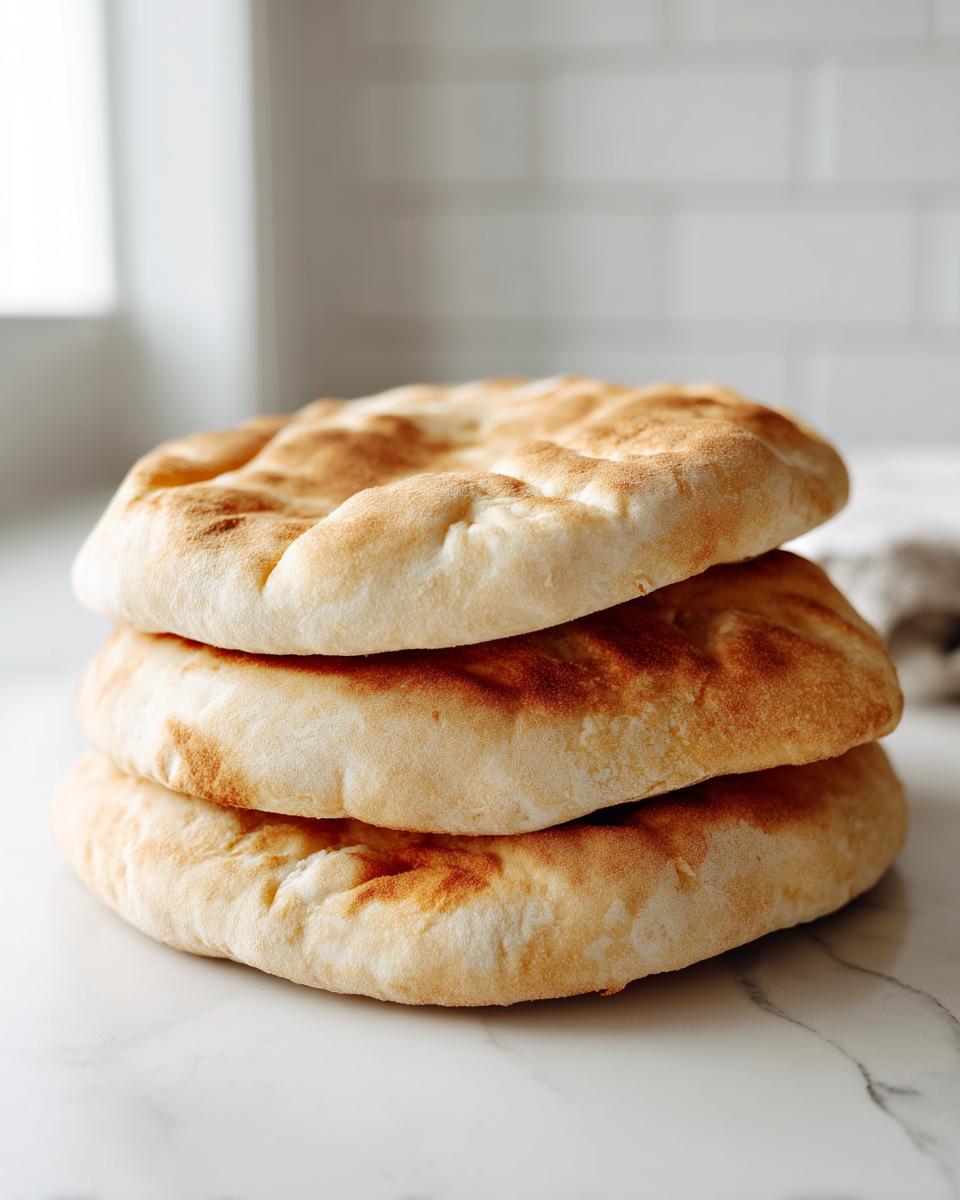
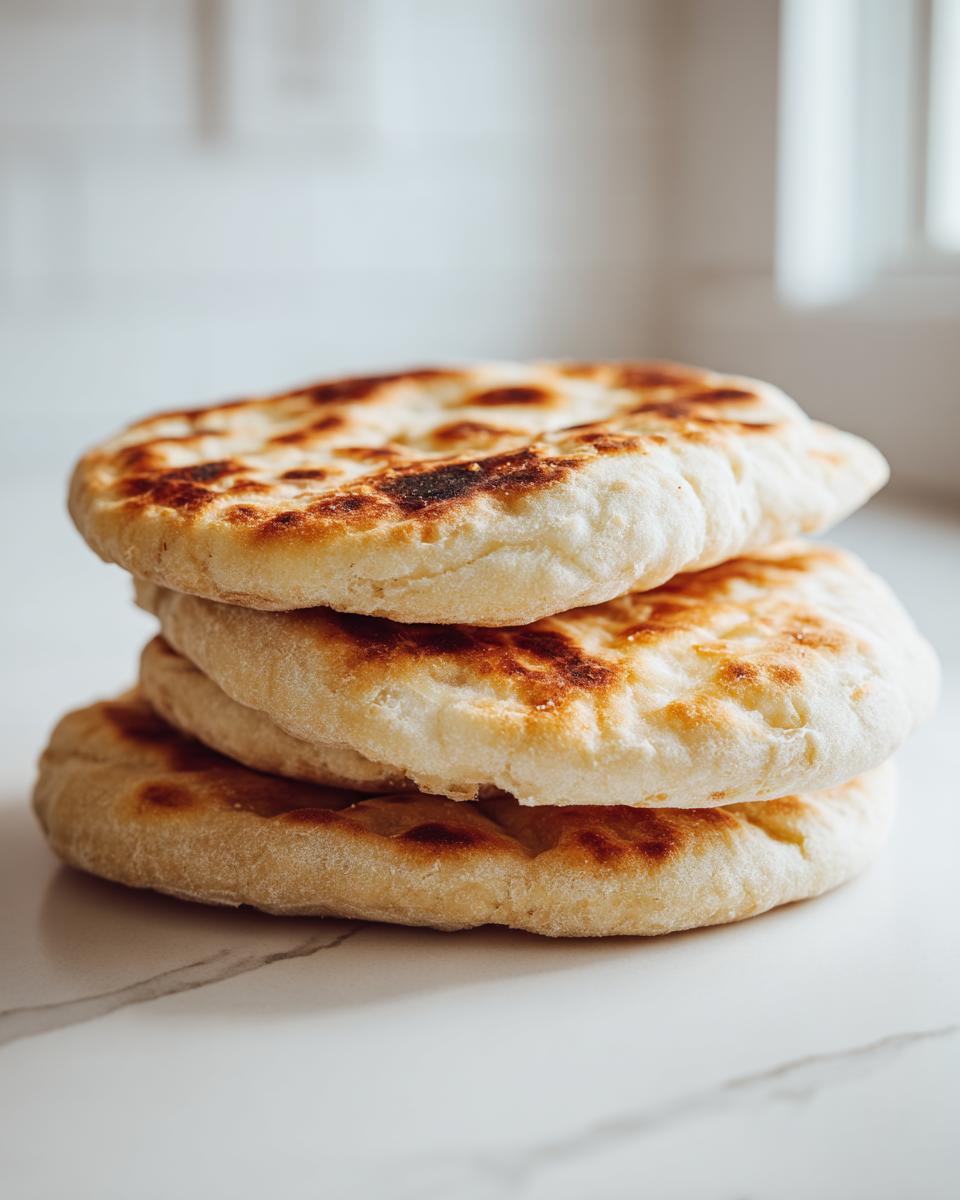
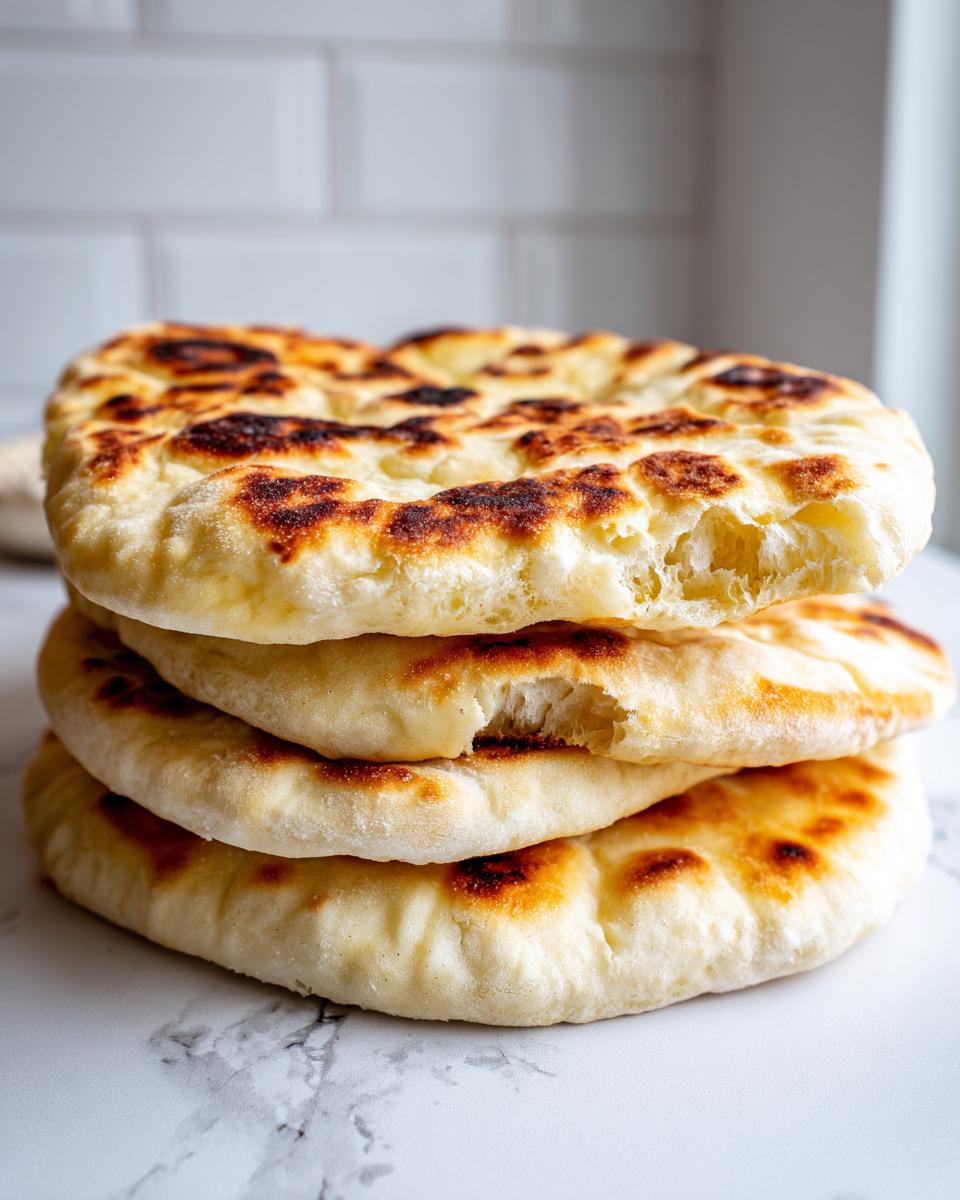
- You get guaranteed pockets! It’s the ultimate joy watching them balloon up in the hot pan.
- The texture is truly fluffy, making it the perfect Mediterranean flatbread base for stuffing.
- It beats those store-bought versions every single time, hands down.
Achieving Softness and Perfect Pockets
The secret sauce is in the very beginning. Using water that’s just warm enough wakes up the yeast perfectly, giving your dough the necessary lift. Plus, I always throw in that optional dollop of Greek yogurt. It sounds strange, but that little bit of acid makes the final pita bread wonderfully tender. It’s a small step that makes a huge textural difference.
Quick Homemade Pita Bread Timeline
This isn’t one of those overnight dough projects! Honestly, this whole batch of homemade pita bread starts and finishes in under two hours. That includes the proofing time! For anyone looking for great Quick Bread Recipes that still taste homemade, this stovetop method is unbeatable. You skip the oven waiting game entirely.
Gathering Ingredients for Your Soft Pita Bread
Okay, before we get to the fun part—watching these babies puff up—we need our simple lineup. You won’t be running to specialty stores for this; everything here is a pantry staple, which is part of why I love this easy pita recipe so much. We’re using 3 cups of all-purpose flour and 1 teaspoon of salt to start.
For the activation and richness, you’ll need 1 cup of warm water (and please make sure it’s between 105-115°F so you don’t kill your yeast!), 2 1/2 teaspoons of active dry yeast, 1 teaspoon of sugar, and 1 tablespoon of olive oil. Here’s the little extra secret for ultimate fluffiness: 2 tablespoons of Greek yogurt—make sure you label that as optional, but trust me, it’s worth trying!
Step-by-Step Instructions: How to Make Pita Bread
Alright, here comes the fun part! Making dough might seem intimidating, but this process is truly straightforward. Think of it like following a map; just stick to the route, and you’ll end up with absolutely fantastic homemade pita bread. We need to treat our yeast right, make sure the dough gets the right texture, and then bring on the heat for those glorious hidden pockets. This section is your complete Pita Pockets Tutorial!
Activating the Yeast and Mixing the Pita Bread Dough
First up, we have to wake up that yeast! Grab a small bowl and mix your warm water, the sugar, and the active dry yeast together. You must let this sit for about 5 to 10 minutes. If you don’t see foam swimming on top, your yeast isn’t happy, and you’ll need to start this step over. Don’t skip that tell-tale froth!
Once the yeast is bubbly, move to your big mixing bowl. Combine your flour and salt. Then, pour in that foamy yeast liquid, the olive oil, and if you decided to include it for extra fluff, the Greek yogurt. Mix everything up until it looks like a messy, shaggy lump. That’s exactly what we want to see before we tackle the kneading.
Kneading and Rising the Pita Bread Dough
Time to get your hands dirty! Turn that shaggy dough out onto a lightly floured surface. You need to knead this dough for a good 5 to 7 minutes. Keep pushing and folding until it feels smooth and springs back slightly when you poke it. It needs that elasticity so those pockets have something to hold onto later!
Next, it gets cozy time. Lightly oil a clean bowl—I sometimes use the same one after wiping it out—and roll that smooth dough ball around so it gets coated. Cover it up tight with plastic wrap or a clean tea towel. Now, let it rest in a warm spot in your kitchen for a full hour. You are looking for that dough to double in size. Patience here pays off huge later, just like waiting for flavor to develop in my soft dinner rolls.
Shaping and Cooking Your Fluffy Flatbread on the Stovetop
Once it’s doubled, gently ‘punch’ that air out—it’s very satisfying, trust me—and divide the dough into 8 equal pieces. Roll each piece into a nice, smooth ball. Cover the balls and let them relax for just 10 minutes; this makes rolling easier. Now for the rolling: 1/8 inch thick, about 6 to 7 inches wide. Keep the ones you aren’t working with covered so they don’t dry out!
Crucial point for the perfect puff: Heat up a dry cast-iron skillet or any heavy, dry pan over medium-high heat until it’s screaming hot. No oil in the pan! Lay one rolled pita right onto that hot surface. Cook it for about 1 to 2 minutes until you see bubbles form all over the top. Flip it fast! Give the other side another minute or two. If the pan is hot enough, the whole thing should balloon up into a perfect pocket right before your eyes. That’s the magic of Stovetop Pita! Remove it right away and wrap it in a towel to keep it soft while you cook the rest.
Expert Tips for Perfect Pita Pockets Every Time
We covered the basics, but achieving that cartoonishly perfect puff—the one where the bread splits cleanly in half—comes down to a few little secrets I picked up over years of testing. Homemade pita bread is wildly forgiving, but if you are chasing those pockets, heat management is everything. You want that quick blast of steam trapped inside the dough to force the separation.
Why Your Pita Bread Isn’t Puffing
If your bread is coming out looking more like a fancy tortilla than a balloon, nine times out of ten, it’s the pan temperature. Your skillet needs to be screaming hot. I mean, you should hear a sizzling hiss when the dough first lands. If the heat is too low, the dough dries out slowly instead of steaming rapidly, canceling out your chance for a great Recipe for Puffy Bread.
Another thing people rush is the thickness. If you roll the dough out too thick, the steam can’t push through fast enough. You need those 1/8-inch circles! Also, don’t overcrowd the pan, ever. If you try to cook two at once, the heat distribution changes, and you end up steaming the dough instead of frying it with intense dry heat. Cook them one at a time, and they inflate like magic.
If you want to refresh any that might have gone cool or stiff, just give them a quick zap! You can reheat them wrapped in foil for about five minutes, or even throw them on a hot, dry skillet for about 30 seconds per side. They come right back to that soft, warm state, just like my homemade cranberry sauce tastes amazing warm!
Variations on Homemade Pita Bread
Because this base recipe for pita bread is so reliable and easy, I love messing around with it a little bit when I’m making a big batch. It’s fun to change things up for different meals! Since we are using dairy in the main version for that extra tender crumb, it’s super easy to pivot if you have guests who are dairy-free or if you just want a slightly different flavor profile for that night’s meal.
Making Vegan Pita Bread
If you’re looking to make this recipe completely Vegan Pita Bread friendly, it’s a breeze—you just skip the optional Greek yogurt! Seriously, that’s it. The dough will be slightly less rich, but the high moisture content from the water and the simple ingredients mean these pitas will still puff up beautifully on the stovetop. They’ll just be slightly different in flavor profile than the richer version, but still absolutely delicious for wraps or dipping.
If you want to get that authentic Greek flavor that pairs perfectly with things like my Greek chicken marinade, try adding about a teaspoon of dried oregano or a tablespoon of finely chopped fresh dill right into your dry ingredients with the flour and salt. It gives the loaf a wonderful herby note that screams Mediterranean. You can use the yogurt version for this, or skip it—either way, you get a fantastic Greek Pita Bread!
Serving Suggestions for Your Warm Fresh Bread
Okay, the moment you pull these beautiful, warm, fluffy rounds off the pan, the big question hits: what am I going to do with them all? Because we made a big batch of these, we usually have leftovers, and honestly, my family demands we use them right away. My earliest memories involve grabbing a warm pita, ripping off a piece, and just dipping it straight into whatever was on offer. That tradition lives on—these are the ultimate Hummus Dipping Bread!
But you can’t just stop at dipping! This recipe makes the absolute Best Flatbread for Gyros. Seriously, the softness means they fold beautifully around grilled meat and veggies without cracking. We often use them for quick chicken wraps, too. I’ve even seen my husband cut them open and lightly toast them to make quick, crisp pita chips. They are amazing dusted with a little salt and dipped in my whipped ricotta dip.
When company comes over, I’ll sometimes look up fun ideas, like recreating restaurant-style gyros. You can check out a great recipe for stovetop Greek pitas over at this resource for inspiration on fillings if you want to go the whole Mediterranean route. Honestly though? Even just smeared with a little butter while they are steaming hot is enough to make my kids quiet down at the dinner table. That’s the power of fresh, homemade bread!
Storage and Reheating Instructions for Pita Bread
So, what happens when you manage to have leftover pita bread? Because these are so fresh and soft, they don’t behave like those factory-made versions that stick around forever. We want to keep that tenderness, especially if we plan on using them for gyros the next day. This is where good storage really helps.
Here’s my rule: Keep them at room temperature for the first day or two. But you have to wrap them up tightly! I mean *tightly*. Use plastic wrap, foil, or a high-quality zip-top bag to keep the air out. Air is the enemy of soft bread—it sucks out all the moisture we worked so hard to bake in. Storing them like this means they are usually good for a couple of days.
If you are trying to keep them longer than that, then the freezer is your friend. Wrap them well, maybe even double-bag them, and they should be good for a couple of months. The reheating process brings them right back to life!
When you want to eat them again, just toss them straight from the freezer back into a hot skillet—no need to thaw first! Heat that heavy pan until it’s medium-high, and cook each pita for just 30 seconds per side. They’ll steam slightly and become fluffy again almost instantly. If you need to reheat a batch quickly and don’t mind the lack of puff, wrapping them in a damp paper towel and microwaving them for 15 seconds works wonders to soften them right up. It’s almost as good as the original batch, especially dipped in leftover cranberry sauce!
Frequently Asked Questions About Pita Bread
Whenever I share this recipe, I get the same few questions popping up in my comments, and that’s okay! Bread making is precise, but we can troubleshoot together. These questions are usually from folks just trying to nail that perfect, fluffy texture we talked about for this Easy Pita Recipe. Let’s tackle the biggest ones so you can get rolling!
Can I use different types of flour for this Easy Pita Recipe?
My main recipe calls for all-purpose flour because it gives you the most reliable, soft result for puffing. If you want to swap some of that out for whole wheat flour, you absolutely can! Just know that whole wheat bran cuts through some of the gluten structure we need. If you replace more than half of the white flour, your dough might feel stiffer. You might need to add an extra tablespoon or two of water to get that smooth dough feel. It will still be delicious, but it might be slightly less puffy because whole wheat doesn’t stretch quite as easily as white flour.
Can I make this Pita Bread from Scratch without a skillet?
While I swear by the cast-iron skillet method for maximum puff—that direct, intense heat is what creates the pocket—you can definitely bake them if you don’t have a heavy pan or just prefer the oven. For baking pita bread from scratch, preheat your oven as high as it will go, usually 500°F, with a pizza stone or baking sheet inside for at least 30 minutes. Roll your rounds out just like normal, place them on the preheated stone, and bake for only 2 to 3 minutes. Watch them carefully! They puff up fast in the oven heat, too, but the skillet just gives it a little more immediate ‘oomph’ in my experience.
How long does the dough take to rise?
We want that doubling time to be about 1 hour in a relatively warm spot. The yeast gets super active in that 105-115°F water we use initially, so the rise time is pretty fast compared to bread that uses colder liquids. If your kitchen is chilly, though, don’t panic! It might take an extra 20 or 30 minutes. The visual cue is everything—we need it doubled, not just ‘risen a bit.’ If you need to connect with me directly about your dough, feel free to reach out via my contact page!
Bringing Connection to Your Table with Homemade Pita Bread
And there you have it! Fluffy, pocketed pita bread, made right in your own kitchen faster than you thought possible. This whole process—from mixing that first bit of warm water to pulling the final piece off the skillet—is exactly what I believe cooking should be: simple, connection-focused, and deeply satisfying.
I truly hope making this easy pita recipe brings that same warmth to your house that it brings to mine. When you’re doing something this simple and turning out something this delicious, it just feels right, doesn’t it? It reminds us that good food doesn’t have to be complicated. That’s the whole idea behind Mia’s Meals, and you can read more about my philosophy right here.
Now, I absolutely need to see your results! When you pull those perfect puffed pockets off the pan, snap a photo and tag me on social media. I love seeing your success stories! Drop a comment below and tell me how you served yours—were they stuffed with gyros meat, or did you just eat them all plain dipped in olive oil? Happy baking, and enjoy bringing your family closer together around this wonderful, warm bread!
PrintFoolproof Soft & Fluffy Homemade Pita Bread with Perfect Pockets

Learn how to make incredibly soft, fluffy homemade pita bread that puffs into perfect pockets every time. This easy stovetop recipe uses basic ingredients and is ready quickly, making it the best flatbread for gyros or dipping.
- Prep Time: 20 min
- Cook Time: 15 min
- Total Time: 95 min
- Yield: 8 servings 1x
- Category: Dinner
- Method: Stovetop
- Cuisine: Mediterranean
- Diet: Vegetarian
Ingredients
- 3 cups all-purpose flour
- 1 cup warm water (about 105-115°F)
- 2 1/2 teaspoons active dry yeast
- 1 teaspoon sugar
- 1 teaspoon salt
- 1 tablespoon olive oil
- 2 tablespoons Greek yogurt (optional, for extra softness)
Instructions
- In a small bowl, mix the warm water, sugar, and yeast. Let this mixture sit for 5 to 10 minutes until it becomes foamy. This shows the yeast is active.
- In a large mixing bowl, combine the flour and salt. Add the foamy yeast mixture, olive oil, and Greek yogurt (if using). Mix the ingredients until a shaggy dough forms.
- Turn the dough out onto a lightly floured surface. Knead the dough for 5 to 7 minutes until it becomes smooth and elastic.
- Place the dough in a lightly oiled bowl, turning it once to coat. Cover the bowl with plastic wrap or a clean kitchen towel. Let the dough rise in a warm place for 1 hour, or until it doubles in size.
- Gently punch down the risen dough. Divide it into 8 equal pieces. Roll each piece into a smooth ball. Cover the balls and let them rest for 10 minutes.
- Working with one ball at a time, roll it out into a thin circle, about 1/8 inch thick and 6 to 7 inches in diameter. Keep the other dough balls covered while you work.
- Heat a dry cast-iron skillet or heavy-bottomed pan over medium-high heat until it is very hot. Do not add oil to the pan.
- Carefully place one rolled pita into the hot pan. Cook for 1 to 2 minutes until bubbles appear on the surface. Flip the pita and cook the other side for 1 to 2 minutes more. The pita should puff up like a pocket.
- Remove the puffed pita from the pan and place it on a clean towel. Cover it immediately to keep it warm and soft while you cook the remaining pitas.
- Serve your warm fresh bread immediately, perfect for hummus dipping bread or gyros.
Notes
- For the best pocket formation, ensure your pan is very hot before cooking each pita. High heat creates the steam needed to puff the bread.
- If you skip the optional Greek yogurt, you may need to add a tiny bit more water if the dough seems too dry.
- These pitas are best eaten the day they are made. Store leftovers wrapped tightly at room temperature for up to 2 days.
Nutrition
- Serving Size: 1 pita
- Calories: 180
- Sugar: 1
- Sodium: 250
- Fat: 3
- Saturated Fat: 0.5
- Unsaturated Fat: 2.5
- Trans Fat: 0
- Carbohydrates: 34
- Fiber: 2
- Protein: 6
- Cholesterol: 0