
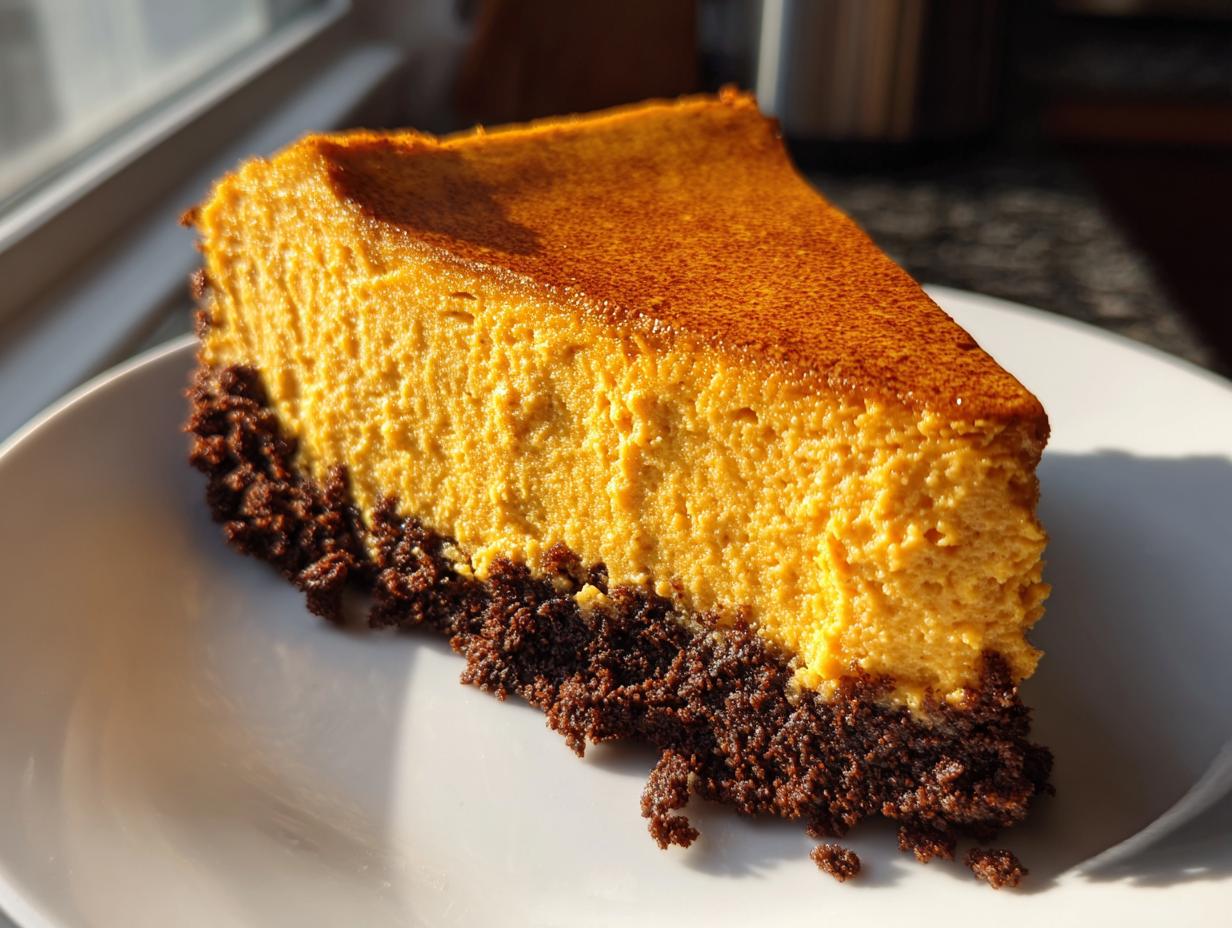
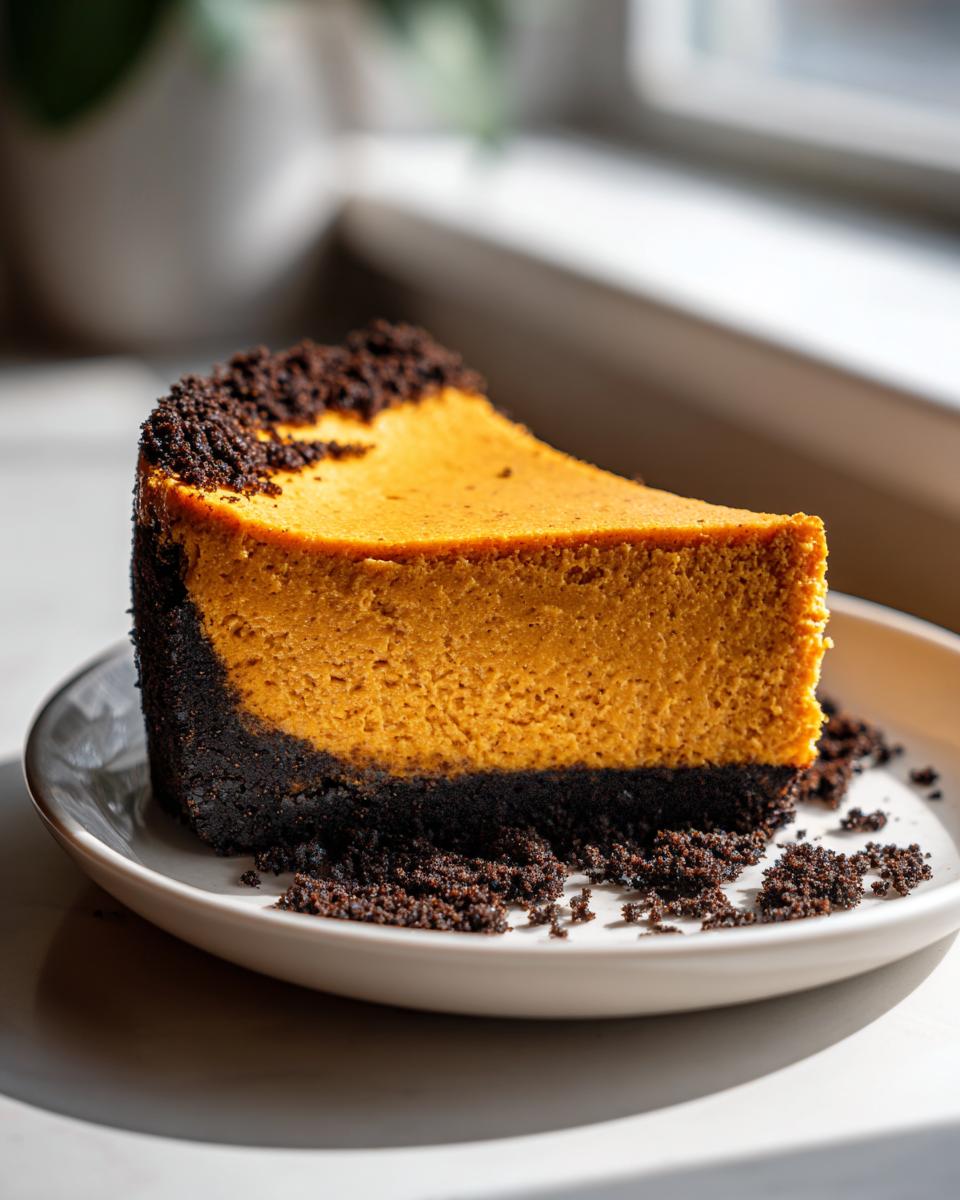
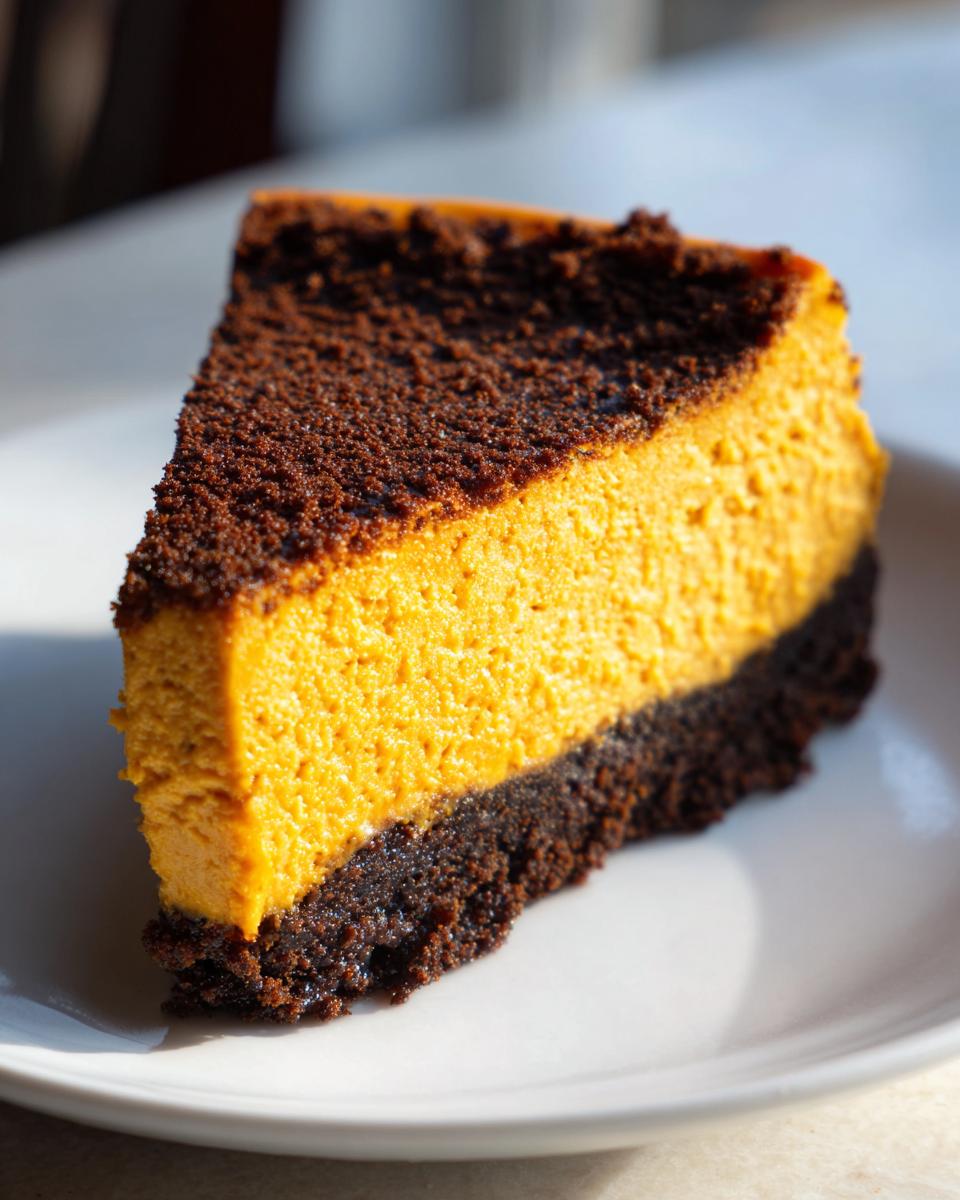
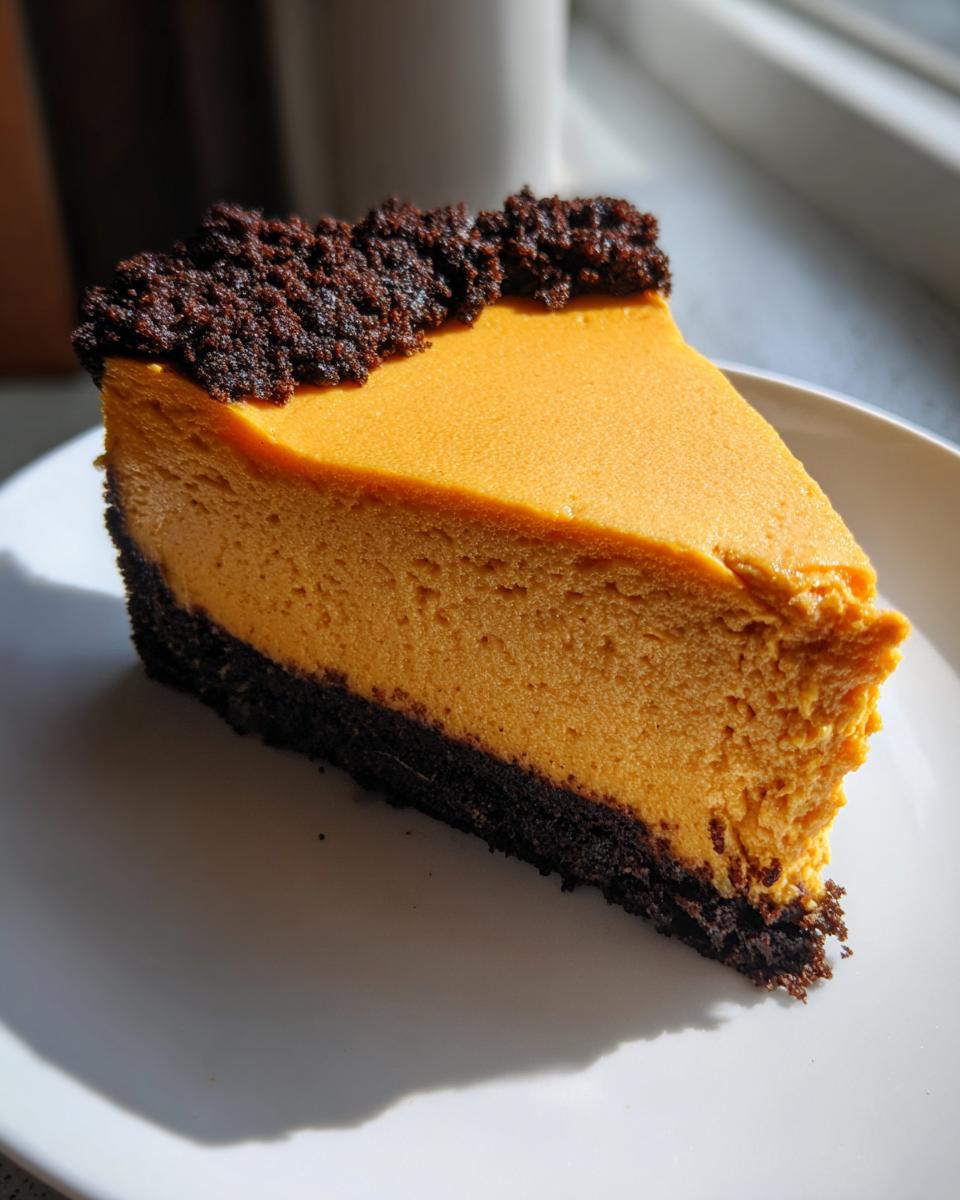
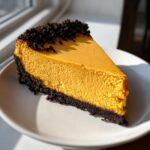
When that first crisp autumn breeze hits, I immediately start dreaming about baking. There’s just something about the cozy spices that makes me want to bring everyone together around the table. If you’re looking for the absolute pinnacle of fall baking, trust me, you need this Classic Creamy Baked pumpkin cheesecake with Gingersnap Crust. This isn’t just another dessert; this is the recipe that ensures a rich, unbelievably smooth, and, most importantly, crack-free experience!
We built this recipe around making elegance simple. That deep orange hue and the spicy kick from the gingersnaps make it the perfect centerpiece for any holiday gathering. It’s about getting that rich baked cheesecake texture without fuss, which always brings a little bit of that warm-kitchen connection right back into my busy modern life.
- Why This Classic Creamy Pumpkin Cheesecake Recipe Works (E-E-A-T)
- Ingredients for Your Homemade Pumpkin Cheesecake
- Step-by-Step Instructions for Perfect pumpkin cheesecake
- Baking and Cooling: Secrets to a Crack-Free pumpkin cheesecake
- Tips for the Best pumpkin cheesecake Experience
- Serving Suggestions for Your Autumnal Dessert
- Storage and Make-Ahead Tips for pumpkin cheesecake
- Frequently Asked Questions About pumpkin cheesecake
- Estimated Nutritional Data for pumpkin cheesecake
Why This Classic Creamy Pumpkin Cheesecake Recipe Works (E-E-A-T)
When you’re making something as beloved as a holiday centerpiece, you need reliability, right? That’s why I trust this recipe implicitly when it comes to making the pumpkin cheesecake. It consistently yields that beautiful, velvety mouthfeel you expect from a truly great dessert. I’ve tested just about every method out there, and the secret weapon here is the water bath. Seriously, don’t skip it!
That gentle, moist heat from the water bath is what locks in the moisture and prevents the sides from cooking too fast. That’s how we guarantee that shiny, smooth surface and achieve that decadent, rich baked cheesecake texture every single time. It’s the technique that separates the okay cheesecakes from the ones people talk about all year!
Achieving the Best Pumpkin Cheesecake Texture
Let’s talk texture. Nobody wants a grainy cheesecake, especially when it’s filled with those warm pumpkin spices. The trick to that perfect, creamy pumpkin cheesecake comes down to two simple things you need to do *before* you even turn on the mixer.
First, all your dairy—that cream cheese and those eggs—must be fully at room temperature. Give them an hour on the counter. Cold ingredients just don’t emulsify properly, and you end up fighting lumps instead of creating a silky smooth filling. Second, patience during cooling is essential. Taking that beautiful cake out of the oven and letting it sit inside the cooling oven for an hour is non-negotiable. That slow, gradual cool down is what stops the top from shrinking suddenly, which is the real culprit behind those dreaded cracks.
Ingredients for Your Homemade Pumpkin Cheesecake
Getting ready to build the best pumpkin cheesecake? Great! The key to a reliable recipe that turns out perfectly every time is being precise here. I’ve broken down exactly what you need so you can shop with confidence. Remember, this is all about quality components creating that amazing, creamy pumpkin cheesecake.
You’ll need your mise en place ready for both the crust and the rich filling:
- For the Gingersnap Crust:
- 1 1/2 cups gingersnap cookie crumbs (Make sure they are ground nicely!)
- 1/4 cup granulated sugar
- 6 tablespoons unsalted butter, melted (and I mean real butter, folks!)
- For the Creamy Filling:
- 3 (8 ounce) packages cream cheese, softened (This is vital!)
- 1 1/2 cups granulated sugar
- 1 teaspoon vanilla extract
- 1 teaspoon pumpkin pie spice
- 1/2 teaspoon ground cinnamon
- 1/4 teaspoon ground ginger
- 1/4 teaspoon salt
- 1 (15 ounce) can pumpkin puree (Not pie filling, promise me!)
- 3 large eggs (Room temperature, remember our chat?)
Ingredient Notes and Substitutions for pumpkin cheesecake
I always get questions about swaps, so let’s get ahead of those! The gingersnap crust really gives this **pumpkin cheesecake** that warm, spicy base that pairs so well with the filling. If you absolutely can’t find gingersnaps, you can absolutely use graham cracker crumbs instead—it just leans a little more traditional. Just use the same measurement!
Now, the pumpkin itself. Please, please, please use pure pumpkin puree. The cans labeled “Pumpkin Pie Filling” already have sugar and spices mixed in, which throws off the careful balance of sugar and spice we’ve established for that **creamy pumpkin cheesecake** texture we are aiming for. Stick to the plain puree, and let our amazing spices do the heavy lifting!
Step-by-Step Instructions for Perfect pumpkin cheesecake
Okay, let’s get baking! Turning this ingredient list into a show-stopping pumpkin cheesecake is all about following the steps clearly. I know some of these parts—like wrapping the pan—feel tedious, but these simple preparation steps are what earn us that glorious, crack-free top. We are working toward that ultimate rich baked cheesecake experience here!
First thing first, get your environment ready. Preheat your oven to 325 degrees Fahrenheit. While that warms up, grab your 9-inch springform pan. You need to wrap the entire outside of it super tightly in heavy-duty aluminum foil. I usually do two or three layers because that foil is our barrier against the water bath; we absolutely do not want any seepage into our crust!
Preparing the Gingersnap Crust
Now we build that spicy, buttery foundation. In a bowl, just combine your gingersnap crumbs, that 1/4 cup of sugar, and the melted butter. Use a fork or your hands; you want everything nice and moist, like wet sand is the perfect comparison. Press that mixture firmly into the bottom of your foil-wrapped springform pan. Get it nice and compact—we want a sturdy layer that holds up to the heavy filling!
Pop that crust into the oven for 10 minutes. Just 10 minutes is all it needs to set up nicely. When those 10 minutes are up, pull it out and let it cool down a touch while we get to the best part: the filling!
Mixing the Creamy Filling for pumpkin cheesecake
This is where we focus on keeping things smooth for that **creamy pumpkin cheesecake**. Remember what I said about room temperature ingredients? This step shows you why! In a big bowl, beat your softened cream cheese until it’s totally smooth—no lumps allowed! Gradually add that 1 1/2 cups of sugar as you beat it until it’s just combined and looks much better.
Next, we fold in the flavorings: the vanilla, pumpkin pie spice, cinnamon, ginger, and salt. Mix until it’s happy. Then, gently incorporate the 15-ounce can of pumpkin puree. The final addition is the eggs, and this is crucial: beat in the eggs one at a time. You mix just until you see that last trace of yolk disappear. Seriously, stop mixing right there! Overmixing the eggs introduces too much air, and that air is what causes cracks in your beautiful **pumpkin cheesecake**.
Baking and Cooling: Secrets to a Crack-Free pumpkin cheesecake
Alright, we’ve got our beautiful batter poured over that spicy gingersnap crust. Now comes the part that feels a little fussy, but trust me, this step is the non-negotiable key to achieving that picture-perfect, crack-free **pumpkin cheesecake**! This whole section focuses on keeping the baking environment gentle and consistent, ensuring your rich baked cheesecake looks as amazing as it tastes.
Take that foil-wrapped springform pan and set it inside a larger roasting pan. This larger pan is going to be our water bath—it’s the gentle steaming environment needed here. If you skip this, I can’t guarantee the results for your pumpkin cheesecake recipe, so please take the extra minute!
Once the pan is situated inside the roasting pan, carefully pour hot water into the outer pan. You want that hot water level to come about halfway up the side of your springform pan. It might splash a little, so go slow! This water bath keeps the temperature around the cheesecake stable and moist, which is precisely what we want.
Bake it at 325 degrees for about 60 to 75 minutes. How do you know it’s done? Watch the center! The edges should look totally set, but if you give the roasting pan a little nudge, the very center should still have a slight, soft jiggle—almost like firm Jell-O. That means it’s cooked through but still holding tons of moisture.
Here’s the final secret to avoiding that sad, sunken, cracked top on your **pumpkin cheesecake**: we don’t shock it! When the baking time is up, you turn your oven OFF completely. Don’t take the cake out yet! Prop the oven door open just a crack—maybe slide a wooden spoon in there—and let that cheesecake cool down slowly inside the oven for a full hour. This gradual transition from hot to room temperature is what saves you from major cracks. After an hour, *then* you remove it from the water bath and foil and let it finish cooling on the counter before it heads to the fridge for its final chill.

Tips for the Best pumpkin cheesecake Experience
We’ve baked it, we’ve cooled it slowly—which is the number one trick for keeping your pumpkin cheesecake beautiful—but now we need to make sure the eating experience is just as good as the look! Getting that perfect slice without messing up the beautiful top takes a little foresight. Serving this rich dessert is almost as important as making it from scratch!
First, let’s talk chilling time. I know the recipe says six hours, and that’s the minimum time needed for the structure to fully set up. But honestly, if you want that incredibly dense, almost fudge-like texture that defines the best **pumpkin cheesecake**, you have to aim for overnight. When it’s thoroughly chilled, it holds its shape perfectly, and all those beautiful pumpkin spice notes really deepen overnight.
Now for the inevitable question: how do I get a clean slice? This has ruined many a perfect cake top for me in the past! You can’t just saw through it with a room-temperature knife; that will drag the soft filling underneath and smear your lovely crust line.
You ready for my trick? Always use a hot knife. Get a tall glass filled with very hot water—like, steaming, almost too-hot-to-touch water. Dip a long, thin knife (a sharp chef’s knife works well) into the water for about 10 seconds. Wipe the blade completely dry with a clean towel so the water doesn’t drip onto your cake. Then, make one clean, decisive slice straight down. Don’t saw back and forth!
Before you cut the next slice, dip the knife back into the hot water, wipe it dry, and *then* cut again. I know it sounds like a lot of wiping, but I promise, this technique gives you restaurant-quality slices for your **creamy pumpkin cheesecake**. It’s small steps like this that make the whole spread look professional, even though the actual baking was simple.
Serving Suggestions for Your Autumnal Dessert
Once your **pumpkin cheesecake** has properly chilled overnight—and trust me, waiting is worth it for that firm, silky texture—it’s time for the fun part: making it look absolutely gorgeous on the dessert table! This creamy spiced cheesecake is already so flavorful on its own, but a little garnish goes a long way in elevating it for your Friendsgiving spread or a special Sunday dinner.
I really try to keep the topping simple. This dessert is meant to be one of those wonderful fall dessert recipes that doesn’t require an extra 30 minutes of fuss right before serving. You want the focus to stay on that rich pumpkin filling and the spicy gingersnap crust, after all!
Here are a few of my favorite ways to dress up this autumnal dessert:
- Classic Cool Whip Swirl: Scoop a big cloud of fresh, lightly sweetened whipped cream right onto the center of a fully sliced cheesecake. Don’t try to frost the whole thing; just a dollop on each serving slice looks elegant but rustic.
- Toasted Pecans or Walnuts: Toasting nuts brings out their flavor like nothing else, and the crunch against the smooth cheesecake is divine. Toss your pecans with a tiny bit of butter and a whisper of cinnamon and salt before baking them briefly in a dry skillet until fragrant. Sprinkle these over your slices just before serving.
- A Drizzle of Decadence: If you want to go a tiny bit extra, a thin drizzle of good quality, slightly warmed caramel sauce is amazing. The saltiness from the caramel plays so nicely opposite the warm pumpkin spice dessert. It’s not necessary, but wow, it makes for a beautiful presentation!
One thing I always remind folks about when pairing: because this cake is so rich, serve smaller slices. Everyone will feel satisfied, and you’ll have leftovers! A strong, dark cup of coffee or a spiced apple cider makes the perfect partner for every bite of that creamy spiced goodness.
Storage and Make-Ahead Tips for pumpkin cheesecake
When you’re making a big **Thanksgiving Desserts** showstopper like this, knowing you can make it ahead of time is a huge relief! I love planning my holiday menus, and being able to get the **pumpkin cheesecake** done a day or two early makes the actual holiday flow so much smoother. Trust me, this rich dessert actually gets better sitting in the fridge overnight!
For optimal freshness and that dense, creamy texture, I strongly recommend chilling your finished **pumpkin cheesecake** for at least 8 hours, but ideally overnight. Make sure it is completely cooled before you even think about wrapping it up. Once cooled, wrap the whole thing—still in its springform ring—tightly with plastic wrap. I usually do a layer of plastic, then a layer of foil over that just to lock out every bit of fridge smell.
This wrapped cake will stay absolutely perfect in the refrigerator for up to four days. Because it’s so rich, it holds up wonderfully, and that gingersnap crust stays surprisingly crisp thanks to the moisture control you’ve put in place!
Taking the Ring Off for Serving
Now, this next part is important for storage *if* you are making it way ahead of time or if you plan on moving it to a serving platter. You shouldn’t remove the metal springform ring until you are ready to serve it, or maybe just an hour before you plan to slice it. If you remove it too soon, handling it might cause the delicate edges to crack, and we worked so hard to avoid that!
Once you are ready to serve your glorious **pumpkin cheesecake**, carefully run a thin, sharp knife dipped in hot water (remember our slicing trick?) around the inner edge of the pan before releasing the latch. Gently lift the ring off. If you need to store it unwrapped in the fridge, cover the top loosely with plastic wrap—don’t let the plastic touch the surface of the cake, or it can pull off some of that lovely top layer.
If you happen to have leftovers (which seems rare around my house!), you can freeze fully baked and cooled **pumpkin cheesecake**! Wrap the chilled, ring-removed cake extra well in plastic wrap, then a layer of foil, and it freezes beautifully for about a month. Thaw it slowly overnight in the fridge. These make-ahead options are total lifesavers for anyone hosting during the busy fall season. It’s such a simple way to enjoy this **creamy pumpkin cheesecake** later, too!
For more easy make-ahead ideas that simplify your holiday kitchen routine, check out my guide on easy no-bake chocolate eclair cake recipe; similar principles of planning ahead apply there!
Frequently Asked Questions About pumpkin cheesecake
I always get so many questions after people try this recipe for the first time—which usually means they loved it and are planning their next bake! Here are the most common things folks ask me about making the **best pumpkin cheesecake**.
Can I make this a No Bake Pumpkin Cheesecake instead?
That’s a big question, especially when the weather is warm! While I love the simplicity of a no bake cheesecake recipe, this specific one relies on eggs and the gentle heat of the oven to achieve that ultra-rich, smooth consistency. If you skip the baking step, the texture is just going to be more like a mousse or a fluff, not that decadent, dense **creamy pumpkin cheesecake** we are aiming for. For a truly great result, stick to the baking instructions!
Why did my cheesecake crack even though I used a water bath?
Oh, I hate that when it happens! Cracks usually come from temperature shock, even with the water bath. Did you remember to let it cool slowly inside the oven for that whole hour with the door propped? That slow descent is so crucial for a swirl pumpkin cheesecake or any baked version. If you jump it straight from the 325°F oven environment onto a cool counter, physics takes over and it sinks and cracks. Also, make absolutely sure you aren’t over-beating those eggs!
I don’t have gingersnaps. Can I use a different crust for this dessert for Thanksgiving dinner?
Yes, absolutely! The cheesecake with gingersnap crust offers that amazing spice contrast, but it’s not mandatory. Graham cracker crumbs are the most popular swap for this kind of **pumpkin cheesecake recipe**. You’ll use the same amount and the same amount of melted butter for the crust. Some people even use vanilla wafers if they want something a tiny bit milder. Whatever you choose, press it down *firmly* so it holds up!
How far ahead of time can I make this Holiday Cheesecake?
If you are planning a big meal, making this early is the way to go! You can easily make this **pumpkin cheesecake** entirely, including chilling it completely, one to two days before you plan to serve it as your main Thanksgiving dessert. The flavor actually gets better and the texture sets up firmer the longer it chills. Just remember to cover it tightly once it’s fully cooled!
Estimated Nutritional Data for pumpkin cheesecake
Now, I know when you’re making something this rich and decadent, you might wonder where it fits into your day—and I get it! We cook because we love sharing food, not because we’re counting every single thing, but knowing the rough breakdown can be helpful, especially when preparing for a big meal like Thanksgiving.
The numbers below are just estimates based on the ingredients we used in this creamy spiced cheesecake recipe. Remember, since we are using real butter and plenty of cream cheese to get that amazing texture, these aren’t exactly diet food, but they are pure joy! These figures are based on 1/12th of the entire dessert.
- Serving Size: 1 slice
- Calories: 450
- Fat: 30g
- Saturated Fat: 18g
- Carbohydrates: 40g
- Sugar: 35g
- Protein: 8g
- Cholesterol: 110mg
A little note here, because I’m all about full disclosure: these are our best guesses based on standard pantry staples. If you use a lower-fat cream cheese or swap out the gingersnaps for a lighter crust, those numbers will shift a bit. But honestly, when you are enjoying a truly memorable slice of fall dessert, just enjoy the moment! That’s my philosophy for every serving.
PrintClassic Creamy Baked Pumpkin Cheesecake with Gingersnap Crust
Make a rich, creamy pumpkin cheesecake with a spiced gingersnap crust. This recipe delivers a smooth texture perfect for your fall or Thanksgiving dessert table.
- Prep Time: 25 min
- Cook Time: 75 min
- Total Time: 100 min
- Yield: 12 servings 1x
- Category: Dessert
- Method: Baking
- Cuisine: American
- Diet: Vegetarian
Ingredients
- 1 1/2 cups gingersnap cookie crumbs
- 1/4 cup granulated sugar
- 6 tablespoons unsalted butter, melted
- 3 (8 ounce) packages cream cheese, softened
- 1 1/2 cups granulated sugar
- 1 teaspoon vanilla extract
- 1 teaspoon pumpkin pie spice
- 1/2 teaspoon ground cinnamon
- 1/4 teaspoon ground ginger
- 1/4 teaspoon salt
- 1 (15 ounce) can pumpkin puree
- 3 large eggs
Instructions
- Preheat your oven to 325 degrees Fahrenheit. Wrap the outside of a 9-inch springform pan tightly in heavy-duty aluminum foil.
- Prepare the crust: Mix the gingersnap crumbs, 1/4 cup sugar, and melted butter in a bowl until evenly moistened. Press the mixture firmly into the bottom of the prepared springform pan. Bake the crust for 10 minutes. Remove from the oven and let it cool slightly.
- Prepare the filling: In a large bowl, beat the softened cream cheese with an electric mixer until smooth. Gradually add the 1 1/2 cups sugar, beating until combined. Mix in the vanilla extract, pumpkin pie spice, cinnamon, ginger, and salt. Beat until the mixture is smooth.
- Add the pumpkin puree and mix until just combined. Beat in the eggs one at a time, mixing only until each egg is incorporated. Do not overmix the batter.
- Pour the cheesecake batter over the cooled crust in the springform pan.
- Bake using a water bath: Place the foil-wrapped springform pan inside a larger roasting pan. Carefully pour hot water into the roasting pan until the water reaches halfway up the side of the springform pan.
- Bake for 60 to 75 minutes, or until the edges are set but the center still jiggles slightly when gently nudged.
- Turn off the oven, crack the oven door open slightly, and let the cheesecake cool inside the oven for 1 hour. This slow cooling helps prevent cracks.
- Remove the cheesecake from the water bath and foil. Let it cool completely on a wire rack.
- Chill the cheesecake in the refrigerator for at least 6 hours, or preferably overnight, before serving. Remove the springform ring before slicing.
Notes
- For the creamiest texture, bring the cream cheese and eggs to room temperature before you start mixing.
- If you skip the water bath, watch the baking time closely and reduce the oven temperature to 300 degrees Fahrenheit.
- You can substitute graham cracker crumbs for gingersnaps if you prefer a classic crust.
Nutrition
- Serving Size: 1 slice
- Calories: 450
- Sugar: 35
- Sodium: 300
- Fat: 30
- Saturated Fat: 18
- Unsaturated Fat: 12
- Trans Fat: 0
- Carbohydrates: 40
- Fiber: 1
- Protein: 8
- Cholesterol: 110