
Oh, there is just something magical about that first slice of homemade bread, isn’t there? That crisp crust giving way to a soft, tangy interior—it’s the smell of home. If you’ve been eyeing those beautiful artisanal loaves and thinking, “I could never,” I promise you, you absolutely can! The secret, the absolute heart of it all, is mastering your own sourdough starter. I know, I know—it sounds intimidating. But trust me, I built Mia’s Meals on the idea of simplifying tradition. My roots are in simple Midwestern comfort food, and I’m here to show you that creating this living, natural yeast culture is surprisingly easy. Forget the fancy equipment; we are getting back to basics! Once you have this bubbling away, you’re halfway to incredible loaves, even that crusty classic French bread recipe we all love.
- Why You Need Your Own Sourdough Starter From Scratch
- The Simple Ingredients for Your Sourdough Starter
- How to Make Sourdough Starter: A 7-Day Guide for Beginners
- Sourdough Starter Maintenance Tips for Long-Term Health
- Troubleshooting Common Sourdough Starter Issues
- Ingredient Spotlight: Choosing the Best Flour for Sourdough Starter
- Activating a Dormant Sourdough Starter
- Sourdough 101: Preparing for Your First Sourdough Starter Loaf
- Understanding Your Natural Yeast Culture
Why You Need Your Own Sourdough Starter From Scratch
Why bother making your own homemade sourdough starter when you can just buy one online? That’s what I thought until I realized what I was missing! Building it yourself means you control everything from Day One. It’s an incredibly rewarding process, almost like nurturing a tiny pet that feeds your family delicious bread.
You should commit to this journey because:
- The depth of flavor you get from your own slow fermentation is miles beyond what commercial yeast offers. It just tastes better!
- There are wonderful health benefits from that slow process that you just can’t get otherwise.
- Watching that jar bubble to life for the first time is pure kitchen magic. It’s your very own artisan bread base!
Trust me, seeing that jar work its magic is part of the fun. Plus, you’ll always have the base ready for your next slow cooker turkey side dish inspiration!
The Simple Ingredients for Your Sourdough Starter
Honestly, sometimes I think people get scared off because they imagine needing fancy, obscure things. Nope! When you look at the ingredients for your sourdough starter, you’ll see we are keeping this incredibly simple. It’s just flour and water, waiting for the wild yeasts to wake up. I always stress to folks that for this whole process, water is key. Make sure you’re using unchlorinated water—chlorine can actually kill the beautiful little microbes we are trying to encourage! If your tap water is heavily chlorinated, just leave it out on the counter overnight so the chlorine can evaporate before you mix.
You will need:
- 100g Whole Wheat or Rye Flour (This gets the party started!)
- 100g Unbleached All-Purpose Flour (This is what we switch to for feeding later.)
- 100g Unchlorinated Water (Room temperature, please!)
That’s it! If you need a reliable recipe for a holiday side, my cranberry sauce recipe uses simple ingredients too, but this starter is even simpler!
Ingredient Clarity: Flour Choice Matters for Your Sourdough Starter
So, why two types of flour listed? This is where we start building our expertise for your sourdough starter for beginners. For the first couple of days, I insist you use whole wheat or rye flour. Those grains have more natural organisms attached to them, which helps kickstart that wild yeast activity faster. Once you see consistent bubbles, we switch everything over to standard unbleached all-purpose flour for maintenance feeding. It’s a small tactic, but it gives your DIY wild yeast culture the best possible launch pad.
How to Make Sourdough Starter: A 7-Day Guide for Beginners
Alright, deep breath! This is the part where we actually make this magic happen. Creating your own sourdough starter is less about precision measurement and more about consistency over the next week. Don’t worry about perfection; just stick to the routine. This is my go-to, easy sourdough starter recipe designed specifically for the sourdough starter for beginners crowd. I still remember checking mine obsessively on Day 3. Remember, we are patiently cultivating a natural yeast culture here, so give it time to wake up!
Days 1 & 2: Initial Mix and First Feeding of Your Sourdough Starter
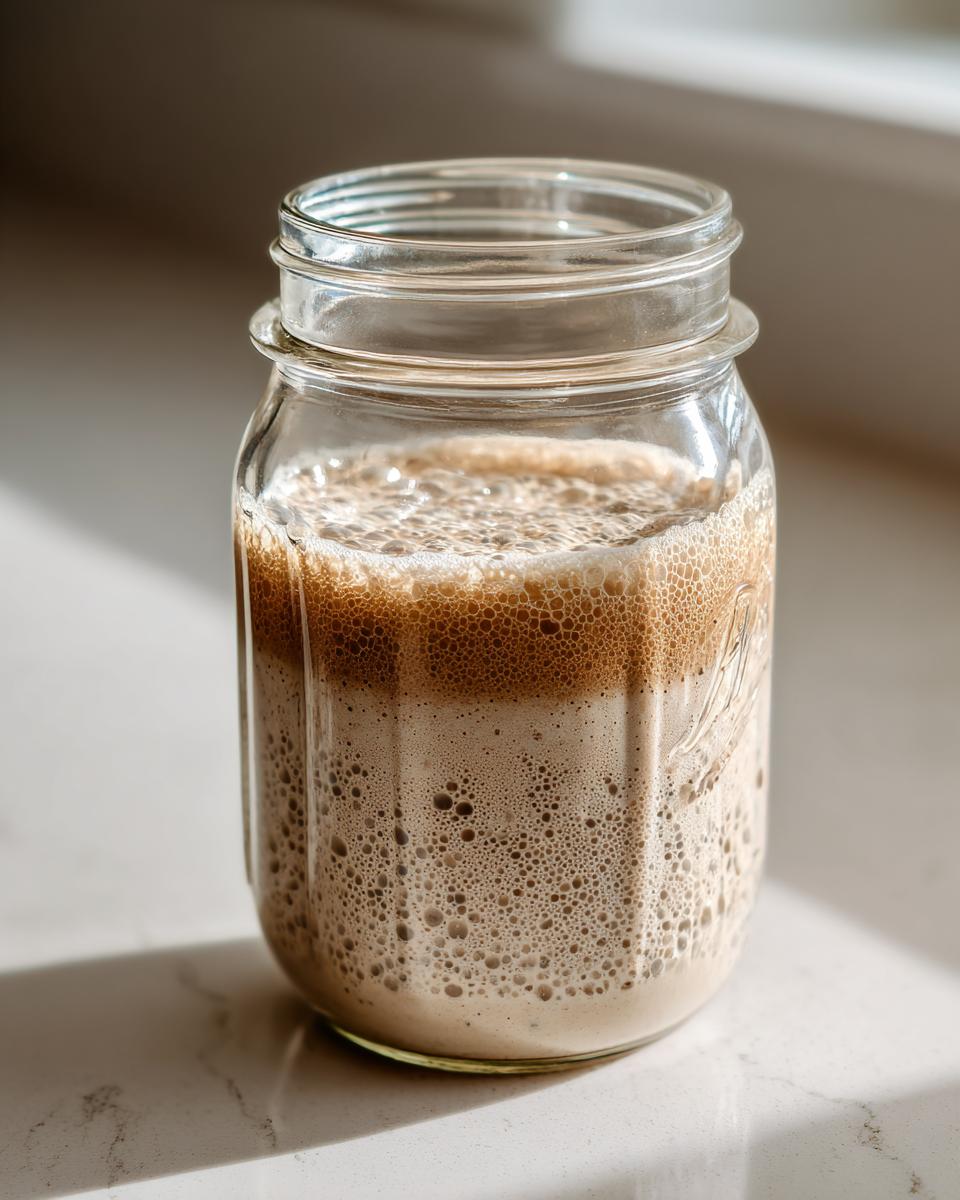
For Day 1, grab your whole grain flour—that rye or whole wheat we talked about—and mix 50 grams of it with 50 grams of room temperature water in a clean glass jar. Mix it until it looks like thick paste. Cover it loosely; you want air to get in, but you don’t want dust! Leave it on the counter for a full 24 hours. On Day 2, it might look sad or just still—that’s normal! Now, you have to discard half of what you mixed yesterday. Then, feed the remaining half with 50 grams of all-purpose flour and 50 grams of water. Just stir it well, cover loosely, and wait another day. I got mine going right next to my apple strudel recipe, just for moral support!
Days 3 through 6: Establishing the Natural Yeast Culture
For the next four days, the process is the same: discard half, then feed what’s left with equal parts flour and water. You should start seeing tiny bubbles popping up by Day 3 or 4. That’s a good sign! If you see dark liquid on top early on, don’t freak out; just stir it in for now. This is the bulk of your timeline for making a sourdough from scratch, and it’s where patience really pays off. Keep that feeding schedule consistent, ideally around the same time each day.
Day 7: How to Know Your Sourdough Starter is Ready to Use
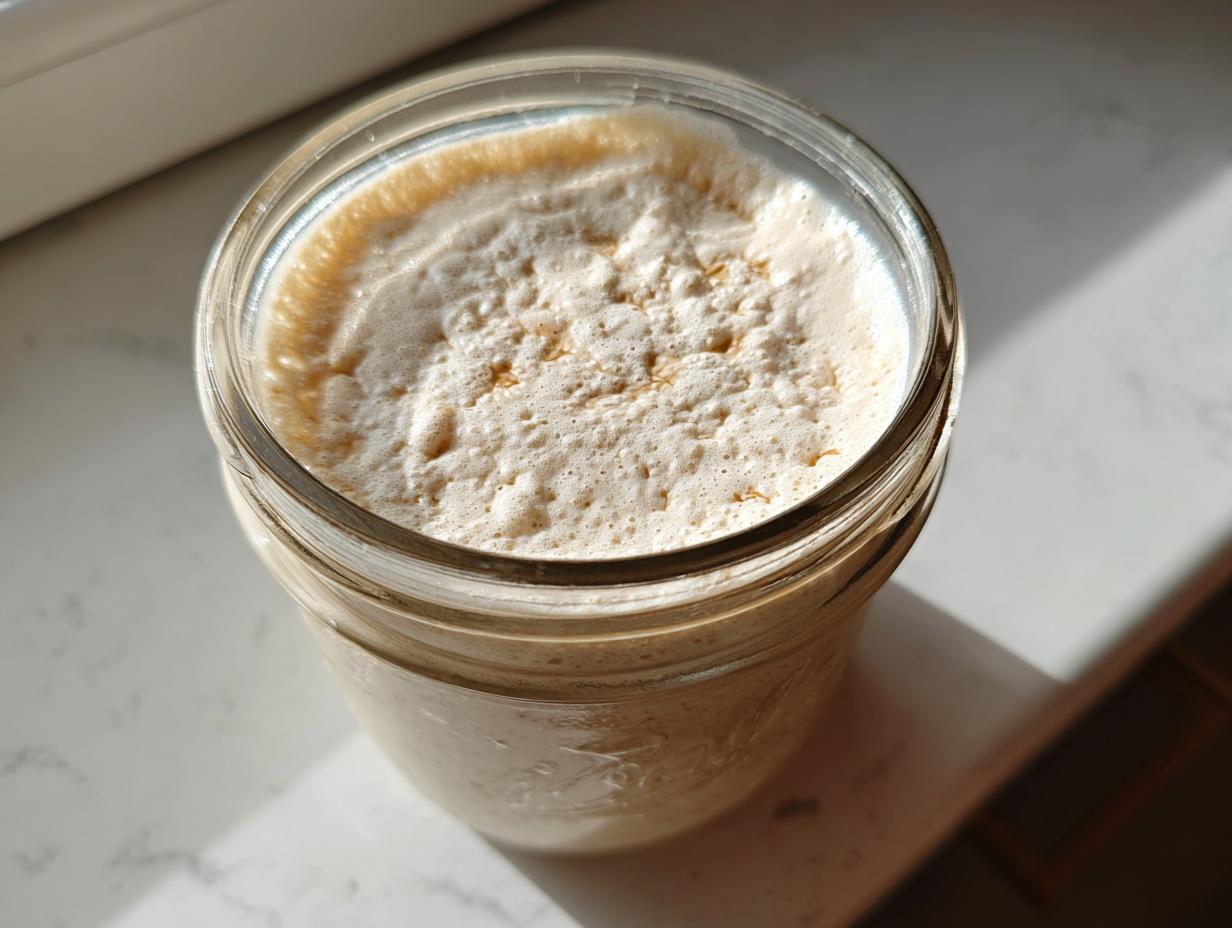
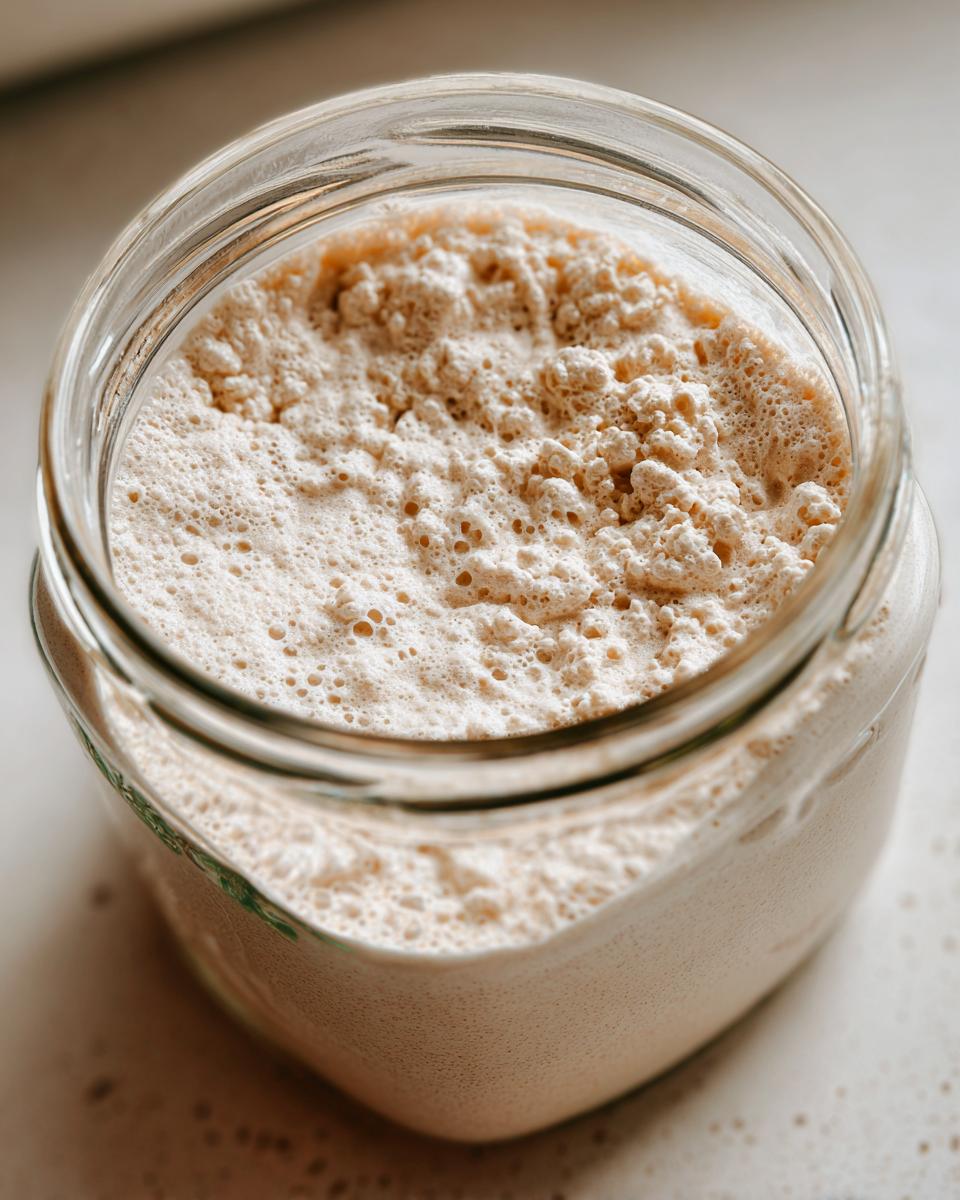
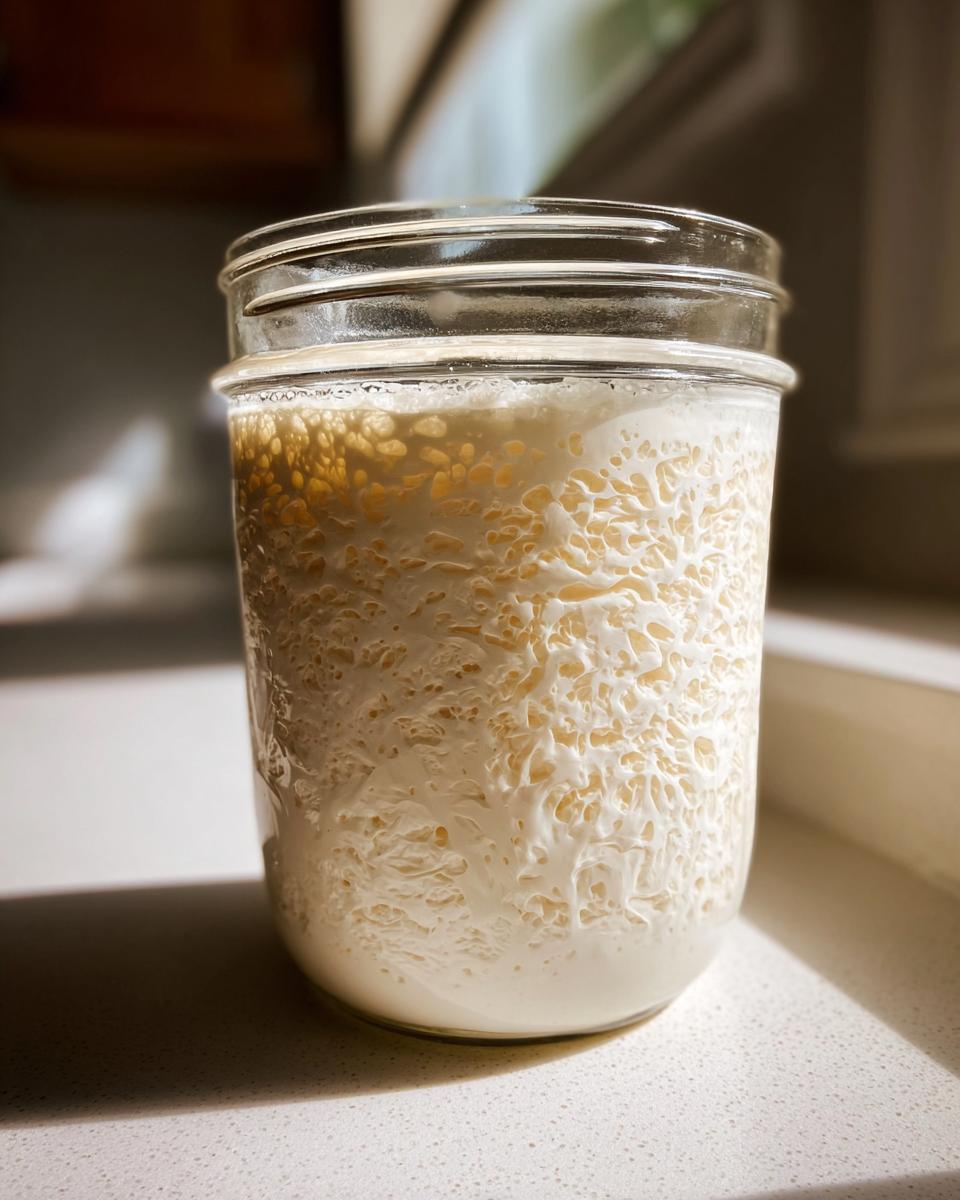
So, how do you graduate your little culture? You’ll know your sourdough starter is officially strong and ready for that first sourdough starter from scratch loaf when it reliably doubles in volume within six to eight hours after its feeding. It should look visibly frothy, full of gas, and smell pleasantly tangy—not like old socks! If it’s doubling reliably, you’ve got yourself a bubbly active starter, and you are ready to bake!
Sourdough Starter Maintenance Tips for Long-Term Health
Okay, you’ve got this vibrant, happy, bubbly culture. Congratulations! Now comes the fun part: keeping it alive without your life revolving around it. A strong sourdough starter only needs consistent attention, not constant fuss. The biggest thing you need to decide is where it’s going to live—on the counter or in the fridge. This decision sets your sourdough feeding schedule.
If you plan on baking every day or every other day, keep it on the counter at a warm room temperature. You’ll need to feed it daily, maybe even twice a day if your kitchen is super warm. When I lived back in Ohio, the winters were fantastic for control—the starter was slower. But now that I’m in a warmer climate, I have to feed it a bit more often. If you’re baking maybe once a week or less, the refrigerator is your best friend! Cold temperatures slow down all that microbial activity.
When storing it cold, you only need to feed it once every seven to ten days. It’s like putting it to sleep! Before you bake, however, you absolutely must wake it up. Pull it out, let it warm up for a couple of hours, and give it two good feedings about 12 hours apart until it’s back to doubling reliably in size. It reminds me of bringing home leftovers; you always perk up the cranberry sauce before serving it again!
Remember, consistency is more important than the exact timing. Just make sure, whether you are baking a loaf for dinner or just making roasted carrots, that you are feeding it flour it recognizes, like the all-purpose flour we agreed on. For more baking inspiration after this, I love checking out tips from folks like Jamestown Tastology.
Troubleshooting Common Sourdough Starter Issues
Look, even when you follow the steps perfectly, your new little sourdough starter might throw a little fit. It happens to everyone! Even the most seasoned bakers deal with quirks. That’s why having a quick guide for sourdough starter troubleshooting is so important. Don’t panic if it doesn’t look exactly like the pictures right away. Your starter is a living thing, and sometimes it just needs a nudge in the right direction.
The two most common meltdowns I see are when the starter looks sad and sleepy, or when it develops that mysterious liquid on top.
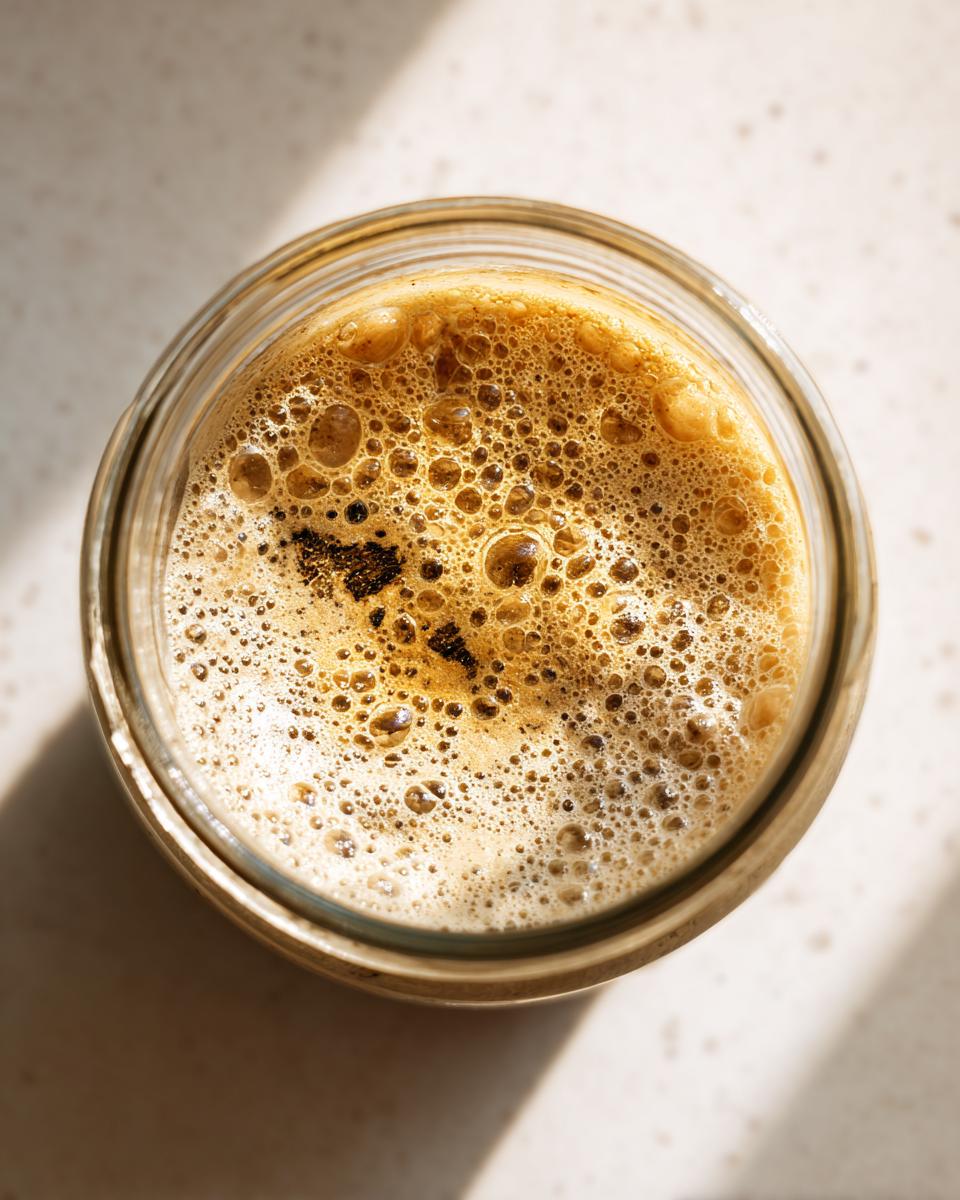
That Dark Liquid: Dealing with ‘Hooch’
If you look down at your jar and see a layer of thin, dark, sometimes greyish liquid sitting right on the top, that’s what bakers affectionately call ‘hooch.’ Don’t be alarmed! Hooch is just the alcohol byproduct created when your starter has eaten all its food and is starving. It means your sourdough feeding schedule is due, and it’s hungry!
You have two choices here, and both work just fine. You can carefully pour that liquid right off the top—it often smells pungent—and then proceed with your normal feeding. Or, if you want to keep those acids in for a tangier flavor (which I sometimes do when making a really sour loaf), just stir it right back into the starter before you feed it. Either way, once you feed it, it should calm down and look healthier right away. It’s a signal that we need to feed it more often, or perhaps increase the flour ratio slightly next time, especially if your kitchen is warm right now.
When Your Starter Won’t Get Bubbly or Active
This is the biggest hurdle for new bakers. You’re on Day 5, and nothing! No bubbles, no rise, just sludge. First, check the temperature. Wild yeast cultures just crawl when they are cold. If your kitchen is below 70°F, your starter needs a warmer spot. Try putting it on top of the fridge or inside your oven *with the light on* (but make absolutely sure the oven itself is OFF!).
If the temperature is fine, let’s look at your feed. Sometimes, if the flour is too heavily bleached, it starves out the yeast. This is why I always suggest starting with that rye or whole wheat on Day 1! If it’s been completely dormant for a couple of days, try giving it two feedings close together—maybe 12 hours apart—just to shock it back to life. A starter that won’t budge often just needs a little encouragement. For awesome tips on managing starters in tricky conditions, I always recommend seeing what folks like the team over at Moon & Magnolia recommend for winter baking!
If it still won’t wake up after a couple of boosted feeds, try tossing out a little extra starter before you feed it—sometimes too much unfed starter weighs down the few active microbes you have. You’re making great food; trust me, we need to get this base ready for that amazing chili you’ll want to serve with your first loaf!
Ingredient Spotlight: Choosing the Best Flour for Sourdough Starter
We touched on this briefly, but choosing the right flour for your sourdough starter is really important, especially when you’re aiming for success. People always ask me what the *best flour for sourdough starter* is, and my answer depends on the day! For those very first days—when you are trying to capture those wild yeasts from the air—I firmly believe whole grain flours like rye or whole wheat are unbeatable. They are packed with the nutrients those little microbes crave to get going.
Once you have that beautiful base culture and are moving into the regular sourdough feeding schedule, I switch everything over to a good quality unbleached all-purpose flour. It just maintains better once it’s established. It’s all about giving the culture exactly what it needs at each stage. Think of it like serving a perfectly delicious side, like my creamy sweet potatoes—you wouldn’t use the wrong spice mix!
Activating a Dormant Sourdough Starter
So, maybe you took a little break from baking—happens to the best of us! Or perhaps you found an old jar of starter hiding in the back of the fridge labeled with a faded date. Don’t throw it out! That culture is resilient, but it definitely goes into a deep sleep when neglected. The moment before you bake, you need to know exactly how to activate sourdough starter that’s been dormant or refrigerated for a while. This isn’t the initial creation; this is the wake-up call!
It’s super simple, but you have to commit to a short routine to make sure it’s strong enough to lift your dough. If you just feed it once and expect it to double right away, you’ll be disappointed. We need to give it a few hearty meals to get those yeast colonies back into fighting shape. You’ll need to plan for at least two, maybe three, full feeding cycles before you use it in a recipe.
Here’s my go-to revival plan for a starter that’s been chilling out:
- First, take it out of the fridge and let it warm up on the counter for a few hours. Toss out most of the old starter, leaving just a tiny bit—maybe a tablespoon.
- Give it its first feed following your normal ratio (usually 1:1:1 flour to water to starter). Don’t worry if it doesn’t rise much; it’s still groggy.
- About 12 hours later, discard again and feed it a second time. This is often when you start seeing some activity again.
- If it looks lively after that second feed, give it one more full feed (the third one) and wait for it to peak (double in size). Once it reliably doubles within 6 to 8 hours after that third feed, it’s ready to go into your dough!
This little routine ensures you aren’t wasting baking time with a sluggish starter. It’s much better to wait an extra day than to end up with a flat loaf! I always treat a revived starter just like I treat my first batch of lemon scones—I make sure all the elements are perfect before I commit!
Sourdough 101: Preparing for Your First Sourdough Starter Loaf
Wow, hold on a second! Look at that jar! If your sourdough starter is consistently doubling after feeding, you’ve officially done the hard part. You went from just flour and water to cultivating a robust, natural yeast culture. Seriously, take a moment and pat yourself on the back! My first attempt at baking a first sourdough loaf was… well, let’s just call it ‘rustic.’ It was dense, I’m not going to lie. I thought I had followed all the rules, but my starter wasn’t quite peaking yet; it was only growing about 50%!
The single most important thing to remember now is timing. You need to bake when your starter is at its absolute peak—that moment right after it doubles, when it’s fluffy and alive, but before it starts to collapse back down. If you feed it a regular amount, say 100 grams of flour and water, and you wait until it doubles to about 200 grams, that’s your green light for baking. If you wait longer, it’s hungry, and that means your dough won’t rise properly.
I finally got my big break when I realized I needed to time my feeds around my day, not the other way around. Once I started feeding my starter right when I woke up, then again in the late afternoon, I could bake the next morning while it was at its peak strength. The pride I felt cutting into that first gorgeous, tangy loaf—it tasted even better than the Caesar chicken I served with it! You’re ready. Just watch that rise, and trust the process!
Understanding Your Natural Yeast Culture
It’s wild to think that all this amazing bread flavor comes from just capturing what’s floating around in the air and on your flour! What we call a sourdough starter is scientifically just a living partnership between wild yeasts and lactic acid bacteria. The yeasts are what make the bread rise, giving you that lovely lift for your slow fermentation baking. Meanwhile, the bacteria are busy producing those wonderful tangy flavors we crave.
This simple interaction is why sourdough is so special—it’s completely natural, something I love connecting back to the original ways of baking. It’s kind of neat that a little flour and water can replicate that ancient process! You can learn a ton more about the deep science over at Farmhouse on Boone if you get curious. I’m usually happier just making sure my persimmon cookies don’t burn while the starter is working, though!
PrintUltimate Beginner’s Guide: How to Make and Maintain a Healthy Sourdough Starter From Scratch

Learn how to create your own natural yeast culture for artisan bread making. This guide covers the simple steps for beginners to make a bubbly, active sourdough starter using only flour and water.
- Prep Time: 5 min
- Cook Time: 0 min
- Total Time: 7 days (for initial creation)
- Yield: 1 active starter culture 1x
- Category: Baking Base
- Method: Fermentation
- Cuisine: American
- Diet: Vegetarian
Ingredients
- 100g Whole Wheat or Rye Flour (for initial activation)
- 100g Unbleached All-Purpose Flour (for maintenance)
- 100g Unchlorinated Water (room temperature)
Instructions
- Combine 50g of whole wheat or rye flour with 50g of room temperature water in a clean glass jar. Stir well until no dry flour remains. Cover loosely and let it sit at room temperature (ideally 70-75°F) for 24 hours.
- On Day 2, discard half of the mixture. Add 50g of all-purpose flour and 50g of water to the remaining starter. Mix thoroughly, cover loosely, and wait another 24 hours.
- Repeat the feeding process (discard half, feed 50g flour, 50g water) every 24 hours for Days 3 through 6. You should start seeing small bubbles.
- By Day 7, if your starter is consistently doubling in size within 6-8 hours after feeding, it is considered active and ready to use for baking your first sourdough loaf.
- To maintain your active starter, switch to a daily feeding schedule if keeping it on the counter, or refrigerate it and feed it once per week.
Notes
- Use unbleached flour for the best results when creating your natural yeast culture.
- If you notice a layer of dark liquid (hooch) on top, stir it in or pour it off before feeding. This means your starter is hungry.
- A consistent feeding schedule is key to developing a strong, bubbly active starter.
- If you are baking infrequently, store your starter in the refrigerator and feed it the day before you plan to bake.
Nutrition
- Serving Size: 50g
- Calories: 100
- Sugar: 0.1
- Sodium: 1
- Fat: 0.3
- Saturated Fat: 0.1
- Unsaturated Fat: 0.2
- Trans Fat: 0
- Carbohydrates: 20
- Fiber: 1
- Protein: 3
- Cholesterol: 0