
If you’ve been anywhere near the dessert world lately, you know that Biscoff is having a serious moment! Those spiced, crispy cookies are just irresistible. But I’m here to tell you—you don’t need to spend hours fussing over an oven to enjoy that amazing flavor. Here at Mia’s Meals, we focus on simple connections, and nothing connects people like a truly decadent, easy dessert. That’s why this biscoff cheesecake recipe is my new go-to showstopper. It’s rich, it’s unbelievably creamy, and the best part? It’s completely no-bake. Seriously, whip this up in about twenty minutes, and trust me, everyone will think you slaved all day.
The secret to making sure this biscoff cheesecake sings is using high-quality cookie butter and making sure everything is the right temperature. It’s one of my favorite delicious dessert recipes because it uses such simple techniques. We’re ditching the water baths and cracked tops; we’re just looking for pure, simple joy in every slice!
- Why This No-Bake Biscoff Cheesecake Is Your New Favorite Party Desserts Recipe
- Gathering Ingredients for the Ultimate Biscoff Cheesecake Recipe
- Step-by-Step Instructions for Your No-Bake Biscoff Cheesecake
- Tips for Success with Your Homemade Cheesecake
- Storage and Reheating Instructions for Leftover Biscoff Cheesecake
- Frequently Asked Questions About This Simple Desserts Recipe
- Nutritional Estimates for Your Creamy Dessert
- Share Your Biscoff Cheesecake Creations
Why This No-Bake Biscoff Cheesecake Is Your New Favorite Party Desserts Recipe
Listen, my philosophy here at Mia’s Meals is that you shouldn’t have to choose between making something amazing and having time left over to actually enjoy the party! That’s why I spent ages testing this Biscoff cheesecake until it was absolutely perfect, but without ever needing the oven. I used to attempt baked versions—oh, the fussy layering and the terrifying cooling times!—but honestly, this no-bake version is a winner, especially when you need reliable party desserts.
It’s one of my favorite no oven treats because it sets up beautifully in the fridge. You get that intensely rich, unmistakable Cookie Butter Flavor, combined with the silkiest, creamy dessert filling you can imagine. It’s sturdy enough to slice and serve, but it melts in your mouth. You can get this ready in about 20 minutes flat, which is why I always keep the supplies on hand!
Key Benefits of Our Easy Cheesecake Recipe
- No oven required! Say goodbye to worries about cracking or overbaking.
- Super quick prep time—we’re looking at about 20 minutes of active work.
- Delivers an intensely rich Cookie Butter Flavor that tastes like you spent hours on it.
- It’s the most reliable recipe in my book, perfect even if you’re new to making a homemade cheesecake.
If you want more amazing, fuss-free sweets that deliver big on flavor, you have to check out my tips for another great no-bake chocolate eclair cake recipe!
Gathering Ingredients for the Ultimate Biscoff Cheesecake Recipe
Alright, let’s talk about what you need for this incredible biscoff cheesecake. Since this is a no-bake beauty, the quality of your ingredients really shines through, especially that wonderful spreadable cookie butter! Seriously, track down the best Biscoff Cookie Butter you can find; it’s the star of the show. Also, please listen to me on this: room temperature cream cheese and ice-cold heavy cream are non-negotiable if you want that luxurious, creamy texture we talked about. Don’t skip those little details!
We keep this recipe short and sweet, relying on just a few powerhouse components to create something truly decadent. Gather these bits, and we’ll be halfway to dessert heaven!
For the Crunchy Biscoff Crust
- 1 1/2 cups Biscoff cookie crumbs (see notes for how to crush them easily!)
- 6 tablespoons unsalted butter, melted
For the Creamy Dessert Filling
- 16 ounces cream cheese, fully softened
- 1 cup powdered sugar
- 1 teaspoon vanilla extract
- 1 cup Biscoff cookie butter, slightly warmed so it folds in easily
- 1 cup heavy whipping cream, very cold
For the Biscoff Topping
- 1/2 cup Biscoff cookie butter, melted slightly for drizzling
If you’re looking for great savory inspiration to balance out all this sweetness, pop over and check out my easy creamy garlic sauce recipe—it’s amazing on pasta!
Step-by-Step Instructions for Your No-Bake Biscoff Cheesecake
Okay, this is where the magic happens! Making this no-bake Biscoff cheesecake is just a matter of assembling our components in the right order. I promise you, putting this together is faster than waiting for your oven to preheat! Pay close attention to those chilling times—they are crucial for making sure your dessert sets up perfectly firm and sliceable.
Creating the Perfect Biscoff Crust
First things first, we need that sturdy foundation! Grab your 9-inch springform pan. In a bowl, mix those 1 1/2 cups of Biscoff cookie crumbs with the 6 tablespoons of melted butter. You want it to look like wet sand—that means it will pack together perfectly. Press this mixture down, down, down into the bottom of your pan. Don’t be shy here; use the bottom of a glass to really compact it! Once it’s smooth and firm, pop that pan straight into the freezer while you whip up the filling. About 10 minutes in the freezer gets it nice and solid.
Mixing the Creamy Filling Base
Time for the star of the show! Start with your softened cream cheese in a large bowl. Beat it until it’s completely fluffy and there are zero little lumps hanging around. Then, mix in your powdered sugar and vanilla. Next, in a separate, cold bowl, whip that heavy cream until you get stiff peaks—this is what gives us that airy, glorious texture. Gently fold the whipped cream into the cream cheese mixture. Remember, this is folding, not stirring! We want to keep those air bubbles in there for the best creamy dessert. Finally, gently fold in the cup of slightly warmed Biscoff cookie butter until it’s just uniform in color. Stop mixing the second it’s combined!
Chilling and Finishing the Biscoff Cheesecake
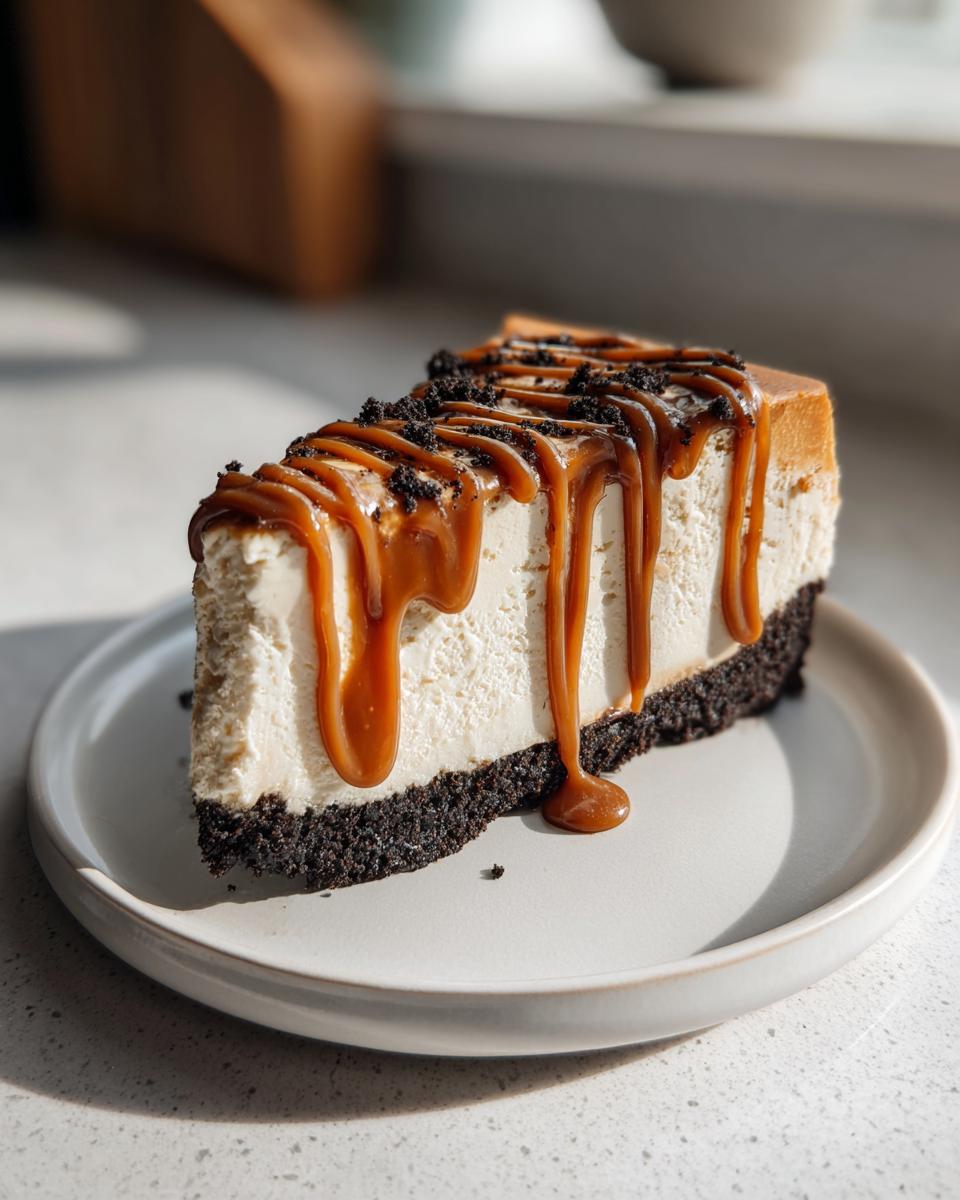
Now, carefully pour that luscious filling right over your frozen crust and smooth the top with a spatula. It should look beautiful already! The next step is the hardest: putting it in the fridge. You need this Biscoff cheesecake to chill for a minimum of 6 hours, but trust me, letting it chill overnight is the secret to achieving that ultimate, sliceable consistency. Once it’s perfectly set, just before serving, warm up that last 1/2 cup of cookie butter until it’s easily drizzle-able. Drizzle it artfully over the top, maybe drag a knife through it for a cute swirl pattern, release those pan sides, and get ready to impress everyone!
For another great no-bake classic that sets up beautifully, check out my guide on making no bake cheesecake recipe easy!
Tips for Success with Your Homemade Cheesecake
Okay, you’ve got the ingredients, you’ve mixed it up, but let’s talk about those little insider secrets that turn a good biscoff cheesecake into an absolute show-stopper! Honestly, the biggest difference between a so-so cheesecake and this perfect, creamy dessert is paying attention to a couple of temperature details. We want smooth sailing from here on out, especially when crafting that beautiful Biscoff Crust.
If you follow these tips, you nail that dense, luxurious texture every single time, guaranteeing that intense Cookie Butter Flavor everyone loves. These little adjustments are what make this recipe reliable for every kitchen!
Achieving a Smooth Cream Cheese Dessert
My number one rule for any cheesecake, baked or not, is this: your cream cheese must be completely, fully softened. I mean it—leave it out for at least two hours before you even think about turning the mixer on. If that cream cheese is even slightly cold, it will fight you, resulting in annoying little lumps that ruin the silky texture of your Decadent Cheesecake. Don’t rush this step! If your cream cheese is room temperature, it will blend seamlessly with the sugar and butter, giving you that perfectly smooth base layer.
Simple Variations for Your Biscoff Cheesecake
While the classic recipe is divine on its own, sometimes you want to add a little extra something special for guests—this is where you can get creative. For example, if you want to elevate this Biscoff cheesecake just a touch more, try adding a spoonful of salted caramel! The notes suggest mixing about 1/4 cup of salted caramel sauce right into the cream cheese filling before you fold in the whipped cream. That salty-sweet hit is unbelievable against the spiced cookie flavor. It makes for the perfect treat when you’re after something extra indulgent.
When you are ready to try another quick indulgence, you might like my recipe for easy homemade soft chewy caramels recipe!
Storage and Reheating Instructions for Leftover Biscoff Cheesecake
So, you managed to save some of this incredible biscoff cheesecake? Good for you! Since this is a no bake cheesecake, leftovers need a little special handling compared to a regular cookie or pie because of those dairy components. Don’t even think about ‘reheating’ it, though—that’s a recipe for soup! This dessert thrives on being nice and cold, which is what helps it stay firm and provides that awesome textural contrast between the crust and the filling.
The key here is airtight storage in the refrigerator. Keep the cheesecake in the springform pan with the sides on, or carefully transfer a slice to an airtight container. This helps lock in that amazing moisture and prevents the cheesecake from absorbing any funny smells from the fridge. If you properly cover and chill your leftover slices, they hold up wonderfully. I find that this decadent cheesecake actually tastes even better on Day Two because the cookie butter flavor has more time to settle into that creamy base!
You can safely store any extra slices in the refrigerator for about three to four days. If you happen to have a huge batch left over and you want to keep it longer, you absolutely can freeze it! Wrap each slice tightly in plastic wrap first, and then wrap that in foil. When you’re ready to enjoy it again, just pull a slice out and let it thaw overnight in the fridge. It’s still going to be fantastic! For more tips on keeping family favorites fresh, check out my post on how to handle leftovers from my easy rice casserole chicken broccoli bake.
Frequently Asked Questions About This Simple Desserts Recipe
It’s funny how many questions pop up once you start making something truly delicious! Since this is such an easy cheesecake recipe, people often wonder about swapping ingredients or changing up the method. I’ve gathered the most common things folks ask me about whipping up this creamy dessert. Hopefully, this clears everything up so you can get baking—or, well, chilling!
Can I make this a baked cheesecake instead of a no bake cheesecake?
Oh, honey, that’s tempting, but no, you really shouldn’t try to bake this one! This whole recipe is built around the stability of cold ingredients—specifically using whipped heavy cream folded into the cream cheese. Baking it would completely melt those air pockets we worked so hard to create, turning it into sweet soup instead of a firm slice. This no bake cheesecake relies on the chill time to set up perfectly. Stick to the fridge for best results!
Can I substitute the Biscoff Cookie Butter?
That’s the million-dollar question! Look, if you absolutely need to, you *could* use another spiced cookie butter, but I won’t lie—the result won’t be the same. The real magic comes from that specific Cookie Butter Flavor. If you don’t have any at all, you could perhaps try melting down Biscoff cookies for the crust and adding a little extra pinch of cinnamon and ginger to the filling, but honestly, it just won’t hit the same way. For this indulgent sweet, the specific cookie butter is worth seeking out!
How far in advance can I prepare this showstopper dessert?
One of the best things about making this showstopper dessert is that you *have* to make it ahead of time! It needs time for the filling to firm up nicely. I always recommend preparing the whole thing the day before you plan to serve it. If you chill it overnight, the texture becomes absolutely perfect—super smooth, super stable, and it just tastes better when the flavors have married. While you *can* serve it after 6 hours, if you leave it overnight, you unlock its full potential!
If you’re looking for other recipes that are big on making an impression but low on stress, check out my tips for easy whipped ricotta dip recipe. It’s another staple I turn to!
Nutritional Estimates for Your Creamy Dessert
Now, I know some of you are meticulously tracking things, and that’s totally fair! When you’re making something this intensely delicious, it’s good to have a general idea of what you’re working with. Remember, since this is a homemade cheesecake made with ingredients that vary slightly by brand—especially the Biscoff spread—these numbers are just solid estimates per slice based on the recipe quantities. Think of this as a helpful guide, not a medical contract!
The good news is that even though this decadent dessert is rich in flavor, we can break down what’s in each serving. This section is based on a yield of 10 nice-sized slices.
- Serving Size: 1 slice
- Calories: Approximately 450
- Total Fat: About 30g (Remember, we use quality butter and cream cheese, so this includes healthy fats!)
- Total Carbohydrates: Around 40g
- Protein: Roughly 5g
Because we aren’t baking this, there are no scary trans fats from baked flour mixtures, which is a bonus! If you’re counting macros, you can see where the sugar content is coming from—mostly that wonderful cookie butter and powdered sugar blend. But honestly, when something tastes this good, I try not to think about the numbers too much! It’s a showstopper simple dessert meant to be enjoyed.
If you’re diving into home baking and need a lighter alternative next time, you should check out my easy protein muffins recipe for a great breakfast option!
Share Your Biscoff Cheesecake Creations
Now that you’ve made the ultimate biscoff cheesecake, I truly want to see your handiwork! Bringing people together over food is why I started Mia’s Meals, and seeing your successes keeps me inspired every single day. Whether this was your first time making a no bake cheesecake or you’re a seasoned pro, your feedback helps everyone who comes after you!
First, if you tried this easy cheesecake recipe and it blew your socks off (and I’m guessing it did!), please do me a huge favor and leave a rating right here on the card—five stars if you loved it! Those little stars really help other busy folks find simple recipes that actually work.
Secondly, I absolutely love seeing your beautiful, creamy desserts! Snap a picture of your finished decadent cheesecake—especially that perfectly set filling and the glorious drizzle on top—and share it on social media. Tag me so I can cheer you on! It means the world to me when you share your creations from my kitchen to yours.
If you have any lingering questions after making this treat, or if you want to tell me how your family reacted to this incredible cookie butter flavor, drop a comment below! I read every single one. Don’t be shy; let’s chat about what we’re baking (or chilling!) next!
Need to get in touch about an issue or partnership? Reach out through my contact page anytime!
PrintEasy No-Bake Biscoff Cheesecake
Make this rich, creamy, no-bake Biscoff cheesecake with a crunchy cookie crust. This simple dessert delivers big cookie butter flavor without turning on the oven, making it perfect for parties or quick treats.
- Prep Time: 20 min
- Cook Time: 0 min
- Total Time: 6 hr 20 min
- Yield: 10 servings 1x
- Category: Dessert
- Method: No Bake
- Cuisine: American
- Diet: Vegetarian
Ingredients
- 1 1/2 cups Biscoff cookie crumbs (for the crust)
- 6 tablespoons unsalted butter, melted (for the crust)
- 16 ounces cream cheese, softened
- 1 cup powdered sugar
- 1 teaspoon vanilla extract
- 1 cup Biscoff cookie butter, slightly warmed
- 1 cup heavy whipping cream, cold
- 1/2 cup Biscoff cookie butter, melted (for topping)
Instructions
- Prepare the crust: Mix the Biscoff cookie crumbs and melted butter in a bowl until the mixture resembles wet sand. Press this mixture firmly into the bottom of a 9-inch springform pan. Place the crust in the freezer while you prepare the filling.
- Make the filling: In a large bowl, beat the softened cream cheese with an electric mixer until smooth. Add the powdered sugar and vanilla extract, mixing until just combined.
- In a separate bowl, whip the cold heavy whipping cream until stiff peaks form. Gently fold the whipped cream into the cream cheese mixture.
- Add the slightly warmed Biscoff cookie butter to the cream cheese mixture and fold until the batter is uniform in color and texture. Do not overmix.
- Pour the filling over the chilled crust in the springform pan. Smooth the top with a spatula.
- Chill the cheesecake in the refrigerator for at least 6 hours, or preferably overnight, until completely set.
- Before serving, drizzle the remaining 1/2 cup of melted Biscoff cookie butter over the top of the cheesecake. You can use a knife to create a light swirl pattern if desired.
- Release the springform sides and slice to serve this ultimate cheesecake recipe.
Notes
- For the easiest crust, pulse whole Biscoff cookies in a food processor until fine crumbs form.
- If you want a salted caramel swirl, mix 1/4 cup of salted caramel sauce into the filling before folding in the whipped cream.
- Make sure your cream cheese is fully softened to avoid lumps in your creamy dessert.
Nutrition
- Serving Size: 1 slice
- Calories: 450
- Sugar: 35g
- Sodium: 250mg
- Fat: 30g
- Saturated Fat: 18g
- Unsaturated Fat: 12g
- Trans Fat: 0g
- Carbohydrates: 40g
- Fiber: 1g
- Protein: 5g
- Cholesterol: 90mg