
Sometimes, you just need that blast of childhood nostalgia in under an hour, right? When the day is long, dinner is done, and you want a truly satisfying sweet bite that doesn’t demand you turn on the oven, I have the answer. Forget complicated baking! We are making the easiest, most crowd-pleasing No-Bake chocolate rice krispie balls you can imagine. This recipe perfectly captures the Mia’s Meals mission: taking a classic treat and stripping away all the fuss so you can get back to connecting with your family. If you love simple, make-ahead delights like my easy no-bake peanut butter pie, you’re going to adore these little bites. They are pure comfort, and they come together faster than I can empty the dishwasher.
- Why Our No-Bake Chocolate Rice Krispie Balls Are Your New Favorite Easy Chocolate Balls Recipe
- Gathering Ingredients for Perfect Chocolate Rice Krispie Balls
- Step-by-Step Instructions to Make Your Chocolate Rice Krispie Balls
- Tips for Success Making Perfect Chocolate Rice Krispie Balls
- Making Chocolate Rice Krispie Balls for Parties and Gifting
- Storage and Make-Ahead Tips for Your Chocolate Rice Krispie Balls
- Frequently Asked Questions About Chocolate Rice Krispie Balls
- Nutritional Snapshot of These Bite Sized Chocolate Desserts
- Share Your Homemade Candy Recipe Creations
Why Our No-Bake Chocolate Rice Krispie Balls Are Your New Favorite Easy Chocolate Balls Recipe
Let’s be honest; sometimes we just need a win in the kitchen, right? When the day is long, dinner is done, and you want a truly satisfying sweet bite that doesn’t demand you turn on the oven, I have the answer. Forget complicated baking! We are making the easiest, most crowd-pleasing No-Bake chocolate rice krispie balls you can imagine. This recipe perfectly captures the Mia’s Meals mission: taking a classic treat and stripping away all the fuss so you can get back to connecting with your family. If you love simple, make-ahead delights like my easy homemade cranberry sauce recipe, you should check that out while you wait for these to chill!
- They are ready fast—the active prep time is barely 20 minutes!
- They use ingredients you likely already have sitting in your pantry right now.
- They are absolute showstoppers for potlucks or cookie trays.
- They require zero oven time, which is a lifesaver in the summer months.
If you’re looking for genuinely Simple No Bake Treats that deliver on flavor every single time, look no further. You won’t believe how quickly these disappear as Quick Chocolate Snacks at our house.
The Ultimate No Bake Rice Krispie Balls Experience
The absolute best part about this recipe is that it is built for ease. If you’ve never made candy before, that’s okay! You can totally handle this. Since we skip the oven entirely, your kitchen stays cool and calm. Forget waiting for things to bake or worrying about crumb structure; we are focusing on mixing, rolling, and coating. These are the perfect No Bake Rice Krispie Balls to make with the kids, too, since the rolling step is so much fun for little hands!
Gathering Ingredients for Perfect Chocolate Rice Krispie Balls
When we make these chocolate rice krispie balls, I try to keep everything simple, but ingredient quality does matter here! Since we aren’t baking these, the structure relies heavily on what we mix together in that first big bowl. The secret ingredient that brings everything together and keeps our Peanut Butter Rice Krispie Treats stable is good, creamy peanut butter. Trust me on this—use the standard creamy kind, not the natural stuff that separates, or your whole base will get messy! If you’ve managed to make my soft and chewy peanut butter blossom recipe, you know I care about the base flavor!
Here is exactly what you need to gather for this easy chocolate balls recipe:
- 1 cup creamy peanut butter (the smooth kind won’t let you down!)
- 1 cup powdered sugar, packed in tight
- 3 cups crispy rice cereal (you know, the one that goes snap, crackle, pop)
- 1 teaspoon good vanilla extract
- 1 cup semi-sweet chocolate chips (for that perfect coating)
- 1 tablespoon coconut oil (this is my secret weapon for smooth dipping!)
I always grab everything before I even start mixing. It just makes the whole process flow better, which is key when you’re trying to whip up Bite Sized Chocolate Desserts fast.
Ingredient Notes and Substitution Tips for Your Chocolate Peanut Butter Bites
Since we want these to be reliable, let’s talk about the quality control. For that peanut butter base, natural peanut butter is just too oily; it makes your balls too soft and they’ll feel greasy. You must use the standard processed creamy kind. Also, don’t shy away from the coconut oil when melting your chocolate! It’s optional, but it thins the chocolate just enough so your coating isn’t thick and hard when it sets. It creates that beautiful, glossy shell.
If you want to mix things up for a variation on these Homemade Candy Recipe favorites, you could use white chocolate chips instead of semi-sweet for the coating. If you are out of coconut oil, melt the chocolate with a teaspoon of butter instead—it works almost as well for getting that smooth dipping consistency. The main thing is sticking to the proportions for the base mixture!
Step-by-Step Instructions to Make Your Chocolate Rice Krispie Balls
Okay, you’ve got your ingredients laid out! Making these chocolate rice krispie balls is actually incredibly relaxing once you get into the rhythm. We are going through two main phases here: building the peanut butter base and then dipping everything blissfully in chocolate. Remember, since this is a Fast Dessert Recipe, speed is our friend, but patience during the chilling phase is non-negotiable!
Mixing the Base for Gooey Chocolate Cereal Bites
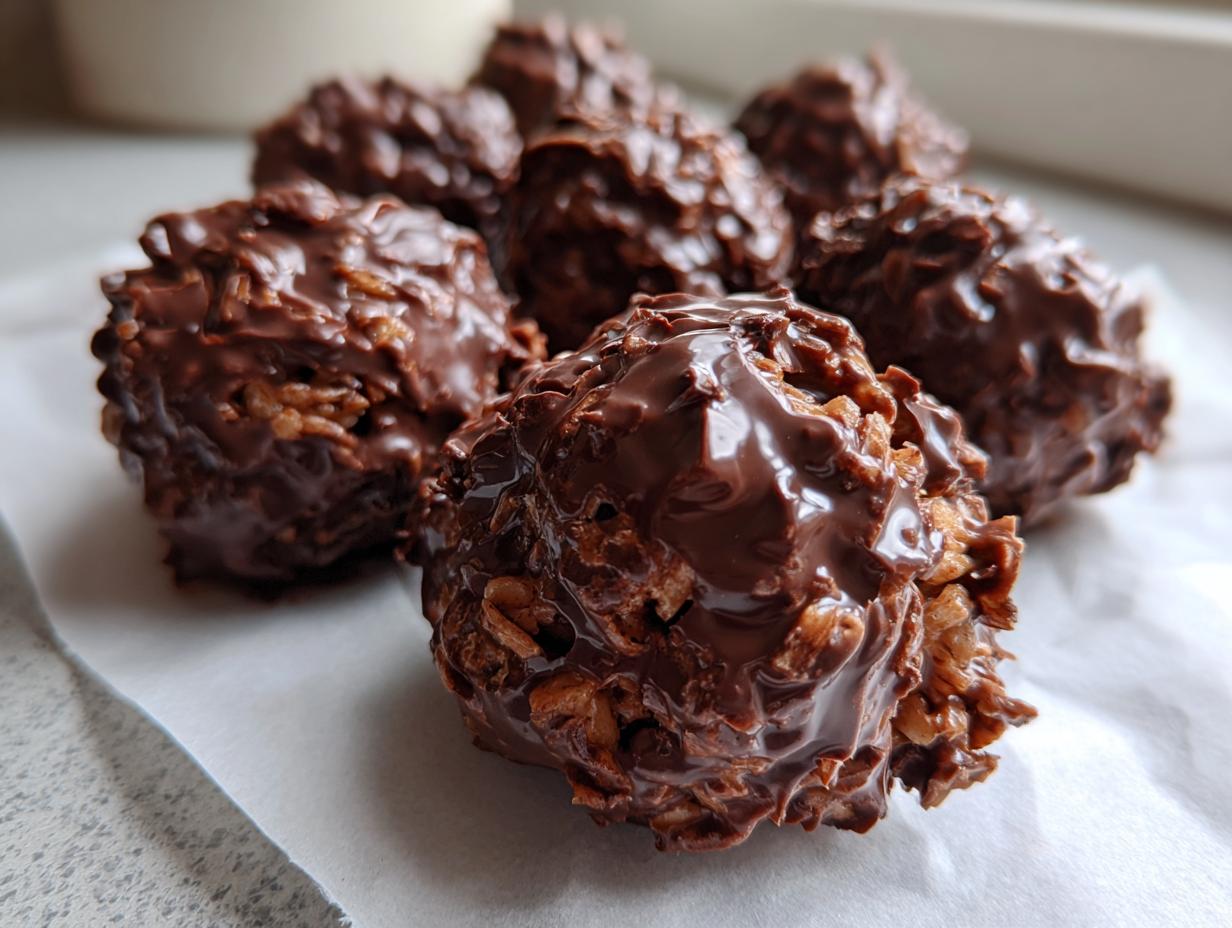
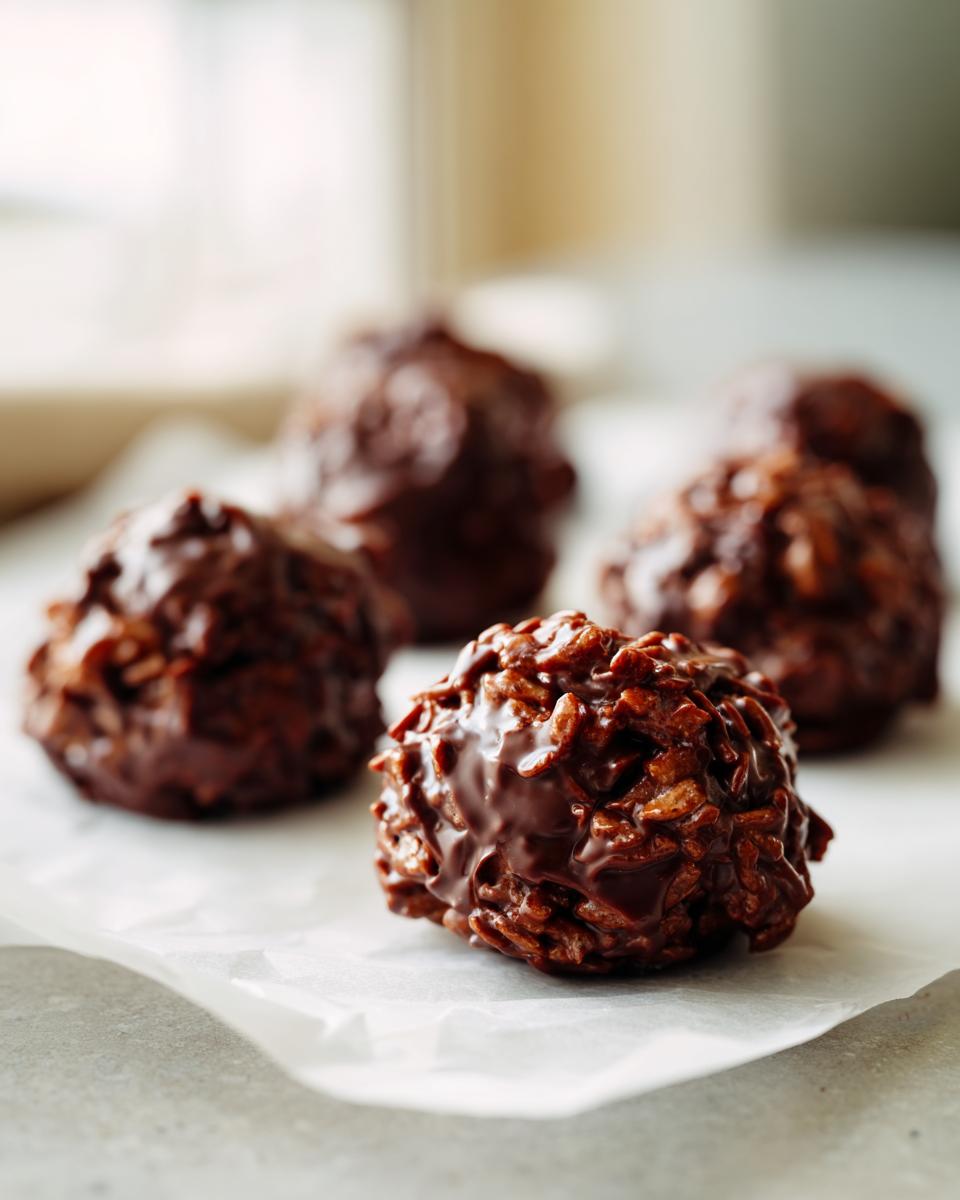
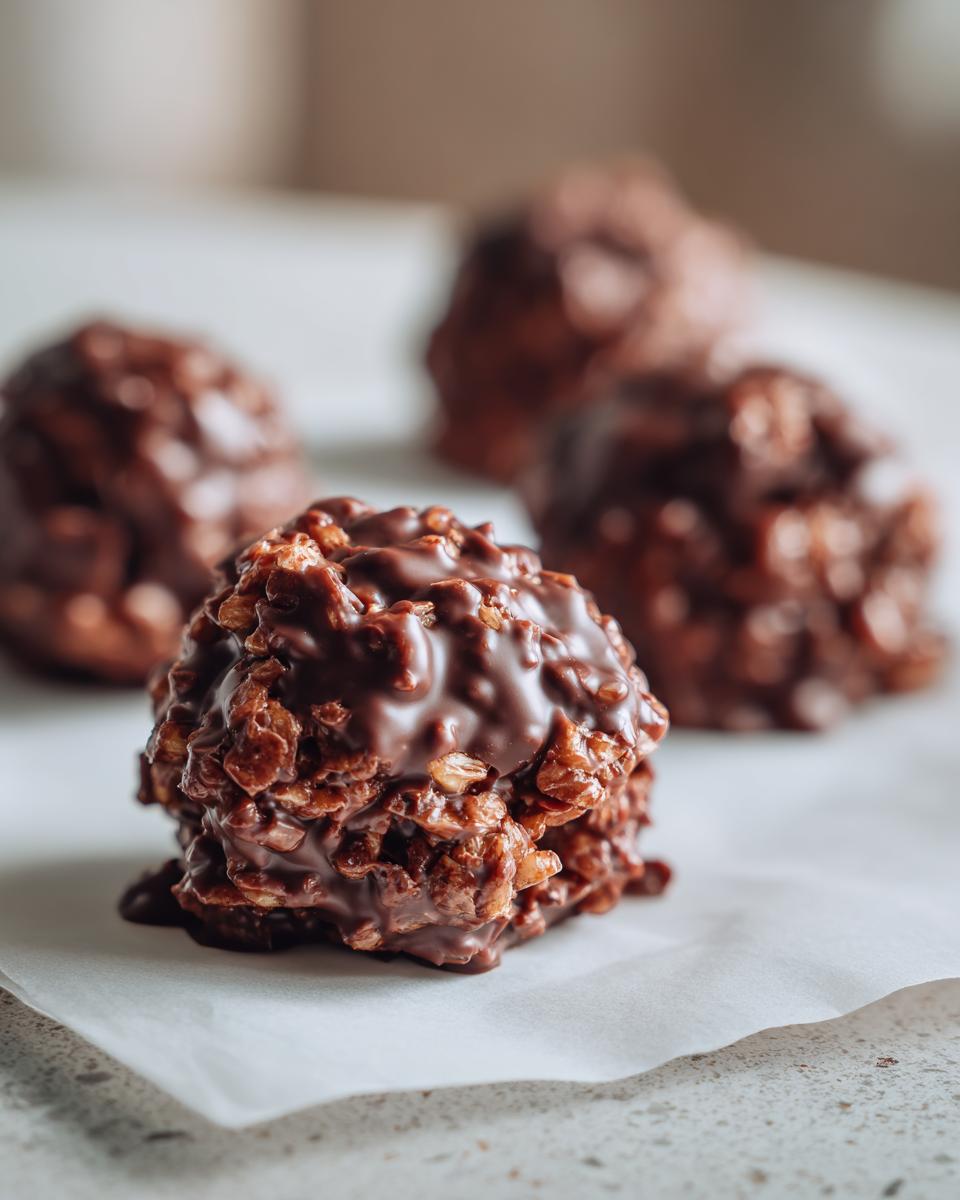
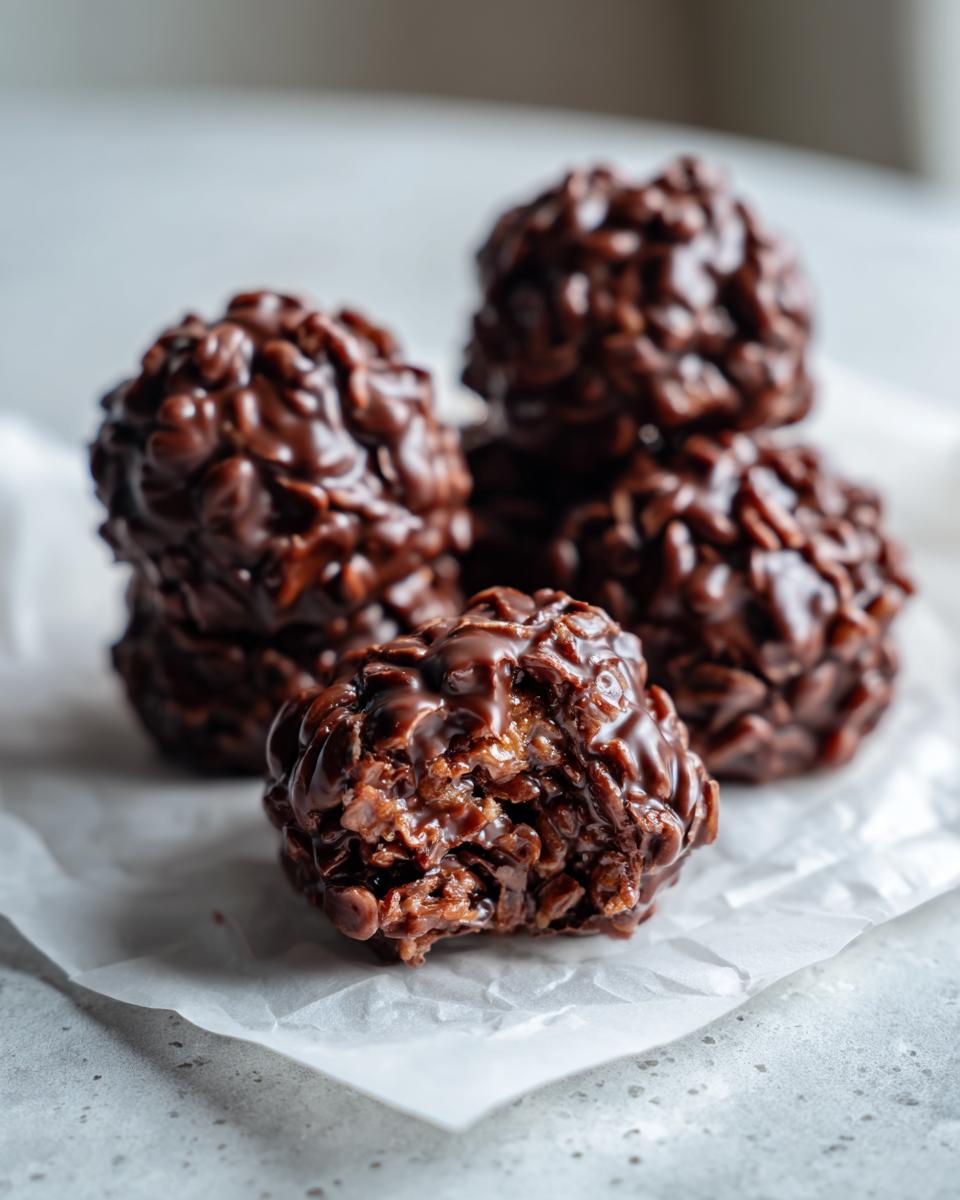
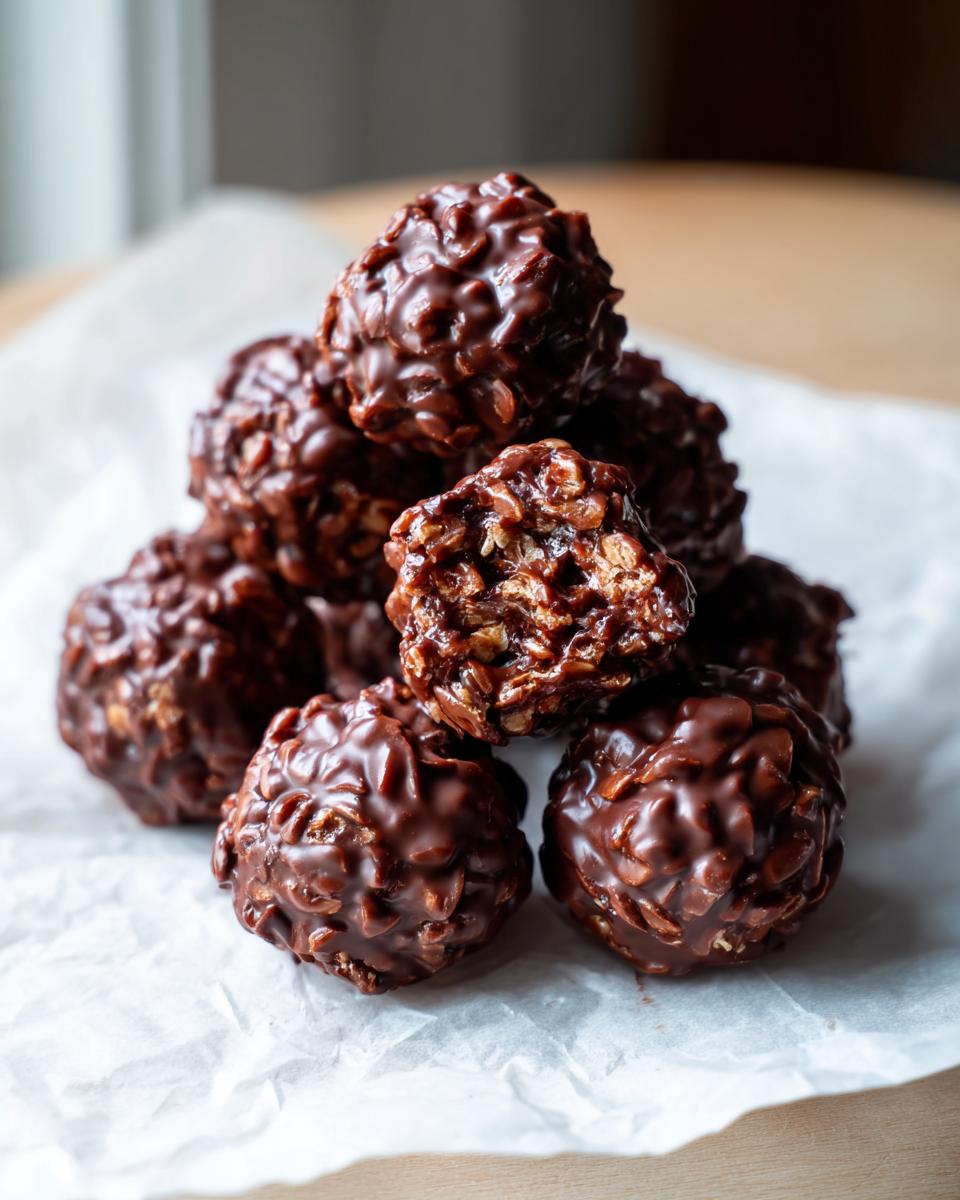
First things first, grab the biggest bowl you own. Throw in your peanut butter, powdered sugar, the crispy rice cereal, and that vanilla extract. Now, you need to mix this until it looks cohesive. I mean really mixed—no dry pockets of sugar hiding anywhere! Once it looks like thick, slightly crumbly cookie dough, it’s time to roll. This is where the fun comes in, especially if you have little helpers who love Kid Friendly Desserts. Roll the mixture into little 1-inch spheres. Don’t make them too big; we want them to be perfect Bite Sized Chocolate Desserts! Pop all your lovely, uniform balls onto a sheet lined with parchment paper. Now, the most important part of this phase: they *must* chill. Stick them in the fridge for at least 30 minutes. Seriously, don’t try to rush this, or they will turn into a melted mess when you try to dip them.
Mastering the Chocolate Coating for Your Chocolate Rice Krispie Balls
While those balls are getting nice and firm, we tackle the chocolate. Put your chocolate chips and that tablespoon of coconut oil in a microwave-safe bowl. You only want to heat this in 30-second bursts. I zap it for 30 seconds, stir it really well—even if it doesn’t look melted—and repeat. This stops the chocolate from burning or seizing up on you. Keep going until it’s smooth, glossy perfection. The coconut oil makes it wonderfully fluid for dipping, just like in my no-bake peanut butter pie filling!
Once chilled, take the stiff balls out. Dip them one by one, using a fork to gently maneuver them. Let the excess drip off before placing them back on the parchment paper. If you want to get fancy, now is the time to sprinkle them with flaky sea salt or some festive sprinkles before that chocolate hardens for good!
Tips for Success Making Perfect Chocolate Rice Krispie Balls
Look, these chocolate rice krispie balls are incredibly forgiving, but there are two places I always see people run into trouble: the mixture being too soft, and the chocolate being too thick. My biggest piece of advice? Don’t skimp on the chilling time! If your base mixture feels sticky at all when you try to roll it into those perfect little spheres, just pop the whole bowl back in the fridge for another 15 minutes. Seriously, that chilling time is what sets up the structure for your Crispy Cereal Balls.
If your chocolate coating ever seems too stiff for dipping, remember that tiny bit of coconut oil I mentioned—it’s your best friend for a smooth, professional-looking finish. It keeps the chocolate fluid enough to work with easily. If you’ve ever struggled with hard icing when making my sugar cookie icing, you know how annoying it is when things don’t set right! A little patience here means you end up with stunning, perfectly coated bites every time.
Making Chocolate Rice Krispie Balls for Parties and Gifting
This is where these chocolate rice krispie balls really shine! Because they are perfectly portioned, they are the absolute definition of Party Food Dessert Balls. Seriously, you can never make enough of them when you bring these to a gathering, partly because nobody can stop at just one, and partly because they look so adorable lined up on a platter.
Since so many people search for these around the holidays, let’s talk about making them look festive. Think of them as your go-to Holiday Rice Krispie Candy! Once you dip those firm balls into the chocolate, don’t let them just sit plain! If you want that little touch of gourmet flair, flake a tiny bit of sea salt over the top immediately. That salty/sweet combo is addictive. Or, if you’re making these for Christmas, grab some red and green sprinkles and throw them on before that chocolate sets. They look fantastic lined up in little paper candy cups, too—it keeps your fingers clean and makes for easy serving!
If you’re making a massive batch for a potluck, sometimes it helps to use a dollop of the melted chocolate just to glue the sprinkles down so they don’t fall off when you move them. I use this same philosophy when I make my Christmas cookie bars—a little extra texture makes a huge difference. If you want even more inspiration for making these, you have to check out the tips they have over at Recipe Hub Dish; they have some great visual ideas for presentation!
Storage and Make-Ahead Tips for Your Chocolate Rice Krispie Balls
One of the best things about these chocolate rice krispie balls is that they are total make-ahead superstars! Since they have no fresh dairy or eggs that need careful handling, they store beautifully. I always make a double batch right before a big holiday, which helps me feel so much calmer later on. They are perfect for stashing away because they count as one of those great easy puff pastry apple strudel recipe style quick fixes!
Keep them in a single layer in an airtight container in the refrigerator. They stay perfectly fresh and firm for up to a full week—and honestly, they usually don’t last that long! If you need to keep them even longer, absolutely feel free to freeze them. Just arrange them on a tray, cover them well, and they freeze beautifully for about a month. When you want one, just pull it out and let it thaw on the counter for about 15 minutes. Perfection!
Frequently Asked Questions About Chocolate Rice Krispie Balls
I get so many messages about tweaks and substitutions for these chocolate rice krispie balls, which is wonderful! It means you all are baking them! Here are some of the most common things folks ask me when they try this Homemade Candy Recipe for the first time. If you are planning ahead, remember you can totally make these ahead just like my easy puff pastry apple strudel recipe!
Can I make these chocolate rice krispie balls without peanut butter?
Oh, that’s a tough one! Peanut butter is really the binder that holds the cereal and sugar together so we can roll perfect little spheres. If you have an allergy, my first suggestion would be to try using sunflower seed butter. It gives a similar texture, but I won’t lie, the flavor is definitely different! You could also try using creamy almond butter if you tolerate nuts. If you absolutely can’t use any nut/seed butter, you’ll need a different recipe entirely, as skipping it means you lose your main structural element for these No Bake Rice Krispie Balls.
What is the best chocolate to use for dipping these quick chocolate snacks?
This is a great question, especially because it affects how nicely they look when finished! For the absolute easiest dipping experience in my Quick Chocolate Snacks variation, I actually prefer using good quality semi-sweet chocolate chips combined with that little bit of coconut oil. The oil keeps the chocolate fluid so you get a thin, even coat that sets up nicely—no thick lumps! If you want that really shiny, snappy shell like you get from a professional candy maker, you might want to look for melting wafers instead of standard chocolate chips. Chips have stabilizers that help them keep their shape, which makes them harder to get super smooth for dipping your Bite Sized Chocolate Desserts. But honestly, for home use, the standard chips work just fine, especially after your 30-minute chill time works its magic!
Nutritional Snapshot of These Bite Sized Chocolate Desserts
I know we aren’t making these chocolate rice krispie balls for health food purposes, but I always feel better knowing what we are serving up, right? Because these are rich with peanut butter and coated in chocolate, they definitely qualify as a fun, indulgent treat—perfect for parties or when you just need a little something sweet!
Here is the estimated nutritional breakdown for one of these Peanut Butter Chocolate Holiday Candy bits, based on the recipe above:
- Serving Size: 1 ball
- Calories: 150
- Sugar: 12g
- Fat: 9g (mostly unsaturated, but still!)
- Protein: 4g
- Carbohydrates: 16g
Please remember, this is just an estimate for one of these delightful Quick Chocolate Snacks. I measure things carefully, but everyone packs their powdered sugar differently, and chocolate chip brands vary too, of course! If you use, say, dark chocolate instead of semi-sweet, the sugar might shift a little. But overall, it gives you a good ballpark idea of what you are enjoying when you grab a few of these Bite Sized Chocolate Desserts!
If you’re curious about other tasty, easy recipes—perhaps something savory this time?—you should definitely take a look at my easy homemade cranberry sauce recipe. Balance is everything in the kitchen!
Share Your Homemade Candy Recipe Creations
Well, friend, that is it! You now have the secrets to making the most wonderfully simple, no-bake chocolate rice krispie balls. Seriously, they taste like they should take hours, but we got them done in less time than it takes to watch an episode of your favorite show! That’s the magic of finding good, solid, easy family recipes that just work.
Now, I can’t wait to see what you create! Did you stick with my suggestion of flaky sea salt on top, or did you go wild with rainbow sprinkles? Does your family prefer these as a holiday candy or an after-school treat? Let me know your thoughts right down in the comments below!
I always love hearing how you adapt things in your own kitchens. Rate this recipe using the stars below (it helps other busy parents find these simple sweets!), and if you have any burning questions or just want to share a picture of your amazing Peanut Butter Rice Krispie Treats, reach out via my Contact page. Happy rolling, everyone!
PrintNo-Bake Chocolate Peanut Butter Rice Krispie Balls

Make these easy, no-bake chocolate peanut butter Rice Krispie balls for a quick snack or holiday treat. They combine creamy peanut butter, crispy cereal, and rich chocolate coating.
- Prep Time: 20 min
- Cook Time: 5 min
- Total Time: 50 min
- Yield: 24 servings 1x
- Category: Dessert
- Method: No-Bake
- Cuisine: American
- Diet: Vegetarian
Ingredients
- 1 cup creamy peanut butter
- 1 cup powdered sugar
- 3 cups crispy rice cereal
- 1 teaspoon vanilla extract
- 1 cup semi-sweet chocolate chips
- 1 tablespoon coconut oil (optional, for smoother dipping)
Instructions
- In a large bowl, combine the peanut butter, powdered sugar, crispy rice cereal, and vanilla extract. Mix well until everything is evenly incorporated and holds together.
- Roll the mixture into small, uniform balls, about 1 inch in diameter. Place the balls on a baking sheet lined with parchment paper.
- Chill the balls in the refrigerator for at least 30 minutes to firm them up. This prevents them from falling apart when dipping.
- In a microwave-safe bowl, combine the chocolate chips and coconut oil (if using). Microwave in 30-second intervals, stirring between each, until the chocolate is smooth and fully melted.
- Dip each chilled ball into the melted chocolate, ensuring it is fully coated. You can use a fork or a dipping tool.
- Return the coated balls to the parchment-lined sheet. If desired, sprinkle with sea salt or festive sprinkles immediately before the chocolate sets.
- Allow the chocolate to set completely at room temperature, or speed up the process by chilling them again for 15 minutes.
Notes
- For a richer flavor, use milk chocolate or a mix of milk and dark chocolate chips for melting.
- If you want a thicker chocolate coating, let the first layer set slightly, then dip the balls a second time.
- These **no-bake treats** store well in an airtight container in the refrigerator for up to one week.
Nutrition
- Serving Size: 1 ball
- Calories: 150
- Sugar: 12
- Sodium: 65
- Fat: 9
- Saturated Fat: 3
- Unsaturated Fat: 6
- Trans Fat: 0
- Carbohydrates: 16
- Fiber: 1
- Protein: 4
- Cholesterol: 1